You may notice that your vibrant marigolds seem extra susceptible to pests when humidity rises and rain falls, which is why you need to know how to prevent pests on marigolds during rainy weeks. This wet condition encourages issues like yellowing leaves and wilting blooms, as pests thrive in damp environments. If left unaddressed, these problems can worsen and lead to more damage, but fixing them is possible now—inspect your plants regularly, and reduce excess moisture to keep your marigolds healthy.
Step 1 – Treat Aphids on Marigolds Immediately
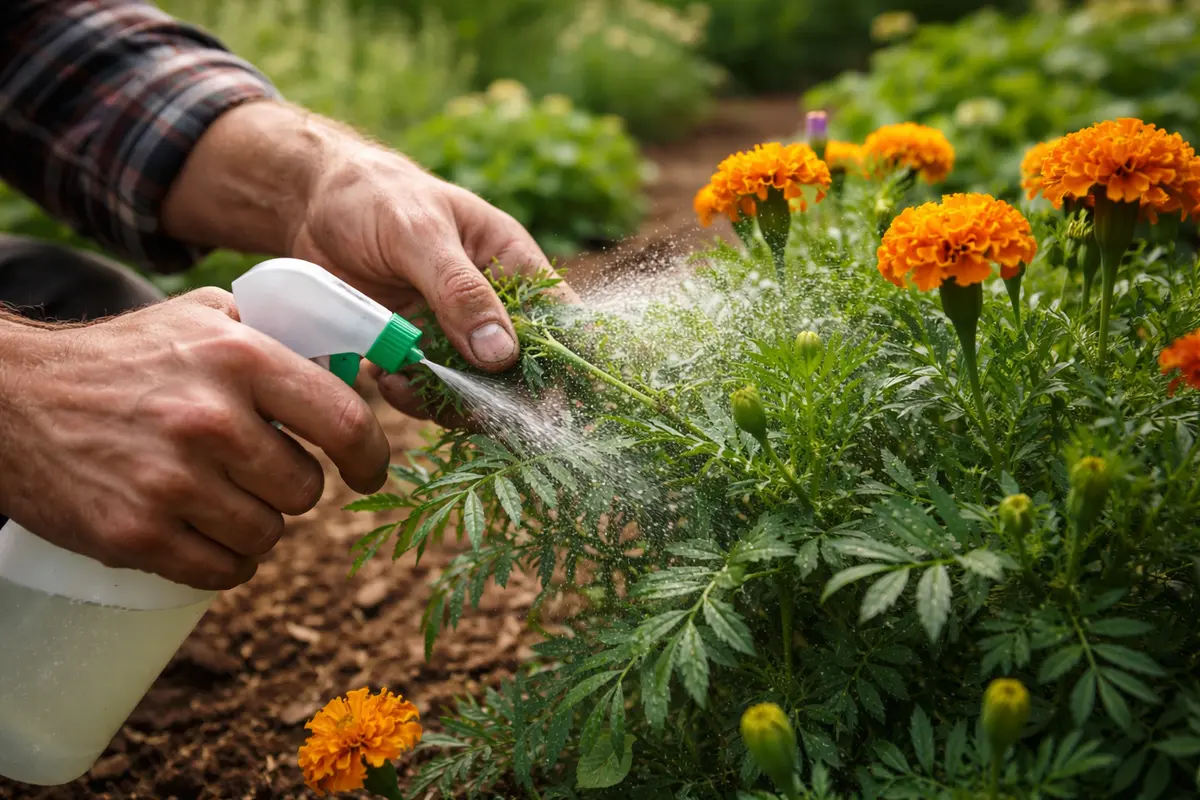
Spray an insecticidal soap on the affected marigolds. You should see the aphid population decrease significantly within a few hours, typically within 2 to 3 hours post-application. In addition, the leaves will appear cleaner and healthier, reducing the likelihood of further infestations. If the rain continues after application, reapply the treatment every four to six days until the aphid numbers are consistently low. This regular monitoring will help you establish a baseline for pest control and plant health.
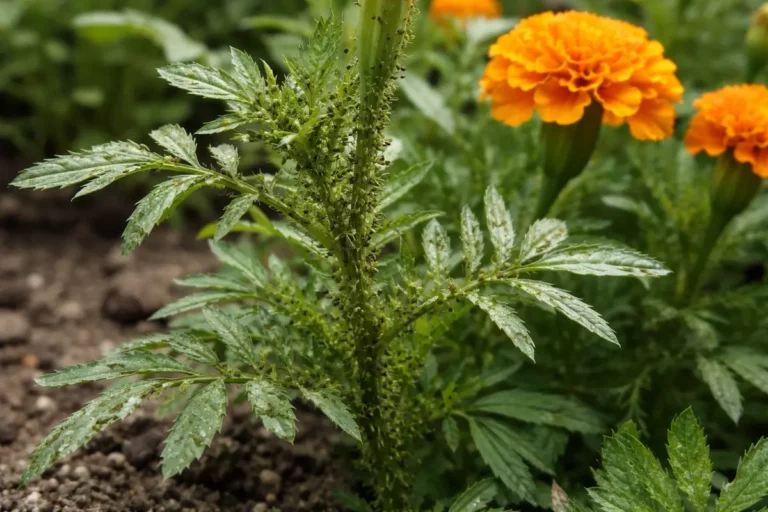
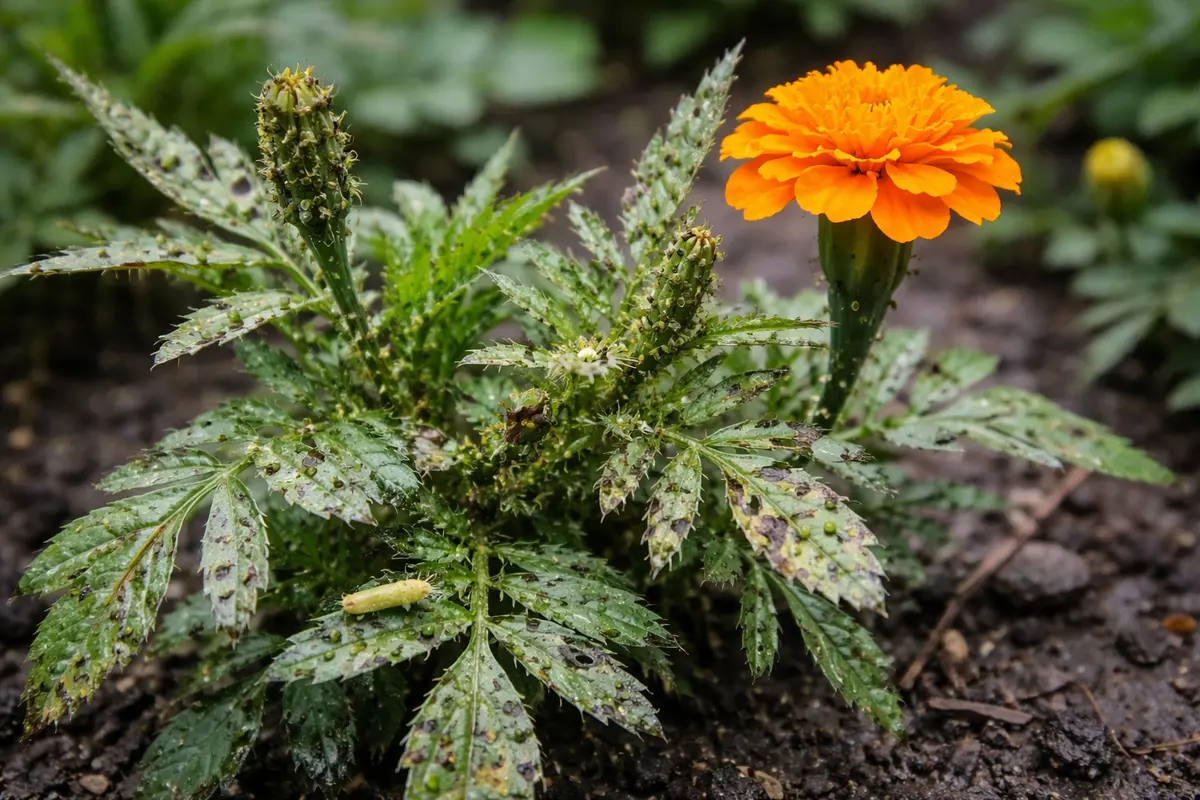
Aphids are sap-sucking insects that weaken plants by depriving them of nutrients. If left untreated, this can lead to yellowing leaves and distorted growth, ultimately harming the overall health of your marigolds. This deterioration often becomes evident within a week if action is not taken, showcasing significant signs of distress such as curling leaves and overall wilting. Early intervention is crucial; acting promptly prevents larger infestations and broader damage. In fact, it can sometimes take only a few days of neglect for a small infestation to escalate into a larger crisis, rendering marigolds vulnerable not only to aphids but also to ant colonization as they farm these pests for their honeydew.
A common mistake is delaying pesticide application, thinking the rain might wash away the pests. However, this only gives them more time to multiply and can create even more of a breeding ground for them once the moisture settles. If you notice sticky residue on leaves or a presence of ants, it signifies a larger issue that needs immediate attention. Ants protect aphids, so their presence often indicates that aphids are nearby. If unaddressed, this partnership can lead to widespread damage across your marigold garden.
Step 2 – Diagnose Fungal Issues in Wet Soil
Inspect the soil moisture levels carefully. You should see an improvement in drainage after adjusting your watering habits within a couple of days. If the soil remains soggy or overly wet, it can exacerbate fungal infections, so it’s vital to ensure optimal conditions. This could mean adjusting your regular watering schedule or implementing proper drainage systems if necessary. Maintaining proper soil moisture is a necessity rather than an option, especially in periods of heavy rainfall, when the tendencies for overwatering can easily occur.
Wet soil creates an ideal environment for fungal pathogens like powdery mildew and root rot, which thrive when drainage is poor. Root rot often leads to a gradual rotting of the root system, making the marigolds more susceptible to other issues like nutrient deficiency. These conditions can severely damage root systems over time, leading to poor plant performance and even death. It’s essential to act quickly to rectify these issues, as you could otherwise lose your marigolds altogether. Soil that drains poorly may produce telltale signs, such as yellowing leaves that are soft to the touch. These observations demonstrate how attention to soil quality is becoming increasingly crucial.
If the soil smells sour or you see dark patches or spots on the leaves, it indicates a fungal issue. In that case, consider applying a fungicidal treatment to prevent further decay. A fungicide can greatly improve your marigold’s resilience against fungal infections. Avoid using heavy mulch in wet seasons, as it can trap moisture against the soil surface and create a breeding ground for fungi, amplifying your existing problems. Regularly checking moisture levels a day after heavy rain can prevent fungal overgrowth and help troubleshoot drainage issues as they occur.
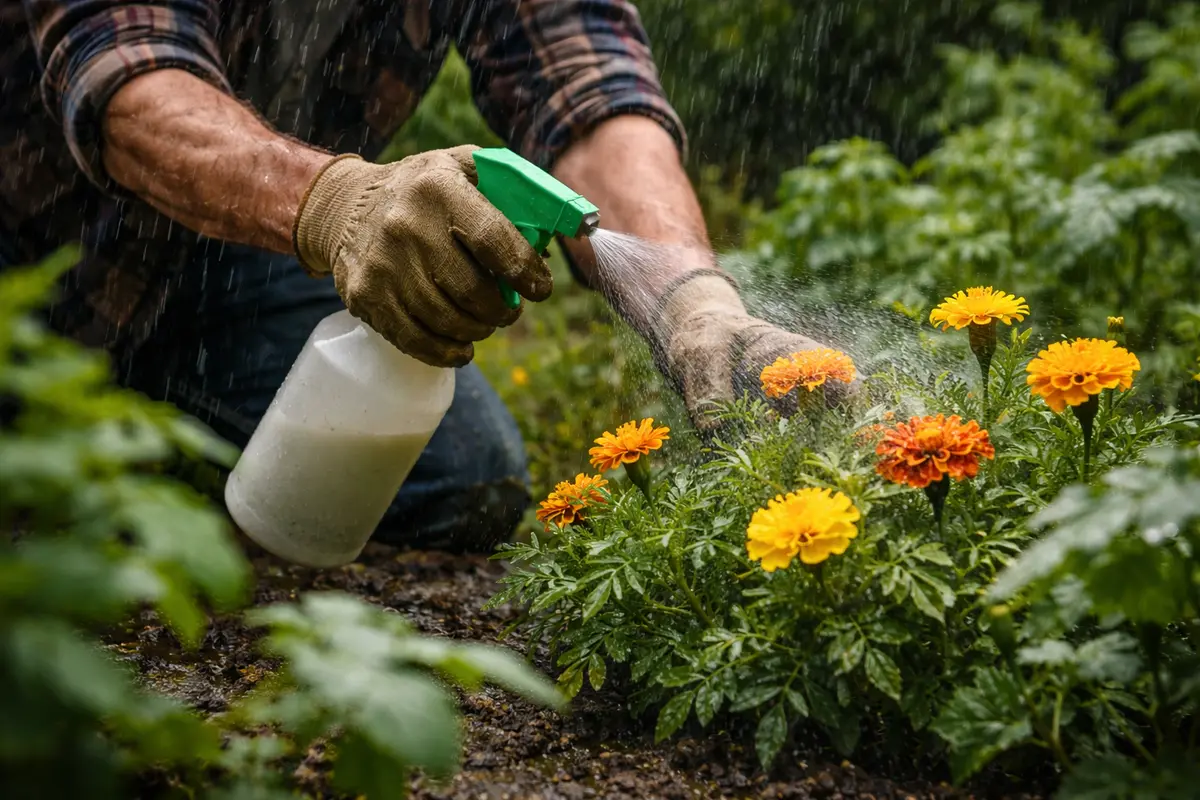
Step 3 – Revitalize Marigolds After Heavy Rain
Start by applying a natural insect repellent made from neem oil to your marigolds every few days, focusing on the undersides of the leaves where pests tend to hide. Within a week, you should observe a reduction in pest activity, indicated by fewer chewed leaves and improved plant appearance as marigolds begin to recover their lush color.
Recovery from pest damage typically takes about two to four weeks, depending on environmental conditions. Healthy regrowth will include new leaf growth, vibrant color in both stems and foliage, and an absence of holes or wilting. If the marigolds appear stunted or discolored, check for underlying root problems or excess moisture which can slow recovery.
A mistake to avoid during this recovery phase is overcompensating with additional water or fertilizer, as too much can threaten the already stressed plants. Instead, ensure the soil has good drainage and only water when the top inch feels dry. If not this, check that the container or garden bed allows for proper drainage, preventing root rot.
During rainy weeks, marigolds may use up their stored nutrients faster than usual, leading to signs of nutrient deficiency, including yellowing and leaf drop. Feeding them adequately allows for recovery, encouraging lush foliage and stronger blooms. This regrowth can be rapid, especially when conditions stabilize afterward. To optimize recovery, fertilization should ideally happen once soil moisture levels have decreased to normal, usually after two sunny days. This ensures the nutrients can be absorbed effectively rather than washed away, wasted through drainage, or locked in saturated soil.
A common mistake while reviving plants is over-fertilizing in an attempt to speed up recovery, which can burn roots. Stick to a recommended dosage and avoid fertilizing if the soil remains consistently wet, as excess nutrients won’t be absorbed. If you notice leaves wilting after feeding or if root-burn begins to manifest, reduce the amount used next time. Conversely, if after a week you’re still not seeing improvements, it might be necessary to reassess your fertilization approach, possibly switching to a product with a higher phosphorus content to encourage blooming and overall vigor.
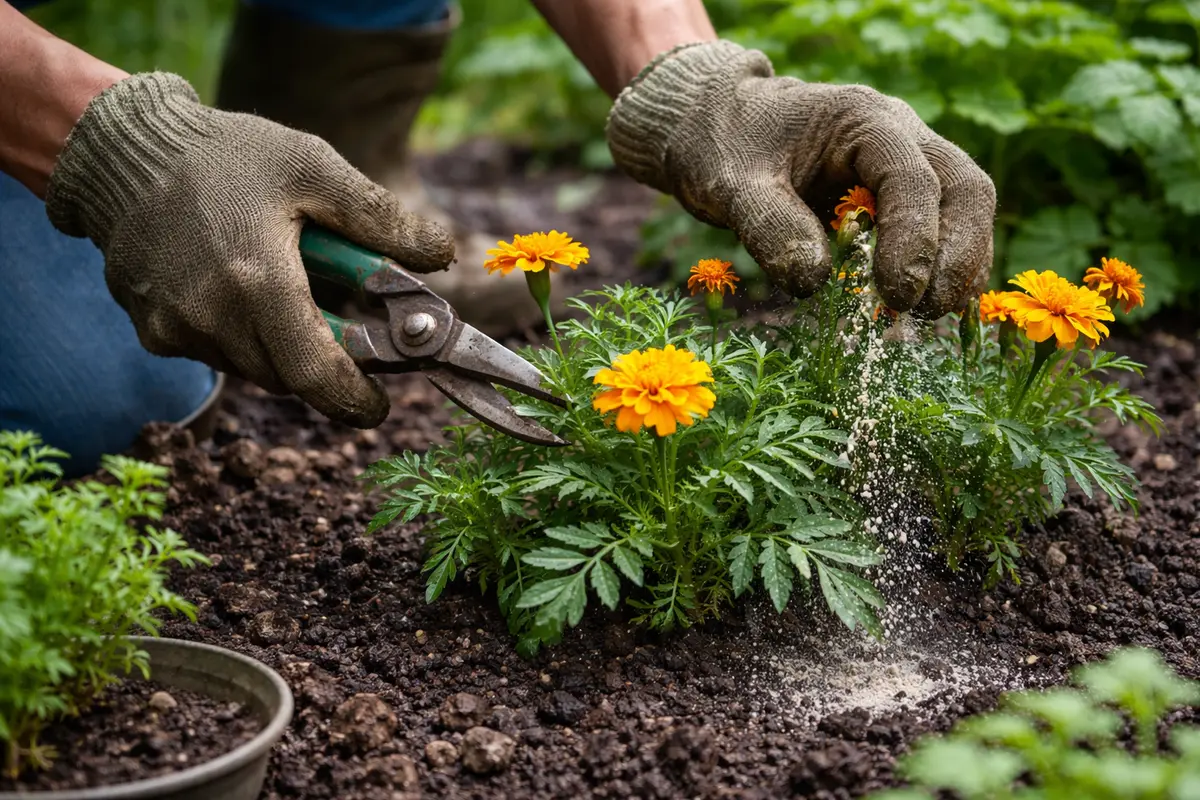
Step 4 – Protect Marigolds from Pests in Rain
Apply a layer of diatomaceous earth around your marigolds to create a barrier against pests. This action will significantly reduce the likelihood of infestations during rainy weeks, as the moisture creates ideal conditions for pests to thrive.
When it rains, the humidity levels rise, often leading to an increase in soft-bodied insects like aphids or spider mites. By applying diatomaceous earth, you disrupt their habitat and deter them from settling on your marigolds, addressing the root cause of pest proliferation during wet conditions. If you notice damage but no pests, check for excess water accumulation around the roots, which can also attract harmful insects.
In addition to diatomaceous earth, consider incorporating neem oil spraying as a secondary prevention layer, especially during particularly rainy spells. Neem oil is effective against a wide range of pests and can further preempt infestations when combined with your initial treatment. During dry spells, scale back on treatments, but revert to your routine if the rains return.
Environmental conditions during rainy weeks enhance pest movement and reproduction, concrete factors that increase the urge for pest management. Moisture creates favorable habitats for insects like aphids and beetles, which thrive under these conditions without effective deterrents in place. Planting bug-repelling companions and using physical barriers can significantly lower pest populations and keep marigolds flourishing. Integrating pest-resistant varieties along with recommended companion plants helps ensure a robust defensive line. The increase in nutrients from companion planting can complement the marigold’s growth and resilience against diseases.
In warmer months or periods of heavy rain, adapt your companion planting strategy by adding herbs like dill or cilantro. These plants naturally repel specific pests, including aphids and spider mites, providing an extra layer of defense. During a rainy season, ensure barriers remain intact by checking on them after heavy showers, as strong winds or downpours can displace lightweight materials that you were counting on for protection. Furthermore, constantly assessing the conditions around these plants, like soil dampness and leaf integrity, can alert you to when re-initiating these measures is necessary.
Step 5 – Check for Leaf Spots Post-Rain Treatment
Inspect the leaves of your marigolds regularly for signs of leaf spots and other damage. You should observe a significant reduction in spots and crisping of leaves over the next week if all previous steps have been implemented correctly. Regular monitoring enables you to catch any returning issues before they escalate. Aim to check leaf health every few days immediately following treatment applications, as leaves can express stress or damage more profoundly in transition periods.
Healthy marigolds typically show firm stems, vibrant colors, and minimal discoloration after recovery. If you spot new spots forming or leaves beginning to curl, it signals that pests may still be an issue or that nutrients are deficient in the soil. Identifying these signs allows for timely action, preventing further damage or loss. Checking for pest activity around the stems and undersides of the leaves can reveal new infestations, while an inspection of surrounding plants can identify whether the issue is localized or community-wide.
If leaf spots or new infestations return despite following the steps, rerun through your pest management and moisture control strategies. Consistently poor plant health after such interventions may signal a deeper issue with soil health or corporate pests. Sometimes, a stronger pesticide or a shift in watering practices is necessary to regain control. If problems persist over multiple cycles, reconsider soil drainage methods to help maintain a healthier environment for your plants. Testing soil pH and nutrient levels can offer additional insight into potential deficits or imbalances that could be affecting the growth of your marigolds. Change tactics if competing vegetation or infestation reduces treatment efficacy.
FAQ
How long does it take for marigolds to recover from pest damage?
Typically, marigolds can begin to show signs of recovery within a week after treatment. With proper pest management, consistent watering, and adequate feeding, you will see improved growth and fewer visual signs of damage. Regular checks for new pest activity can ensure that any recurring issues are managed promptly.
Can aphids spread from one plant to another during rainy weeks?
Yes, aphids can easily transfer between plants, especially during wet conditions that promote their movement. Taking quick action to treat affected plants prevents them from infesting nearby marigolds and other flowers. Keep neighboring plants well-groomed and free of pests to discourage this behavior.
Should I remove leaves affected by fungal infections on my marigolds?
Removing severely infected leaves can help prevent the spread of fungal issues. Make sure to dispose of the affected leaves properly rather than composting them to avoid any chance of reinfection in the future. Regularly cleaning up organic debris around your marigolds, such as dead leaves or flowers, can reduce potential fungal spores and maintain a healthier environment.