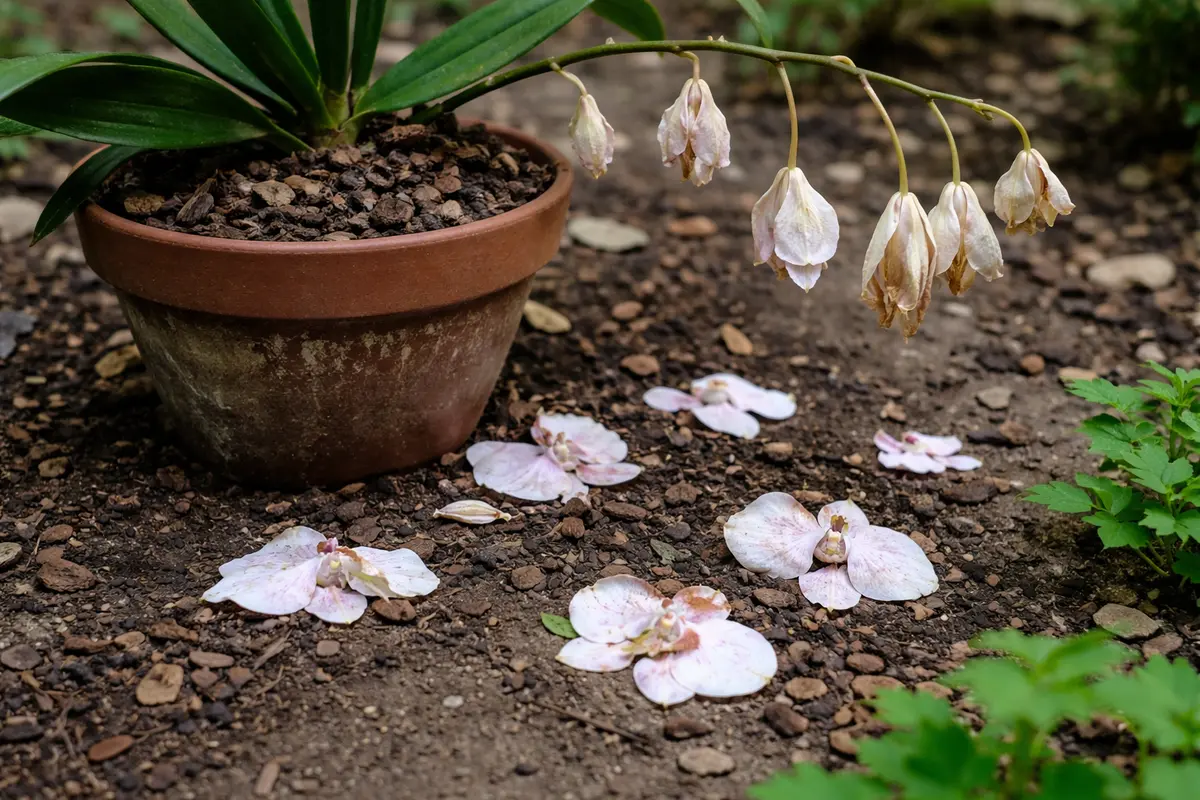
You notice your orchid flowers falling off shortly after repotting, wanting to know how to stop flowers dropping from orchids after repotting. The plant experiences stress due to a sudden change in its environment, which can lead to the blossoms dropping prematurely. If you don’t act quickly, your orchid may suffer further damage and fail to thrive, but relief is possible with timely intervention.
Step 1 – Check Orchid Roots for Trauma Immediately
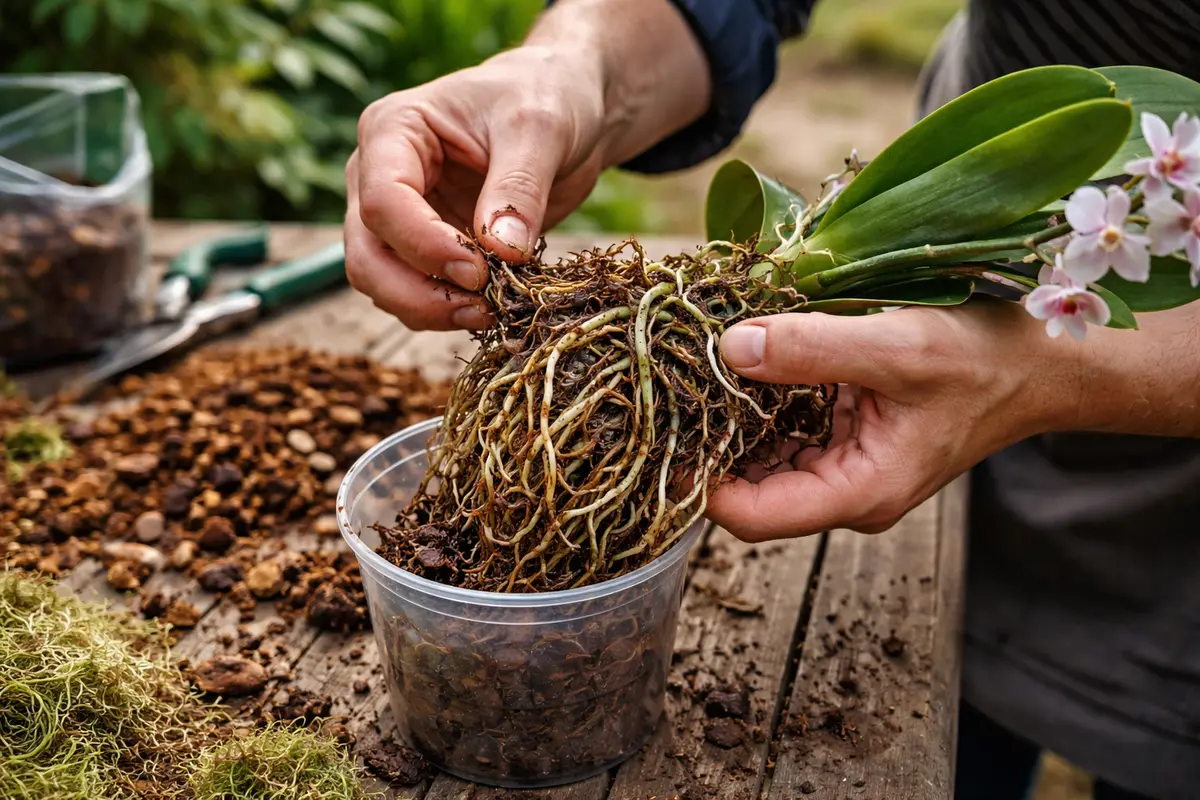
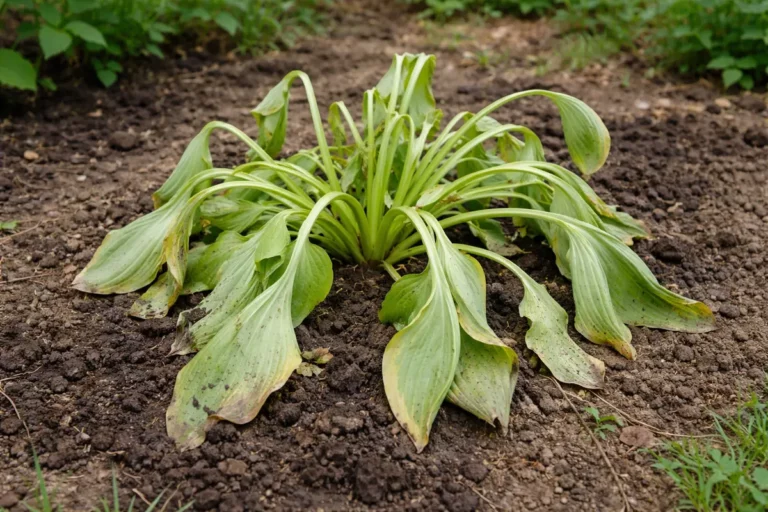
Inspect the roots of your orchid for any signs of damage or trauma. You should see whether the roots are firm and healthy or if they show signs of rot within minutes of checking. Begin by gently removing the orchid from its pot to avoid further disturbance. Keep an eye out for any roots that are brown, mushy, or have a foul odor. Healthy roots should appear firm and white or green, indicating good health.
Checking for root health is critical immediately after repotting since orchids are susceptible to root disturbance and adapt poorly to sudden changes. In cases where roots show a brownish color or a mushy texture, this often indicates rot, whereas firm, white or green roots signal healthy growth. If you notice any rotten roots, their incapacity to absorb water will directly exacerbate the stress the plant is under, leading to flower drop. Healthy roots are vital in helping the plant cope with stress and regain its balance, especially crucial within the first few hours after repotting when the shock is highest.
Many gardeners mistakenly assume that repotting alone will rejuvenate their orchids and neglect to inspect root health. For instance, they may repot in a soil mixture that retains too much moisture, which can cause immediate root rot and lead to inevitable flower drop. If you find that your orchid is sitting in overly wet soil, take immediate corrective action by trimming away affected roots and allowing the remaining roots to dry slightly before repotting them in a drier, more free-draining medium. A common standard involves replacing the substrate with a mix of bark and perlite to improve airflow and drainage. Keeping a vigilant eye during the first few hours after repotting is essential to prevent cascading problems. If roots appear severely compromised, consider applying a fungicide specifically designed for orchids to combat potential rot.
Step 2 – Diagnose Stress Factors Affecting Flower Drops
Assess the environmental conditions where your orchid is situated to identify stress factors. You will observe any discrepancies in light, temperature, and humidity levels that could affect the plant’s wellbeing, usually noticeable within a day. Start by checking the light exposure; too much direct sunlight can scorch leaves while too little can deprive the plant of needed energy. Compare the planting location before and after repotting to notice these differences.
Improper light exposure or extreme temperature fluctuations can lead to flower drops. Orchids that receive too much direct sunlight may develop scorched and discolored leaves, as well as accelerating bloom drop as they attempt to conserve energy and moisture. Conversely, if your orchid is placed in a drafty or excessively hot area, the imbalance promotes significant stress, which often leads to flower loss. Being attentive to the exact placement of your orchid is critical; if it was recently relocated to a location drastically altering its light conditions, it may require further acclimatization. If you notice the leaves curling or turning yellow, this is a strong indication of too much light or heat exposure.
For example, if your orchid was recently placed in a south-facing window that receives intense afternoon sun, it may struggle to adapt and begin dropping its flowers within just a few days of repotting. If you observe leaves starting to yellow, droop, or show signs of burning, this indicates that your plant is reacting poorly to the current setting. It’s essential also to check for moisture levels, as humidity plays a significant role in flower retention. Orchids generally thrive in high humidity environments, and when conditions are too dry, the plant’s flowers can stress out and drop prematurely. By moving your orchid to a more stable, indirect light location and boosting humidity around the plant, you greatly increase its chances of adapting positively. Always examine the plant closely over several days after making changes to evaluate health and adjust conditions as needed.
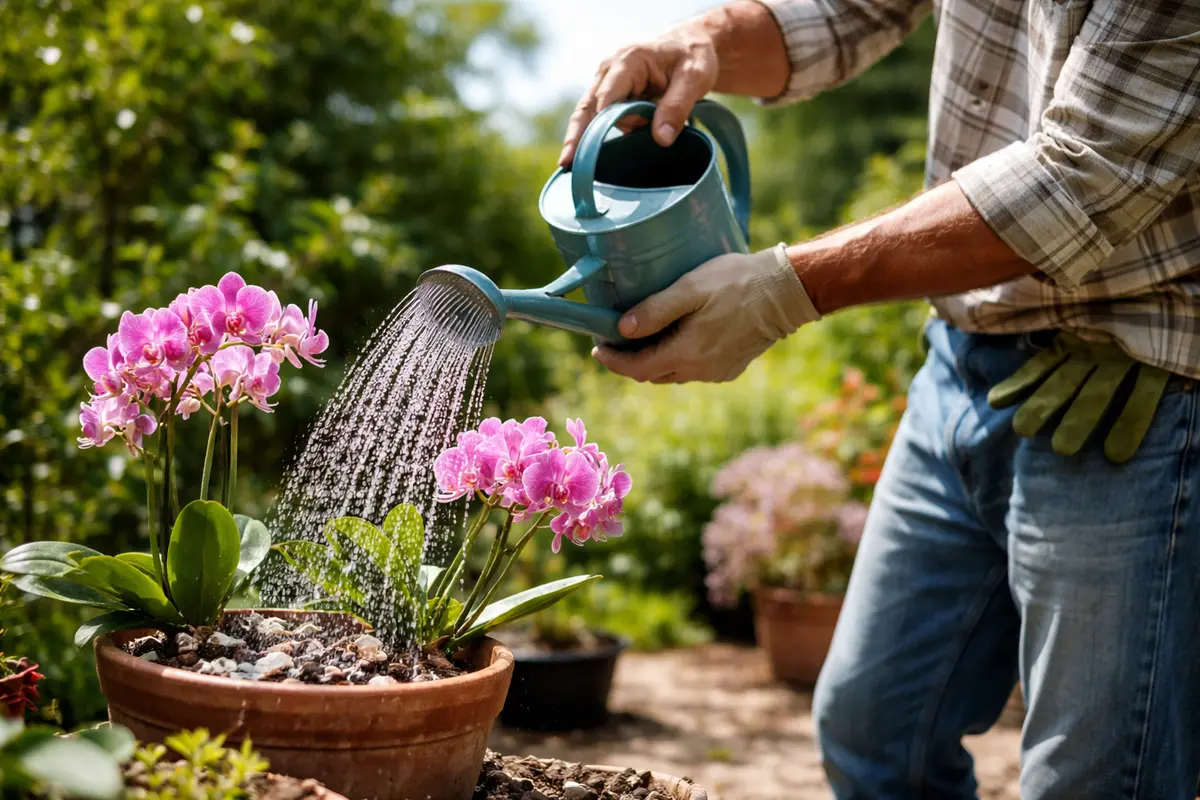
Step 3 – Rehydrate Orchid After Repotting Stress
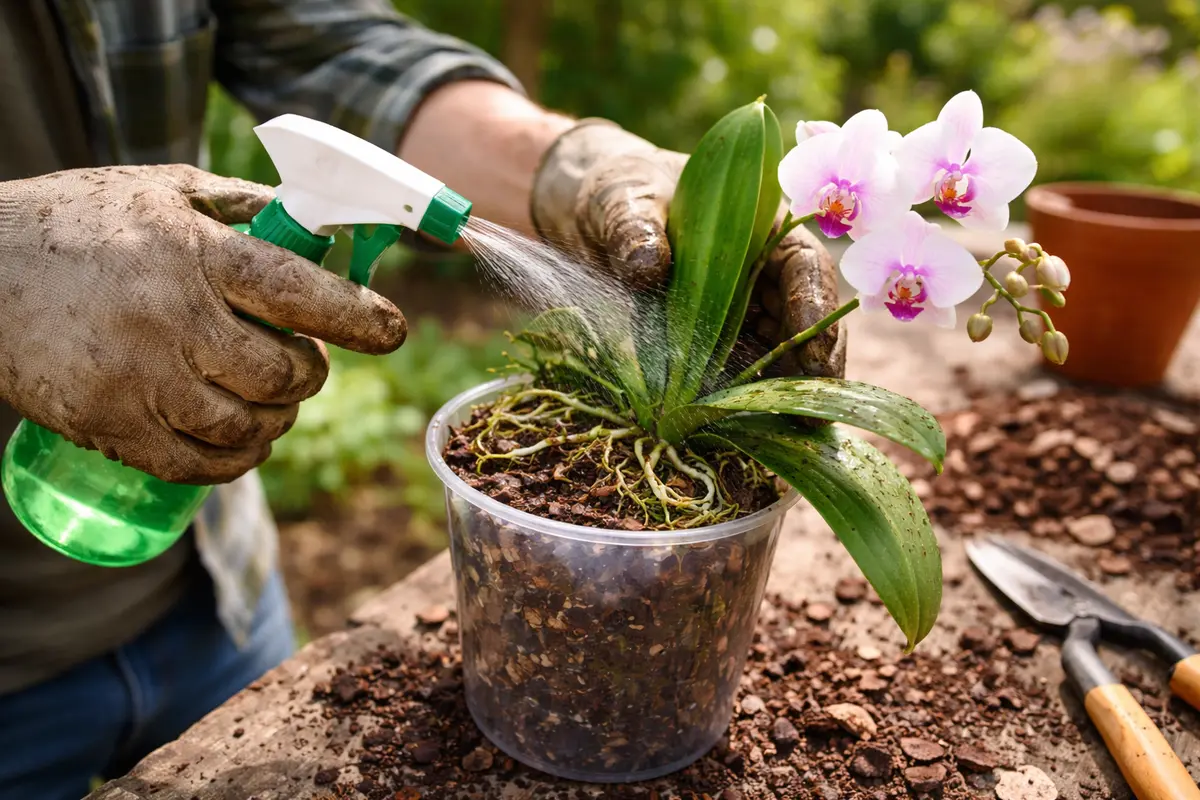
Water your orchid thoroughly right away to help alleviate stress from the repotting process. You will notice the substrate becoming visibly saturated, and observe your orchid perk up slightly as it absorbs moisture within just a short timeframe. The objective is for the potting medium to feel damp but not overly wet, as excessive moisture can quickly lead to root rot, which exacerbates stress during recovery.
Rehydrating the orchid is essential; roots need access to water for effective nutrient uptake, which is critical post-repotting. Damaged or dry roots may struggle to perform well, hampering the plant’s ability to recover its vigor after relocation. Healthy, hydrated roots facilitate proper water and nutrient absorption, helping the plant regain stability and overall health, often visible within a few days. If the substrate dries out too much while awaiting recovery, this can hinder the healing process and worsen flower drop.
Be cautious about overwatering; this is a common error that can compound the issue. For instance, waiting a week without checking water levels can lead to unnecessary root stress if the substrate becomes too dry. Instead, check moisture levels frequently for a week after repotting; use your finger to probe the top inch of the substrate. If it feels dry to the touch, rehydrate immediately with lukewarm water, ensuring that excess drains well to prevent drowning the roots. This balanced approach encourages quicker recovery and improves resilience against potential flower drop. Regularly observing changes in the plant allows you to make swift decisions on adjusting the watering frequency according to need.
Step 4 – Protect Flowers from Heat Stress in Summer
Start by ensuring consistent humidity levels of 50-70% around your orchids immediately after repotting; maintaining this humidity will reduce flower drop significantly. You should notice that the blooms remain intact longer and the plant stabilizes as it adjusts to its new environment.
Orchids are sensitive to changes in their surroundings, and insufficient humidity can trigger stress, leading to flower drop. Implementing a humidity tray or using a misting system directly addresses this issue because it creates a moist microenvironment that helps prevent dehydration, which is often the root cause of dropped flowers. If not humidity, check for sudden temperature fluctuations that can also stress your orchids.
During summer months, the increased heat can cause humidity levels to fluctuate rapidly, making it critical to adjust your prevention routine as needed. Consider grouping orchids together to create a more humid environment or using a room humidifier when temperatures rise significantly, as these methods can provide extra moisture during particularly dry spells.
Orchids often suffer from flower drop due to abrupt changes in humidity, which can stress the plant and trigger a defensive response. This can be particularly evident if an orchid is placed in a dry room or near heating vents, leading to rapid moisture loss. By routinely misting and utilizing a humidity tray, you help stabilize the microclimate around the orchid and eliminate the shock that can cause flowers to drop. If you notice persistent flower drop despite the humidity adjustments, check for drafts or fluctuations in temperature.
As seasons change, adjust your misting routine to account for drier winter air or increased humidity in summer. In winter, you may also want to incorporate a humidity-boosting device like a small humidifier in the room. This layered approach ensures your orchid remains comfortable throughout varying environmental conditions.
The primary trigger for flower drop is shock from sudden changes in temperature and humidity after repotting. Orchids can suffer stress from these factors, leading to premature bud drop; however, establishing a consistent watering routine with room-temperature water helps stabilize their environment and minimizes shock. If flowers drop after repotting in a hot, dry room, low humidity could be the culprit; ensuring humidity levels between 40-70% is optimal for retaining blooms.
As the seasons change, adjust your watering routine to reflect the varying humidity levels in your home. During winter months, indoor heating can dry out the air significantly, necessitating an increase in humidity around your orchids. You can achieve this by placing a pebble tray filled with water beneath the pot or using a humidifier in the vicinity. If you fail to do so and experience consistent flower drop, remember that overwatering can also lead to stress and should be avoided.
Orchids thrive in specific temperature ranges; they generally prefer moderate sunlight and humidity. When temperatures soar, especially during summer, the flowers can dehydrate and drop if not protected adequately from heat and sun. For instance, creating a microclimate for your orchid by moving it to a shadier spot or placing it next to a larger plant can significantly improve its chances of preserving blooms and maintaining overall health. Employing sheer curtains or shade cloth can soften light exposure while allowing ample ventilation for the plant.
Regularly misting the air around your orchid or grouping plants together can further raise humidity levels and help to keep the environment cooler and more forgiving for flower retention. Implementing a humidity tray filled with water and pebbles beneath the pot serves to maintain higher moisture levels in the air around the orchid, promoting better flower retention over time. Always keep an eye on your orchid during changing weather conditions; if flowers start to wilt or if leaves are showing signs of heat stress, respond promptly by relocating the plant to a cooler area or adjusting the watering schedule to combat dehydration.
Step 5 – Inspect Orchid Flowers for Signs of Weakness
Monitor your orchid’s flowers routinely for early signs of weakness, ideally every few days. You should watch for whether the flowers start perking back up or if any new buds begin to drop off, signaling the need for immediate attention. Signs such as limpness, wilting, or discoloration are critical indicators of stress and require quick assessment to prevent further flower loss.
After implementing your recovery and prevention measures, a healthy orchid should show flowers displaying vibrant color and firmness within a week. If you find that new blooms are still limp or discolored, this indicates inadequate watering or ongoing environmental stress. Recognizing these visual indicators assists you in making necessary further adjustments to maintain the plant’s health. If flowers are stable but not thriving, it’s worthwhile to reconsider your checks on environmental factors such as light, water, and air circulation.
Should you find that problems with flower drop persist despite your care efforts, consider reassessing the environment and watering levels once more. For example, if you find that the flowers continue to drop regardless of good watering practices, check the temperature; extreme cold or heat may still lead to flower loss. Additionally, look for pests or diseases that may have been overlooked, as these can also negatively impact flower stability. Further inspection could reveal pests like spider mites or aphids lurking in the foliage—these insects can rapidly damage delicate flowers. Thus, continuously examining your conditions while staying proactive and responsive can save remaining flowers and support potential new growth.
FAQ
How long does it take for an orchid to recover from flower drops?
Recovery times can vary; generally, you can expect to see new flower spikes or signs of healthy growth within a few weeks if the orchid receives adequate care. Some orchid varieties may take longer, depending on the extent of stress they experienced and their specific growth cycle. Keeping a close watch during this period can help hasten recovery and ensure the plant stabilizes well.
Can poor watering practices cause flower drop in orchids?
Yes, inconsistent watering practices can certainly lead to flower drop in orchids. Overwatering can result in root rot, while underwatering will contribute to dehydration, both of which place the plant under stress and can result in flower loss. Implementing a consistent watering routine tailored to the specific needs of your orchid is crucial; tracking your watering frequency can help maintain this balance.
Should I remove dropped flowers from my orchid?
Yes, you should promptly remove any dropped flowers and spent spikes to prevent unnecessary energy loss. This allows the plant to direct its resources toward new growth and blooming, substantially improving overall vigor. Regularly removing spent blooms not only fosters energy redirection within the plant but also keeps the remaining flowers healthy and vibrant.