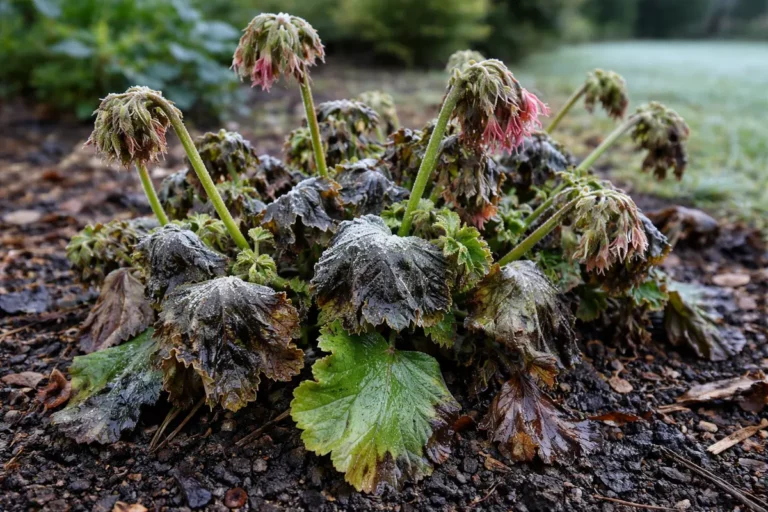
You’ve probably seen your once-vibrant tulips drooping and wilting after heavy rain, which is why you need to know how to fix wilting tulips after heavy rain. Excess water can cause the stems to weaken and the blooms to droop, leading to a disappointing and lackluster display. If left unattended, the problem can worsen, ultimately weakening the plant and leading to more damage. The good news is that fixing it is possible now by adjusting moisture levels and inspecting the soil. By taking action to improve drainage and monitor the plants closely, you can help your tulips bounce back to their former glory.
Step 1 – Trim Wilting Tulip Stems Immediately
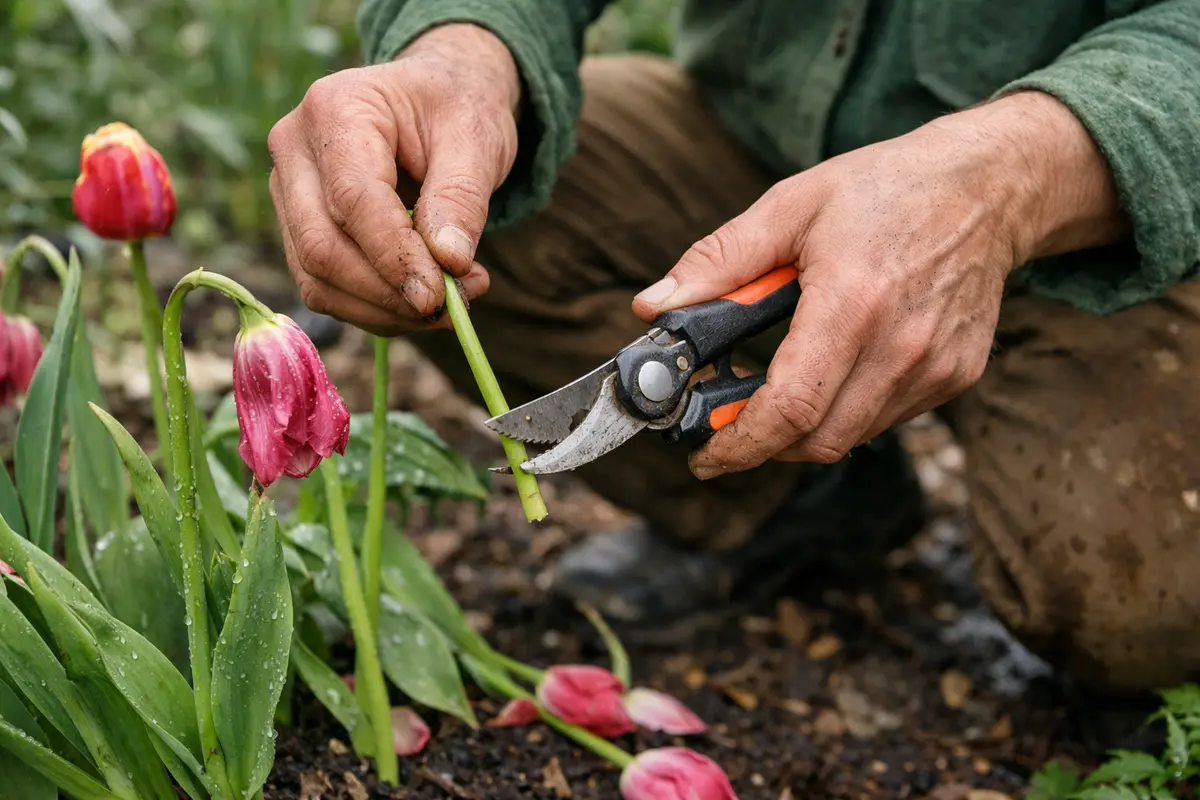
Start by cutting back the wilting tulip stems just above the first set of healthy leaves. This action stops the strain on the roots and improves air circulation around the base of the plant, helping to alleviate the stress from waterlogged conditions. Timing matters; addressing the situation promptly can increase the chance of recovery significantly. In poor drainage conditions, plants may also develop root rot in potato plants.
Wilting in tulips often occurs after heavy rain due to root systems overwhelmed by excess water. If the leaves appear yellow or limp, it indicates the plant is not getting enough oxygen from the saturated soil. In contrast, healthy tulips in well-drained conditions maintain their vibrant color and turgor. If you notice the stems still drooping hours after trimming, then the roots may have started rotting. Take note: the longer you wait, the worse the root damage can become, leading to a higher risk of permanent decline.
A gardener who waited too long to trim their wilting tulips observed brown patches developing on the leaves within days, contrasting sharply with another gardener who swiftly cut back the stems and saw a noticeable perk in their tulips. This highlights the importance of immediate action: if yellowing occurs after cutting, it’s essential to check for root rot by inspecting the bulbs for mushiness and discoloration. Delay in this step might increase the likelihood of needing to remove and replace the bulbs entirely, incurring further work and cost.
It’s crucial to remove any stems that are not thriving to prevent decay from spreading to nearby healthy parts of the plant. Healthy stems should remain firm and upright, while wilting ones become soft and limp, contrasting with the vibrant green of thriving foliage. Take care not to cut too low, as healthy foliage is needed for photosynthesis during the recovery phase. If you delay making these cuts, the chances of recovery diminish dramatically, leading to long-term damage.
A common mistake is to assume that simply lifting the tulips from the waterlogged soil is enough; without trimming, the remaining foliage can still impede recovery. Be vigilant; if you begin to notice a persistent limpness after a few hours post-trim, reassess how the bulbs are faring underground. If left unchecked, they could succumb to a lack of nutrients. The failure to trim can lead to further exhausting the energy supplied from the remaining healthy parts of the plant, hampering recovery efforts. Excess moisture often leads to problems like root rot in potted cacti.
Cutting the stems not only reduces the burden on the roots but also aids recovery by directing the plant’s energy toward developing stronger roots and new shoots. Each cut encourages regeneration from the healthier portions of the bulb, and ideally, you should witness signs of improvement—like a more upright posture—within just a couple of hours. If trimming shows no sign of improvement within a day, it is essential to reassess the next steps regarding soil and bulb conditions.
Many gardeners mistakenly think that waiting for the wilting stems to wither completely before cutting is the best option. In reality, this creates environments ripe for decay, which can infect otherwise healthy tissue. In my experience, prompt action can mean the difference between revival and loss, with healthy leaf color returning often within days after appropriate cutting. Monitor for any potential fungal development following moisture exposure; quick action will help avoid complications.
If you observe your tulips recovering well—showing green, firm leaves—then the initial intervention was successful. Conversely, if the foliage continues to turn brown or shrivel after trimming, this indicates potential ongoing drainage issues that need correction. A clear sign of trouble is when only a few leaves begin to recover while others continue wilting, suggesting further root examination is required.
Step 2 – Evaluate Soil Drainage for Tulips
Start by inspecting the drainage quality of the soil surrounding your tulips. You should notice that the soil condition improves as air begins to circulate around the roots. Poor drainage occurs when heavy rain saturates the soil, leading to waterlogged roots and a consequential lack of oxygen, which causes the tulips to wilt. This saturation inhibits the roots from effectively absorbing nutrients, resulting in symptoms of dehydration even when moisture is abundant. If you observe pooling water around the base of the tulips, this is a clear indicator of drainage issues that need immediate attention. In poor drainage conditions, plants may also develop wilting tulips after prolonged rain.
If you see the soil is thick and clumpy, it often indicates compaction, which restricts proper root function. Such conditions are typical in clay-heavy soils, further exacerbating drainage issues. To address this, gently lift the tulip bulbs using a trowel to create necessary air pockets while ensuring to preserve the roots. This simple action can significantly improve the drainage around the roots, alleviating the suffocation caused by excess moisture. However, be careful not to disturb the bulbs excessively, as this can yourself contribute to further stress.
If the soil feels soggy or emits a rotten smell, remove the affected bulbs to let them dry before replanting. This prevents the spread of rot, ensuring healthier future growth. Conversely, if the leaves are turning crispy or brown at the tips, this may indicate underwatering or insufficient drainage; confirm that the plants are not struggling to uptake nutrients despite the recent rains. Tulips can suffer from both overwatering and drought conditions, making soil management critical in all scenarios. Properly aerated soil will bounce back faster after rain events, reestablishing a healthy growing environment. Excess moisture often leads to problems like succulent turning mushy heavy rainfall.
Once the excess water is addressed, monitor the soil’s drying speed after watering or rain events. Rapid drying is a good sign of effective drainage, essential for maintaining healthy bulb development. If air pockets are restored and soil moisture levels balance, your tulips should begin to perk up and show signs of recovery in no time. If not this, then assess the soil composition; heavy, dense soils may require raised beds or the addition of sand to improve aeration for the long-term health of your tulips. Keep a vigilant eye out for any recurring wet patches, which can signal further corrective actions are necessary.
Step 3 – Fertilize Tulips Post-Rain for Recovery
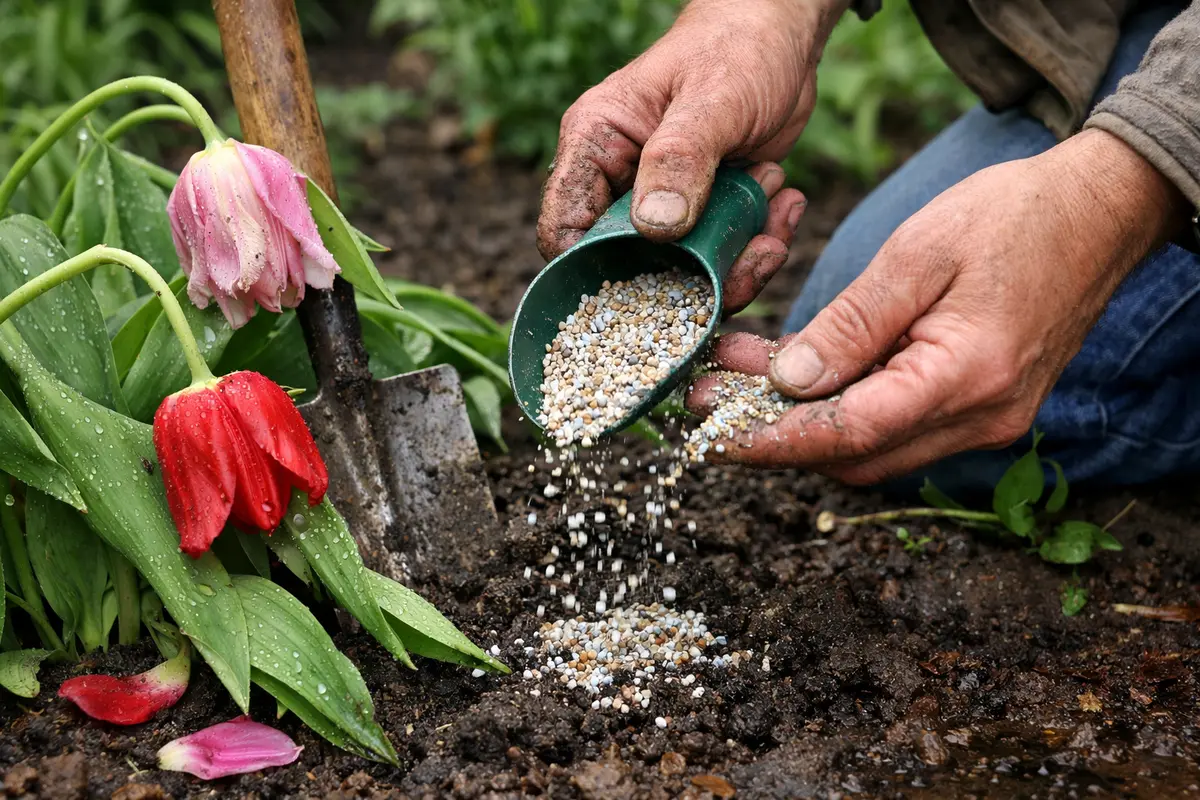
Apply a balanced fertilizer around the base of your tulips to promote recovery immediately after trimming the stems and ensuring the soil is well-drained. Within a week, you should observe new growth signaling that your tulips are responding positively to the nutrients. Recovery begins when you replenish the essential nutrients washed away by heavy rains, enabling your tulips to revitalize and thrive. Liquid fertilizers, in particular, offer quicker absorption, allowing roots to access immediate nutrients in saturated soils. Ensure that the application is uniform, as uneven fertilizer will lead to variable growth and recovery.
Enhancing nutrient levels helps fortify the root system while stimulating vibrant new leaf growth. This replenishment is vital during the recovery phase as it supports the plant’s health. Look for fertilizers with a balanced N-P-K ratio (Nitrogen-Phosphorous-Potassium) to ensure comprehensive nutrition; consider staggering your feeding schedule to manage nutrient availability effectively. Mixing a general-purpose fertilizer with water enables rapid nutrient uptake through the roots. However, applying too much fertilizer can lead to root stress; trouble signals such as leaf scorch may arise.
To prevent issues, be cautious not to over-fertilize, as excessive application can cause salt accumulation, damaging already stressed roots from excess moisture. Watch for signs of nutrient burn, such as yellowing leaf tips or browning edges. Maintain vigilance with your fertilization schedule; wait at least two weeks before reapplying after the soil has dried slightly to avoid re-saturation. Consistent feeding during the active growth period in spring and early summer will help ensure nutrients remain accessible as the tulips strengthen. Be diligent: if stunted growth persists despite fertilization, check your watering routine, as similarities between overwatering and nutrient deficiencies can hinder recovery.
If you see no improvement in leaf vigor after two weeks, it may indicate that the roots are too damaged for effective nutrient absorption. In this case, it’s essential to assess ongoing drainage issues. If necessary, consider replanting the bulbs in fresh, well-amended soil to facilitate long-term recovery. This step is crucial, especially if the bulbs exhibit signs of weakness or decay, as they may be beyond simple recovery measures.
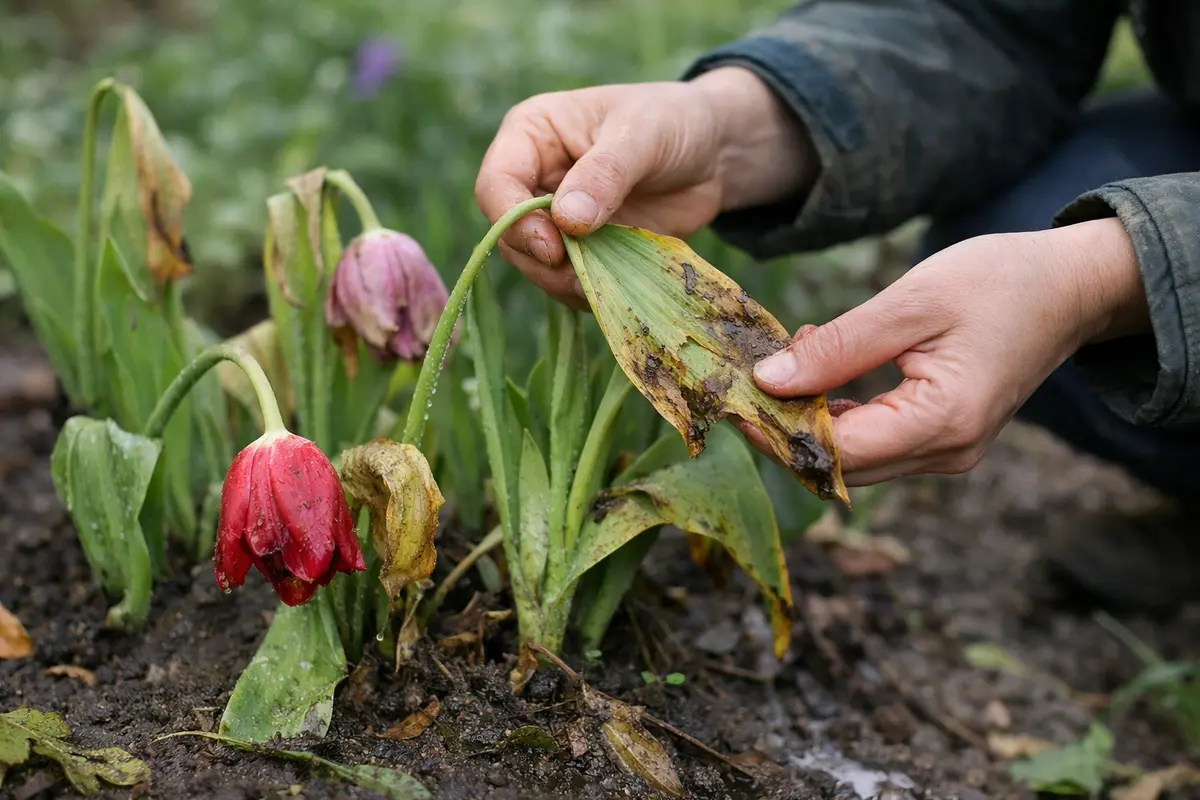
Step 4 – Inspect Tulip Leaves for Wilting Signs
Start by inspecting the leaves of your tulips every few days for any signs of wilting or improvement. Healthy, upright leaves that are vibrant green indicate successful recovery. For the next couple of weeks, check at least once a week to track these changes and remain vigilant about any discoloration or browning, which could signal ongoing stress or issues. Take note of the color and firmness of the leaves, as they are crucial indicators of plant health.
A healthy tulip should exhibit firm, bright green leaves. In contrast, if you see persistent wilting or yellowing, this suggests that the problem may still persist, possibly due to root rot or other environmental stress factors. Early detection of renewed wilting is crucial for timely intervention, as it helps prevent further decline. Observe how new growth develops; resilient leaves are a strong indicator that your corrective measures are taking effect. If the leaves become limp again shortly after improvement, it could suggest a recurring issue with soil saturation or drainage that requires additional action. Excess moisture often leads to problems like root rot jade in plant.
For the next few weeks, keep monitoring the plants closely. If conditions do not improve, check the bulbs by gently digging around them with a garden fork. Healthy bulbs should feel firm and look vibrant; if they appear mushy or discolored, remove them from the soil immediately. If the roots remain saturated after this assessment, consider implementing better drainage solutions or replanting your tulips in a different location to avert future issues, particularly after heavy rains. Taking prompt action in response to visible signs is essential to safeguard the health of your tulip bulbs.
FAQ
How long will it take for my tulips to recover from wilting after heavy rain?
Recovery can take anywhere from a few days to two weeks, depending on the extent of damage incurred from the excess water. You should start to see indications of new growth emerging within a week if environmental conditions are stabilized and proper care is maintained. Sustained warmth and sunlight can further enhance recovery, so consider your climate when gauging that timeline. If environmental temperatures remain mild and sunny, recovery could be quicker than in cooler, cloudy weather. However, keep in mind that prolonged moisture may lead to additional complications.
Should I remove wilting leaves from my tulips?
Yes, removing wilting leaves can be beneficial as it redirects the plant’s energy into healthier parts. When cutting, ensure that you make the cuts above the soil line to avoid further stress to the bulbs, which could compromise their recovery. Additionally, wilting leaves that have begun to rot may harbor diseases that could spread to nearby healthy growth, making immediate removal essential. It’s also crucial to ensure your pruning tools are sanitized to prevent any disease transfer during this process; a simple alcohol wipe can serve to keep pathogens at bay. Regular checks will reduce the chances of increased pressure on the remaining healthy foliage.
Can overwatering spread diseases in tulips?
Yes, overwatering creates a conducive environment for fungal infections, such as root rot. Poor drainage combined with excessively wet conditions can significantly escalate the risk of disease spreading among your tulip population. For this reason, ensuring proper drainage and regularly monitoring soil moisture levels are critical to prevent conditions that can promote these dangers. If you employ mulch around your tulips, ensure it is not too thick or densely packed against the crowns, as this could contribute to excess moisture retention and create ideal conditions for rot. Frequent monitoring of the soil moisture levels will help mitigate this risk.