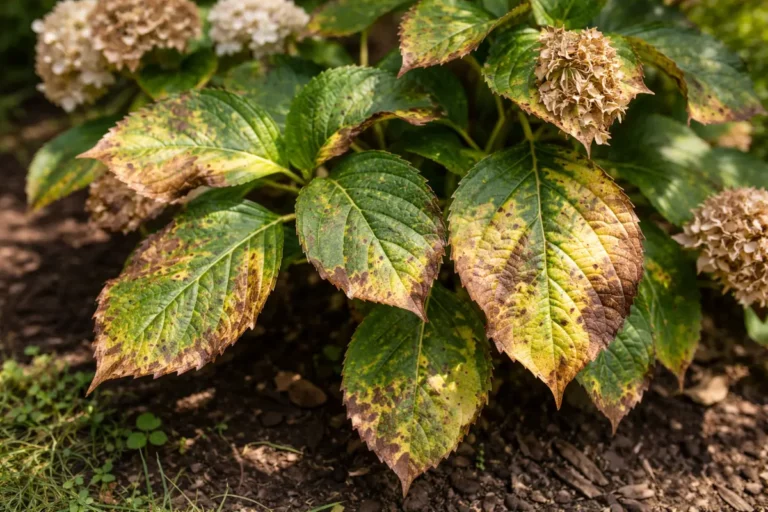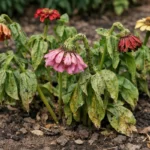
You’ve probably seen your once-vibrant hydrangea blooms fading to a dull brown during the heat of summer, which is why you need to know what to do when hydrangea blooms turn brown in summer. This browning is often caused by stress factors like excessive sun exposure or inadequate watering, leading to wilting and damage. If left unaddressed, the problem can worsen, weakening the plant and making recovery harder. It’s crucial to act promptly by inspecting your watering routine and adjusting your plant’s environment to foster recovery.
Step 1 – Trim Brown Hydrangea Blooms ASAP
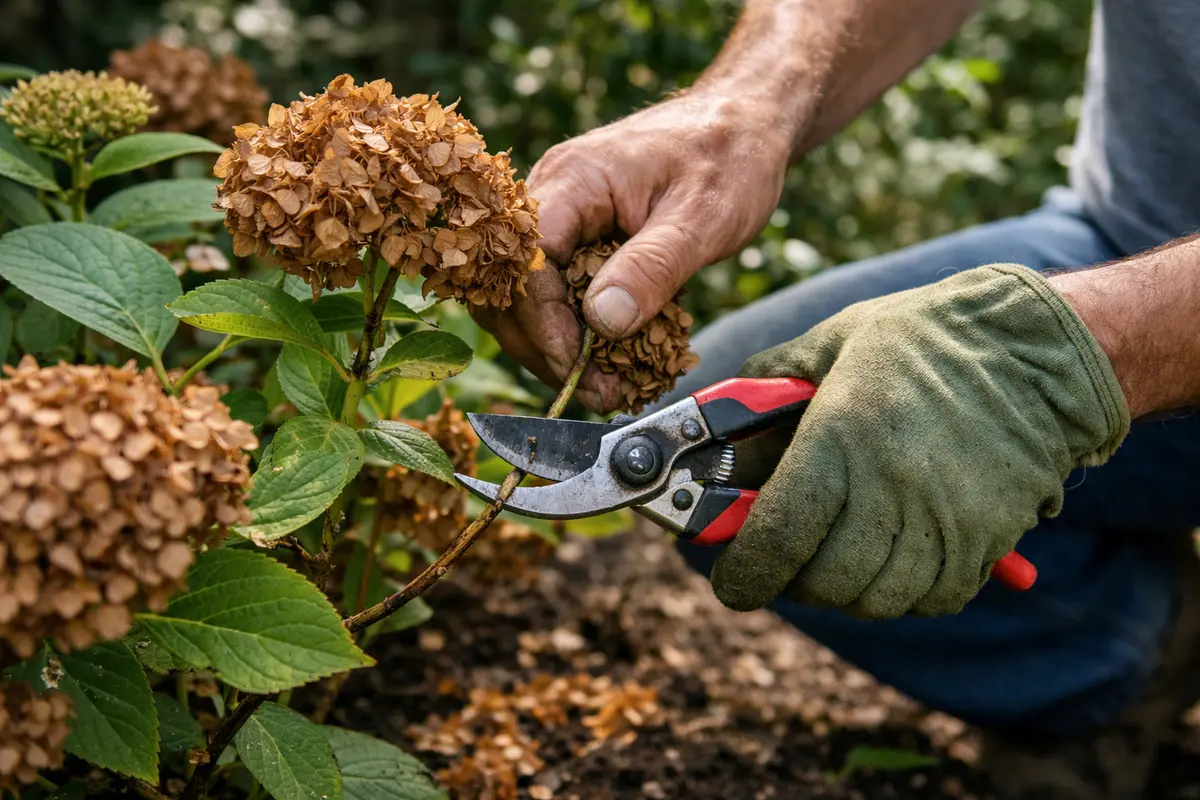
First, assess the hydrangea blooms for signs of wilting, dryness, or discoloration. Remove any brown, dead flowers and leaves immediately, taking care to cut them back to healthy green growth. You should see an immediate reduction in the brown foliage as you clear away the affected areas, allowing the plant to focus on healthier blooms.
Acting fast is crucial for hydrangeas, as delayed intervention can lead to stress that affects the entire plant. When blooms turn brown, it’s often a sign of inadequate water or nutrient issues; waiting too long can exacerbate the problem, leading to further browning or dieback. If you notice wilting instead of merely brown leaves, check the soil moisture level; if it’s dry, the roots may be struggling for water.
In one case, a gardener who acted promptly saw their hydrangeas flourish, while another who delayed intervention faced significant bloom loss. Many gardeners mistakenly overlook the importance of checking soil moisture when blooms turn brown, which can lead to missed signs of stress. If the soil seems adequate yet the blooms are browning, check for possible nutrient deficiencies.
Timely trimming helps your hydrangea direct its resources toward new and healthy blooms, which is essential during high-stress conditions such as excessive heat. The browning occurs because the blooms cannot sustain themselves under dry and high temperatures, often leading to wilting and eventual decline. If left unchecked, these dying flowers could attract pests and fungal diseases, which further complicate recovery and lead to further deterioration. In fact, when unhealthy blooms stay on the plant, they create a favorable environment for diseases, increasing the risk of root issues that might also go unnoticed until substantial damage is done. Proactive trimming is critical.
A common mistake is waiting too long to cut off damaged blooms, operating under the misconception that they might revive. It’s crucial to act promptly; the longer you wait, the more energy the plant expends on maintaining those dead parts. I’ve seen that addressing the problem quickly yields better results, as the plant can quickly redirect its limited resources towards healthier growth. Always use clean, sharp shears to avoid introducing pathogens to the plant; be particularly careful if trimming multiple plants in one session. Make sure to clean your shears with rubbing alcohol between snips to prevent cross-contamination. If the shears are dull or dirty, they may stress the plant unnecessarily and introduce diseases that could complicate recovery.
Step 2 – Diagnose Causes of Brown Hydrangea Flowers
Inspect the soil moisture levels to identify the root cause of the browning. If the soil is dry and crumbly, you’ll need to adjust your watering regime immediately to restore hydration. Conversely, if the soil feels overly saturated and compacted, it would indicate a drainage problem or root disease that needs to be addressed. Dig down a few inches to get an accurate assessment of moisture levels. Use your fingers to assess the soil; if it feels dry several inches down, it confirms the necessity for immediate and deep watering.
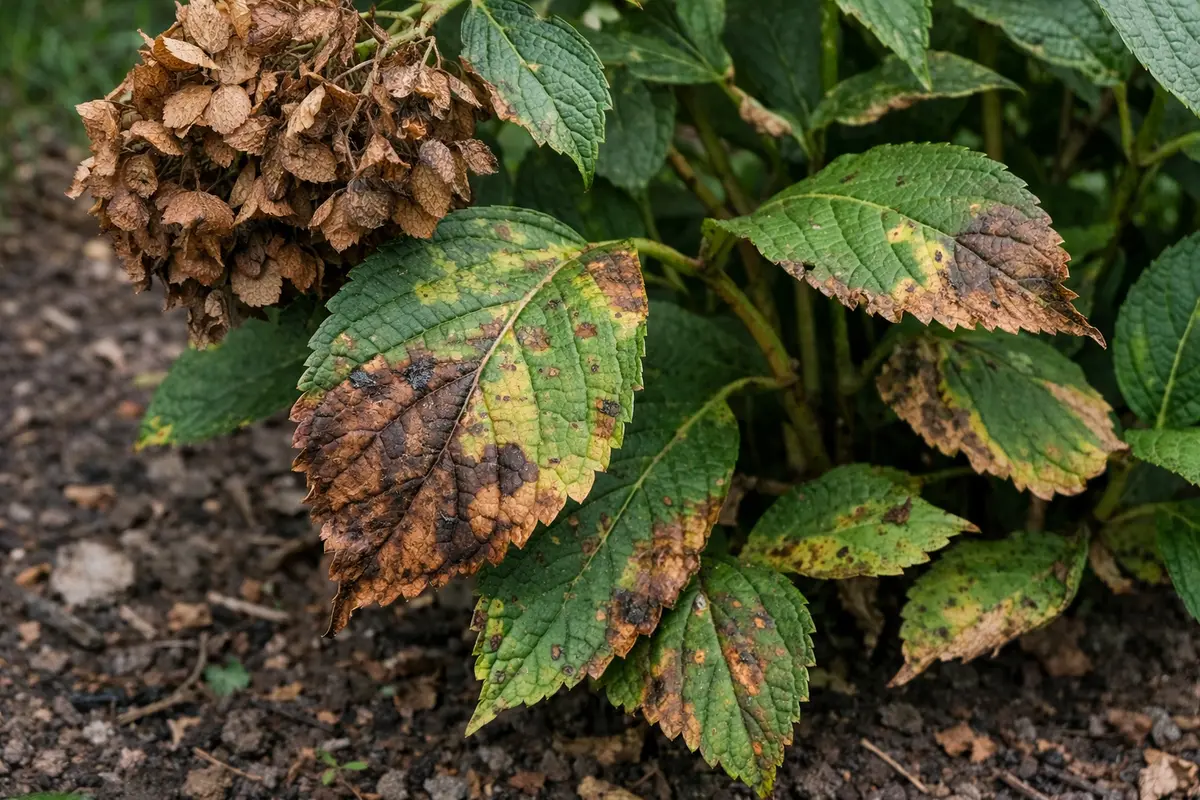
Hydrangeas thrive in well-drained, consistently moist soil. If they experience dry conditions, they will start to exhibit signs of stress, like the browning of blooms. Specifically, hydrangeas can develop brown flowers when the roots do not receive enough moisture to sustain healthy growth, which is vital for blooming. Checking moisture levels helps pinpoint whether to increase watering or adjust drainage practices; if the brown blooms occur alongside crispy leaves, it indicates severe water deprivation. Catching these signs early can allow you to apply corrective measures before significant damage ensues, potentially saving the plant from a root-pruning fiasco. If the root ball dries hard, you may first see yellow leaves on eggplant after drought.
If the soil smells sour during this inspection, it may point toward root rot due to over-watering. In this case, inspect the roots for any decay or discoloration; healthy roots should feel firm and white while decayed roots might be mushy or exhibit a dark, slimy texture. If you detect such conditions, consider replanting in fresh, well-aerated soil to encourage recovery and promote root health. If the leaves feel crisp to the touch, increase watering gradually while ensuring that the water penetrates to the root zone effectively. Aim for a soil moisture guideline of 70-80% for optimal health, adjusting as needed based on weather conditions. If you’re unsure of moisture levels, a moisture meter can provide accurate readings to help you regulate your watering schedule effectively.
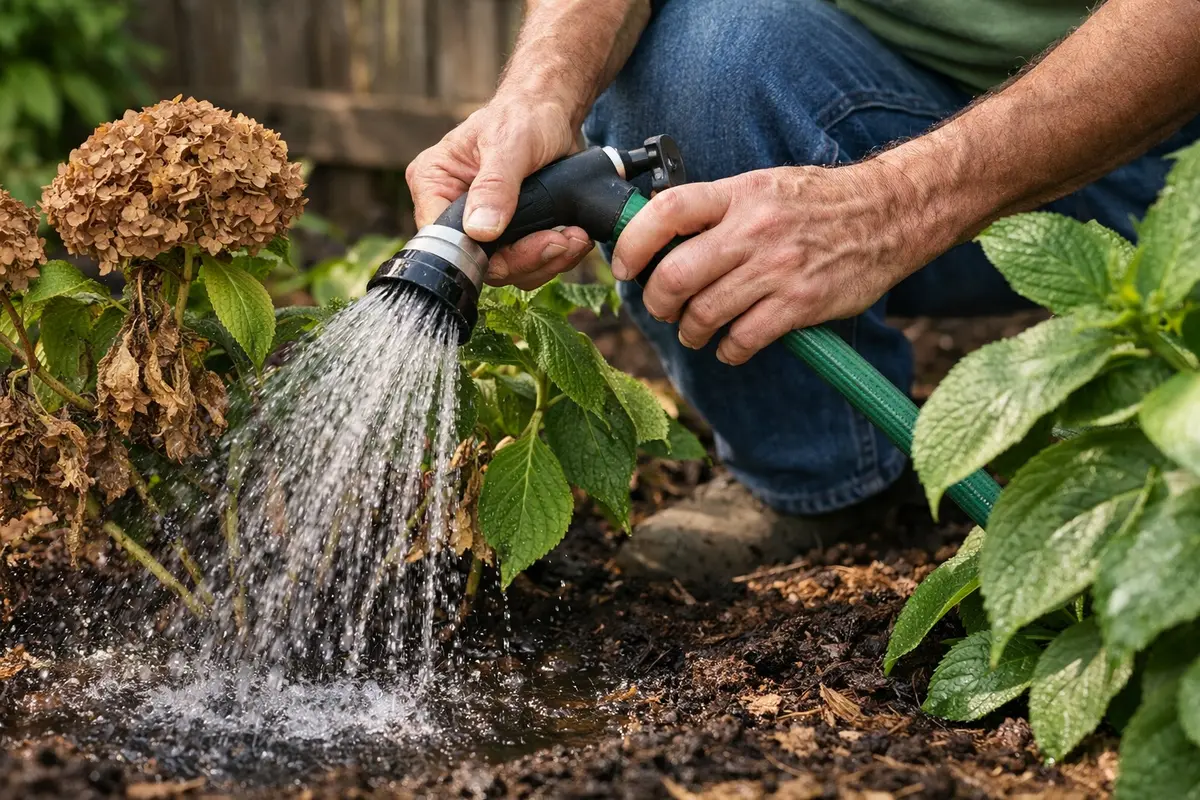
Step 3 – Revive Hydrangea Blooms with Proper Watering
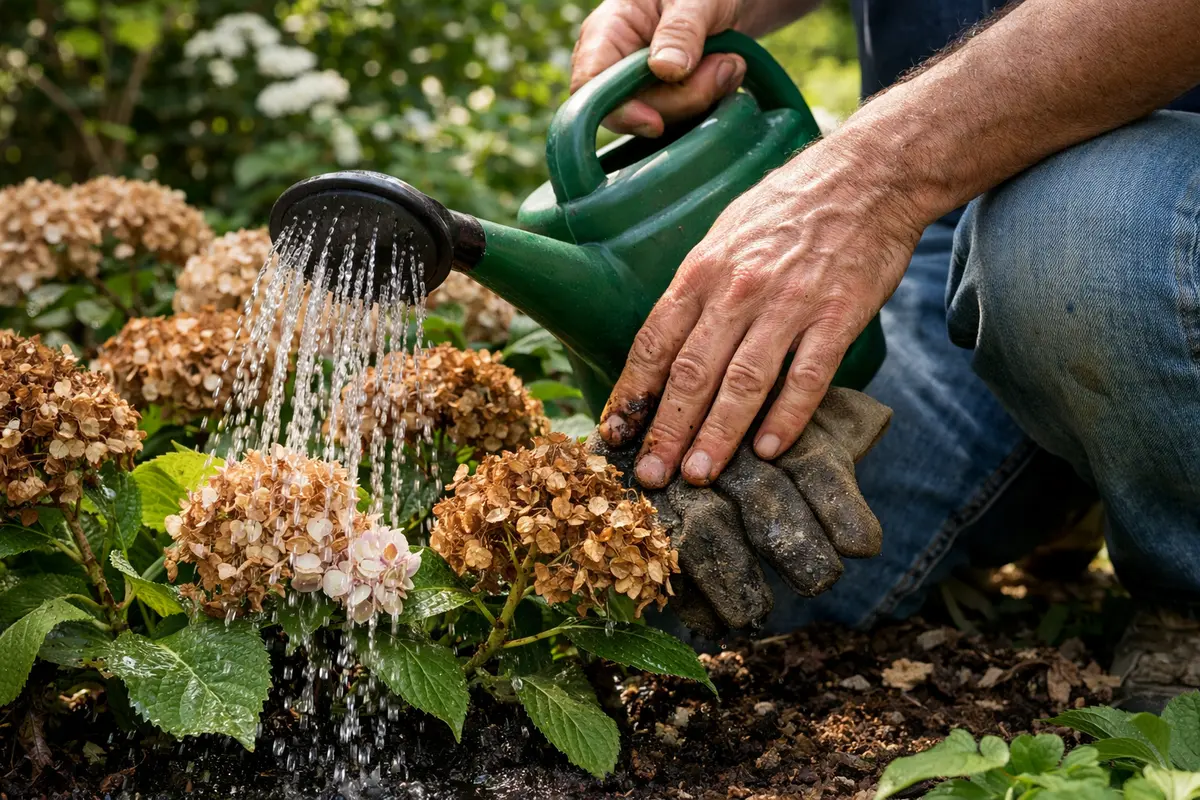
Water the hydrangea deeply to restore moisture to the roots. Within a day or two of consistent watering, you will start to notice the leaves perking up, which reflects the plant’s response to improved hydration and indicates that the roots are being revitalized. This action rejuvenates the plant, leading to improved overall health and regeneration of the blooms. To ensure effective watering, saturate the soil until water seeps down to at least six inches deep, reaching the root zone. If the soil repels water after initial watering, this may indicate that it is too dry and has become hydrophobic, which requires reevaluating your watering technique.
Proper watering hydrates the roots and stabilizes the plant’s overall physiological functions. When sufficiently hydrated, hydrangeas can maintain moisture levels needed for new flower growth and alleviate browning from earlier heat stress. Be sure to keep an eye on the weather; for instance, after a heavy rain, your watering may need to be adjusted to prevent over-saturation. This approach reduces the likelihood of further stress, allowing for a better recovery on the plant’s part. If subsequent heat waves occur, be prepared to implement longer watering sessions to replace moisture lost through evaporation, happening particularly during peak sun hours.
However, be cautious not to overcompensate by soaking the plant excessively immediately after watering, as this could lead to root rot, especially if drainage is poor. Instead, gradually increase watering frequency while continuously monitoring moisture levels. If the blooms seem resilient and show signs of recovery, you can allow the top inch of soil to dry before re-watering; this balance is crucial for the overall health and vitality of the plant. To further enhance your watering strategy, consider using a moisture meter to help gauge when to water, ensuring a more consistent hydration schedule. Proper recognition of when to adjust watering entails closely observing the soil texture and consistently checking for adequate moisture levels.
Step 4 – Implement Watering Strategy for Heat Stress
Start by applying a layer of organic mulch around the base of your hydrangeas to support moisture retention and help regulate temperature. Just a few inches of mulch can prevent the blooms from turning brown, promoting consistent hydration and optimal blooming quality throughout the summer. Notably, hydrangeas are sensitive to fluctuations in soil moisture, especially during hotter and drier spells. When the soil dries out, the plant can struggle to absorb nutrients, leading to brown blooms. By implementing mulch, you insulate the soil, keeping it cooler and maintaining a more even moisture level, which both combats drought stress and enhances blooming potential.
Pay careful attention to your surrounding weather conditions, as hot months may require adjustments to your moisture routine. Increase your watering frequency by checking the soil moisture weekly, especially during August. If you notice that the mulch begins to dry out rapidly, consider reapplying a fresh layer or adding additional shade via companion plants to further shield the hydrangeas from intense sun exposure. Practically, keeping an eye on moisture levels visually—by lifting the mulch and examining how dry the soil beneath may feel—can also provide insight into how often you need to water.
In extreme heat conditions, consider watering in the cooler parts of the day, like early morning or late afternoon. This timing helps prevent excessive evaporation, allowing more water to penetrate the roots, which is essential during peak summer days. Additionally, if you find maintaining a manual schedule overwhelming, an automatic irrigation system may deliver more efficiently without constant oversight. However, if actively monitoring by hand, keep in mind to ensure mulch isn’t packed against plant stems since this could retain excess moisture and lead to rot. A smart strategy combines timing adjustments with preventative measures for consistent success in sustaining hydrangea health.
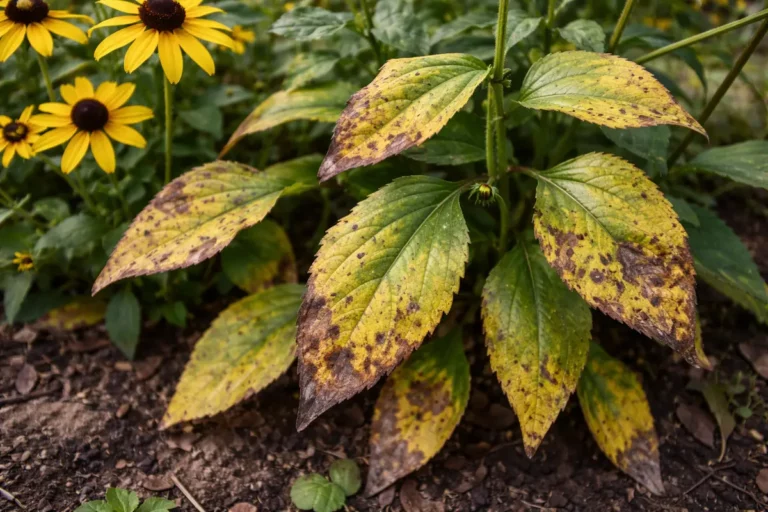
Step 5 – Check Hydrangea Leaves for New Brown Signs
Monitor your hydrangea leaves every 2-3 days for any signs of new browning or wilting. You should observe visibly improved growth within a week, or conversely, notice if new brown areas develop, indicating either that your watering strategy is effective or that new stressors are present. This close inspection enables you to detect potential issues before they escalate, allowing for prompt interventions. The early detection of browning can often mean the difference between a minor adjustment and major health crises for your hydrangea.
Healthy leaves will feel firm and vibrant while showcasing regrowth from earlier wilted flowers. However, if you still see brown blooms forming, it may indicate that either watering is still inadequate or pests are significantly affecting the plant, thus obstructing healthy growth. Maintaining regular observations allows you to see improvement or catch problems before they get out of hand, which assists in successfully maintaining plant vigor. In cases where leaves develop browning that spreads quickly, consider the possibility of fungal infections that can hamper overall health and performance.
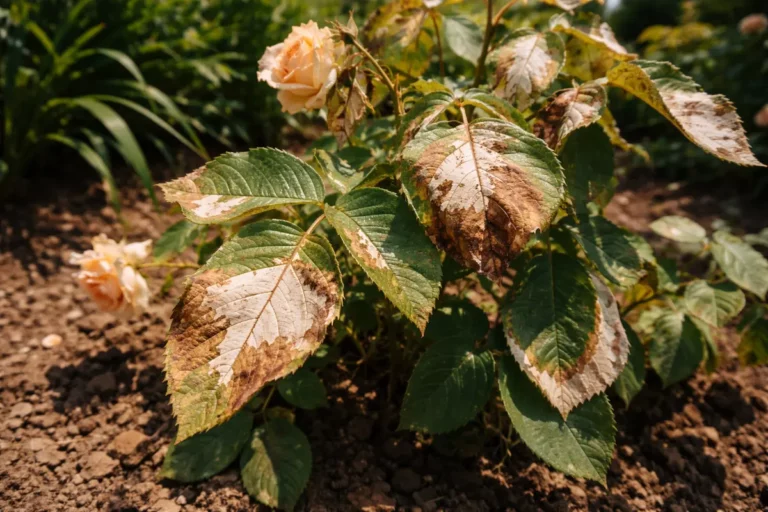
If the browning persists despite following your watering and trimming regimen, dig deeper into investigating possible pests or diseases impacting your hydrangea. Aphids and spider mites can quickly multiply, compromising foliage and blooms, leading to damage that may not be immediately apparent. If pests are suspected, examine both sides of the leaves closely; a significant presence of these pests indicates immediate action is required to mitigate their impact. In instances of diseases like powdery mildew or black spots, applying an organic pesticide or fungicide may become essential. Quick responsiveness is vital; once a disease establishes itself in the plant, it can rapidly spread and may cause irreversible damage. Always monitor not just for new growth but also for changes in leaf texture or color, as these signs can alert you to underlying issues that require your expertise in oversight.
FAQ
How long does it take for hydrangeas to recover from browning?
Recovery from browning can typically take around 1-3 weeks with consistent care, which includes proper watering and exposure to adequate sunlight. You might notice the first signs of improvement in the form of new leaves or healthy blooms appearing within a week, particularly if interventions are made swiftly. Delayed action can prolong recovery time, making prompt measures vital for the best result possible.
Can browning blooms spread to other hydrangeas?
If the browning results from wilting due to insufficient water, the issue can remain localized and generally limited to that specific plant. However, if the browning is due to pests or diseases, it holds the potential of spreading to other hydrangeas if not managed quickly. Regular monitoring and swift action can help prevent further spreading, particularly in gardens with multiple plants in proximity. If you notice signs of disease, it’s prudent to isolate affected plants to minimize risk to surrounding hydrangeas.
Should I remove all the brown flowers immediately?
Yes, promptly removing browning blooms is essential to prevent energy waste and to help the plant focus on healthy regrowth. Being judicious is key; trim only the damaged parts while ensuring you’re careful not to remove excessive foliage, as leaves are critical for harnessing sunlight through photosynthesis. Healthy leaves are necessary as they provide energy for recovery and future blooms. Prioritizing trimming brown parts immediately minimizes shock to the plant while maintaining its overall health.