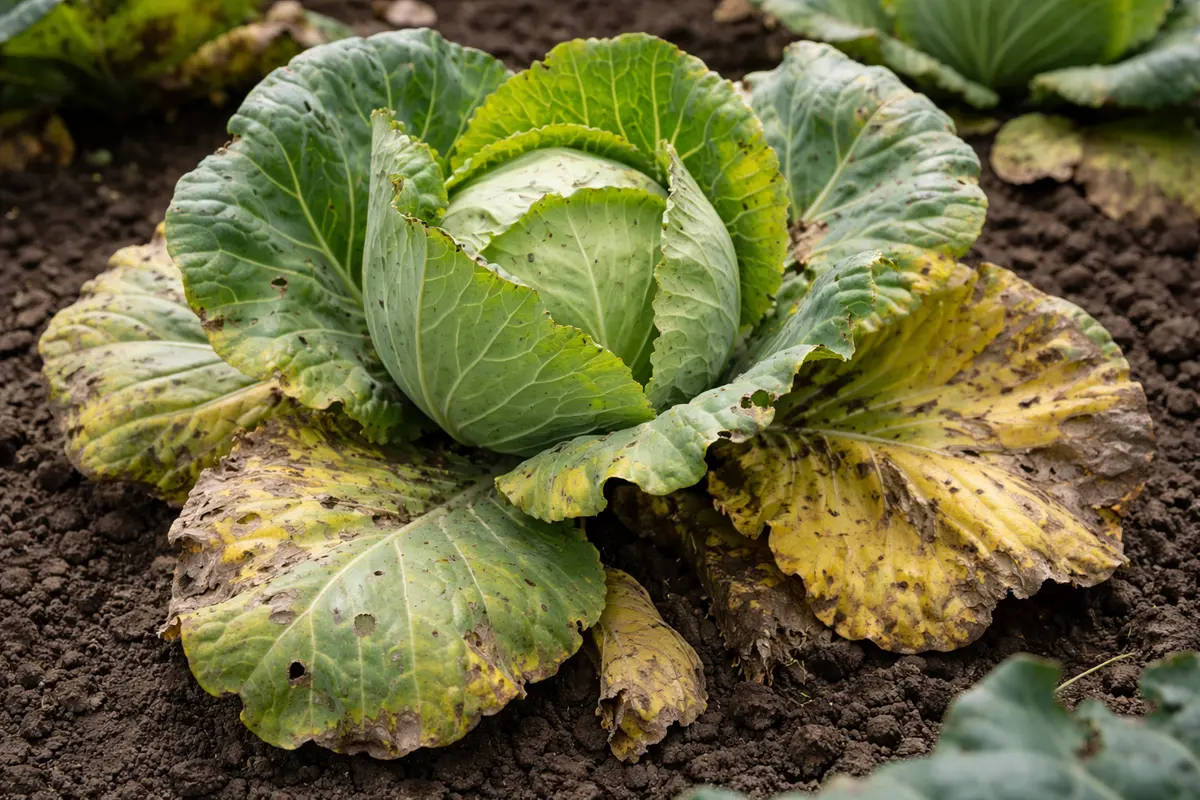
You may notice that your newly planted cabbage leaves are turning yellow after planting, which is why you need to know why are my cabbage leaves turning yellow after planting. This yellowing often occurs due to nutrient deficiencies or overwatering, both of which can lead to significant leaf damage. If left unaddressed, the situation can worsen, leading to stunted growth and weakening the plant, but you can fix it now by checking the soil moisture, adjusting nutrients, and improving care practices.
Step 1 – Inspect Cabbage for Pest Infestation
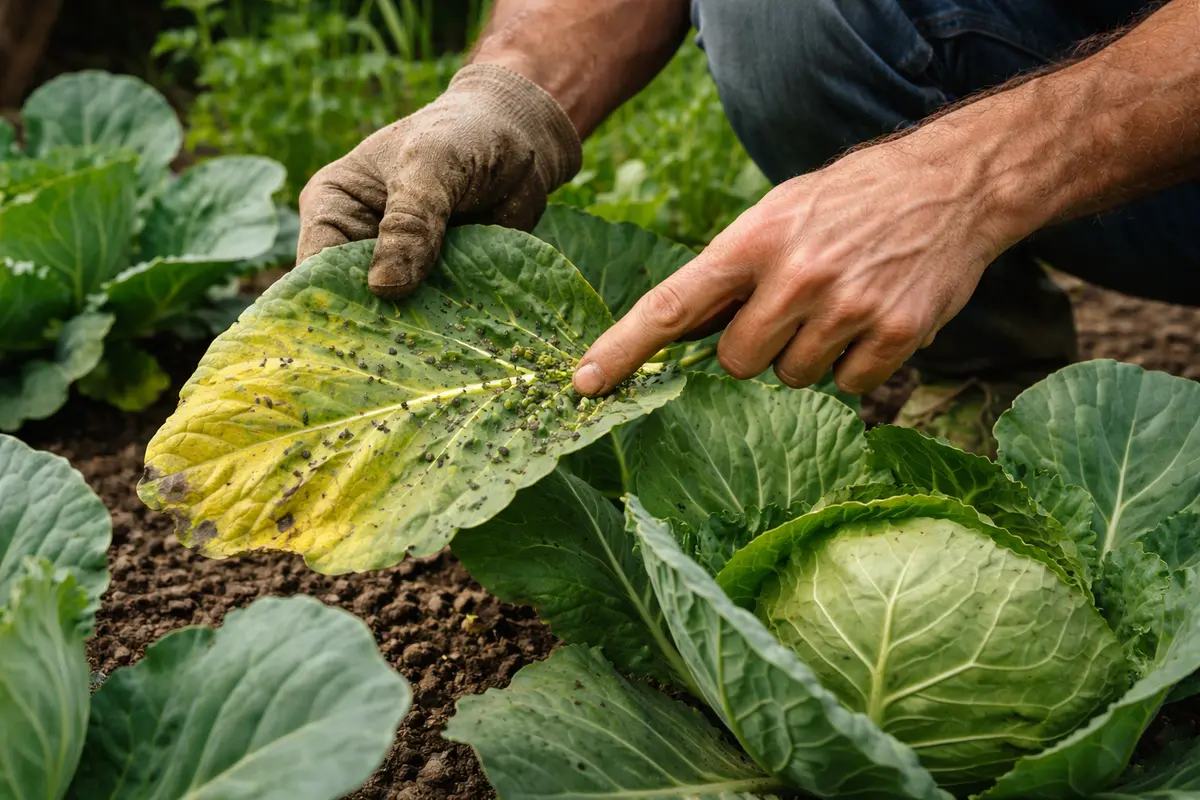
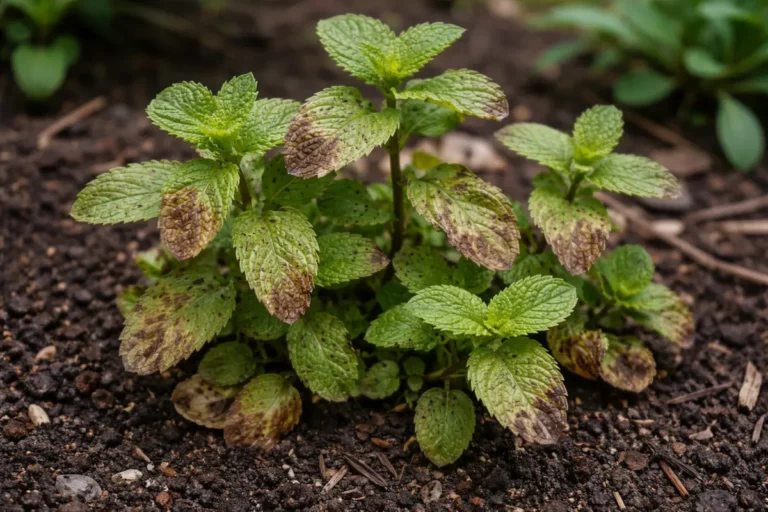
Begin by thoroughly inspecting the cabbage leaves for signs of pest infestation. Look for visible pests, such as aphids or caterpillars, as well as small holes in the leaves or sticky residues left by insect activity. If you notice discolored or distorted areas on the leaves, this is a strong indicator of pest presence. Check the undersides of leaves where pests often hide and lay eggs, as this area is commonly overlooked.
Pests can quickly damage cabbage plants, leading to compromised health and further yellowing of the leaves if left untreated. Acting swiftly limits the spread of infestations, as many pests reproduce rapidly; for instance, aphid populations can double in a matter of days. Immediate action ensures you’ll catch the issue before it escalates to a full-blown infestation, which could require harsher control methods later. If the pest population seems high, they can transmit diseases further worsening the plant’s condition, potentially leading to crop loss.
A common mistake at this stage is overlooking the signs of pest activity, mistakenly assuming the yellowing is solely due to nutrient issues. If you find insect damage or droppings, immediately remove the affected leaves and use an appropriate pesticide or natural deterrent like neem oil to address the infestation before it spreads. Be mindful that if you see predators like ladybugs, applying chemical treatments can harm beneficial insects that are crucial for biological pest control. If you notice visible clusters of pests, consider using insecticidal soap, ensuring the product is safe for vegetables and follow all instructions to minimize any potential adverse effects.
Step 2 – Determine Nutrient Deficiencies Affecting Leaves
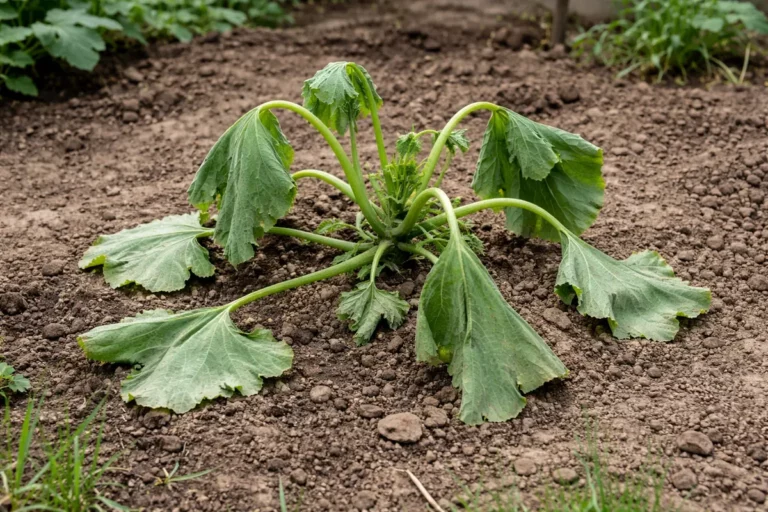
Check the moisture level of your soil immediately; if it’s too dry, thoroughly water your cabbage plants to restore hydration. After a day or two, you should notice the yellowing leaves beginning to green up as the plants receive the necessary water intake.
Yellow cabbage leaves often indicate a lack of water, which affects the plant’s ability to absorb nutrients from the soil. When soil moisture is insufficient, the roots cannot efficiently transport essential minerals like nitrogen, leading to chlorosis, where leaves lose their green pigment. Conversely, overly soggy soil can also cause yellowing, as it may disrupt root oxygenation.
If your soil feels overly saturated or smells sour, apply a well-draining soil amendment to improve aeration and drainage. On the other hand, if the yellowing persists despite adequate watering, check for pest infestations like aphids, which can sneakily siphon off sap from the leaves, causing similar yellowing symptoms.
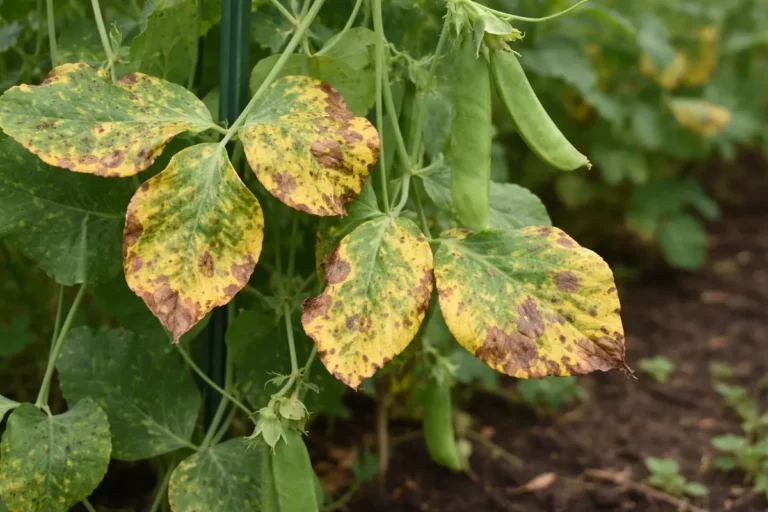
Yellowing leaves can indicate that the soil lacks essential nutrients such as nitrogen, magnesium, or iron. Each nutrient deficiency produces distinct symptoms, and accurately identifying them allows for targeted corrections that will save your plants time and resources. Understanding these variables is critical for your cabbage’s recovery. If you spot stunted growth along with yellowing, this typically signals a nitrogen deficiency, as this nutrient is vital for overall vegetative development and ensures the plant can photosynthesize effectively.
If you find that your soil test reveals low nitrogen levels, consider applying a balanced fertilizer or compost to replenish the nutrients and encourage green leaf growth. Aim for a fertilizer with a nitrogen content higher than the other two nutrients; for instance, a fertilizer labeled 10-10-10 (N-P-K) can support cabbage growth but may need higher nitrogen, such as a 16-4-8 formulation. However, if the soil appears excessively damp, indicating overwatering or poor drainage, revise your watering routine immediately before adding fertilizers to prevent nutrient washout. Applying fertilizers to waterlogged soil can create further nutrient lockout, compounding the plant’s issues; therefore, evaluate soil moisture using a simple soil probe or digging down a couple of inches to gauge moisture levels properly.
Step 3 – Apply Balanced Fertilizer to Cabbage
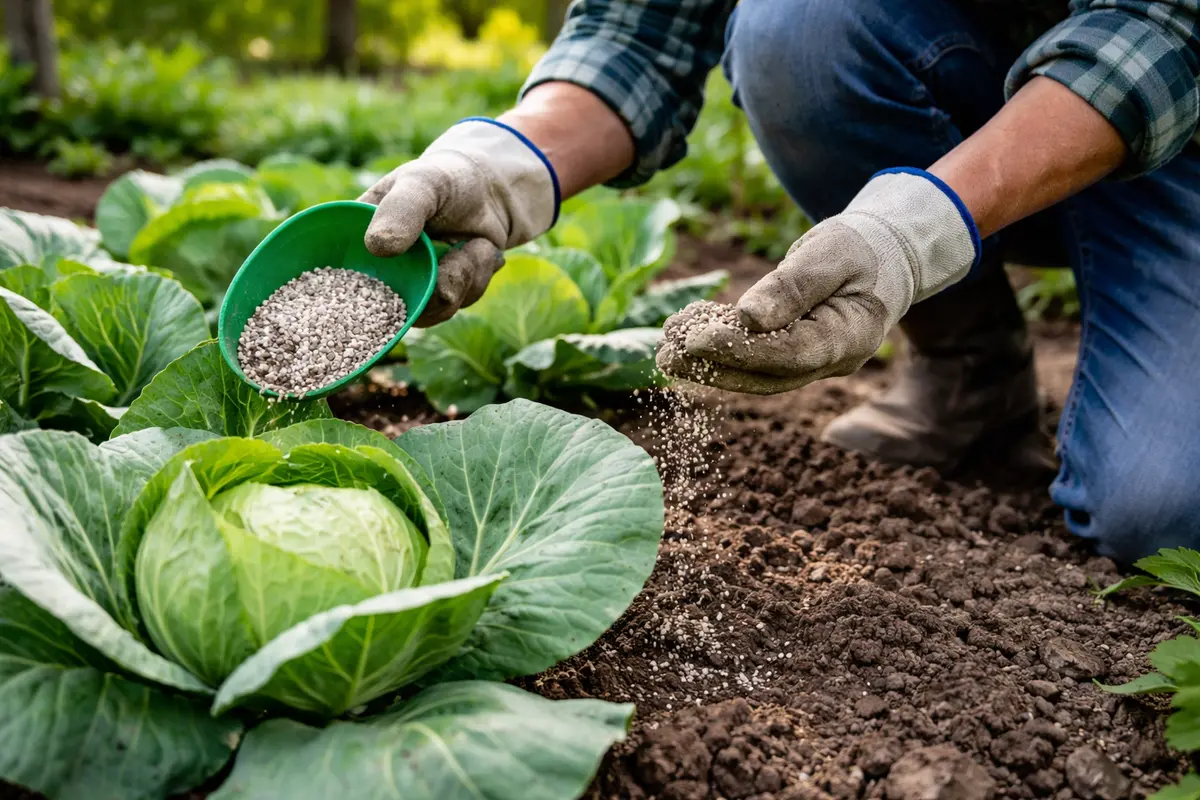
Apply a balanced fertilizer specifically designed for leafy greens to your cabbage. You should see signs of recovery as leaves begin to regain their green color within a week after fertilizing. The balanced blend usually includes nitrogen, phosphorus, and potassium, each playing a role in the plant’s development and resilience. Fertilizer application should be timed according to the plant’s growth cycles; for instance, applying it during early growth stages can yield the best results.
This recovery method works because a balanced fertilizer replenishes essential nutrients that support healthy leaf development and improve overall plant vigor. The nitrogen stimulates leaf growth, promoting chlorophyll production, while elements like potassium help in root development, reducing plant susceptibility to diseases. The right balance of nutrients will cater to the cabbage’s growth phase and help stabilize its health. Over time, a consistent fertilization schedule will ensure robust cabbage growth and mitigate future deficiencies.
Be careful during this step; over-fertilizing can lead to “fertilizer burn,” which stunts the plant’s recovery. Instead, apply fertilizer at the recommended rate for your specific cabbage variety, usually around 1 tablespoon per foot of plant height at the roots, and avoid any rapid treatments that could stress the plant further. Additionally, water immediately after fertilizing to dilute the chemicals and reduce any potential damage to the roots. If recovery is slow or is not evident after a week, evaluate your watering practices and consider implementing a more tolerant fertilizer option, such as one with slow-release granules to provide nutrients over a longer period.
Step 4 – Water Cabbage Consistently to Prevent Stress
Apply a balanced fertilizer high in nitrogen to your soil immediately, focusing on areas where your cabbage plants are located. This practice will enhance nutrient absorption and promote the vibrant green color of the leaves, preventing yellowing.
Excessive nitrogen can also lead to yellowing if too much is applied, symbolizing nutrient imbalance. Conditions such as poorly draining soil or consistent overwatering can cause cabbage to develop yellow leaves; applying fertilizer in conjunction with improving drainage lessens the likelihood of recurrence by addressing both nutrient and water issues.
During the colder months, adjust your prevention routine by using organic compost with slow-release properties, ensuring that your cabbages have consistent nutrients as they grow gradually. If heavy rains wash away recent fertilizer applications, apply a new layer to maintain nutrient levels.
Consistent moisture helps maintain proper nutrient absorption from the soil, preventing further yellowing of the leaves due to drought stress. Cabbage requires constant access to moisture, especially during the early growth phases of establishment, to support its leafy growth positively. Inconsistent watering can lead to stress responses, which may include wilting, bolting, or increased susceptibility to pests. Monitor your plants closely during heatwaves, which can accelerate soil moisture loss; in such cases, it might be necessary to water more frequently.
During hot summer months, you may find this watering frequency needs to be adjusted, potentially requiring up to 1.5 inches per week to prevent plants from wilting, especially if grown in sandy soil. Consider using mulch around the base of the plants to retain moisture while suppressing weeds, which can compete for nutrients. Be cautious, however, as too much mulch can cause excess moisture retention leading to root rot — a clear sign will be a sudden onslaught of yellow leaves accompanied by mushy stems, indicating a dire need to reassess your mulching practices.
Step 5 – Check Cabbage Leaves for Yellowing Every Week
Next, monitor your cabbage plants closely for signs of stress. Check the soil moisture around the roots, ensuring it’s consistently moist but not waterlogged. Observe the leaf color daily for any signs of green returning; if the yellowing persists after a week, reevaluate your soil pH and nutrient levels, as imbalances can contribute to ongoing issues.
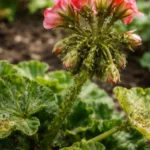
A fully recovered cabbage plant will display vibrant green leaves, firm and crisp to the touch, contrasting with early signs of trouble such as soft, wilting foliage that may exhibit a yellow or brown tint. If the leaves start to re-yellow, look for changes in texture, where the edges may curl or turn brittle instead of remaining fresh and supple.
If yellowing returns despite following these monitoring steps, act quickly by inspecting for pests or checking for signs of nutrient deficiencies; treat any identified issues immediately. If problems persist, consider applying a balanced fertilizer to restore nutrients, or consult a local extension service for further guidance on addressing specific deficiencies.
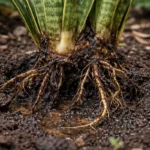
A fully recovered cabbage plant should exhibit vibrant green leaves, sturdy stems, and no new yellowing signs. Keep a meticulous eye for retouches of yellow, as they can indicate either a return of pests or continuing nutrient deficiencies. If yellowing persists, update your inspection approach to include observing roots for signs of decay or soil texture assessments to ensure proper drainage. Checking for any unusual gapping or decay under the soil can provide insights into whether the yellowing is symptomatic of root issues or a lack of nutrient access.
If yellowing returns despite following these steps, consider reassessing soil drainage and nutrient balance, and inspect plants closely for pest signs again. If issues persist, it may be helpful to consult a local gardening expert for tailored advice regarding your unique soil and environmental conditions. Staying proactive about preventative measures, including altering watering schedules or adjusting planting density, can significantly help in maintaining your plants’ health in future growth seasons. Be ready to implement strategies learned from past assessments for improved outcomes.
FAQ
How long will it take for my cabbage to recover from yellowing leaves?
Recovery can take approximately one to two weeks after successfully addressing the issues. The speed of improvement depends heavily on appropriate application of fertilizers and ensuring consistent water levels. If the problem was related to heavy pest damage, recovery may be significantly slower based on the extent of damage and stress experienced by the plants.
Can pests spread the yellowing in my cabbage leaves?
Yes, pests can significantly contribute to yellowing leaves by draining vital nutrients from the plant. If left unchecked, infestations can worsen quickly, leading to more extensive damage and potentially affecting neighboring plants through transmission of diseases. Regular monitoring and rapid response to observed pest populations are crucial in preventing insect damage before it exacerbates yellowing.
Should I remove yellowing leaves from my cabbage plants?
Yes, it’s advisable to remove severely yellowing leaves to prevent any potential spread of disease among remaining foliage, allowing the plant to focus its energy on healthier growth. Be cautious when removing leaves to avoid damaging the stems or adjacent healthy leaves; use clean, sharp scissors for a swift removal while ensuring that your tools are sanitized to prevent contamination.