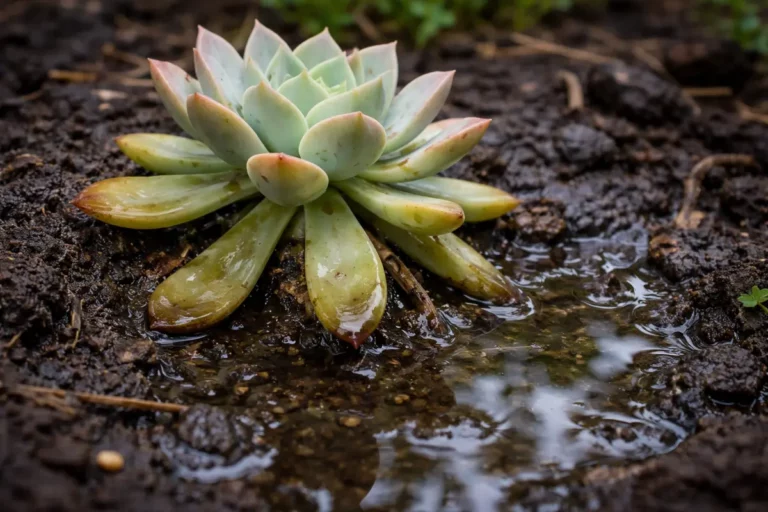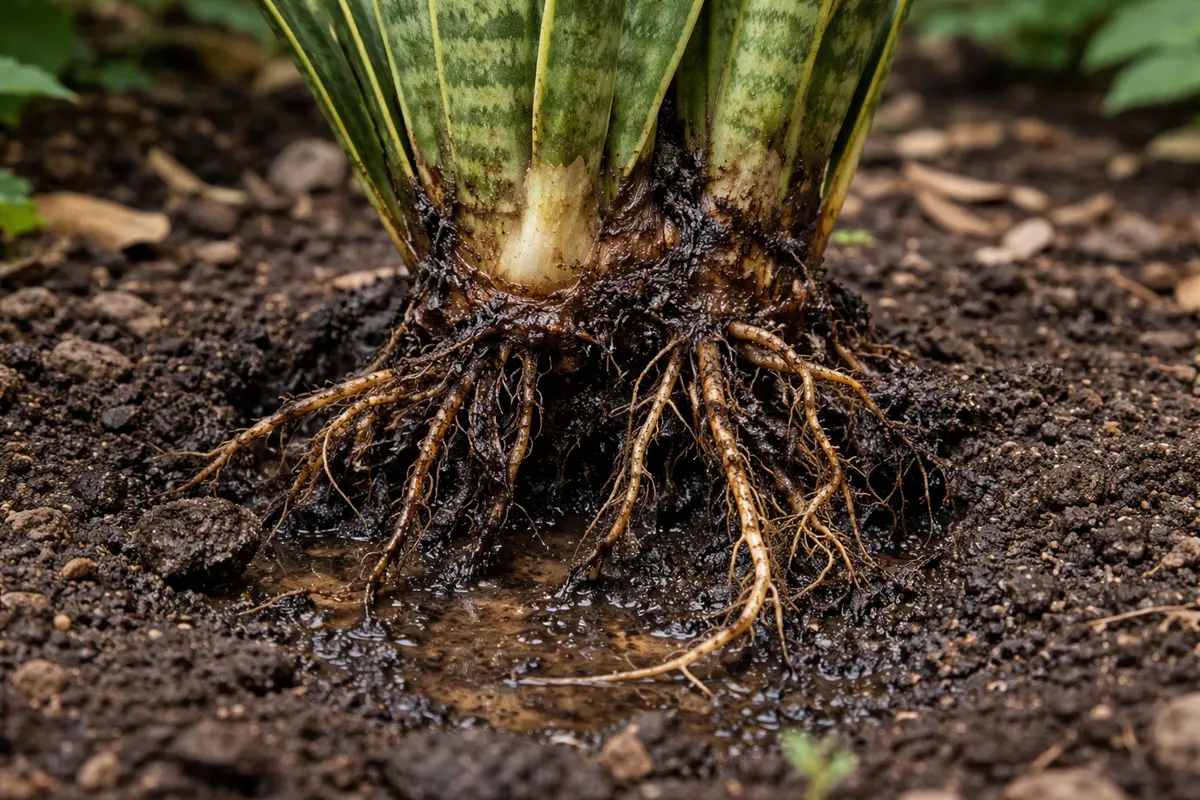
You may notice your snake plants looking a bit off during winter, which is why you need to know how to stop root rot in snake plants during winter. The roots can become mushy and lead to yellowing leaves due to overwatering in cooler months when the plant is less active. If left untreated, this condition can spread and weaken the plant, making it harder to fix later on, but you can take action now by checking the soil moisture and adjusting your watering schedule accordingly.
Step 1 – Trim Damaged Snake Plant Leaves Fast
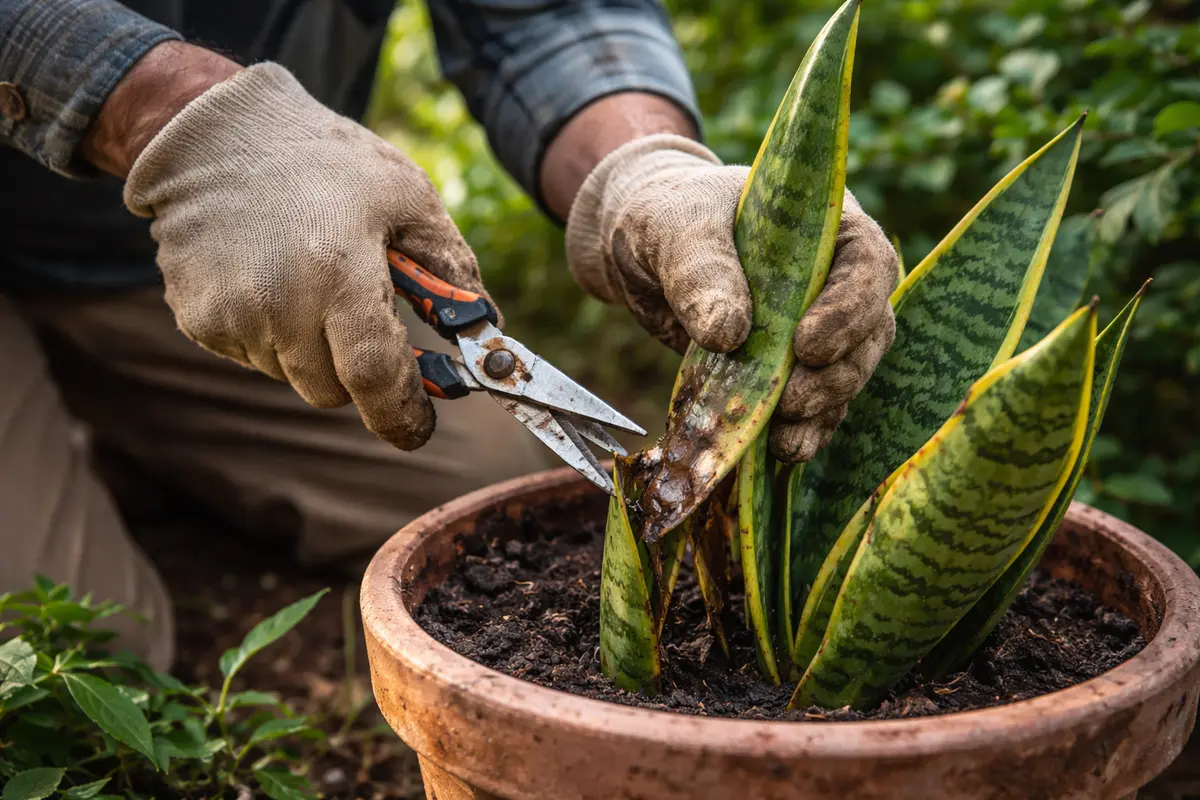
Start by cutting any visibly affected leaves off at the base using sterile shears. You will see an immediate reduction in the signs of rot affecting the overall plant health. Inspect the root system for mushy, brown roots; if present, remove these portions as well. Healthy tissue that’s left should be allowed to air dry for a few hours to minimize the risk of further damage.
Acting quickly is crucial because snake plants are particularly sensitive to prolonged moisture around their roots, which can lead to pathogen growth and further decay. By addressing root rot immediately, you give the plant a fighting chance to recover, as the healthier roots will begin to regenerate in the drier environment, encouraging new growth. If you delay this action, the imbalance of moisture can cause widespread rot, leaving the plant in a state of decline and severely limiting its recovery options.
A typical scenario is when a gardener notices wilting leaves and delays trimming the snake plant. This delay often results in increased rotting leaves and roots, whereby once-healthy tissue becomes a source of decay, leading to a condition that is harder to reverse. If the leaves show signs of softness or discoloration, prioritize swift removal before the rot spreads further.
Acting fast is essential during winter months when lower temperatures inhibit evaporation and slow down water uptake. If root rot progresses, the plant may struggle to recover as healthy roots diminish, leading to stunted growth or even plant death. If you notice yellowing leaves despite adequate light, check for waterlogged soil to confirm issues.
For instance, a gardener waited too long to intervene and lost a snake plant to severe root rot, resulting in brown, limp leaves and a mushy base. Conversely, another gardener promptly trimmed away signs of decay, recovering their plant and witnessing vibrant new growth. At this stage, act quickly; if you detect a musty odor or visible blackening of leaves, it’s time to inspect the roots and adjust your watering practices accordingly.
Acting swiftly to trim back affected leaves prevents the rot from spilling over to healthier portions of the plant. Snake plants are particularly vulnerable to root rot in cooler months when their growth significantly slows down. If soft, brown leaves are not removed quickly, they enable fungal spores to proliferate, putting the entire plant at risk. It’s essential to use clean, sharp scissors or shears to avoid introducing additional stress or disease to the plant. Each cut should be made right at the base of the leaf, eliminating any chance for rot to extend down toward the roots and potentially affect their health.
Many gardeners underestimate the impact of dead or damaged foliage on plant health. When temperatures drop, moisture levels in the soil can linger longer than necessary, promoting increased fungal activity. If you delay trimming back infected sections, you may face a larger issue of root rot. If you see new leaves starting to wilt, this could indicate that more trimming is required as the plant continues to struggle against root rot. A common error is leaving behind the tips of the leaves, believing it won’t matter, but even remnants can be a continuous source of fungal spores jeopardizing recovery. Remember that damaged leaves often divert resources from healthy ones, so acting swiftly only enhances the recovery potential of your snake plant.
Step 2 – Assess Overwatering Causes for Snake Plants
Inspect the soil moisture levels to confirm overwatering as the root cause. You will notice that overly damp soil results in a decline in the plant’s health. Understanding this aspect enables you to take decisive corrective actions. A moisture check could mean the difference between recovery and worsening conditions.
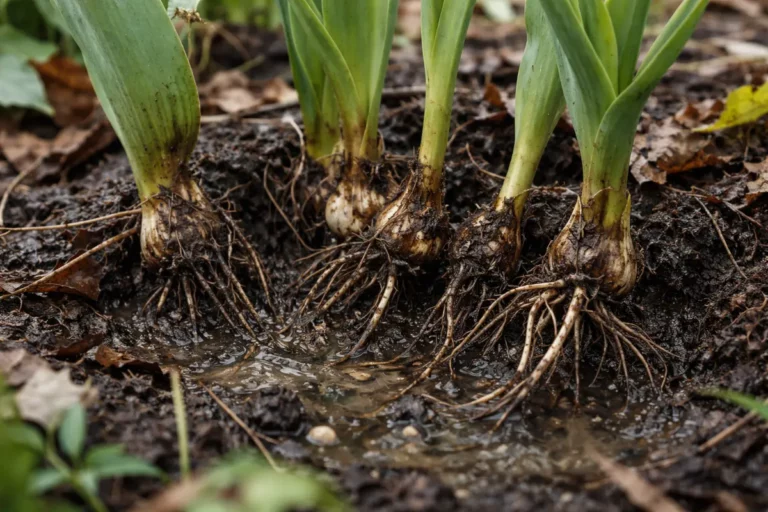
This moisture issue arises because snake plants are adapted to thrive in drier conditions; their roots store water, but excessive moisture can lead to root rot and suffocation, particularly during winter when their growth slows. Correct this by allowing the top two inches of soil to dry out completely before watering again. To test, insert your finger into the soil; if it sinks deeper than knuckle-deep, you need to adjust your watering frequency.
Additionally, look out for other symptoms; if the soil has a sour smell or feels slimy, it’s a sign of overwatering. If the soil remains persistently wet and shows signs of fungal growth, replace it with a well-draining soil mix or incorporate perlite to improve drainage. Observe your plant over the following weeks; if the leaves darken, feel mushy, or droop despite your care routine, these are indicators of excessive moisture stress. Seasonal changes can impact moisture retention, so recalibrate your watering based on these environmental factors. If you notice water pooling or bubbling at the soil surface after you water, it’s likely that the roots are unable to absorb the water properly. Changing your watering approach in winter can help mitigate these issues.
Step 3 – Repot to Revive Snake Plant Roots
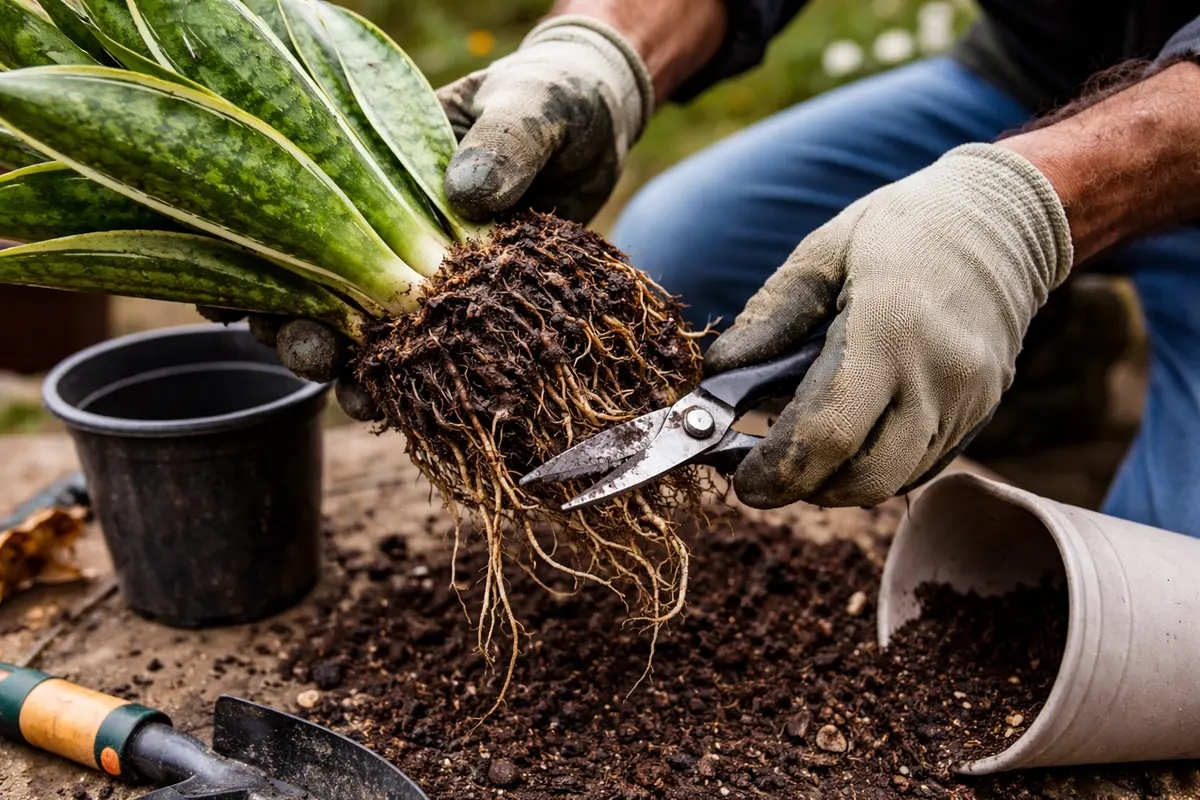
Start by removing any severely affected snake plant leaves that show signs of rot, and transfer the plant to fresh, sterile soil that promotes drainage. Within a few weeks, observe new growth emerging from healthy roots and a reduction in mushy tissue, indicating that the plant is shifting toward recovery.
Recovery from root rot can take anywhere from a few weeks to several months, depending on the severity of the disease. Observe the emergence of new, firm leaves and healthy roots as visual indicators of progress, as this signifies that the plant is stabilizing. Limiting excessive moisture and providing bright, indirect light can accelerate recovery, while cold exposure can slow it down significantly; if you see yellowing leaves despite management efforts, check the root condition.
A common mistake during recovery is overcompensating with water or fertilizer, believing it will restore vigor faster. If you provide too much water or nutrients, the plant might suffer from further root stress, leading to additional rot. If leaves remain droopy after adjusting care, check the drainage to ensure it is not retaining excess water.
The recovery process typically takes 4 to 8 weeks for noticeable signs of healthy regrowth, such as expanding leaf tips or vibrant green coloration. Warm, brighter environments can accelerate growth, while cold or dark conditions may hinder recovery. If you notice any persistent mushiness in the leaves, check for remaining root rot as this could indicate that the plant isn’t fully out of danger.
Follow up by limiting your watering and fertilization during recovery; both can worsen root rot rather than help it. Ensure the soil dries completely between each watering, as snake plants flourish on infrequent yet thorough watering sessions. If leaves begin to yellow and become mushy, reassess the soil moisture levels and adjust your watering routine accordingly.
Recovery signs might appear within weeks depending on the severity of root rot; healthy plants often show firm leaves or new roots emerging from the soil. Provide ample bright, indirect light to expedite the recovery process further. Should growth be absent after two weeks, it’s critical to inspect for any leftover rot or inadequate light exposure. New foliage typically indicates improved root health, while lingering wilting or discoloration suggests that additional interventions are necessary.
Avoid the urge to water excessively after treatment; over-watering can lead to reoccurring rot, even as recovery appears to be underway. Let the top inch of soil dry out completely before re-watering, and resist the temptation to water immediately following repotting. If soggy conditions persist a week after the last watering, check that the drainage holes are clear, as clogged drains can impede recovery. Repotting enhances drainage and provides fresh nutrients; therefore, selecting the right pot size is crucial. Opt for a pot increase of two to three inches, as a pot that is too large can retain excess moisture and elevate rot risk. Monitor for signs of moisture pooling on the soil surface; this may indicate inadequate drainage necessitating further adjustments.
Step 4 – Water Snake Plants Sparingly in Winter
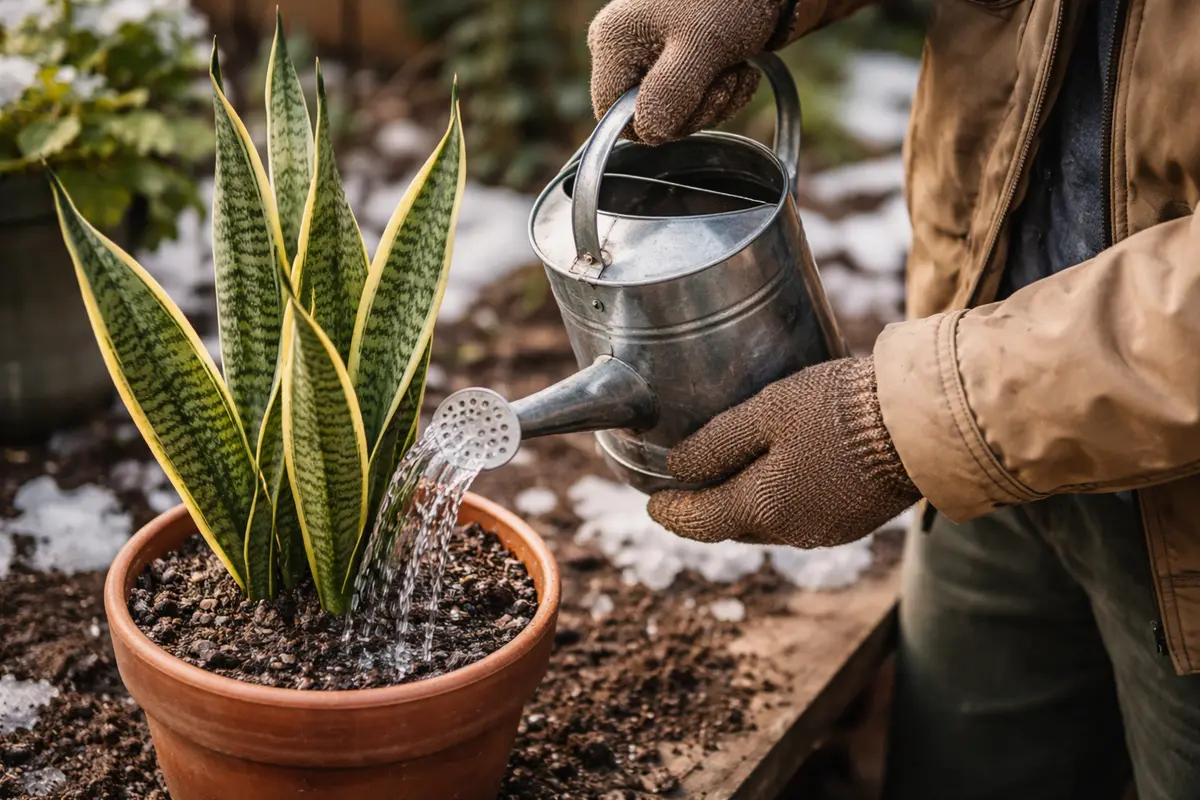
Start by reducing the frequency of watering your snake plant during winter. This results in drier soil, which is crucial for preventing root rot. Establish a strict routine of watering every 3-4 weeks, adjusting only if you notice unusual symptoms.
From here on, check the soil moisture by probing three to four inches deep; if it feels dry, it’s time to water. If you notice its leaves drooping, this indicates overwatering and should prompt immediate action. Implementing a winter watering schedule ensures the plant has adequate time to dry out, reducing the risk of waterlogged soil. Pay close attention to your home conditions; if you’re using artificial heating, this may dry out the air faster, and you might need to shorten the gap between checks. Reinforce this habit by setting a calendar reminder to inspect the soil moisture regularly and observe your plant’s visual cues.
For a more precise approach, consider using a moisture meter to assess when to water. If the top few inches of soil remain dry for an extended period, it’s safe to hydrate. Conversely, if leaves continue to droop after watering, tighten your schedule or check for excess water retention. Always be aware that environmental factors like temperature and humidity directly influence your plant’s water needs; adjusting your care routine accordingly can help maintain its health and vigor throughout the winter months. If not sensing moisture at the correct depth — check that your pot has adequate drainage to prevent future issues.
Step 5 – Inspect Snake Plant Soil for Moisture Levels
Check the soil of your snake plant weekly to assess moisture levels. You should observe the surface of the soil becoming dry while the roots remain healthy and firm. For the next few weeks, monitor the soil moisture to ensure balanced conditions.
Watch for signs of recovery, such as firm leaves and slight new growth, indicating a thriving plant. If you notice brown or limp leaves returning, this may signal ongoing moisture issues. A properly adjusted environment should yield a dry surface without risking root rot conditions. Evaluate humidity levels carefully; during dry spells, you might need to alter your watering schedule. If the soil is still damp a week after watering, double-check your pot’s drainage and consider relocating it to a sunnier spot to ensure proper drying.
If mushiness or limpness returns within two weeks, revisit your watering routine meticulously. Consider repotting with a soil blend made for succulents that enhances drainage. If browning continues despite your best efforts, further root rot issues may be at play; check the roots during repotting to ensure proper health. Frequent evaluation and a proactive approach can significantly improve your snake plant’s longevity and health, ensuring it thrives even through the winter months.
FAQ
How long does it take for snake plants to recover from root rot?
Recovery from root rot in snake plants can take several weeks, depending on the extent of the damage. If action is taken promptly, signs of improvement, such as new growth or firmer leaves, might appear within 2-4 weeks. Provided the conditions are optimal with proper care and monitoring, these indicators will facilitate healthy regrowth.
Can root rot spread to other plants?
Yes, root rot can spread to other nearby plants if fungal spores are present in the soil or if watering practices are not adjusted accordingly. Keeping different plants well-spaced and routinely checking for root health can minimize this risk. It is wise to isolate affected plants until you’re confident that the root rot issue is resolved and practice stringent hygiene while tending to multiple plants, such as cleaning tools regularly.
Should I remove all the affected roots from my snake plant?
It’s advisable to remove any visibly damaged roots but leave healthy ones intact. Always ensure to sanitize tools before and after pruning to prevent spreading diseases. If a significant portion of roots is affected, consider repotting into fresh, well-draining soil to minimize potential risks. This method can greatly improve healthy moisture uptake, allowing new growth as the plant heals.