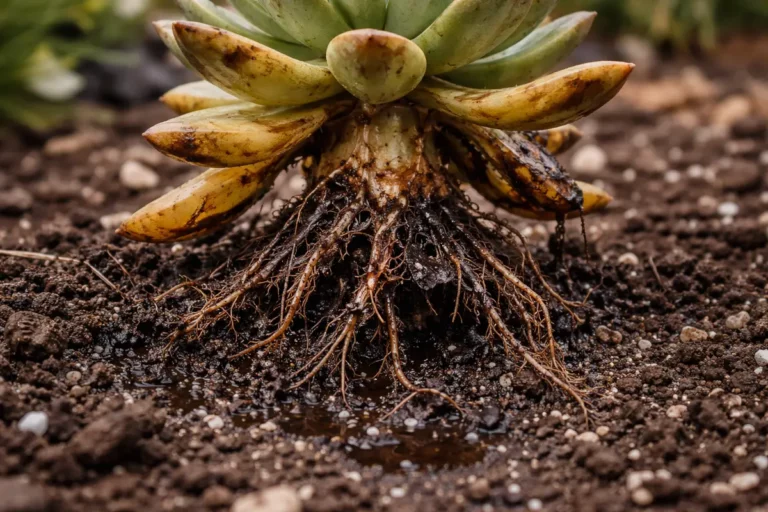
You may notice your tulips showing signs of distress with wilting and yellowing leaves during the winter thaw, which is why you need to know how to stop root rot in tulips during winter thaw. This issue arises when the roots become waterlogged and start to rot, leading to mushy spots that can compromise the health of your plants. If ignored, the problem gets worse and weakens the plant, making it harder to fix, but you can still improve the situation by inspecting the bulbs, adjusting drainage, and monitoring moisture levels closely to prevent further damage.
Step 1 – Dig Up Affected Tulips Immediately
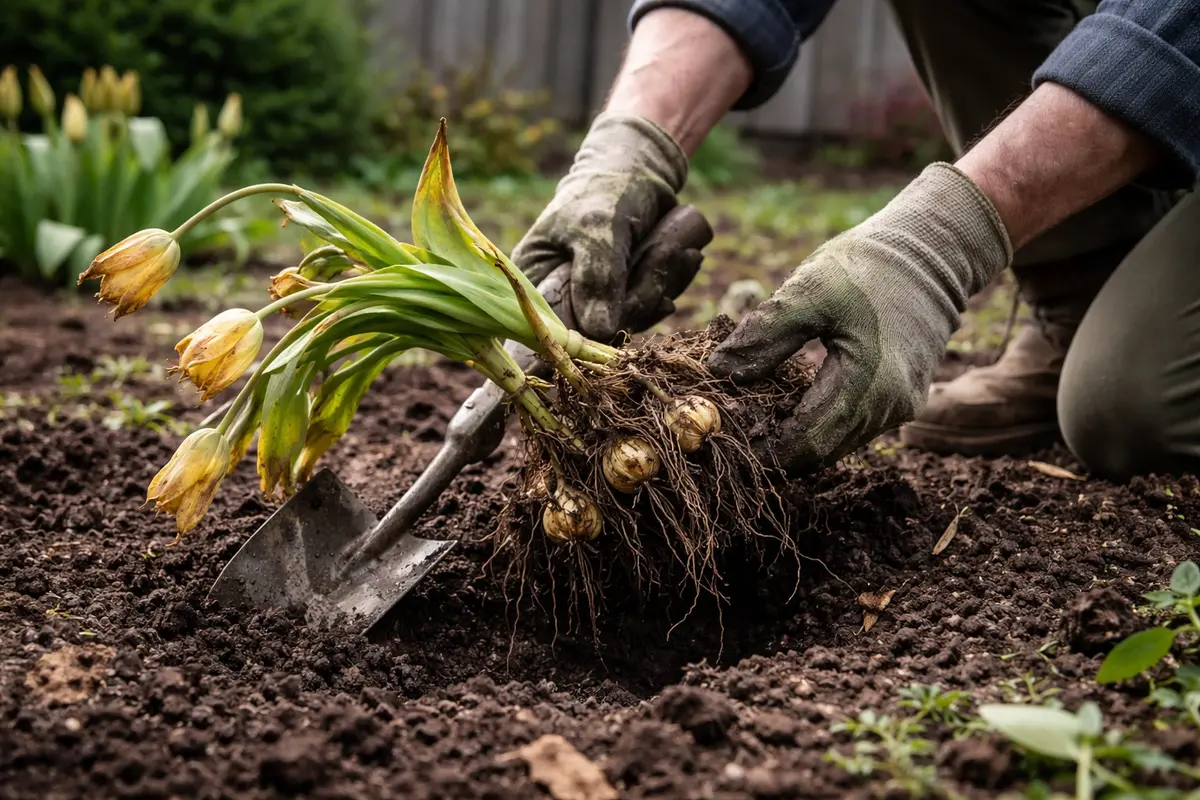
Dig up the affected tulips right away. You will see fewer damaged bulbs exposed to the air, allowing for better assessment and care. This immediate action minimizes the risk of further rot and enables you to prevent the problem from worsening. Unsurprisingly, when the soil around the bulbs remains saturated, it creates a breeding ground for pathogens, exacerbating the chance of root rot. Digging them up helps to interrupt this cycle and can reveal additional signs of trouble.
Acting swiftly is crucial because tulip bulbs can decay rapidly when exposed to wet conditions. If left in saturated soil, fungal pathogens thrive, leading to mushy, discolored bulbs that signal severe rot. By quickly unearthing the plants, you can assess the extent of the damage and protect any healthy bulbs still left intact. A bulb’s external surface might look healthy, but the internal decay could be severe if left unattended. If you find any bulbs are squishy or have an off-color, that indicates significant rot.
Many gardeners mistakenly wait until they see further signs of decline. When a gardener waits too long to dig up the affected tulips, the roots can succumb to rot entirely, leading to the loss of the plant. If simply one or two bulbs are affected, it’s critical to remove them promptly; otherwise, they can drain energy from the healthy ones. Early action not only saves the existing plants but allows for intervention before the rot spreads further into the bulb collection. If your fingers press through the soil and feel excessive dampness, that is a strong indicator that immediate action is needed to avoid total loss. The window for action can be narrow; waiting stages of visible wilting often means significant damage is already underway.
Step 2 – Assess for Soil Saturation Issues
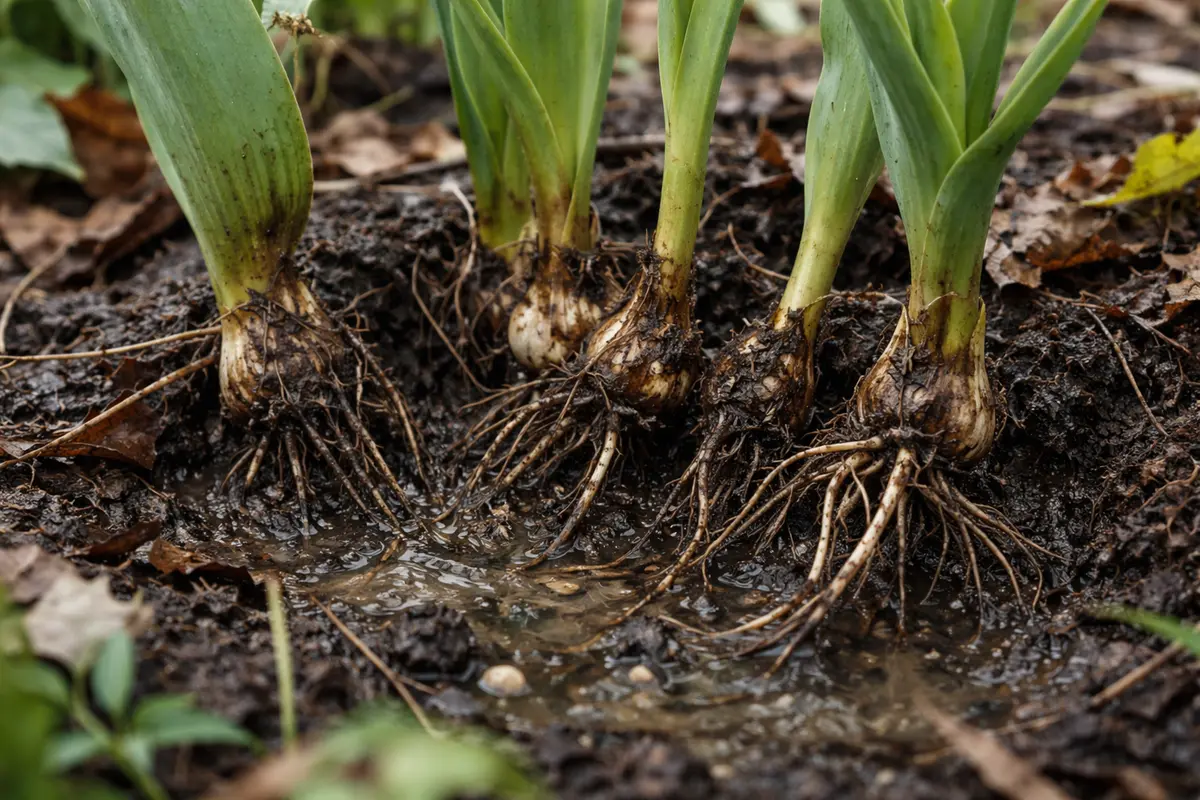
Check the soil moisture levels around the tulip bulbs. You will observe whether the soil is overly wet or retains an unpleasant odor, indicating rot. Assessing for saturation will help you determine the necessary corrective steps to ensure the bulbs can recover effectively. A simple test involves using your fingers to dig a little into the soil; if it’s sticky or muddy, drainage issues are likely the cause. Be particularly attentive to the first few inches of soil where most roots reside, which are crucial for bulb health.
Overly saturated soil prevents adequate oxygen exchange, which is vital for healthy root function. When the soil is waterlogged, rot develops because fungi and anaerobic bacteria thrive in such conditions, leading to plant distress. Understanding this root cause is essential for correcting the issue and ensuring a healthy growing environment. If the soil feels spongy or smells musty, it not only affects the bulbs in the immediate area but can also extend the problem throughout your garden.
If your soil retains a sour smell, that indicates imminent danger for your bulbs. If the condition persists even after a few days of drier weather, it’s necessary to act, as healthy bulbs cannot thrive in such an environment. Use well-draining soil mixes around them or amend the existing soil with sand or perlite to improve aeration and drainage. Should the soil remain overly wet despite your efforts, consider relocating your tulips to an area with improved drainage or raised beds to prevent recurrence. Interestingly, soil structure and microbial activity change according to season, so it’s particularly vital to monitor conditions in early spring when thawing begins.
Step 3 – Replant Tulips to Encourage Recovery
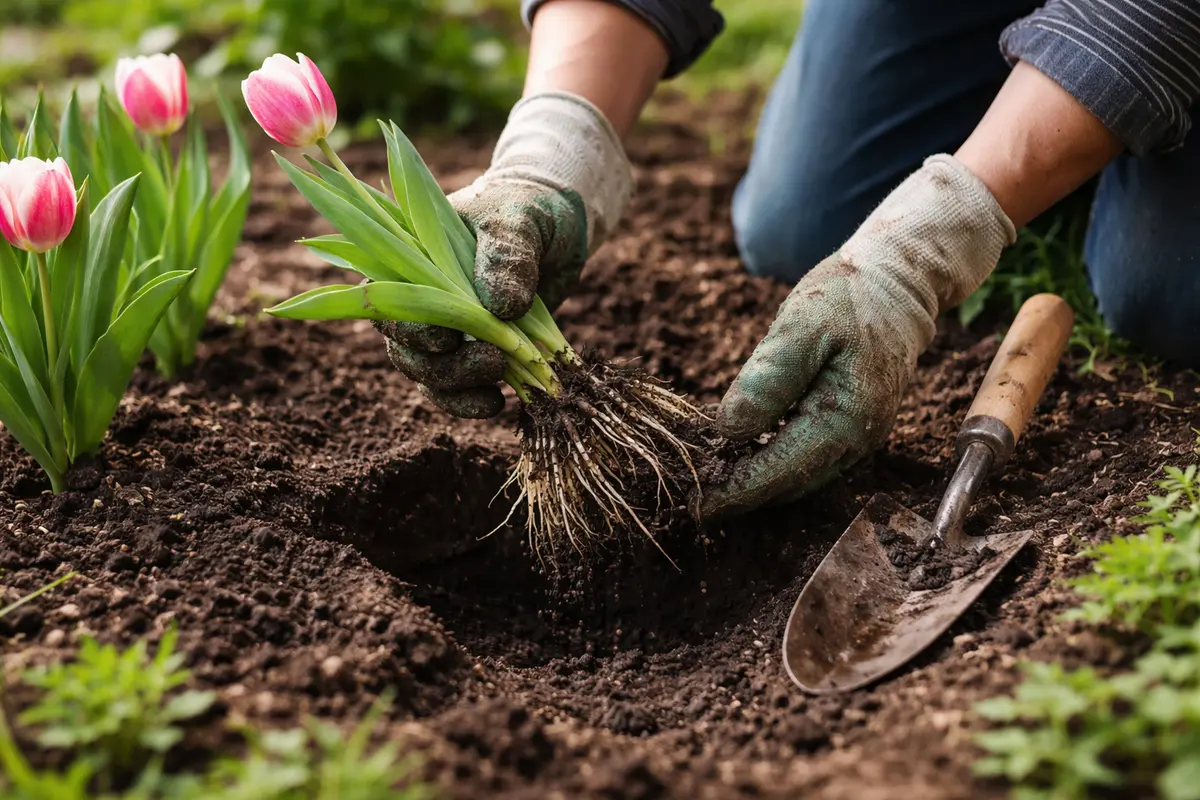
Replant any salvaged tulips into fresh, well-draining soil. You should see new growth appearing within a few weeks if the replanting is successful. Providing a new environment allows the tulips to stabilize and begin the recovery process gracefully. While the bulbs are still viable, relocating them can significantly enhance their chances of thriving. Make sure the new environment provides sufficient aeration and does not retain excess moisture too frequently.
Carefully place the bulbs deeper into the new soil while ensuring they have enough space to breathe. This action allows moisture to dissipate through improved drainage while reducing the chances of rot returning. Adequate care during this phase is key to fostering healthy regrowth and vitality. It’s best to plant them at least 6 inches apart, which aids air circulation and keeps soil moisture levels manageable. Additionally, consider mixing in organic matter to regulate moisture retention without compromising drainage.
Avoid overfertilizing during the recovery phase, as this can stress bulbs already under duress. Application of high-nitrogen fertilizers should be avoided; instead, use a balanced fertilizer at half the recommended dose. Overcompensation can lead to burning roots and can hinder recovery efforts. Monitor the soil’s moisture level to ensure it remains consistently damp but not saturated; this balance will help new growth emerge effectively. Pay attention to any changes in the plant’s color; a shift towards healthier green hues signals a positive response to new conditions. If you notice any new shoots within two to three weeks, that typically signifies a successful transition.
Step 4 – Ensure Proper Drainage During Thaw
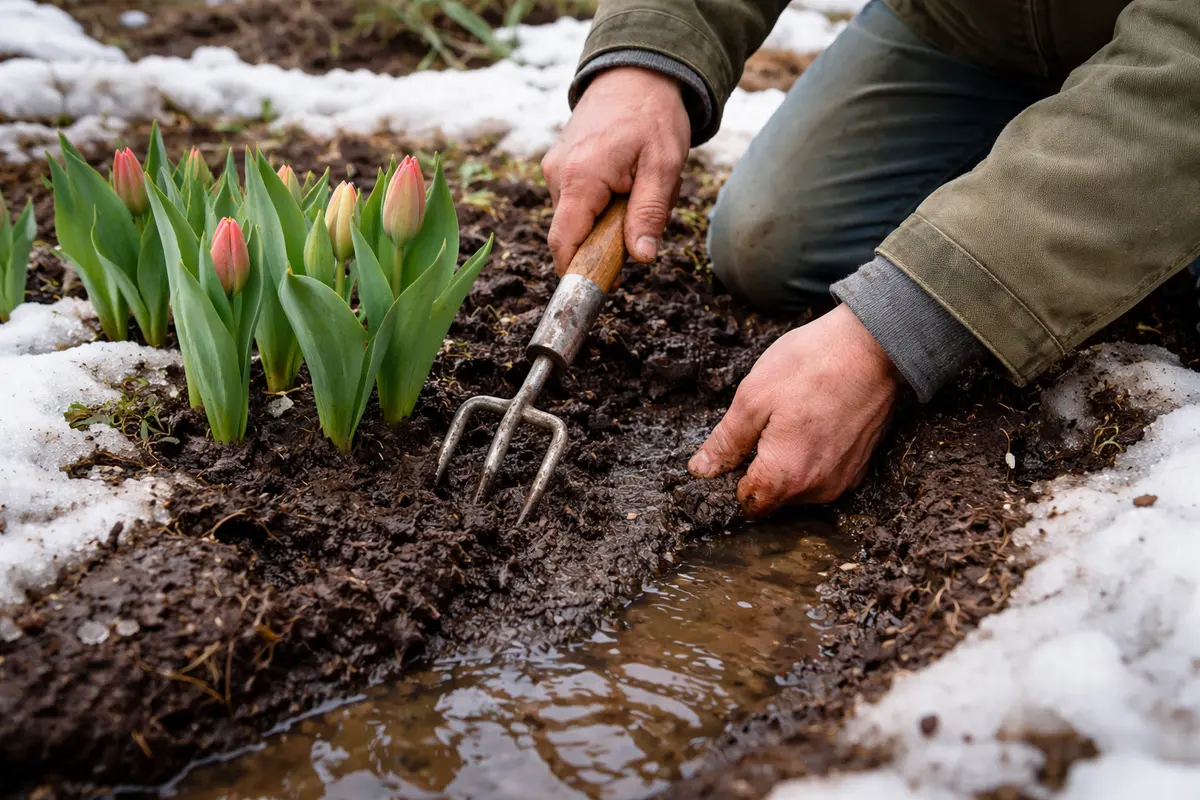
Remove any excess mulch or debris around your tulips to ensure adequate drainage during winter thaw periods, which helps prevent root rot. Over time, this will minimize the chance of moisture accumulation around the bulbs, supporting healthier growth as the thaw approaches. A clean area allows for faster drying and better overall air circulation.
Root rot in tulips typically occurs when the soil remains too saturated due to environmental conditions such as melting snow or heavy rainfall. By clearing the mulch, you encourage proper drainage and reduce standing water, addressing the root cause of dampness that leads to decay. If you live in an area that experiences heavy snow accumulation, be especially attentive to this condition as melting snow can create problematic puddles. Monitor any extreme weather conditions for their potential impact on soil saturation.
As winter progresses and temperatures fluctuate, consider adjusting the depth of your bulb planting to enhance drainage. Bulbs planted too deep can retain excess moisture, whereas those closer to the surface may dry more quickly during thawing periods. Monitor thaw cycles closely and be prepared to adapt your practices based on the weather conditions. One strategy involves mounding the soil around the bulbs to elevate them slightly out of excess water entirely, leading to improved drainage.
Moisture control is vital because tulips are susceptible to root rot during periods of excessive wetness. By incorporating techniques such as installing drainage tiles, creating raised beds, or using mulch to promote airflow, you effectively reduce the water retention that encourages rot and fungal growth. Be aware, however, that even after applying these techniques, maintaining vigilance in monitoring water accumulation is essential to ensuring long-term health. If water is still pooling in the vicinity of your tulip beds even after storms, revisiting your drainage assessment is essential. Elements like local topography can significantly contribute to these challenges, emphasizing the need for tailored solutions.
Step 5 – Check Tulip Bulbs for Rot Signs Regularly
Next, check the soil moisture around your tulips at least once every two weeks during the winter thaw. Look for signs of excessive dampness or a musty smell, indicating possible root rot. If you observe these symptoms, adjust your watering schedule by allowing the soil to dry out for a couple of days before rechecking its condition. Take care to include routine checks following significant weather changes, as these can quickly affect moisture levels.
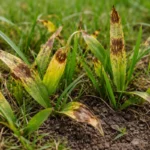
A fully recovered tulip displays robust green leaves with a crisp texture, standing upright and showing vibrant color. In contrast, early signs of return may include yellowing leaves that feel mushy to the touch and droop under their weight. If yellowing spreads from the base upward, focus on soil drainage; if leaves maintain stiffness, the issue might be related to overwatering. A good indicator of successful recovery is a gradual progression from wilting foliage to healthy bright-green leaves that are structurally firm.
If root rot symptoms return despite your careful monitoring, remove the affected plants and improve soil drainage immediately. Consider replanting your tulips in a raised bed or a pot with well-draining soil. If rot persists, consider applying a suitable fungicide to combat the spread of disease in adjacent plants. Ongoing moisture issues may also require a more permanent solution, such as changing planting sites or choosing different bulb varieties more tolerant of wet conditions.
A healthy tulip plant will show strong foliage and elongated stems, signaling that your interventions are effective. If foliage begins to wilt or soften, or if you detect any foul smells from the bulbs, these could indicate that rot is returning. Being vigilant and attentive to these signs can help you catch any issues before they escalate. Establishing a schedule for regular inspections will aid immensely, as tracking these changes provides actionable insights into the health of your tulips. This can also help streamline your replanting efforts if necessary, ensuring that you can respond proactively to any recurrence of rot.
Should you find that signs of rot return despite your best efforts, it might be time to reset your planting strategy altogether. Removing affected bulbs completely and trying a different location with improved drainage or using alternative planting solutions such as mounding the soil to facilitate faster drying is advised. Even the most careful gardeners face setbacks, but responding quickly to these signs keeps your tulips thriving. Always have a backup plan — whether it’s relocating or replacing your bulbs — because prevention is better than repeated recovery efforts. This long-term vigilance can make a significant difference in maintaining the vibrancy and health of your garden.
FAQ
How long does recovery from root rot take in tulips?
Recovery can take anywhere from a few weeks to several months, depending on the extent of the initial damage and growing conditions. Healthier bulbs may show new root development within three weeks, while others may need to take up to three months before any significant improvement is observable. Healthy new growth is usually a good indicator that the bulbs are recovering successfully and indicate that they are coming back from a threatening environment.
Can root rot spread to healthy bulbs nearby?
Yes, if left unchecked, root rot can spread to nearby healthy bulbs, particularly if they are planted in the same wet soil. In damp conditions, fungal spores can easily travel through the soil, infecting adjacent plants. It’s crucial to act immediately upon noticing symptoms to minimize the spread and protect your entire planting. This proactive approach can include removing nearby bulbs that show minimal symptoms and treating the larger area around the plants.
Should I remove all affected tulip parts immediately?
Yes, any visibly rotting parts should be removed as soon as possible to prevent the further spread of fungal pathogens to healthy areas. It’s vital to extract the entire root system if showing signs of rot. Additionally, ensure that you dispose of these parts properly to avoid any cross-contamination. Avoid composting infected bulbs, as the heat may not be sufficient to kill pathogens effectively, and this can risk contaminating your compost with the same pathogens in the future.