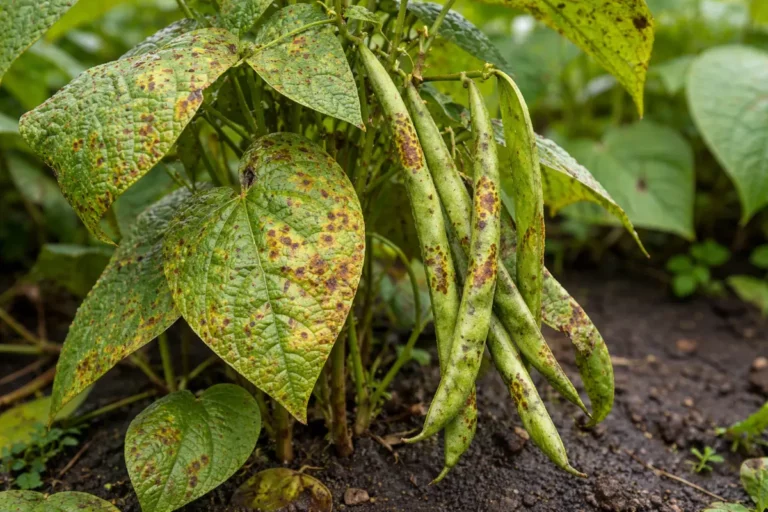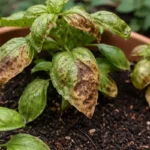
You may notice your tulips starting to develop unsightly spots and yellowing leaves after heavy rain, which is why you need to know how to prevent fungal disease on tulips after heavy rain. This fungal infection thrives in damp conditions, often leading to rotting and drooping petals that mar their vibrant beauty. Ignoring the signs can spread the disease further, weakening the plant and making recovery harder to fix, but you can improve the situation now by inspecting your plants daily and trimming any affected foliage.
Step 1 – Trim Damaged Tulip Leaves Right Away
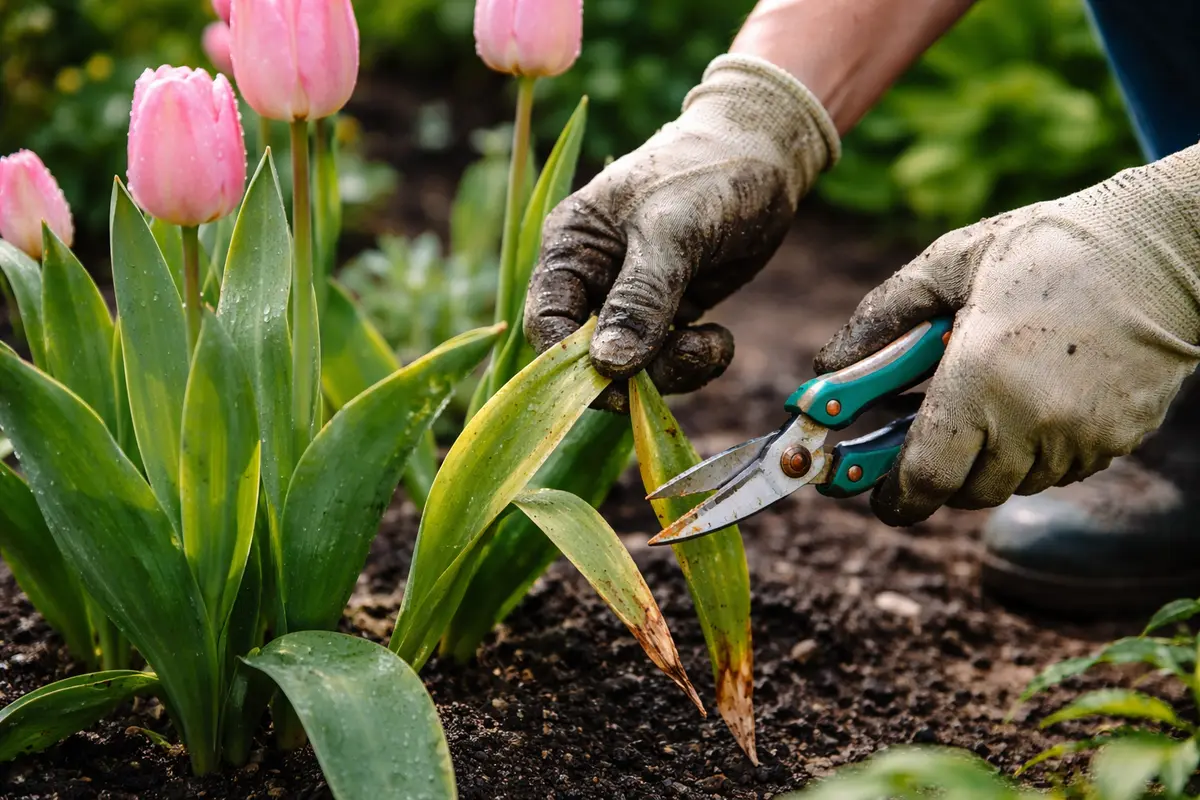
Remove any visibly damaged tulip leaves immediately. You should see a reduction in wilting and an overall improved appearance of the infected area within a day or two. Acting fast is crucial because the longer the damaged leaves remain, the higher the risk of fungal spores spreading to other healthy parts of the plant. Make it a practice to assess your tulips after heavy rain, as damage can manifest quickly.
Promptly trimming the affected foliage helps limit the spread of disease and fosters better airflow around the remaining healthy leaves. When you cut away the dying tissue, you remove potential sources of infection and help the plant redirect its energy towards healthy growth and recovery. This action creates an environment that’s less favorable for fungal spores that thrive in wilted, damp conditions. Ensuring a clean cut with sterilized scissors can further minimize the risk of introducing additional pathogens into healthy areas. If you don’t sterilize your tools, you may inadvertently transfer spores from one plant to another.
A common mistake at this stage is to hesitate in cutting back the damaged leaves, thinking they might recover. This often makes the situation worse, as the moisture retained in the wilted foliage promotes fungal growth. Aim to trim any leaves displaying significant damage at the first sign of trouble. If you notice that the problem persists even after initial trimming, consider reassessing for underlying issues such as inadequate drainage or persistent moisture from rain. Signs to look out for include a lingering unpleasant smell or increased saturation in the soil, which both indicate further intervention may be necessary.
Step 2 – Inspect for Overwatering Causes in Soil
Check the soil around your tulips to assess for overwatering conditions. You will notice the soil’s texture and moisture level, which helps determine if drainage is insufficient. Prompt identification of waterlogged conditions is essential to prevent root rot and further fungal development. Insert a finger into the soil up to two inches to gauge moisture; if it feels muddy at this depth, then overwatering is likely.
Overwatering is often the primary culprit behind fungal diseases in tulips. When the soil is overly saturated, roots struggle to breathe, leading to stress and susceptibility to pathogens. This can be particularly pronounced in clay soils, which retain water and create a perfect habitat for fungus where excess moisture lingers without proper drainage. Realize that during periods of heavy rain, the soil can shift from manageable to overly saturated quickly; thus, monitoring after rainfall is crucial. If soil remains consistently wet three to four days after heavy rain, immediate corrective measures are warranted.
If you find that the soil has a sour smell or feels excessively muddy, it’s critical to address this by improving drainage. Consider incorporating organic matter, such as compost or perlite, into the soil to enhance aeration and drainage. Additionally, you should adjust your watering routine by allowing the top couple of inches of soil to dry out between waterings. These adjustments create a healthier environment where roots can thrive and are less prone to infection. If you notice persistent pooling on the surface, you might need to expand the drainage outlets around your tulips to prevent excess rainfall from accumulating. Regularly check these outlets, especially after heavy rains, to ensure they remain clear and functional.
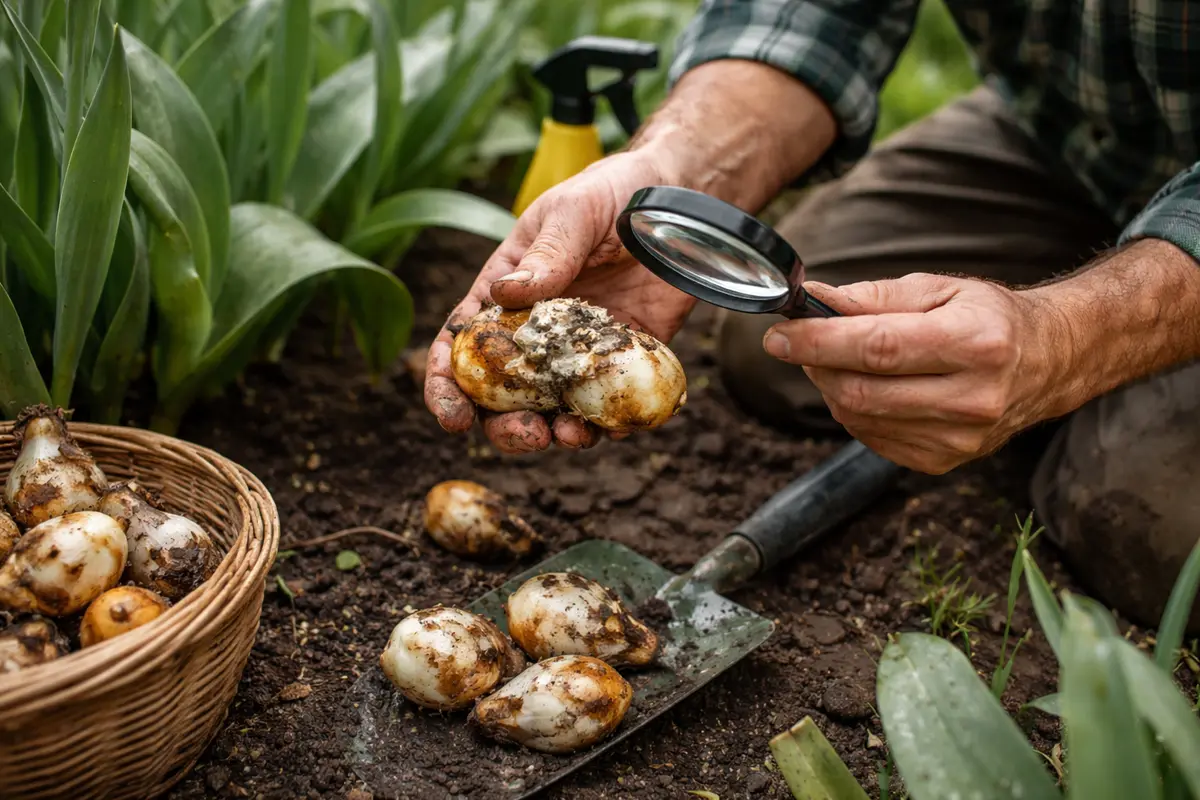
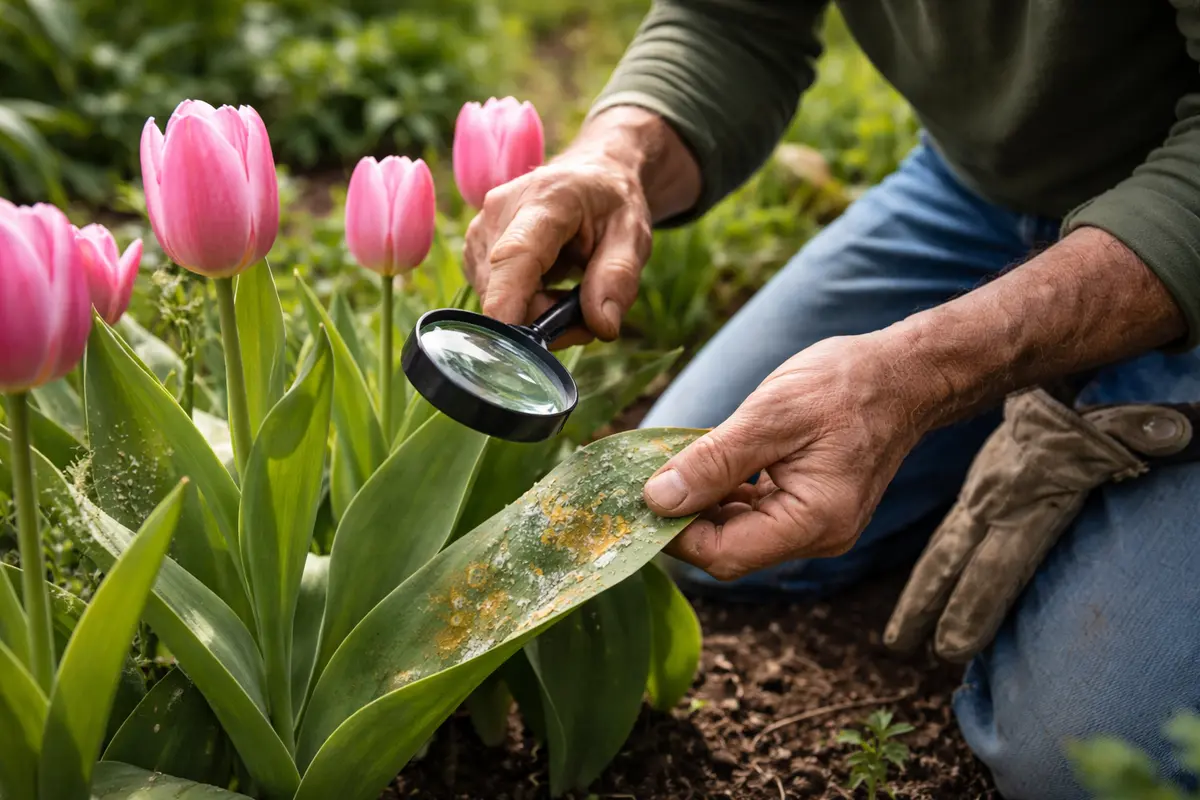
Step 3 – Test for Fungal Growth on Tulip Bulbs
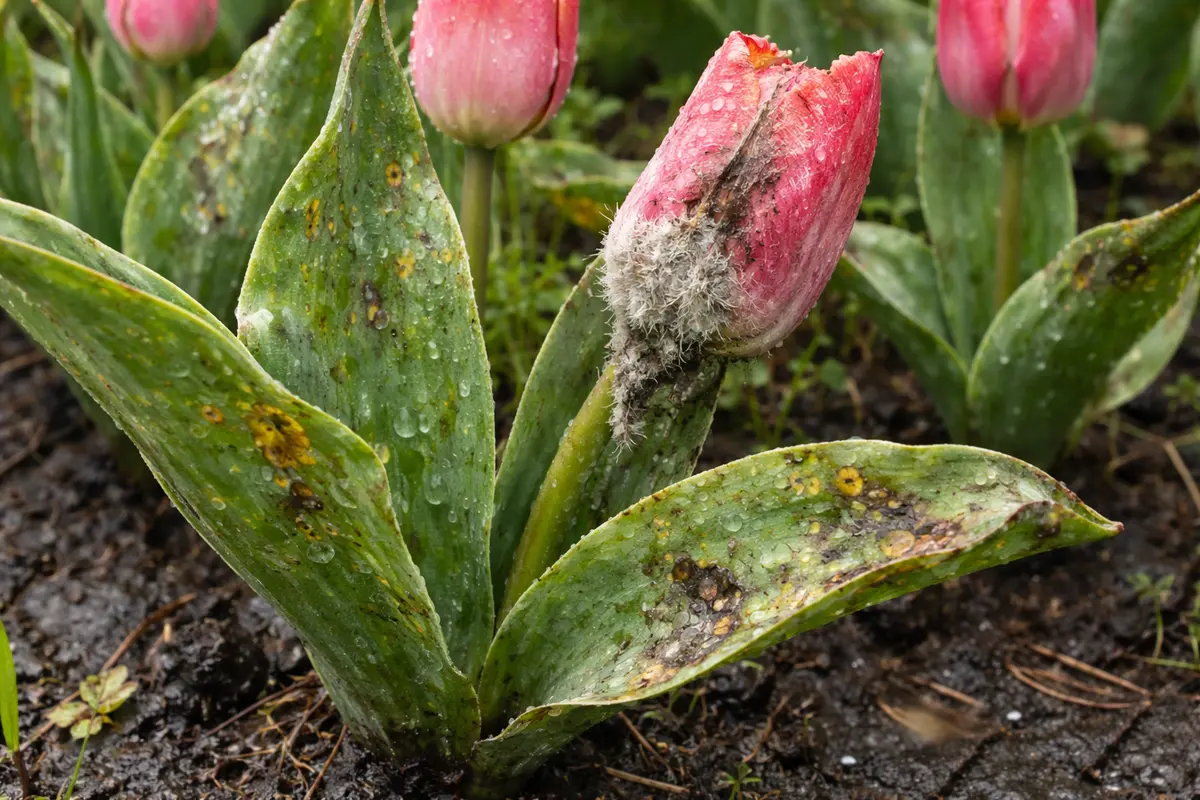
Start by checking your tulips for signs of fungal disease, particularly after heavy rain. Look for yellowing leaves, dark spots, or a moldy appearance on the petals or stems. If these symptoms are present, you’ve likely confirmed a fungal infection that requires immediate attention.
Distinguish between fungal disease and other problems like nutrient deficiency or pest damage. Nutrient deficiency often results in uniformly yellow leaves without dark spots, while pest damage may lead to holes or visible insects on the plant. If the tulips feel slimy to the touch, it indicates a fungal issue, whereas a dry, papery texture suggests pests are at play.
If the diagnosis is uncertain, observe your tulips over a few days to see if new symptoms appear or existing ones worsen. Alternatively, you can perform a simple test by gently scraping the affected area to see if dark spores are present, indicating a fungal infection. If no spores are found and symptoms persist, consider checking for environmental factors affecting the tulips’ health.
Fungal disease can appear similar to other problems, such as nutrient deficiencies, which often present with yellowing leaves but lack the distinct dark spots typical of fungal issues. Additionally, leaf spot diseases may cause water-soaked lesions that are soft to the touch, whereas fungal infections typically result in a more rigid texture. If you notice any wilting without discoloration, this could indicate underwatering rather than a fungal infection. Maintaining correct moisture levels is crucial to prevent misdiagnosing the problem.
If the diagnosis remains uncertain, observe the tulips over the next few days for any changes in symptoms. A secondary test such as a soil moisture assessment can help indicate if excessive water is contributing to the problem. If symptoms persist without clear identification, consider consulting a plant specialist for assistance. Fungal infections can manifest as discolored, mushy, or spongy bulbs, distinguishing them from healthy bulbs, which should feel firm and intact. Additionally, the smell can provide valuable clues; an unpleasant, earthy odor often points to rot and fungal issues. It’s vital to differentiate between healthy growth and signs of infection, as mistaking one for the other can lead to further complications. Thoroughly inspecting your tulip bulbs at least once every few weeks, especially after heavy rain, can help catch any problems early and avoid severe outbreaks.
If you’re uncertain about your findings, wait a day or two to see if symptoms worsen or consider consulting local gardening resources for verification. An incorrect guess could delay addressing a serious problem, so careful observation is key. If the issues escalate, remove the most affected bulbs, but keep a close eye on those that appear healthy; document your findings for future reference. Healthy bulbs can remain if they show no signs of infection. Always remember that fungus can spread quickly from infected bulbs to surrounding plants, so maintaining vigilance is crucial. If large patches of your tulips start to show signs of disease, it may signal a need to evaluate larger environmental factors like drainage and sunlight exposure.
Step 4 – Treat Affected Tulips with Fungicide Solution
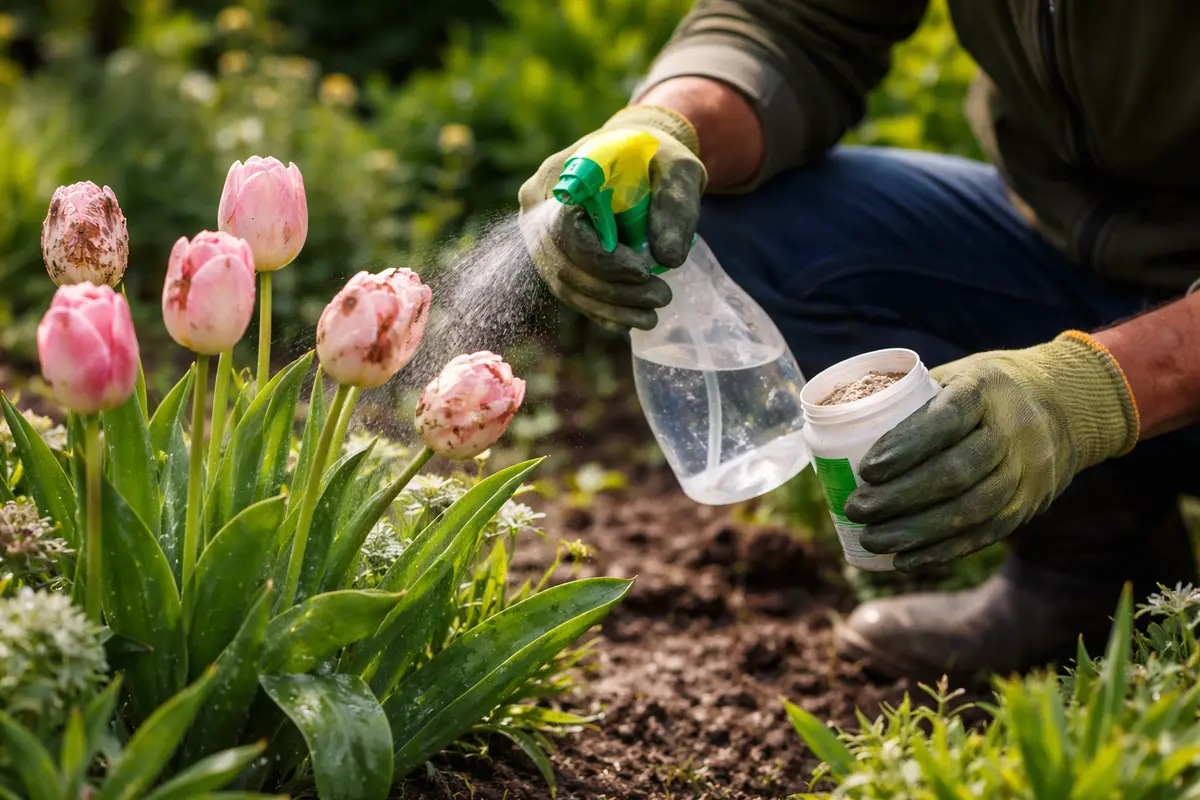
Apply an appropriate fungicidal treatment to the affected tulips. You will notice a decrease in fungus presence within a week, with improvements in leaf condition and overall vitality. Regular treatments in line with label instructions can be key to effectively managing the spread and severity of fungal diseases. Ensure that your fungicide is suitable for the specific type of fungus, as broad-spectrum treatments may not target the precise pathogen affecting your garden. Incorrect use can lead to ineffective treatment or even exacerbate existing problems.
Fungicides work by targeting the fungal pathogens directly, preventing their reproduction and attacking their cellular structures. It’s essential to select a product specifically designed for the type of fungus affecting tulips, as this ensures the treatment is effective against the particular strain. Proper application techniques are crucial; for instance, applying fungicide during the cool parts of the day minimizes evaporation and maximizes absorption by the plant. You might notice that treating with a systemic fungicide could provide longer-lasting protection as it integrates into the plant’s system. If you delay treatment or mix fungicides improperly, you may risk creating conditions where pathogens can thrive.
Be cautious, as over-application or incorrect use of fungicides can lead to runoff or harm beneficial organisms in the garden. A common mistake is assuming more fungicide will provide better results, but this often results in diminished returns and potential phytotoxicity. Instead, follow the manufacturer’s guidelines strictly for the best results. If you notice any adverse reactions such as leaf burn or further wilting, consider scaling back on application frequency or switching to a gentler alternative. Additionally, rotating fungicides can help prevent resistance build-up in the fungal pathogens. If your tulips appear unaffected after a week despite treatment, check for alternative stressors, including environmental conditions and nutrient deficiencies that fungi may exploit.
Step 5 – Water Tulips Carefully to Prevent Infection
Adjust your watering practices to prevent future infections. You’ll notice a healthier moisture level in the soil, which will help in reducing the risk of fungal disease recurrence. Ensuring that soil conditions stay balanced and do not remain overly wet is crucial for long-term plant health. Create a consistent watering schedule that allows the soil to dry out slightly between sessions; this practice helps maintain an ideal balance and discourages fungi. If you consistently notice that your soil feels excessively wet at a depth of one inch, consider further adjustments in your watering regimen.
Creating a consistent and moderate watering schedule maintains ideal soil moisture while reducing the risk of damp conditions conducive to fungal growth. Water deeply but less frequently, allowing the top inch of soil to dry between watering sessions; this helps roots access necessary moisture without becoming waterlogged. Additionally, positioning your tulips in a sunny location can further aid in drying excess moisture quickly after watering, especially if rainfall is frequent. Plan to water in the early morning, as this timing allows for optimal absorption before the heat of the day increases evaporation rates. If rainfall consistently disrupts your schedule, consider using rain gauges to measure moisture levels.
If your region is experiencing heavy rainfall, consider using raised beds or adding organic mulch to enhance drainage and retain ground temperature. The inclusion of temperature is important; during cooler months, plants may need less water, whereas warmer months might require adjustments based on heat parameters. If you begin to notice fungal issues recurring, adjusting watering intervals or switching watering methods, such as utilizing drip irrigation, might help achieve a more consistent moisture level. Be mindful that overly dense mulch can retain too much moisture and should be used judiciously. Ultimately, maintaining this balance can lead to healthier tulips and reduced incidence of fungal diseases.
Step 6 – Look for Signs of Fungal Reoccurrence Weekly
Check your tulips at least once a week for any signs of fungal reoccurrence. You should observe consistent foliage health, marked by bright color and firmness, indicating that your management methods are effective. Regular monitoring ensures that any new fungal activity is caught early. When checking, look not only at the leaf surfaces but also inspect for any hidden mold growth that may not be immediately visible. Feel the texture of the base of the leaves for any softness, which can indicate early-stage infection.
A well-maintained tulip should show stable growth patterns without wilting or discoloration that may hint at underlying issues. Look for both visual cues and the health of the surrounding soil; if it remains moisture-balanced, your tulips are set up for success. Regular checks help instill good gardening practices and prepare you for potential disease challenges. Keeping a visual record or journal of plant health over time can help you identify patterns or emerging problems you might otherwise overlook. This practice enables you to adjust your care routines proactively and catch potential issues before they escalate.
If you do notice early signs of disease returning, address the issue immediately by repeating fungicide application or adjusting water schedules as needed. Failing to keep up with monitoring might lead to a larger outbreak, which can then overwhelm your treatment options. Being proactive at this stage is critical; if the problem worsens, you may need to escalate your approach by using a stronger treatment or, in severe cases, consulting with a professional for more intensive intervention. A key point is to communicate with fellow gardeners or local horticulture experts for shared experiences and advice on tackling persistent fungal challenges.
FAQ
How long does it take for tulips to recover from fungal disease?
Recovery for tulips can vary widely based on the severity of the fungal infection and the measures taken. Typically, you might start to see improvements in leaf health within a week after applying fungicide and adjusting care routines, but full recovery could take several weeks, depending on environmental conditions. Regular monitoring during this recovery phase is crucial, as each tulip may respond differently due to varying stress factors.
Can fungal disease spread to other plants in the garden?
Yes, fungal diseases can easily spread from infected tulips to neighboring plants, especially if they are in close proximity. Ensuring that you remove any infected foliage promptly and treating surrounding areas with fungicide can help mitigate this risk. Promoting air circulation between plants can also hinder fungal spread, as drier conditions are less favorable to pathogen development. Implementing a physical distancing method between different plant species can further reduce the chances of cross-contamination.
Should I remove bulbs affected by fungal disease?
Removing affected bulbs is advisable if they show extensive signs of rot or severe infection, as these can act as reservoirs for the disease. Healthy bulbs should be left in the ground but monitored closely to prevent any potential spread of the disease. If healthy bulbs start to appear compromised, revisit your care methods to prevent larger-scale issues. Overlooking seemingly small signs can lead to a quick escalation of fungal issues, so vigilance remains necessary for long-term maintenance.