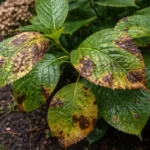
You may notice issues with your gardenias during rains, which is why you need to know how to stop fungal infections on gardenias during rains. The excessive moisture can lead to unsightly black spots and rotting leaves, as the plant becomes overwhelmed by fungal pathogens. If left unchecked, the infection can spread, weakening the plant and leading to more damage, but fixing it is possible now by inspecting the foliage and adjusting your watering schedule.
Step 1 – Remove Infected Gardenia Leaves Quickly
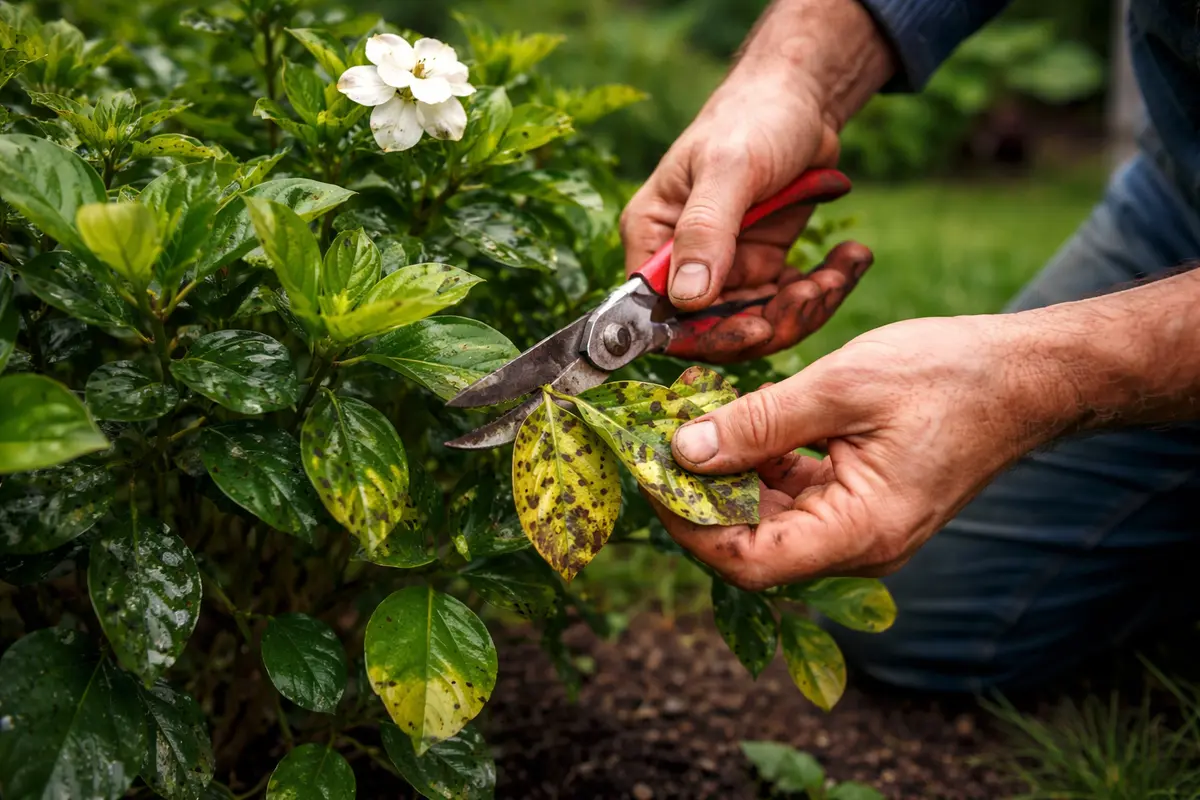
Start by removing any visibly infected leaves from your gardenias immediately. You will see a reduction in the visible spread of lesions within a couple of days, and your plant will seem less stressed overall. It is crucial to act fast because the longer fungal spores remain on the foliage, the more likely they are to infect healthy parts of the plant, leading to severe damage. Remove leaves at the base rather than allowing them to hang on until they are crumpled, which can release spores into the air and the soil.
When you prune off the infected leaves, you not only remove the disease source but also enhance air circulation around the plant, creating a less favorable environment for fungal growth. This action halts the further spread of spores and promotes the overall health of your gardenias. Furthermore, high humidity and stagnant air after rain create ideal conditions for fungi, making this kind of removal critically beneficial in maintaining plant vitality. After the initial removal, allow the gardenias to air out by gently shaking the branches or using a fan to help expedite drying. Just be wary of displacing spores too close to healthy foliage.
A common mistake many gardeners make at this stage is neglecting to sanitize their pruning shears. Using unclean tools can lead to cross-contamination between plants, worsening the issue. An effective way to sterilize tools is to wipe them down with isopropyl alcohol between cuts. Additionally, if you see signs of infection in one area, check the rest of your gardenias since fungal infections can spread rapidly if not controlled early. If you don’t notice any improvement in leaf condition after a few days, consider whether other stress factors, like ongoing excess moisture, might be impacting recovery.
Step 2 – Diagnose Fungal Issues from Excess Rain
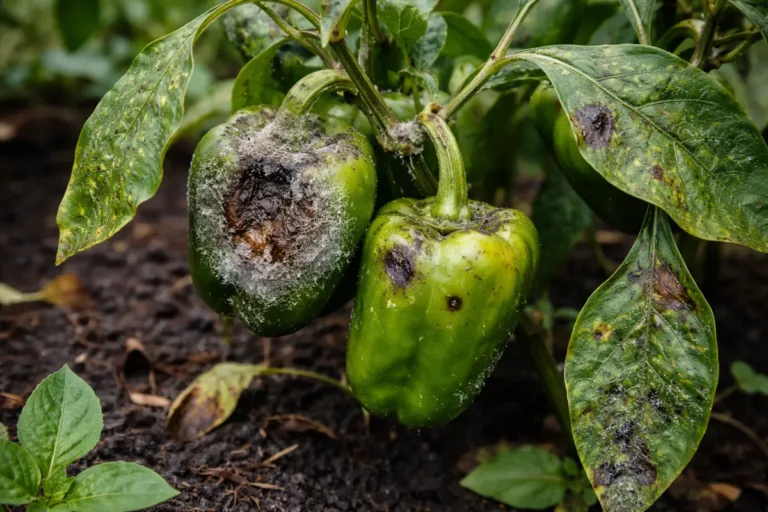
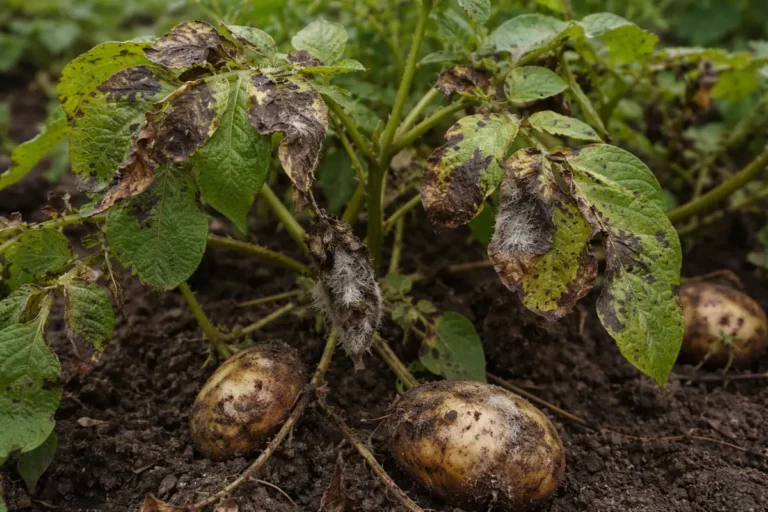
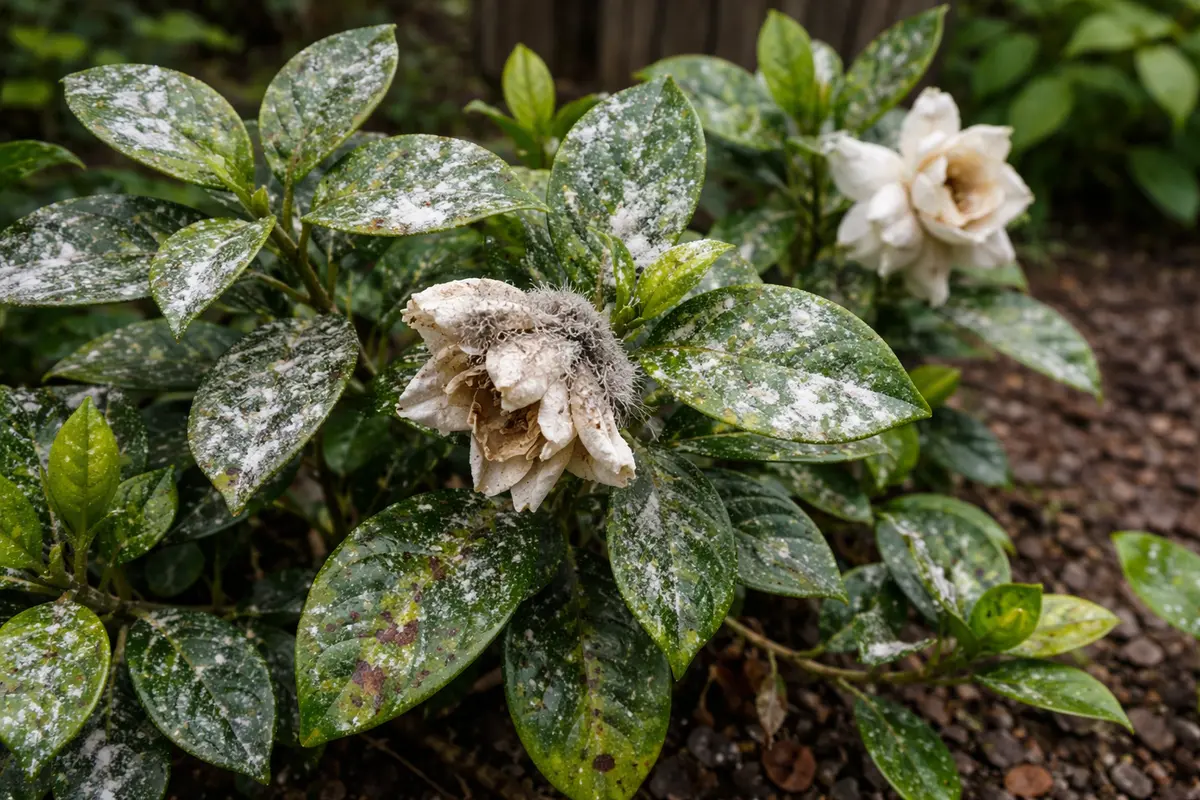
Inspect your gardenia plants for signs of excess moisture and fungal growth patterns, such as discolored areas, black or brown spots, or a fuzzy white coating. You will notice these signs more clearly after a heavy rain, as prolonged wet conditions are prime environments for fungal infections. Identifying the root cause involves checking the soil moisture levels and evaluation of plant stress factors contributing to fungal proliferation. Use a moisture meter or your finger to check at least 1–2 inches deep into the soil for a more accurate reading.
Excess moisture can lead to root rot and fungal diseases because while gardenias thrive in at least moist soil, saturation hinders their roots’ ability to absorb oxygen. The combination of poor drainage and high humidity creates an environment where fungal spores can germinate and spread quickly. Look for signs of wilting or yellowing leaves, as these can be indicators of root stress and may suggest compromised health. Actively diagnosing these conditions allows you to address them before they escalate into more serious problems.
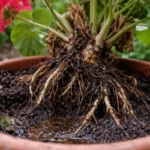
If you notice soil that has a sour smell or feels too wet, consider adjusting your watering practices or improving drainage in the surrounding area. Soil saturation can be resolved by amending it with sand or perlite to allow for proper aeration. Make sure that pots have adequate drainage holes, and review their location to avoid water pooling. Ensure the drainage basins are not obstructed, as debris can block water flow away from the roots. If you have queries about the proper amount of moisture your specific gardenia type needs, refer to care guides tailored to your plant’s variety, particularly those focusing on species more sensitive to moisture levels.
Step 3 – Treat Affected Gardenias for Fast Recovery
Start by improving air circulation around your gardenias. Trim back excess foliage that traps moisture, which will help reduce the damp conditions conducive to fungal growth. Within a few days, you should notice a decrease in fungal spots and a more upright appearance of the leaves.
Recovery from fungal infections after rain may take approximately two to three weeks as new growth appears. Healthy regrowth will manifest as bright green leaves unfurling from the center of the plant, signaling resilience. Conditions like continued rainfall can slow recovery, while dry, sunny days can expedite the process; if the leaves droop instead of growing, check for persistent humidity around the roots.
Avoid the mistake of overwatering your gardenias during their recovery period, especially after heavy rains. Adding excessive water can lead to root rot, which can exacerbate fungal issues. Instead, ensure the soil is well-drained, and wait until the top inch of soil feels dry before watering again to support healthier growth.
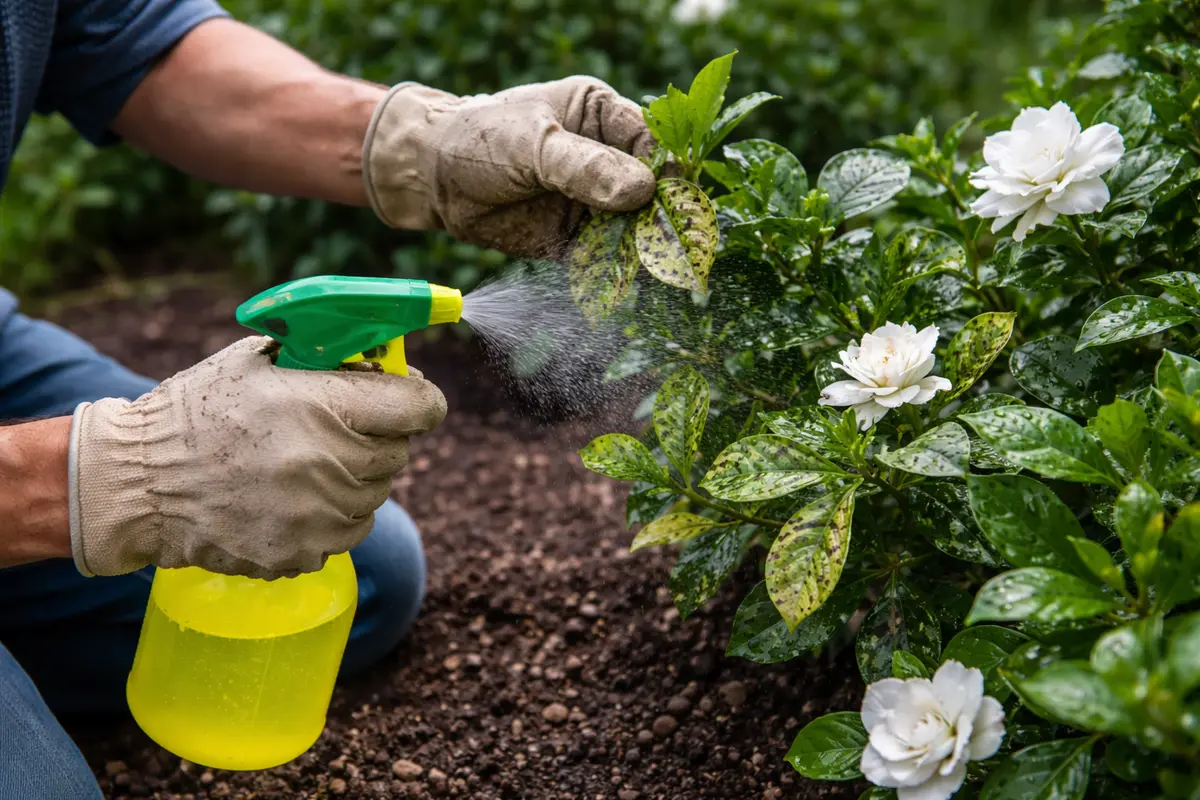
Using a fungicide formulated for gardenias helps restore the plant’s health, targeting existing spores while protecting new growth. Healthy plants begin to regenerate when their conditions improve, leading to vibrant foliage as chlorophyll production resumes. Make sure to apply fungicides in the morning or late afternoon; this timing helps prevent sunlight from degrading the effectiveness of the treatment. Keep an eye on the progress to ascertain that treatment is working effectively; the absence of new spots is a good sign that recovery is underway.
A common error during this phase is over-applying fungicides, which can result in chemical burn rather than helping the plant. It’s also crucial not to overlook the watering habits; over-watering after applying the fungicide can undo your efforts by encouraging further fungal growth. Be cautious of this balance to ensure your intervention achieves the desired results. If you see no signs of improvement in a week, or if discoloration spreads beyond the treated areas, consider switching to a systemic fungicide that can address fungal issues throughout the plant’s vascular system.
Step 4 – Prevent Fungal Growth with Proper Spacing
Start by applying a fungicide specifically formulated for gardenias to the leaves and soil regularly, especially before expected rainfall. This proactive approach will significantly reduce the likelihood of fungal infections taking hold.
Fungal infections thrive in conditions of high humidity and excessive moisture, particularly when gardenias are left wet after rain. By ensuring a regular application of fungicide during these wet periods, you disrupt the fungal life cycle, preventing spores from germinating and spreading. If gardenias have already displayed signs of infection, prioritize immediate treatment alongside this prevention routine.
As the rainy season wears on, increase the frequency of your fungicide applications following heavy downpours when soil moisture levels peak. If you notice new growth starting to appear, apply an organic mulch to help retain moisture while also creating a barrier against fungal spores. This layered approach will further safeguard your plants during unpredictable weather changes.
Good airflow prevents excess moisture buildup that often occurs in crowded plantings. When plants are too close together, they trap moisture between them, creating a breeding ground for fungal infections. This can be seen visibly where plants appear to collect water droplets in their leaf intersecting areas. Over time, establishing good spacing, coupled with appropriate pruning, will help maintain a healthy gardenia population and reduce disease vulnerability. Remember, the lower branches can often be pruned to increase air circulation at ground level.
If conditions change seasonally—such as increased rainfall—consider adding mulch to help absorb excess moisture from the soil surface. Organic mulch can also prevent weeds that can compete for water and nutrients. It also serves as a barrier against water splashing up onto the leaves during rain events. Always monitor the conditions and consider adjusting your watering and fertilization practices accordingly, particularly as the weather changes towards more humid periods. Keeping an eye on seasonal forecasts and adjusting plans based on incoming rain predictions can drastically reduce instances of fungal infection.
Step 5 – Check Gardenia Foliage for Recurring Spots
Start by monitoring your gardenias regularly during and after rainfall. Check for excessive moisture around the base of the plant, as this can promote fungal activity. Observe the foliage for signs of discoloration, wilting, or spots, and recheck every few days until you notice improvements in the plant’s condition.
A fully recovered gardenia will showcase vibrant green leaves, free from any blemishes or discoloration, and will exhibit strong, upright growth. In contrast, early signs of returning problems include yellowing leaves or spots that appear darker than the healthy foliage. If the leaves feel soft and mushy instead of firm and resilient, this may indicate that the fungal issue is resurfacing.
If the problem returns despite taking preventive measures, apply a fungicide specifically designed for gardenias and increase air circulation around the plant by pruning overcrowded areas. If conditions do not improve after treatment, consider consulting a local horticulturist for tailored advice based on specific symptoms observed in your gardenia.
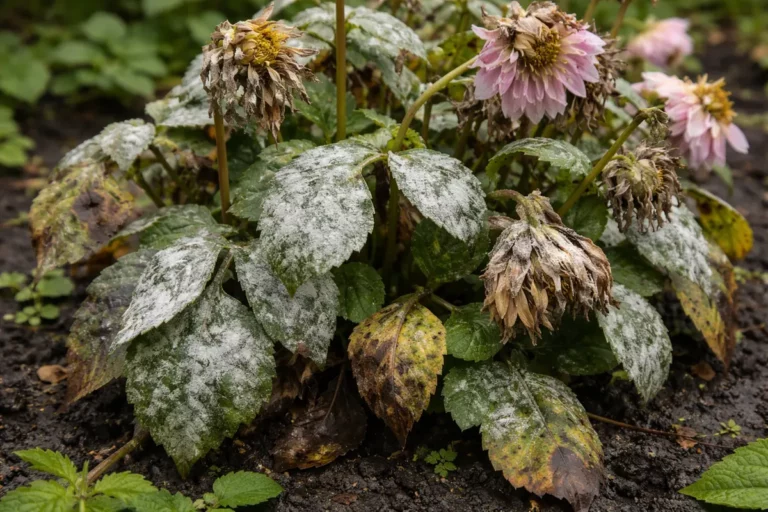
A fully recovered gardenia showcases bright green foliage that feels firm to the touch with no signs of water-soaked spots. In contrast, an early sign of a returning problem includes dark, mushy areas on the leaves accompanied by a fuzzy texture on the stems. If you notice leaves curling upwards or a powdery white residue, it’s time to investigate further.
If the fungal issue returns despite prevention efforts, consider applying an appropriate fungicide specifically designed for gardenias after rain. You should escalate to consulting a local gardening expert if the treatment does not yield positive results within a week or if symptoms worsen.
A fully recovered gardenia will display vibrant green foliage with no discoloration or leaf drop. If you notice new spots returning or existing ones worsening, this is a sign that you need to re-evaluate your treatment plan or take further action to amend the growing conditions. Documenting your care routine, including treatment dates and observed plant reactions, can help identify what seems to help or hinder the plants’ recovery. It can also clarify recurring issues that may stem from cultural practices rather than isolated incidents.
If problems persist despite treatment, consider consulting a local horticulturist or plant local gardening society for personalized advice. They can offer solutions tailored to your specific conditions, plants, and soil compositions. In severe cases, removing additional infected plants might be necessary to protect the health of the entire area. It’s important to remain vigilant since recurring diseases often indicate a deeper underlying issue that may require more than just surface-level care.
FAQ
How long will it take for my gardenias to recover from a fungal infection?
Recovery from a fungal infection can vary, but typically you will start to see improvements within one to two weeks after applying treatment. New growth indicates a return to health, which can be a reassuring sign of progress during your monitoring. In some situations, particularly involving heavier infections or inadequate environmental conditions, it may take up to a month for full recovery.
Can fungal infections spread to other plants in the garden?
Yes, fungal infections can spread easily to nearby plants, especially if they are in close proximity and have similar environmental conditions. Ensuring adequate spacing between plants and promptly addressing infected areas will help minimize this risk. Additionally, keep in mind that certain fungal pathogens can overwinter in soil, making it essential to maintain good sanitary practices.
Should I remove all infected parts of my gardenia plant?
It is advisable to remove all severely infected parts of the plant to prevent the disease from spreading. However, be sure to clean any cutting tools before and after use to avoid further contamination on other plants. If infected areas are numerous and seemingly interconnected, consider removing the entire plant to avoid compromising your garden’s health.