You may notice your thyme plants turning a concerning shade of yellow after recent heavy rain, which is why you need to know why is my thyme turning yellow after overwatering. This yellowing typically indicates that your plants are suffering from root rot or other stress due to excess moisture, leading to wilting and overall damage. If left unaddressed, this issue can spread and weaken the plant, making recovery harder, but fixing it is possible now—just be sure to check the soil moisture, remove any affected parts, and adjust your watering habits.
Step 1 – Remove Excess Moisture from Thyme
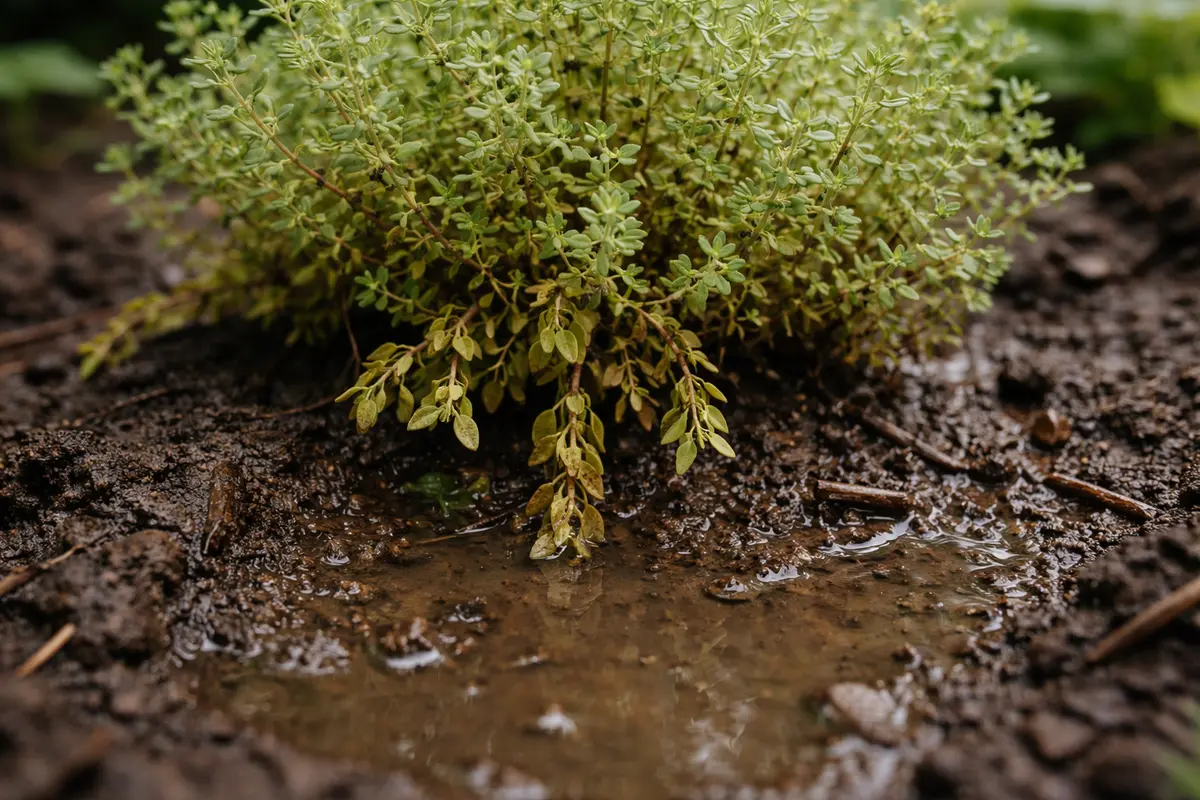
Start by inspecting the soil moisture levels and draining any excess water from the pot. You should see the water pooling in the saucer below, indicating that the upper soil layer is still too wet. If water sits in the saucer for more than a few hours, observe the soil’s saturation and be prepared for immediate action. If the top inch of soil feels wet, it is critical to act quickly to prevent further damage.
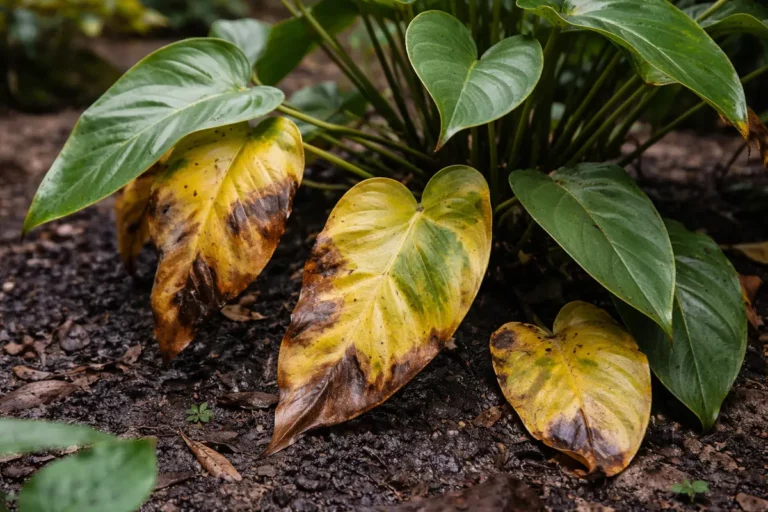
Excess moisture leads to an environment where plant roots cannot breathe, causing them to rot and the leaves to yellow. Acting quickly to ensure good drainage saves your thyme before the issue escalates. Letting the plant stay overly saturated even for a day or two can exacerbate problems with root decay, resulting in irreversible damage to the plant’s health. If you notice darkening soil or a foul smell, these can signify the onset of root rot.
Common mistakes at this stage include not checking the drainage holes for blockages or failing to remove the plant from its pot for inspection. Many gardeners mistakenly believe it’s enough to simply not water for a few days; however, without addressing standing water directly, the roots remain compromised. If the soil continues to feel overly damp even after drainage, you may consider repotting the thyme into a new potting mix designed to improve aeration and drainage, ideally consisting of a mix of potting soil, perlite, or sand to enhance moisture retention while allowing excess water to drain away.
Step 2 – Check Soil for Overwatering Issues
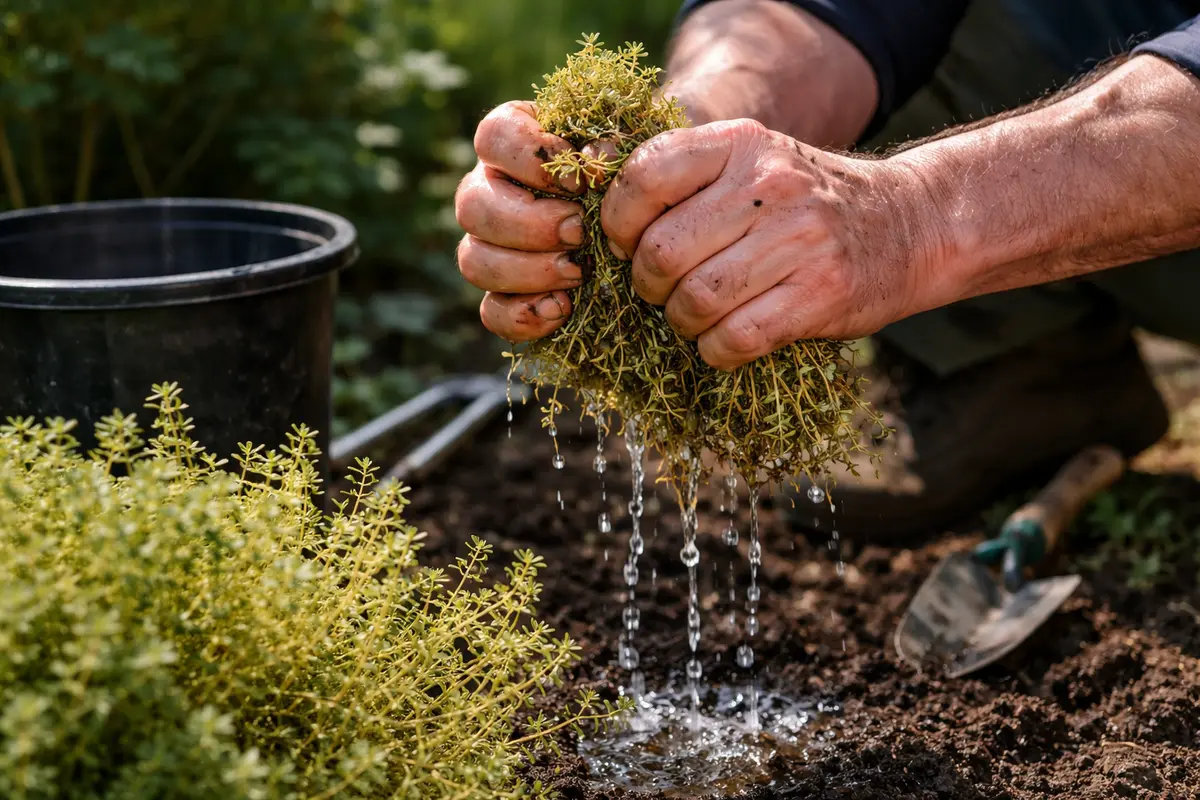
Check the soil consistency by feeling it for dampness and inspecting roots if necessary. You will notice whether the soil is excessively moist or if it has turned sour, indicating possible root rot. Pay attention to the texture; if it’s muddy and lacks drainage, that indicates trouble. Make sure your hands are clean to prevent additional contamination during this process. If you can squeeze a handful of soil and it clumps together without easily breaking apart, the moisture level is too high.
When thyme is overwatered, it suffocates the roots, causing a lack of oxygen that leads to yellow leaves. This biological reaction happens because the saturation effectively drowns roots, disrupting their ability to absorb water and nutrients efficiently, which is vital for their health. A deeper examination involves closely inspecting the roots for any mushiness or discoloration as these are clear indicators of impending rot. If the roots feel soft or break easily, immediate action is necessary.
If the soil smells sour or appears sludge-like, it signals that root rot may have already begun. In this case, you should consider repotting the thyme in fresh, dry soil. If the roots are brown and mushy, trim away the damaged sections before placing it in the new soil mix. Alternatively, if the soil is merely damp but not smelly, allow it to dry before watering again. This nuanced inspection is crucial, as gardeners often mistakenly think the plant simply needs more water rather than addressing root suffocation first. For example, if the soil feels almost sticky to touch, it’s a clear sign that aeration is needed, possibly through a repotting process.
Step 3 – Fertilize Thyme to Encourage Recovery
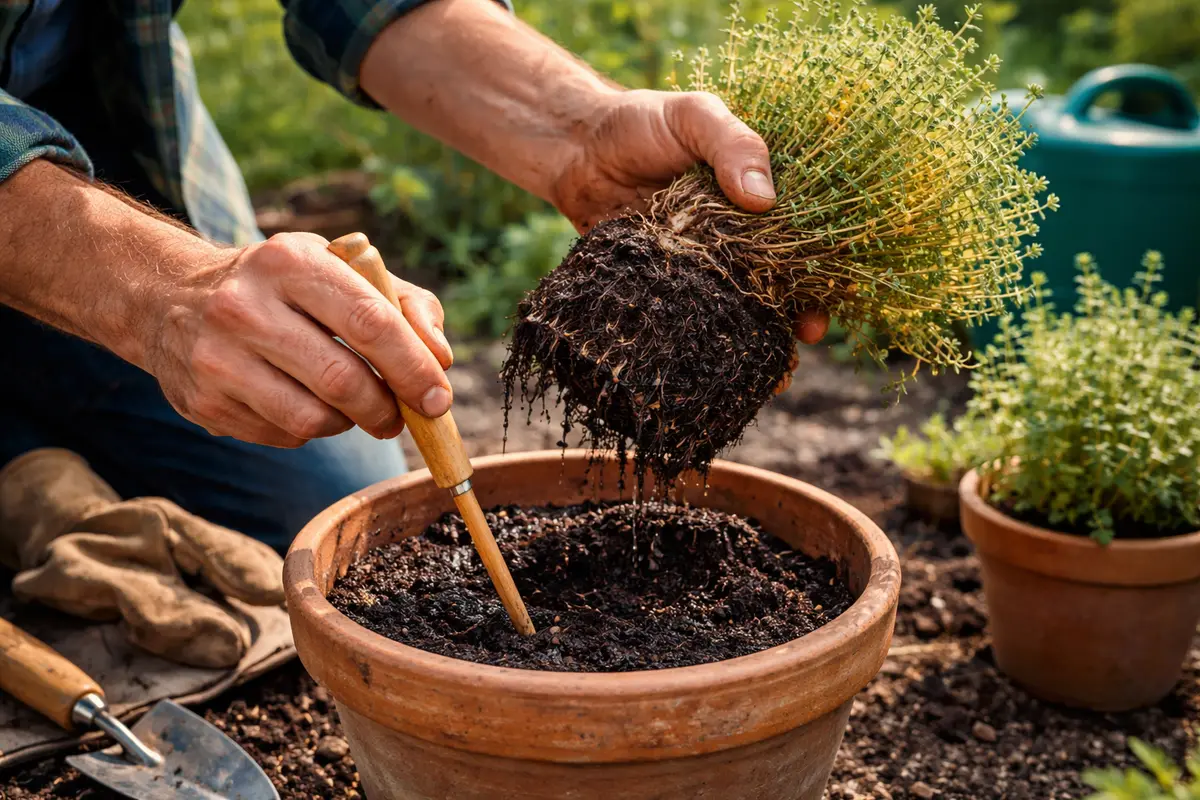
Start by removing the thyme plant from its pot and gently shaking off the excess soil to avoid further root saturation. Trim away any visibly yellowing leaves and inspect the roots for rot; healthy roots will be firm and white, indicating the plant can start recovering. Once repotted in fresh, well-draining soil, you should notice the remaining green leaves perk up within a few days.
The recovery timeline for thyme after overwatering typically ranges from a few days to a couple of weeks. During this period, you should see new growth emerging from the stems, particularly if provided with adequate sunlight and the right soil conditions. If the plant remains limp or the soil stays soggy, check your drainage; inadequate drainage directly contributes to prolonged yellowing.
Avoid the mistake of overcompensating with excess water or fertilizer during the recovery phase. Rather, allow the soil to dry out slightly between waterings, as thyme prefers drier conditions to avoid root suffocation. If the soil appears dry but the leaves remain yellow, check for root rot, as this may indicate a need for further action.
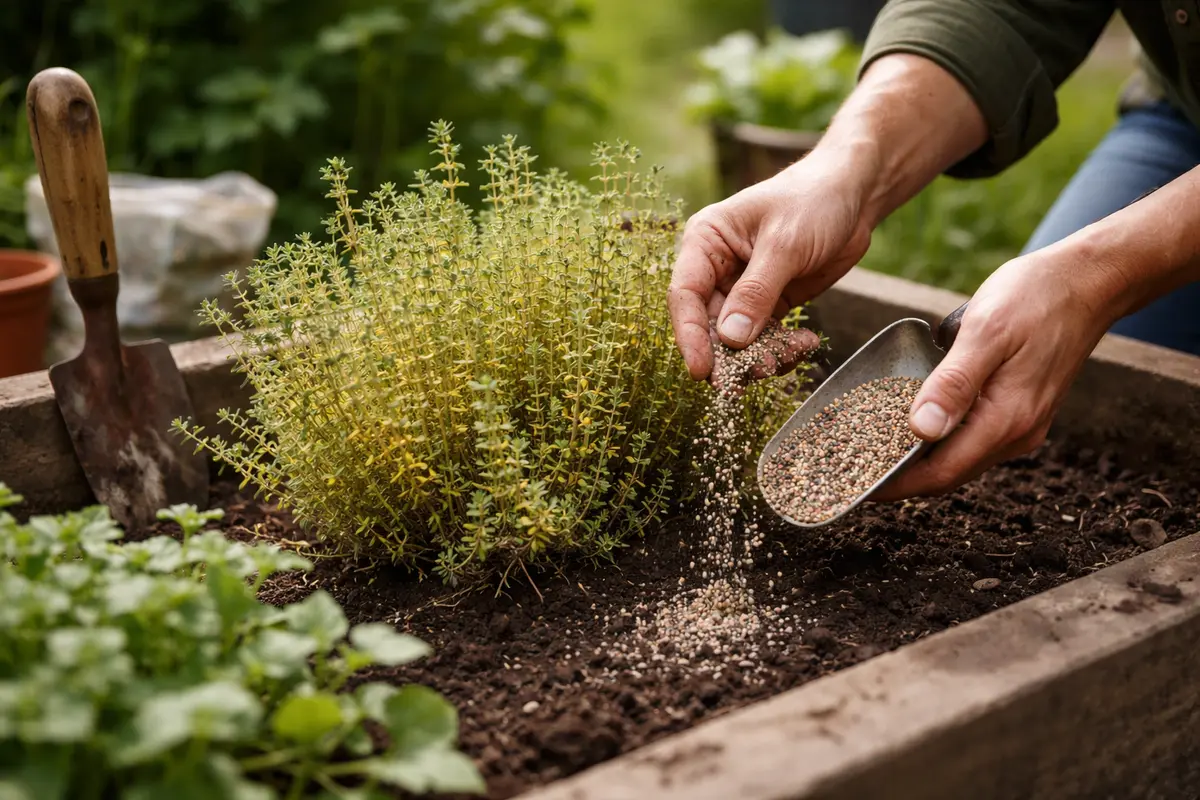
Fertilizing helps replenish nutrients that may have been washed away due to overwatering and supports healthy growth once the roots start to recover. As the thyme begins to regain its vigor, expect a visible shift from yellowing leaves to greener, lush foliage as the plant re-establishes proper nutrient uptake. Look for the leaves to start unfurling instead of remaining limp. Be mindful that in some cases, the fertilization will only be effective if the root system is healthy enough to absorb the nutrients.
It’s essential to avoid overdoing the fertilizer application during recovery, as excessive nutrients can lead to further damage. A practical check is to observe the top inch of soil—if it appears dry and has a light brown color, this may indicate a need for fertilization. Instead, checking the leaves daily for signs of new growth is advisable. If the new growth is still sparse or absent after a week, consider revisiting your watering practices and soil conditions, as these might need further adjustment. Regularly inspecting the plant will also provide insight into whether the fertilizer is truly nourishing the thyme or if adjustment in soil pH is necessary.
Step 4 – Avoid Overwatering Thyme in Future
Start by allowing the soil to completely dry out between watering sessions for thyme plants. Within a week, you should see the yellowing leaves revert to a healthier green as root rot risk decreases.
Overwatering can lead to poor drainage conditions, which often causes yellow leaves and stunted growth. This occurs primarily in humid environments or poorly draining pots, where excess moisture accumulates. By ensuring the soil dries out thoroughly, you address the key cause of yellowing rather than just treating the symptom.
From here, add a layer of mulch around the base of your thyme plants in warmer months to help regulate moisture levels. If you’re in a particularly wet season, check that the drainage holes in your pots aren’t blocked to further facilitate proper water flow.
Recognizing the signs that your thyme needs water is critical; you want the soil to dry out until it’s only slightly moist at the top before watering again. An established routine encourages robust root growth and nutrient absorption while preventing future yellowing. For outdoor thyme, environmental changes, such as increased sunlight or fluctuating temperatures, might alter your watering needs, so remain vigilant. If you notice that the soil dries out much quicker in summer months compared to the winter, adjust your schedule accordingly.
In drier seasons, you may need to increase your watering frequency, while in humid conditions, check soil moisture levels more often. If you’re growing thyme indoors, consider using pots with drainage holes and placing them on a slotted tray to avoid standing water. Consistently monitoring surrounding humidity levels will enhance your watering habits, as the plant’s environment directly influences its hydration needs. For example, if you keep thyme near a heater or air conditioning vent, it may require more frequent checks for dryness, as these conditions dry out the soil faster.
Step 5 – Inspect Thyme for Signs of New Growth
Start by examining your thyme plant’s soil moisture levels immediately. Use your finger to check for excessive wetness; the top inch should feel dry to the touch. Observe any yellowing leaves and monitor for signs of wilting or mushiness within a week, as these can indicate ongoing issues from overwatering.
A healthy thyme plant showcases vibrant green leaves with a firm texture, standing upright and thriving. In contrast, early signs of stress include dull, yellowed leaves that feel soft and limp. If the plant is recovering, expect to see new, bright green growth emerging within a few weeks; if yellow leaves reappear, check for signs of root rot or inadequate drainage.
If the yellowing persists despite following these instructions, escalate your action by repotting the thyme in fresh, well-draining soil. Trim away dead or damaged roots, ensuring that no excess moisture remains. If drainage issues continue, evaluate the pot’s drainage holes or consider switching to a pot with better airflow.
A fully recovered thyme plant typically showcases robust green leaves, firm stems, and an overall appearance that denotes vitality and health. If you notice the leaves beginning to yellow again, it may indicate that the previous issues have returned or accumulated stress factors have affected the plant. Careful observation can be critical in identifying whether the plant is truly recovering or experiencing additional issues. For instance, observing multiple plants in the same space can help identify if environmental factors are impacting your thyme’s health.
If the yellowing reoccurs despite your efforts, reevaluate the drainage, soil conditions, or consider changing the plant’s location to a spot that offers better airflow. Sometimes, pests may also contribute to the decline in health; inspect the leaves for any signs of infestation. A professional consultation should be sought if you observe the thyme continuing to deteriorate despite thorough care, as this may signify underlying diseases or structural issues that require expert intervention. Consider taking a leaf sample to a local gardening center for specific diagnosis if problems persist, especially if symptoms are unclear.
FAQ
How long does it take for thyme to recover from overwatering?
Thyme can typically take around 2–4 weeks to show significant recovery signs if overwatering has been addressed effectively. During this period, you should monitor for new growth and green leaves, indicating that the plant is resuming normal function. Watch closely, as early detection of new growth can help confirm successful recovery, ultimately setting the stage for a more robust growing season ahead.
Can overwatering spread to other plants nearby?
Yes, overwatered soil can create a breeding ground for pests and diseases that could affect neighboring plants. If you suspect one plant has become an issue, it’s essential to check others nearby for any signs of stress or illness due to shared soil conditions. Inspect the soil texture and color closely to prevent transferring the issue to your healthy plants. If you see wilting or yellowing in any nearby plants, consider examining their soil moisture as well.
Should I remove yellow leaves from my thyme?
Yes, it’s advisable to prune yellowing leaves as they won’t revitalize and could harbor pests or diseases that might spread. Focus on trimming only the damaged areas while maintaining the healthy parts of the plant as it recovers. Be cautious to avoid cutting back too many leaves at once; preserving some foliage assists in the continued healing process. Regular light trimming can also encourage new growth, which supports the plant’s overall recovery.