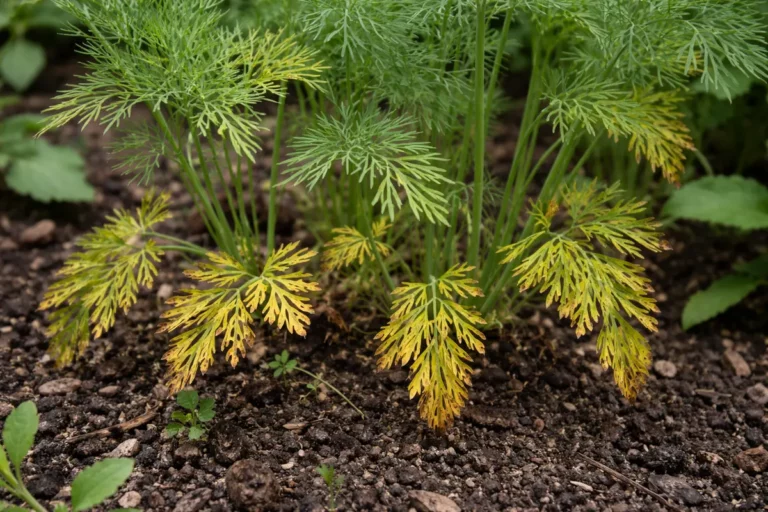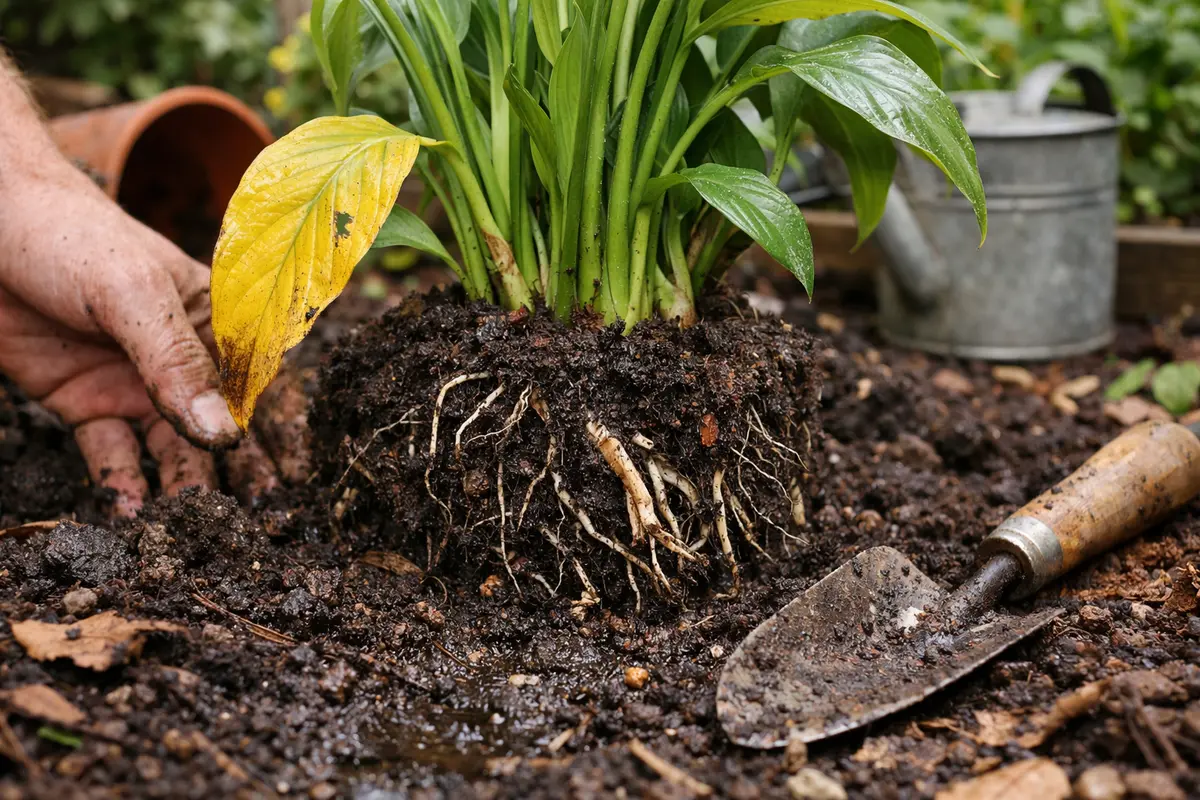
You may notice your peace lily developing yellowing leaves during the transition period after repotting, which is why you need to know how to fix yellowing leaves on peace lily after repotting. This yellowing often indicates stress from root disturbance or inadequate moisture levels, leading to potential damage. If left unaddressed, the condition can worsen, weakens the plant, making it harder to fix and leading to more damage down the line, but addressing the issue now can improve your plant’s health if you monitor the water levels and adjust the light exposure.
Step 1 – Trim Back Yellowing Peace Lily Leaves
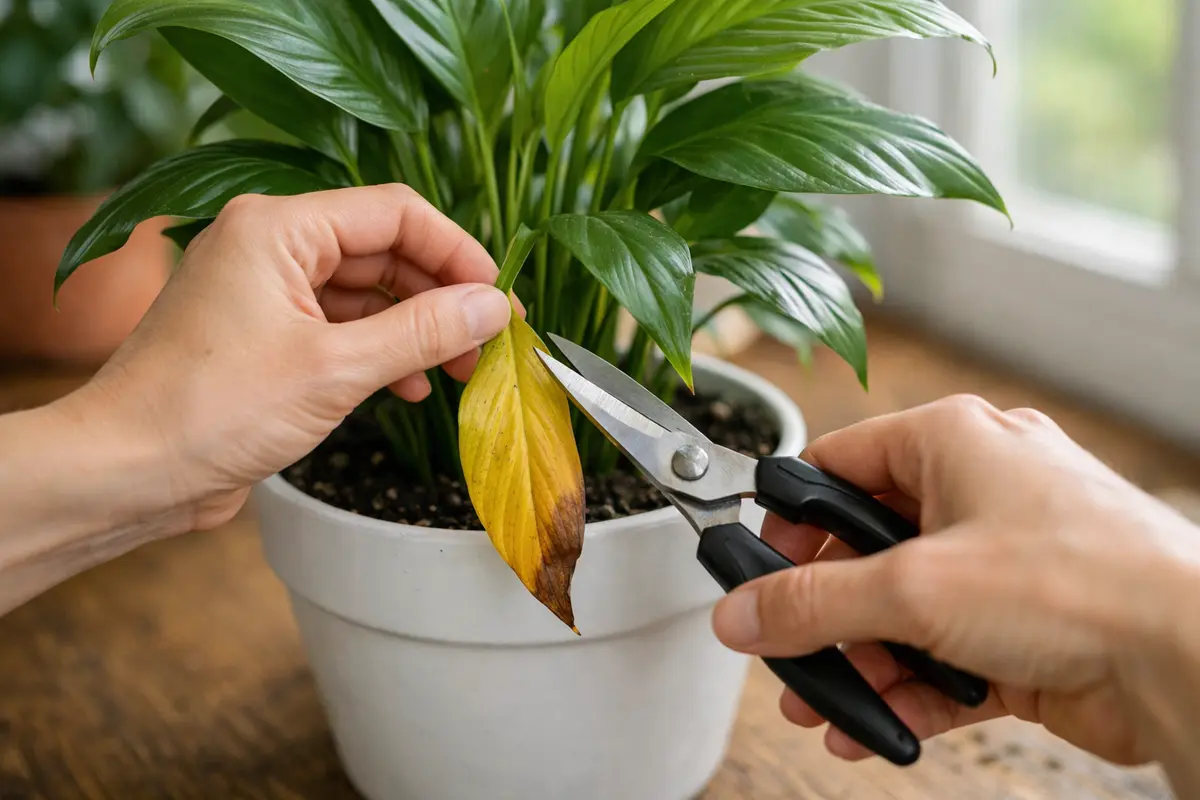
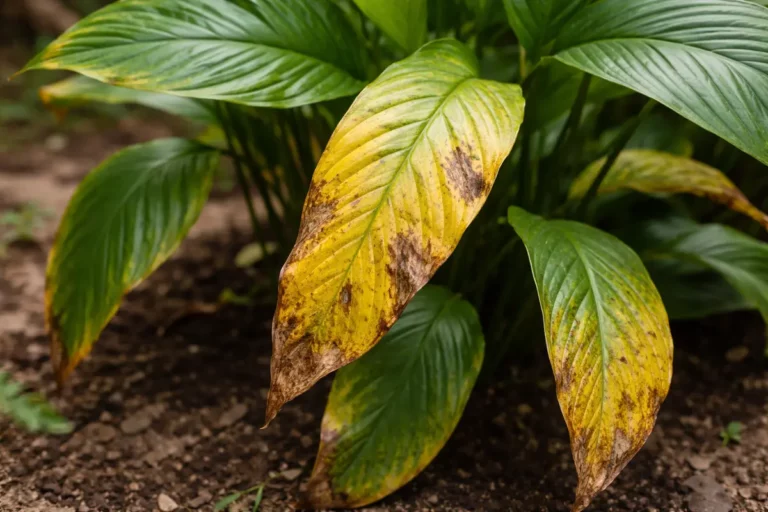
Begin by trimming off any yellowing leaves from your peace lily. You will notice that removing these damaged parts quickly enhances the plant’s appearance and allows for better light absorption, which is crucial for its recovery. Observing the plant’s immediate response can be quite rewarding; healthier leaves are more visible, and they’ll start to perk up as the plant reallocates resources. If you see significant yellowing, it’s likely due to stress from repotting, which underscores the importance of pruning.
Removing yellowing leaves promotes healthier growth by redirecting the plant’s energy toward producing new foliage rather than maintaining dying leaves. Infected or damaged leaves can attract pests or diseases, compounding the problems your peace lily faces. This step is vital as it prevents the spread of potential diseases and allows for better airflow around the healthy parts of the plant, thus reducing the risk of further stress. When assessing the plant, be sure to consider any leaves that may only show signs of yellowing at the edges; even these should be pruned, as they can still impact the overall health if left unchecked. A mild yellow around the edges often signifies root issues or light exposure problems, indicating a deeper need for adjustments.
This is often where gardeners hesitate; they mistakenly think that cutting away leaves will harm the plant further. However, it’s crucial to recognize that unaddressed yellowing only exacerbates stress, especially after repotting. For instance, if yellowing occurs right after transferring to a larger pot, it usually signals adjustments needed in care, like watering or light exposure. An untrimmed plant may struggle unnecessarily; after a week, assess the periodic growth of remaining leaves—this is a good indicator of whether trimming was beneficial. Always assess each leaf’s overall condition before deciding—not all yellowing is equal, and each situation requires a tailored response. Failure to act can lead to a heavier burden of plant stress that becomes increasingly difficult to manage. If new growth visibly emerges after this step, then it confirms effective energy redirection, indicating that the trimming was helpful.
Step 2 – Diagnose Overwatering in Peace Lily Soil
Inspect the soil to determine if overwatering is the cause of the yellowing leaves. If the soil feels excessively wet or compacted, you should re-evaluate your watering schedule and moisture levels immediately. High moisture content can lead to compaction, blocking necessary air from reaching the root system. Observe the condition of the soil two to three inches down; it should be moist but not sopping wet. If you notice a hard crust on the surface but soggy soil underneath, this is a clear signal that the roots are not breathing adequately.
Peace lilies thrive in moisture, but overly saturated soil can suffocate roots, leading to leaf discoloration. You should also check for other signs: a grayish color or a rotten smell can indicate that root rot is in progress. When you notice yellowing leaves alongside waterlogged soil, it’s essential to address this promptly; otherwise, root rot may develop, posing a severe threat to your plant’s health, which can set in quickly if conditions are not corrected. Be aware of how the moisture levels change after watering; if your soil retains water longer than anticipated, your watering frequency might need adjusting dramatically. In extreme cases, roots can begin to turn black and mushy, signaling that immediate intervention is necessary. If you see any brown or black roots during your inspection, that directly implies severe overwatering, and those roots should be snipped before repotting. If you are dealing with a related issue, petunia plants turn covers a similar problem in detail.
If after checking the soil, it has a sour smell or is mushy, consider repotting the plant into dry, well-draining soil. A mix that includes perlite or bark can significantly improve drainage. Additionally, if the soil drains quickly yet the leaves are still yellow, it could indicate that the plant isn’t acclimating properly to its new pot size or type. In many cases, gardeners tend to stick with the same watering routine as before the repotting, not realizing that different sizes and types of pots (like clay vs. plastic) can alter drainage dynamics. If the soil in the pot is beyond recovery, a full repotting may be necessary to restore the plant’s health. Pay attention to your peace lily after repotting; effects may vary depending on root confinement and soil composition. If the yellowing persists even after changing the soil, it may be worthwhile to install a layer of gravel at the bottom of the pot to enhance drainage further. Always ensure that the drainage holes are clear to prevent any future blockages.
Step 3 – Water Peace Lily to Restore Vibrancy
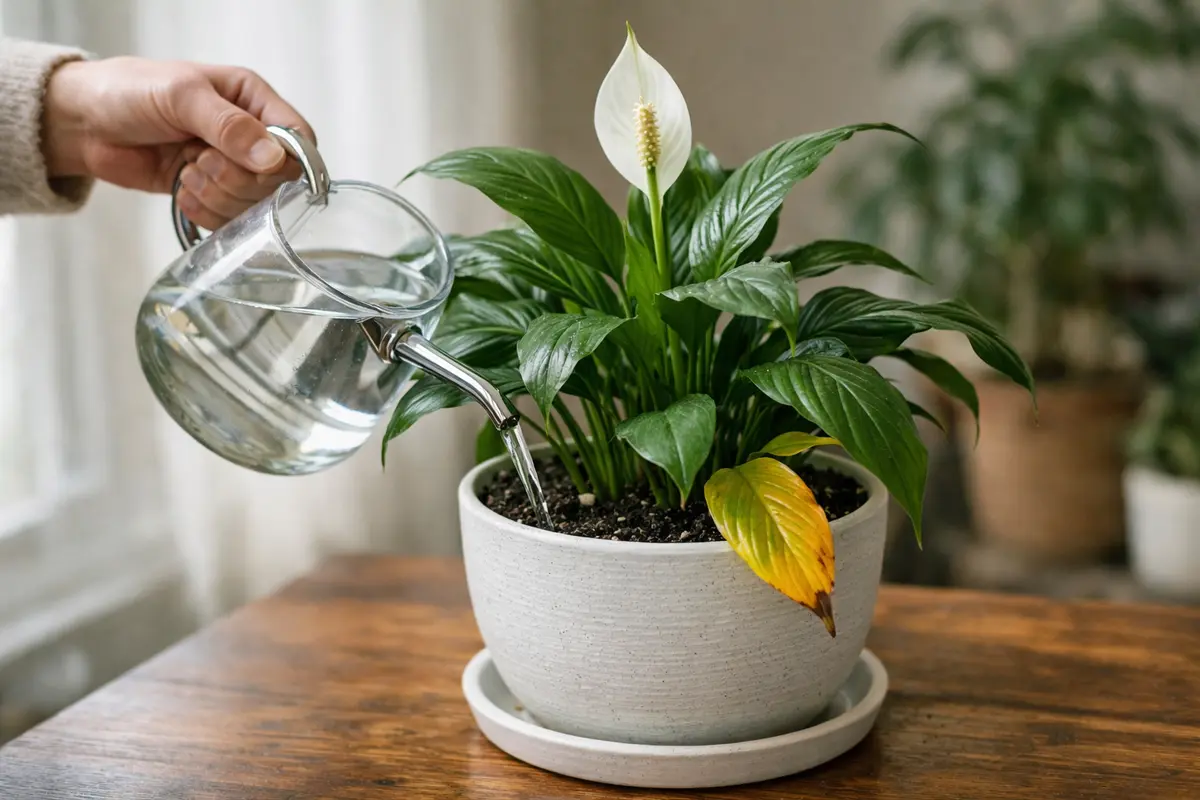
Water the peace lily deeply but infrequently, allowing the top inch of soil to dry out between waterings. You should observe an immediate perkiness in the remaining leaves as the plant rehydrates, which is often very encouraging to new plant caregivers. Don’t rush this step; allow for a full soaking and observe how quickly the water drips out the bottom of the pot, ensuring the roots are receiving adequate moisture. As a good practice, try to fulfill watering needs early in the day to provide the plant with moisture throughout the hotter hours.
This watering technique not only maintains ideal moisture levels but also encourages root growth by allowing aeration around the roots, which prevents potential rot. Noticeable improvements often manifest within a week when the plant can access the nutrients in the newly dry soil, particularly as new leaf shoots emerge and existing ones liven up. However, if the leaves begin to droop shortly after watering, then it may indicate that you have overcorrected and should allow the roots to adjust more gradually to increased moisture levels. Monitor your peace lily carefully; if you notice the soil dries out faster than would be expected for the season or environment, it may signal that additional care adjustments are necessary. This is especially true in very warm or low-humidity conditions.
A common issue gardeners run into during this stage is overcorrecting; they might start watering too frequently due to previous mishaps. Instead, it’s crucial to maintain the moisture consistency provided by your environment, adjusting the frequency based on how the soil feels. If the weather is particularly dry or humid, tailor your watering approach accordingly—keeping regular checks on the plant’s water needs will foster a smoother recovery. For those uncertain of soil moisture, inserting a finger into the soil up to the first knuckle gives a reliable indication without risking over or under-watering. Gardener error often occurs when a plant looks droopy; they may water too quickly, without checking first to confirm actual dryness. If the plant remains yellowing despite adequate watering, check for root damage or reassess the plant’s environment. This could worsen any existing issues, resulting in even more yellowing. What usually helps is having a soil moisture meter handy for a couple of weeks post-repotting to guide your watering decisions accurately, ensuring the balance between moisture retention and root health. A related fix is explained in during drought recovery if you want to compare approaches.
Step 4 – Check Peace Lily Leaves for New Yellowing
Start by monitoring your peace lily closely after repotting. Check for signs of overwatering or underwatering, which can both contribute to yellowing leaves. Observe the leaf color daily for improvement; if leaves do not start to regain a vibrant green within a week, re-evaluate your watering schedule and soil condition.
A fully recovered peace lily features deep green, glossy leaves, standing upright and firm. In contrast, if yellowing reappears, leaves may feel limp or produce a brown edge, indicating stress. If you notice a general droopiness despite proper care, evaluate the soil’s drainage capacity and moisture retention.
If the yellowing persists despite following the previous steps, check for root rot by gently removing the plant from its pot to inspect the roots. If the roots are brown and mushy, trim them back and repot in fresh, well-draining soil. Should issues continue, consider reevaluating your indoor environment for changes in light levels or humidity, which could also affect your plant’s recovery.
A fully recovered peace lily displays vibrant green leaves, firm and upright, contrasting sharply with early signs of yellowing, which appear as soft, drooping foliage. If yellowing reemerges, look for leaves that feel dry or crispy around the edges; they indicate further stress, possibly from environmental changes or continued moisture issues. If you note leaf discoloration with no new growth, check the roots for overcrowding or decay, as this can also play a large factor in recovery. Healthy roots will appear white and firm; any mushy or dark roots indicate there are problems needing immediate resolution.
If the problem persists despite addressing moisture levels, consider inspecting the light conditions for excessive brightness or saturation. Check for shadows during the day, and note the location of direct sunlight hitting the leaves. Adjusting the plant’s placement may be necessary if you notice wilting or a lack of leaf growth after repotting. Alternatively, if the soil remains too compact or can’t retain moisture, repotting again in fresh, well-draining soil might be necessary. A layer of compost can help maintain necessary moisture for the surrounding soil without the risk of over-saturation. Once recovered, healthy peace lilies will produce firm, upright leaves that are vibrant rather than wilted or discolored. If you continue to see yellowing despite making adjustments, it may indicate an ongoing issue with light, humidity, or pests, each requiring further investigation. Checking for pest activity under the leaves and on the stems is critical as well. If experimenting with various lighting scenarios, be vigilant; under or overexposure can perpetuate the yellowing by affecting the plant’s natural cycles. Regular checks are crucial during these formative recovery stages, as noticing changes can give insight into what’s going right or wrong.
If yellowing persists, returning to a detailed care log can help—review your light exposure, humidity levels, and potential pest threats. For example, if your peace lily is now placed in a shady corner after repotting and previously thrived in moderate light, the lack of it could lead to further yellowing. Similarly, if humidity levels in your space have dropped significantly, that can also trigger issues. Sometimes issues can arise from new sources after a repotting, so while regular checks are necessary, reevaluating changes made during repotting is key. It’s essential to remember that environmental factors may not impact all leaves equally; emerging new growth could be thriving, while older leaves might still reflect the adverse effects of previous stressors. Monitor these factors diligently to ensure that your peace lily remains healthy and thriving, adjusting care strategies as needed to accommodate evolving plant needs.
FAQ
How long will it take for my peace lily to recover from yellowing leaves?
Recovery time can vary, but you may start to see improvements within a few weeks as long as you address the underlying causes effectively. Consistent care will help the plant regain vibrancy faster, particularly if the underlying causes are addressed promptly. For instance, addressing overwatering quickly can lead to a faster recovery as the plant regains adequate root function; ideally, new shoots should begin appearing within two weeks.
Can yellowing leaves spread to other plants nearby?
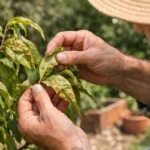
Yes, if the yellowing is due to pests or diseases, these can indeed spread to nearby plants. It’s essential to check the health of surrounding plants, and should they exhibit any spots or color changes, make sure to remove affected leaves immediately. Keep an eye on your peace lily and its surroundings for any signs of distress in neighboring plants as well, ensuring to quarantine affected plants to prevent cross-contamination. Implementing a preventive routine, such as regularly managing pests and diseases, can mitigate risks and improve overall plant health. For a closely related scenario, see prevent aphids collard.
Should I remove the yellowing leaves at all times?
Yes, removing yellowing leaves is essential to promote healthy growth and prevent pest attraction. Always trim damaged leaves, especially after issues like repotting, to encourage the growth of fresh foliage. Trimming in small bursts often allows for better recovery, given the plant’s energy will focus more efficiently. Consider the overall appearance of your plant; a peace lily’s health can significantly improve when its energy is redirected from dying foliage to new leaf development, and this can dramatically enhance both aesthetics and plant vitality.