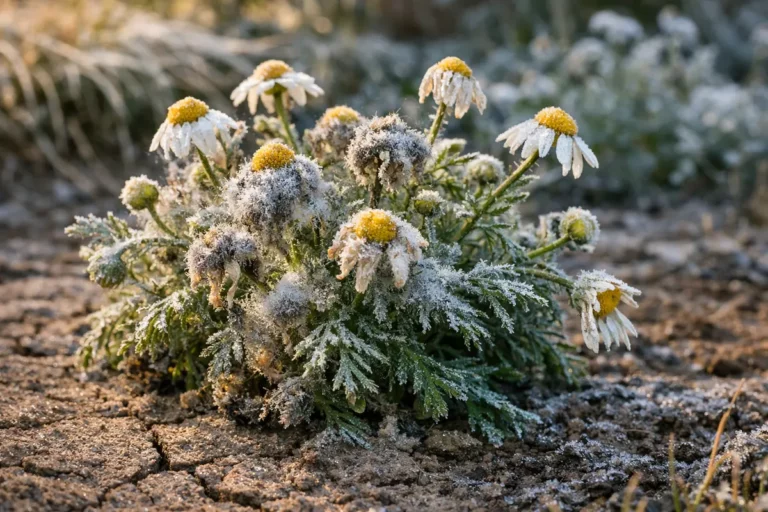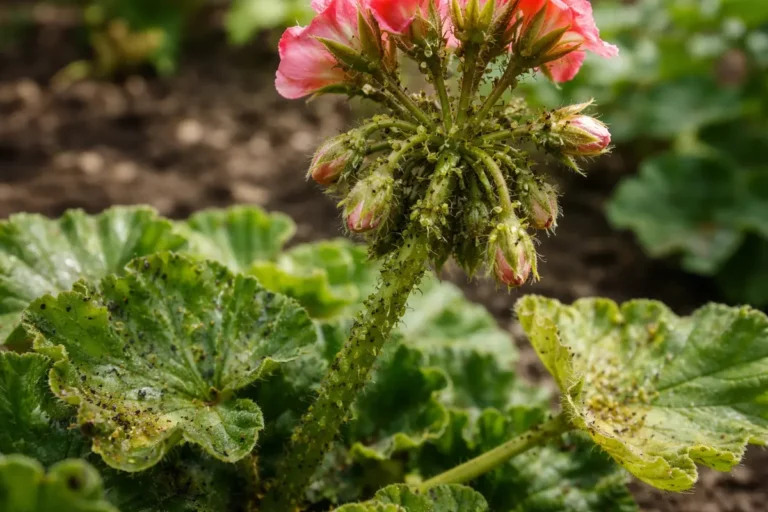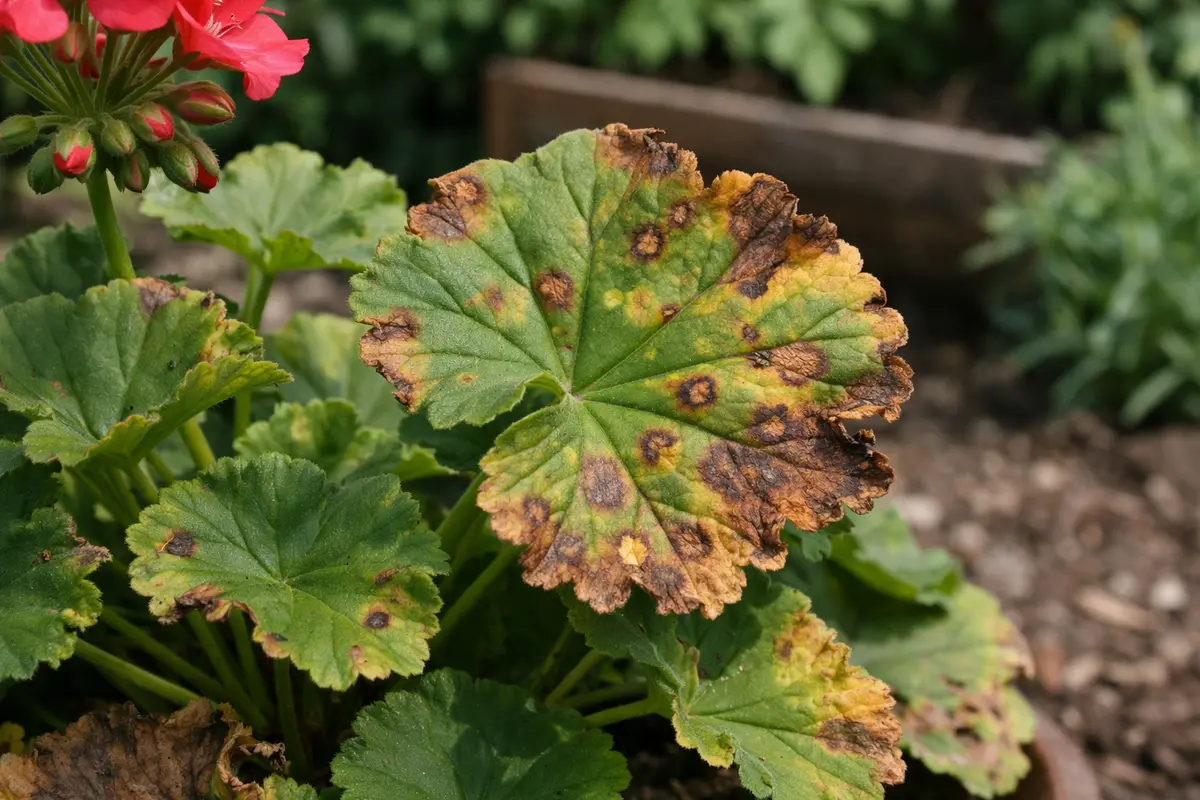
You may notice unsightly spots on your geraniums after high humidity, which is why you need to know how to treat spots on geraniums after high humidity. This discoloration is often caused by fungal diseases that thrive in damp conditions, leading to spots that can quickly spread across the leaves. If left unaddressed, the problem can worsen and weaken the plant, making recovery harder, but fixing it is possible now—just inspect, remove any affected foliage, and adjust your watering schedule to improve airflow.
Step 1 – Remove Affected Geranium Leaves Immediately
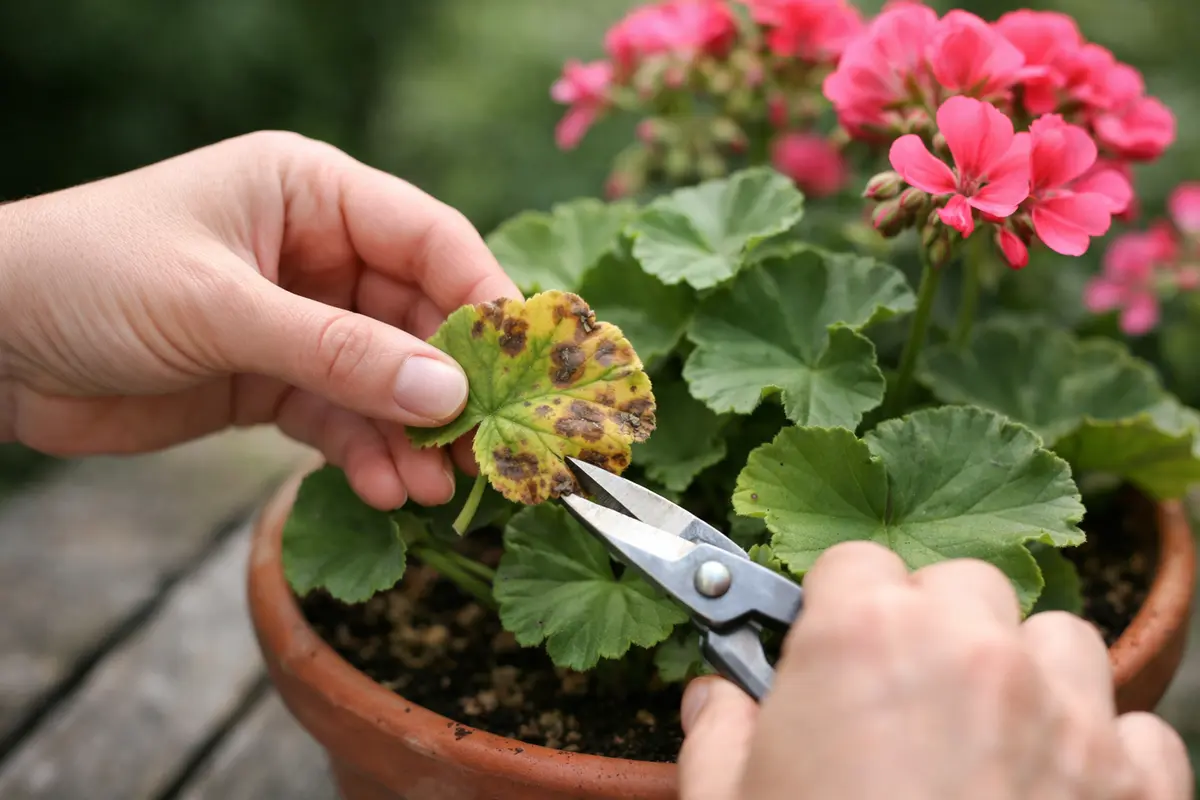
First, remove any affected leaves from your geraniums, ensuring you cut at the base of the stem to prevent further damage. This immediate action will help limit the spread of any diseases associated with high humidity, and you should notice a decrease in the visible spots within a few days as the plant begins to refocus its energy on healthy foliage.
Acting swiftly is crucial because delayed intervention can lead to a severe fungal infection that can spread rapidly through the plant. As humidity increases, the spots on the leaves indicate the onset of conditions like powdery mildew or downy mildew, which thrive in moist environments. If you don’t prune the affected areas promptly, you risk losing large portions of the plant as these pathogens proliferate and consume its resources. This issue is often caused by lawn fungus evening watering.
An example of the importance of timing can be seen in gardeners who notice spots but hesitate to take action. One gardener waited too long, allowing mildew to spread, ultimately leading to a complete loss of their geraniums. If you see extensive leaf discoloration and wilting, you’re likely facing a more serious condition—check for any signs of mold or a distinct sticky residue, as that could indicate aphid presence instead.
The removal of affected leaves reduces the number of spores in the environment that could lead to further infection. Geraniums are particularly susceptible to fungal diseases when humidity levels climb, as this allows pathogens to thrive. If you delay removing the infected leaves, the spores can spread to other parts of the plants, exacerbating the issue. If you observe that a cluster of leaves is affected, consider removing not only those specific leaves but also any neighboring ones that show mild discoloration. This precaution helps halt the spread by eliminating potential carriers of the infection. Additionally, it is vital to dispose of the infected leaves properly; simply placing them in a compost pile can lead to the spread of spores, potentially infecting other plants in your garden.
One common mistake is to wait too long to take action, thinking the spots might heal on their own. If you see symptoms intensifying, such as further discoloration or leaf curling, it’s evident that the plant needs immediate intervention. Staying proactive supports healthier growth and reduces the chances of future outbreaks. An effective strategy is to assess up to 30% of the plant’s leaves; if the affected area covers less than this, you can focus on those leaves, but if it is more widespread, you may need to reassess environmental conditions and consider comprehensive treatment. In many cases, the surrounding environment can influence recovery significantly and may require adjustments such as trimming back competing plants or ensuring better exposure to sunlight.
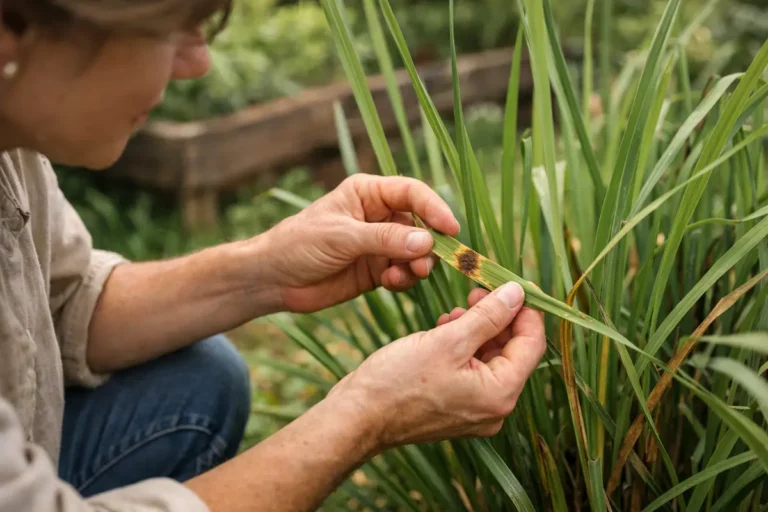
Step 2 – Diagnose Fungal Issues Causing Leaf Spots
Inspect the leaves to identify any fungal infections visible on the remaining foliage. You should see the absence of new spots developing as soon as you remove the infected leaves. By diagnosing the exact issue, you can target the treatment effectively and ensure your geraniums recover.
Fungal infections can manifest in various forms, such as dark spots, blight, or a fuzzy mold indicating powdery mildew. You should look for distinguishing characteristics, such as a powdery white coating, dark spots expanding in size, or any yellowing around the edges of the leaves. The actual fungus can persist in the soil or on plant debris, waiting for moisture to trigger new infections, leading to severe problems if it goes untreated. This understanding is crucial, as it informs how you’ll manage the environment and prevent further issues. If you notice patches that appear like downy mildew, you might be dealing with a specific type of fungal infection that requires targeted fungicidal intervention. In some cases, symptoms may not be purely fungal; pests like spider mites can mimic these signs, causing further confusion.
If the soil smells sour or if the roots appear rotten, consider repotting the geraniums with fresh, sterile soil. This action can greatly enhance recovery, as it removes the underlying source of the pathogens that cause fungal infections. A clear indicator that repotting is necessary is if the plant is wilting despite consistently being watered. An ideal repotting timeframe is during a cooler part of the day, preferably in the morning or late afternoon when sun exposure is less intense. One common mistake is to ignore root health; if you see brittle brown roots instead of healthy white ones, this indicates overwatering and root rot, often leading to a need for immediate repotting with a well-draining mix. Additionally, ensure you set the plants in an area with better airflow; if they are crowded, reposition them to improve ventilation. High air circulation helps dry out the foliage quickly, making it less hospitable to fungal spores and reducing the risk of further outbreaks. Recently moved plants are also prone to yellowing leaves peace lily.
Step 3 – Treat Geraniums to Promote Healthy Growth
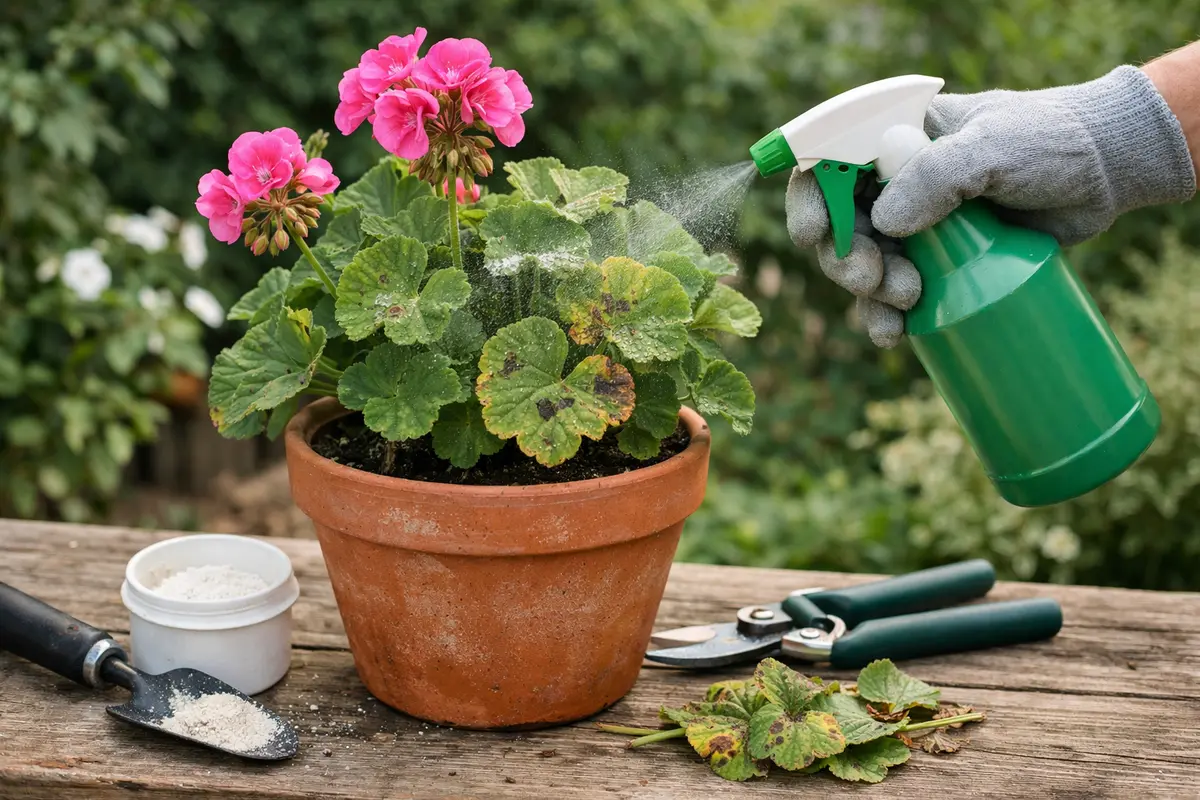
Apply a balanced organic fertilizer focused on promoting leaf health and vibrant growth. You should notice new, cleaner leaves emerging within a week of application. Fertilizer that contains nitrogen is particularly beneficial during recovery, aiding in the production of fresh foliage. Nurturing a healthy root system plays a critical role, as it helps geraniums recover more quickly from previous infections. Ferrilizers with slow-release formulations are usually recommended since they provide a steady stream of nutrients and reduce the risk of over-fertilization.
Post-treatment, the geraniums need nurturing as they heal from the stress of fungal infections and environmental conditions. Fertilizers provide essential nutrients that support the plant’s recovery mechanisms. Ideally, apply it in the morning when moisture levels are high and absorption is optimal; this can help the fertilizer assimilate into the soil more effectively. Keeping moisture levels balanced with added nutrients promotes vigorous growth of new leaves, becoming more resilient against future infections. However, be mindful of the signs of over-fertilization, such as a white crust forming on the soil surface or any leaf burn; these symptoms indicate that you may need to dilute or pause the fertilizer application. If you do choose to apply fertilizer during high humidity, ensure you balance it with adequate watering to avoid excessive soil moisture causing further issues.
A common mistake during this recovery phase is over-fertilizing. Too much fertilizer can shock the plant, potentially negating the benefits of proper nutrition. Monitor new leaf growth closely; if you observe any signs of nutrient burn, characterized by yellowing edges or browning leaf tips, immediately adjust the fertilizer usage before the plant’s health declines further. If recovery stalls and leaves begin to curl or drop again, consider re-evaluating your watering habits alongside fertilizer application; controlling moisture carefully is essential, as excess watering can neutralize the effects of fertilizer due to nutrient leaching. For better results, alternate between liquid feed every two weeks and granular fertilization once a month to ensure consistent nutrients throughout the growing season. When feeding is off, expect signs such as if petunia plants turn yellow.
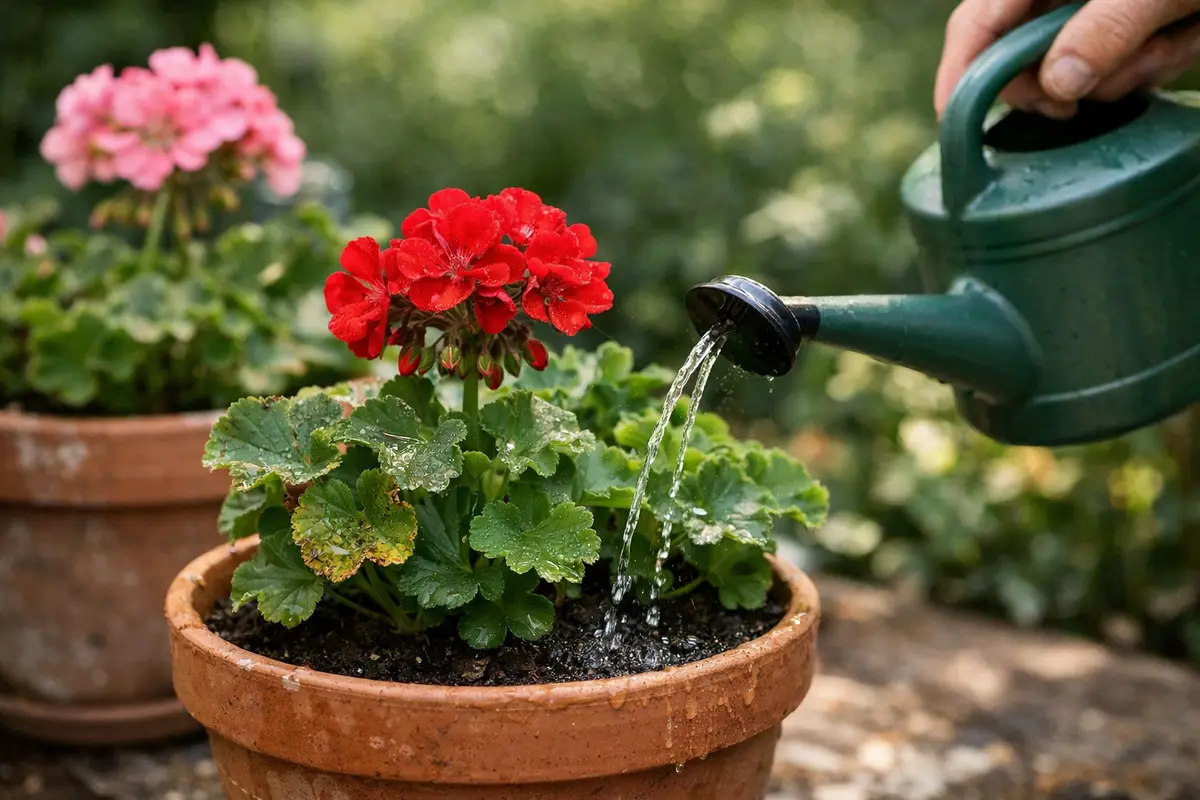
Step 4 – Water Geraniums Sparingly During Humid Days
Start by ensuring adequate air circulation around your geraniums by spacing them at least 12 inches apart and pruning any overcrowded foliage. This action reduces the humidity levels around the plants, preventing the growth of fungal diseases and leading to visibly healthier leaves over time.
High humidity often fosters the ideal conditions for fungal infections like powdery mildew, characterized by a white, powdery coating on leaves. By maintaining proper spacing and airflow, you eliminate stagnant conditions that encourage these diseases to thrive, distinguishing healthy foliage from infected plants. If you notice yellowing leaves despite good airflow, check for root rot due to overwatering, as it can contribute to overall plant health deterioration.
During the hottest months, implement a morning watering schedule to allow soil moisture to evaporate during the day. This adjustment creates a consistently drier environment that discourages mold formation, allowing your geraniums better resilience against pests that thrive in moisture. In addition to watering, it may also help to mist the foliage early in the morning, supporting humidity balance without over-saturating the soil below. Take care that leaves dry out completely by early afternoon to avoid creating an environment conducive to fungal growth.
High humidity paired with overwatering creates an ideal environment for mold and fungal development. If the soil surface appears consistently moist after watering, this can mean the geranium roots are not getting the aeration they need, leading to potential threats. It’s crucial to avoid situations where wet, compacted soil hinders root growth, as this exacerbates the risk of rot. Keeping a consistent and controlled watering routine helps combat excessive moisture that could otherwise fuel plant diseases, ensuring the health of the geranium. If you find yourself in hot, humid conditions frequently and need to maintain moisture levels, consider using self-watering pots to regulate soil hydration without over-saturating the roots. Also, observe the leaves closely for signs of wilting; if they droop despite moist soils, that signals stress from overwatering. Excess moisture often leads to problems like root rot in potted cacti.
Step 5 – Inspect Geranium Foliage for New Spots Weekly
Inspect geranium leaves at least once a week for new spots or signs of distress. You should observe fresh, healthy foliage without new brown spots emerging over time. Regular inspections help you catch potential problems before they escalate, ensuring effective ongoing management. Use a magnifying glass if necessary to spot early signs of infection or distress that might not be visible to the naked eye, as many early fungal symptoms can be very subtle.
A fully recovered geranium will display vibrant green leaves, indicating no signs of stress or infection. Frequent inspection means taking note of texture and coloration changes; if new spots appear, closely reassess environmental conditions, as fluctuations in humidity or exposure to excess moisture could signify problems like fungal resurgence. Additionally, keep an eye out for tiny webbing or small insects, as encountering these pests may signal pest issues, which often interlink with ongoing fungal infections. This ongoing vigilance ensures that the plants remain robust against any external pressures.
If you notice returning symptoms despite following previous steps, consider shifting to a stronger fungicide suitable for the specific type of fungal infection identified during your diagnosis. Persistent issues might signal a deeper problem with soil health or broader environmental factors; keeping notes about growth patterns can help adjust your approach effectively. For example, if humidity levels rise unexpectedly, take preemptive measures to dry out foliage and maintain good air circulation to avoid fostering a breeding ground for fungi. Regularly evaluating any surrounding plants can give insight into whether your geranium’s issue is isolated or part of a more extensive contagion.
FAQ
How long does it take for geraniums to recover from leaf spots?
Typically, geraniums can show signs of recovery within one to three weeks, assuming proper treatment is followed and environmental conditions are managed. Responding quickly to leaf spots will expedite the recovery process as the plant regains health. However, if conditions remain humid or the plant has been significantly stressed, it might take longer for the plant to establish itself fully and produce new, healthy foliage. The most rapid recovery often occurs under consistent variable sunlight and balanced moisture levels, making it essential to observe these factors closely.
Can leaf spots spread from one plant to another?
Yes, leaf spots caused by fungal infections can easily spread from one geranium to another, especially in high humidity. Spores can travel through air currents or splashing water, putting neighboring plants at risk. Implementing proper sanitation measures, such as the immediate removal of affected leaves and maintaining good airflow, can significantly mitigate this risk. Conducting regular checks is essential to catching any early symptoms before they proliferate among your plants. Additionally, if you have recently introduced new plants to your garden, inspect them closely for signs of issues before allowing any close proximity to existing greenery.
Should I remove all the geranium leaves with spots?
Remove only the leaves that display visible spots while ensuring the plant retains enough foliage for photosynthesis. Over-pruning can stress the plant and delay recovery, particularly if many leaves are removed at once. It is crucial to maintain a balance; leaving healthy leaves intact will allow the plant to continue producing energy while healing from infections. If you’re uncertain about how many leaves to remove, consider a gradual approach, allowing the plant some time to recover from each pruning session.