You may notice your gardenia’s leaves curling after a frost, which is why you need to know why are my gardenia leaves curling after frost. This curling typically indicates stress from cold damage, often resulting in wilting or leaf drop. If left unaddressed, this issue can lead to more damage and weaken the plant, but fixing it is possible now—just check the soil moisture and adjust your care routine accordingly.
Step 1 – Inspect Gardenia Leaves for Frost Damage
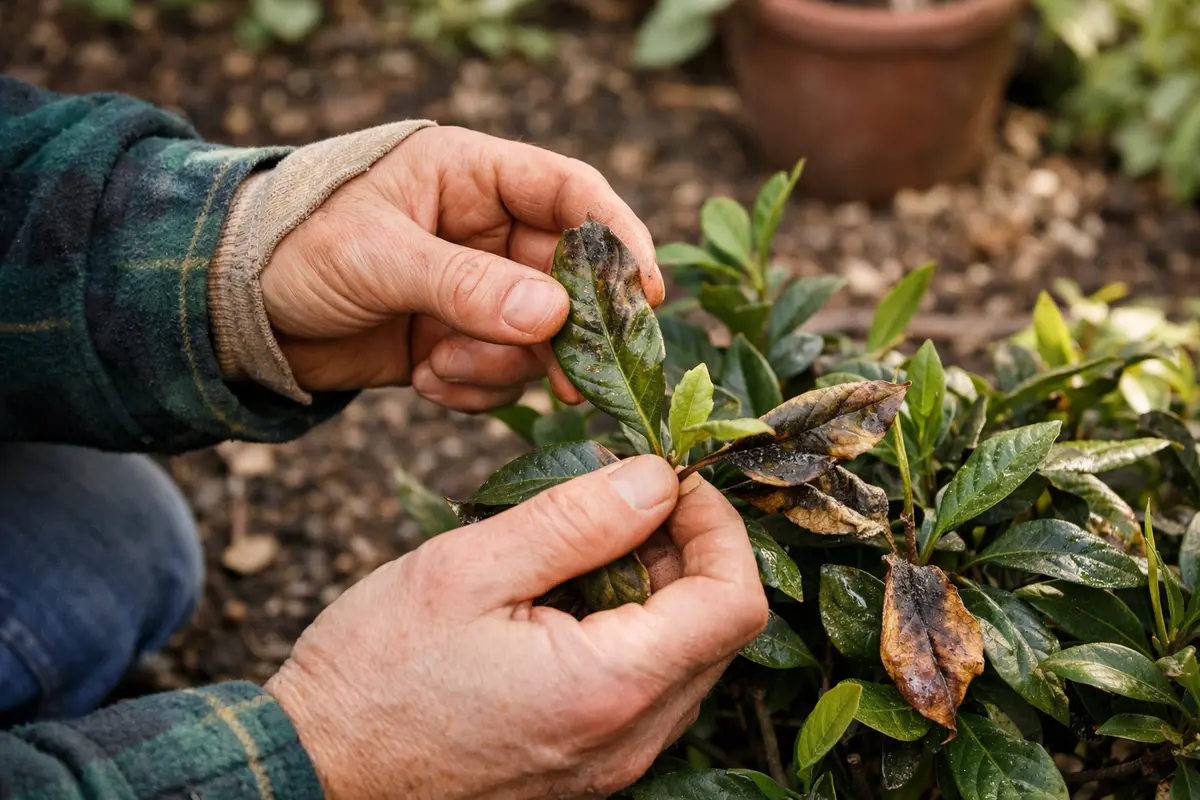
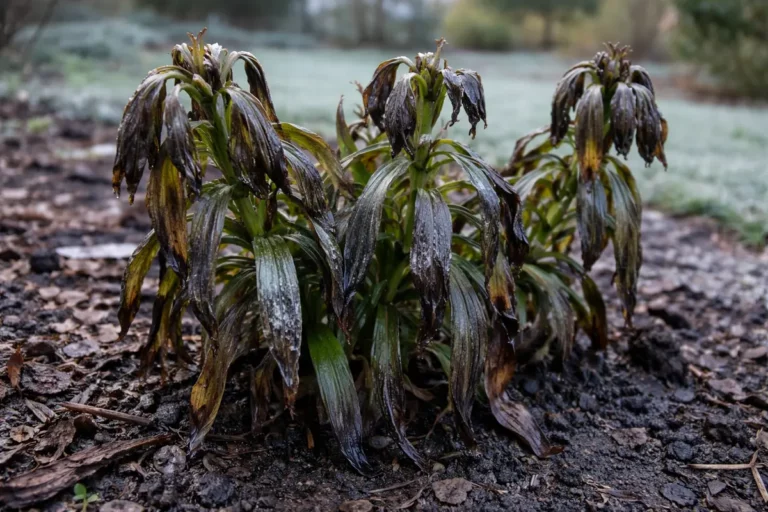
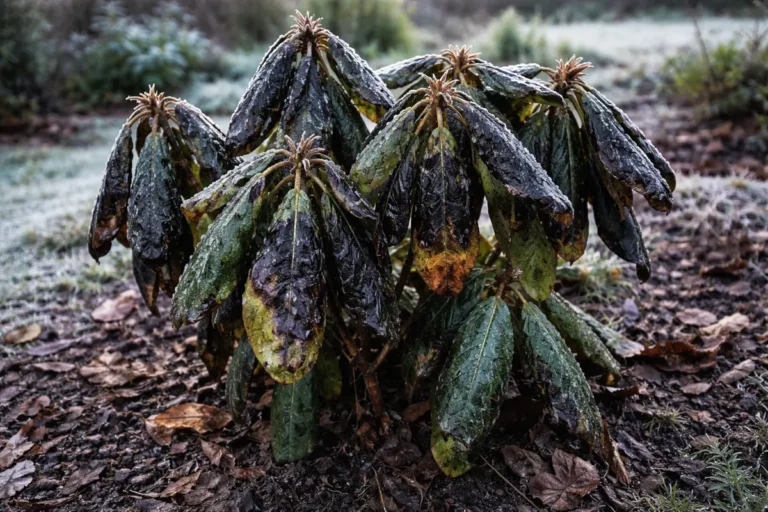
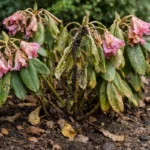
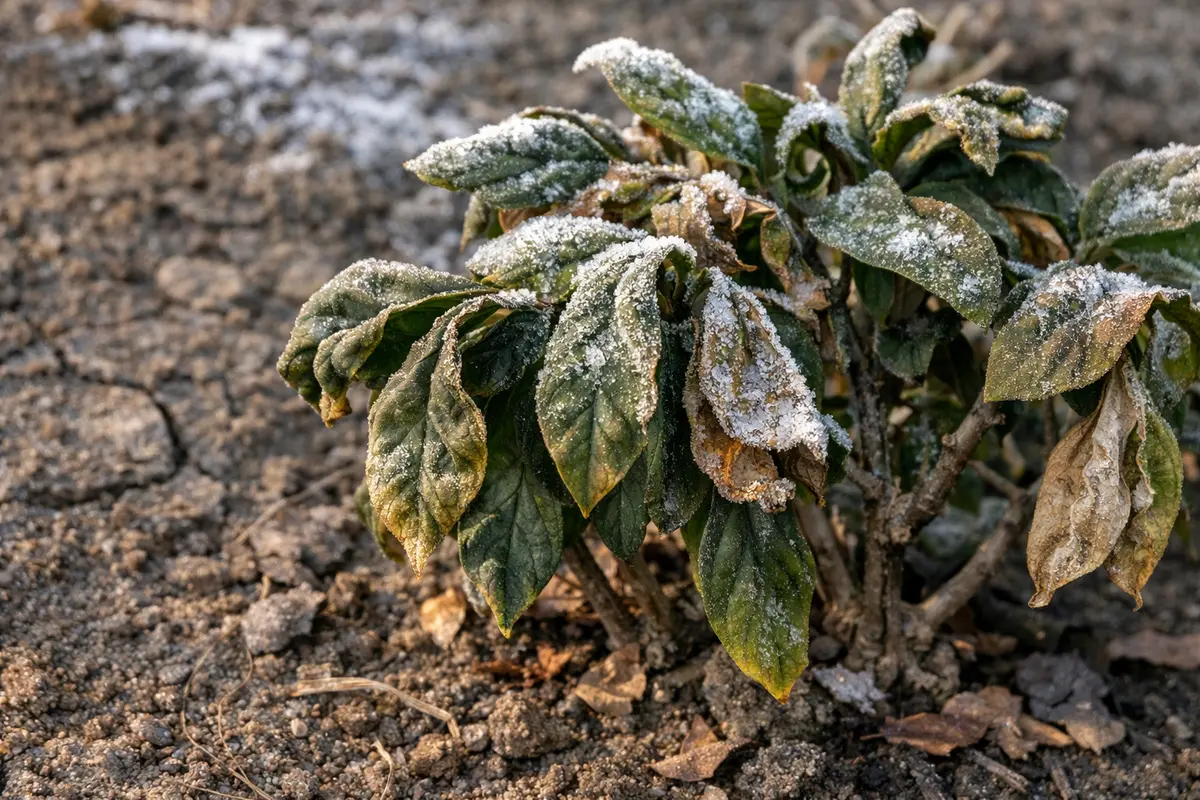
Start by inspecting the leaves for visible signs of frost damage, including browning edges, curling, and limpness. You will likely see the leaves appear less vibrant, signaling that they are stressed from cold temperatures. Focus particularly on leaves exposed to frost and evaluate whether the curling is more severe at the tips or edges, as this will help assess the level of damage sustained. This early assessment is crucial for determining how severely the frost has impacted your gardenias. Pay special attention to the older leaves, as they may show damage faster than newer growth.
When gardenias are exposed to frost, their leaf cells can become damaged, causing nutrient flow disruption and physical symptoms like curling. Acting quickly is essential because the longer you wait, the more the damage may impact new growth and overall plant vigor. By swiftly identifying any affected areas, you can decide the best course of action for recovery. Consider using a magnifying glass to check the underside of leaves, as frost can sometimes cause additional petal-like tears that aren’t immediately visible. If you notice more extensive damage on the northern side of the plant, it may indicate that this side is less sheltered from cold winds.
Many gardeners overlook the importance of this initial inspection, focusing instead on cosmetic fixes like removing dead leaves without assessing the full extent of frost damage. This can lead to further complications, especially if the base of the plant is also damaged. Check not only the leaves but also stems and branches for signs of cold stress too; for instance, discoloration or softness in the stems may indicate that cold temperatures have penetrated deeper, potentially threatening the plant’s overall integrity. If you find any broken or soft stems, these should be pruned back, as they can serve as entry points for diseases.
Step 2 – Assess for Root Stress Causing Leaf Curling
First, assess the soil moisture around your gardenias; if it’s excessively dry, water the plants deeply. After a day or two, observe the leaves; if they begin to uncurl and regain a turgid appearance, you’ve identified dehydration as a root cause. Conversely, if the leaves remain curled or continue to wilt even after watering, it may indicate other underlying issues.
When gardenias experience frost, the sudden drop in temperature can cause their leaf cells to lose moisture rapidly, leading to curling as they try to conserve what little water remains. In well-hydrated plants, the leaves should maintain their shape, while overexposure to frost can create cell damage, disrupting the normal water flow and causing visible stress symptoms. If the soil feels compacted or crusty on the surface, this could hinder water absorption, making it critical to amend the soil for better drainage.
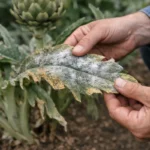
If the soil feels excessively wet or smells sour, it may indicate root rot. In that case, check for any areas where the soil may be holding too much moisture and adjust your watering schedule or improve drainage. If you observe yellowing leaves alongside curling, it suggests a potential nutrient deficiency that may be exacerbated by frost exposure. Inspect for pests like aphids, which can also lead to curling leaves and require a different treatment approach. Gardenia roots require consistent moisture but can also suffer from rot if the soil is excessively wet after frost. Assessing root health is vital; if you dig around the roots and they feel mushy, it is imperative to remove any affected roots immediately and replant, as allowing rot to fester can lead to widespread leaf curling and death. Conversely, if the roots are firm and healthy, the problem may stem from inadequate watering practices or nutrient deficiencies that could hinder recovery efforts towards perking up those leaves.
If you notice a sour smell emanating from the soil, it indicates potential root rot, which will lead to further leaf curling if left untreated. In this case, trim back any affected roots and replace the compromised soil with fresh, well-draining potting mix. On the other hand, if the soil appears too dry, water thoroughly, ensuring moisture reaches deeper layers and supports root recovery; aim for a depth of at least 12 inches to encourage deep roots to rehydrate effectively. Using a moisture meter can help gauge wetness at various depths, allowing for accurate assessments of whether your gardenia’s root zone is adequately hydrated.
Step 3 – Hydrate Gardenia to Reverse Leaf Curling
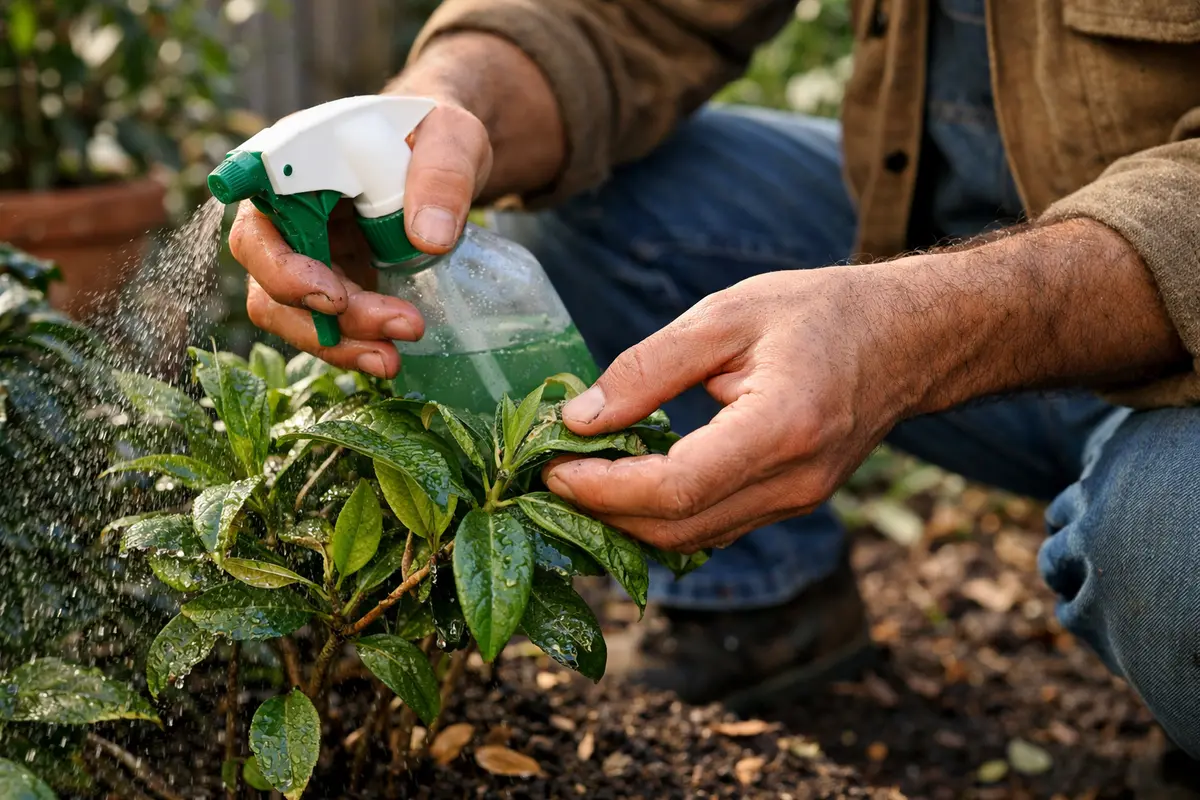
Water the gardenia thoroughly by saturating the soil down to the root level, providing deep hydration that is essential for reversing leaf curling. Within a few days, you should see improvement in the leaves as they begin to perk up and regain some turgor. Employ a soaker hose or a gentle watering can to ensure even distribution of water around the base, helping to restore the health of the root system effectively. If you notice the soil has dried out excessively between waterings, consider adjusting your schedule to water every 3 to 4 days in dry conditions.
Hydration is key since frost can limit the plant’s ability to draw moisture, thereby worsening leaf curling and stunted growth. By rehydrating the soil, you enable the roots to absorb necessary water and nutrients to support recovery. Healthy water uptake will gradually lead to leaves regaining their firmness and vibrancy, typically manifesting as a green hue returning to the affected areas of the leaves. This transformation may take a few days, so patience is essential as the roots reset their moisture balance.
Be cautious not to overwater after frost exposure, as this can create additional stress on your gardenia. Many first-time gardeners mistakenly think that additional watering equates to faster recovery; however, over-saturation can cause root rot, which might lead to additional curling. Observe the moisture level, allowing the top inch of soil to dry out before the next watering check; if it feels dry, that’s your cue that the plant might need more water. Depending on your garden’s climate, check twice a week at first to ensure you’re not missing out on signs of dehydration just after recovery efforts. If you notice persistent curling despite changes to your watering routine, explore the possibility of pests interfering with overall plant health.
Step 4 – Shield Gardenias from Frost During Winter
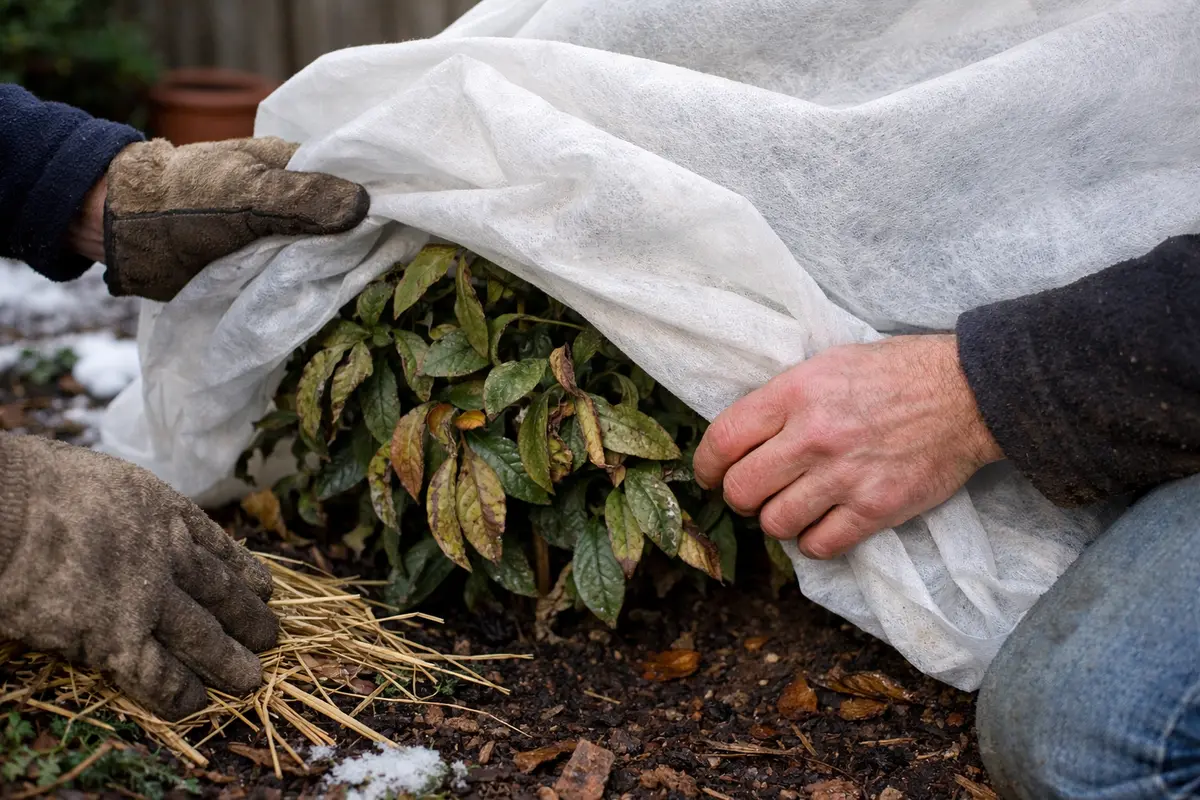
Start by covering your gardenia plants with protective fabric or mulch before frost hits. Doing so locks in warmth and moisture, preventing the leaves from curling and allowing the plant to maintain its health through colder temperatures.
Temperature drops below freezing create stress for gardenias, leading to curled leaves. By adding protective layers in advance, you create a barrier against sudden frost, reducing the likelihood of frost damage, unlike bare plants that suffer more significantly in cold snaps. If you notice leaves curling despite protection, check for excessive moisture or damp soil, which can also lead to curling.
As winter progresses, adjust your protective methods based on weather patterns. If you anticipate prolonged bitter cold, reinforce your mulch insulation to help retain soil temperature. Alternatively, if you face milder weather, a lighter cover may suffice, allowing the plant to breathe without risking frost injury.
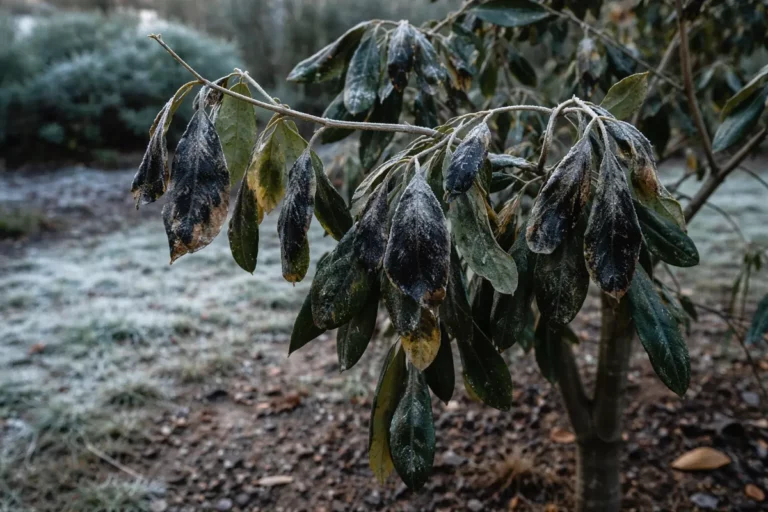
Cold winds and sudden frost can desiccate the leaves, causing them to curl and droop. Protecting your gardenia creates a microclimate that helps retain moisture in the soil and surrounding air, thereby addressing the root cause of the curling leaves. If you notice a comparison between wilting leaves in exposed plants and healthy leaves in covered ones, you can confirm the effectiveness of your protection strategy.
In early spring, maintain this protection at night while temperatures are still fluctuating. As the season progresses and temperatures stabilize, you can gradually remove the coverings. If nights are still cool late in the season, check for frost advisories and be ready to cover the plants again to reinforce their defenses.
Frost conditions often trigger curling when leaves are exposed to sudden temperature drops, leading to dehydration. By covering the plants, you create a microclimate that protects them from freezing and allows moisture retention, which stabilizes the leaves and keeps them healthy. Layering the cloth rather than using a single layer can add additional insulation, particularly if nighttime temperatures dip dramatically.
After that, as temperatures fluctuate in early spring, consider using a protective mulch around the base to enhance insulation. If mild temperatures are followed by quick cold snaps, mulch can retain soil heat, preventing additional stress that may lead to leaf curling. When applying mulch, be sure to remove any winter coverings first to prevent overheating and facilitate healthy soil aeration. An added bonus is that organic mulch can improve soil nutrients over time as it breaks down.
Frost protection is not just a seasonal change; it’s a critical aspect of garden care because gardenias are particularly susceptible to cold weather stress. When temperatures drop suddenly, leaves can curl quickly, leading to long-term damage if not addressed promptly. Implementing this routine, particularly in early winter, not only aids in preventing immediate frost damage but also fosters a healthier and more resilient plant. For added insulation, consider pairing your wrapping with mulch, laid 2 to 4 inches thick around the root zone to stabilize temperatures and retain moisture. A common oversight is failing to adjust coverings on warmer days; always remove protective cloths if temperatures rise drastically during the day to prevent heat build-up.
Adapting your frost protection based on seasonal temperature changes is vital for optimizing your gardenia’s health. During especially harsh winters, it might be necessary to increase the thickness of fabric layers or introduce supplemental heat sources, such as outdoor lights placed beneath the cover, to provide warmth. Installing a small, sheltered greenhouse effect around your gardenia might also work effectively in extreme conditions. Consistent monitoring of weather forecasts can prepare you for adverse conditions, allowing for timely protective measures against expected frosts so your plant doesn’t take a hit while you’re unable to shield it.
Step 5 – Check for New Growth on Gardenia Leaves
Recheck your gardenia every 2-3 days for signs of new growth emerging from previously affected leaves. After the implementation of the previous recovery steps, you should begin to observe fresh, green shoots developing or existing leaves regaining their firmness within a week. This progress indicates that your gardenia is responding positively to the recovery actions taken, making the initial distress worthwhile. Look for signs that specific branches are beginning to produce new flowers or leaves; this indicates overall health.
Successful recovery from frost damage should include seeing the leaves regain turgor, a pivotal sign that optimal moisture levels have been restored. Healthy plants will exhibit signs like brightening leaf color and some growth of new shoots over time, demonstrating their ability to rebound from environmental stressors. Conversely, if you see yellowing or continued curling, it may hint at recurring issues, such as root-related problems or nutrient deficiencies, which need immediate attention to prevent long-term damage from being established. Checking for pests is also crucial, as they can impede recovery.
If recovery is not evident within this week, consider reassessing your watering frequency and checking for pest infestations that may complicate recovery efforts. For example, if you notice sticky residue on leaves, this could indicate aphids, and you should rectify the situation with appropriate insecticidal soap that can eliminate them without further stressing the plant. Inadequate care can lead to setbacks, so remain proactive by making adjustments quickly if desired signs of recovery fail to occur—it truly makes a difference regarding plant health and vitality. If your gardenia still appears stressed despite proper care, a soil test can reveal nutrient deficiencies that may require specific amendments.
FAQ
How long does it take for gardenia leaves to recover from frost damage?
Recovery time can vary but generally ranges from a few days to a couple of weeks, depending on the extent of the damage and the care provided. If the roots are healthy, and the proper hydration levels are maintained, you can expect noticeable improvements in leaf health within the first week. However, some varieties may require a bit longer, especially if they’ve been significantly stressed. Frequent checks can help gauge recovery stages and ensure you are on the right track.
Will my gardenia recover fully after frost damage?
Yes, gardenias can recover fully with timely intervention and proper care after frost damage. Regular monitoring, appropriate watering techniques, and protective measures will help the plant regain its strength and beauty once again. However, severe or prolonged damage may result in slow recovery, potentially taking several weeks or even months to return to its previous health. If you notice lengthy periods without sign of recovery, reevaluating your care routine is prudent.
Should I remove any damaged leaves from my gardenia?
Yes, you should remove any severely damaged leaves, as this helps the plant focus energy on recovery and redirect nutrients toward new growth. Use clean, sharp scissors to carefully trim these leaves to avoid further stress to the plant. Make sure your scissors are sanitized to prevent transferring any diseases. Ensure you dispose of the trimmed leaves properly to prevent the potential spread of pests or diseases in your garden, protecting neighboring plants in the process. If you observe a significant amount of leaf loss, be aware that the plant may need extra support through increased nutrition or humidity.