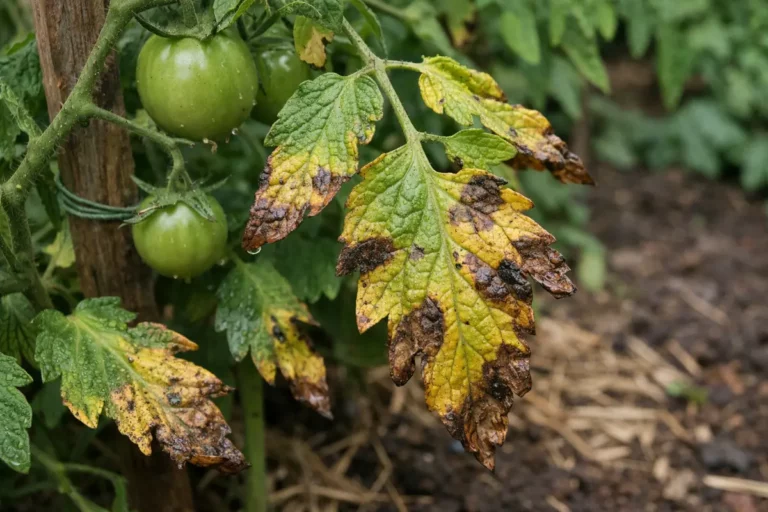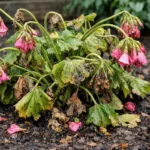
You may notice that your tomato plants are turning yellow after heavy rains, which is why you need to know what to do when tomato plants turn yellow from overwatering. This yellowing is typically a result of excess moisture in the soil leading to root stress and nutrient deficiencies. If left unaddressed, the problem can spread and weaken the plant, making it harder to fix while reducing overall yields. Fortunately, you can improve the situation now by adjusting your watering habits and inspecting the soil for proper drainage.
Step 1 – Trim Yellowing Tomato Leaves Quickly
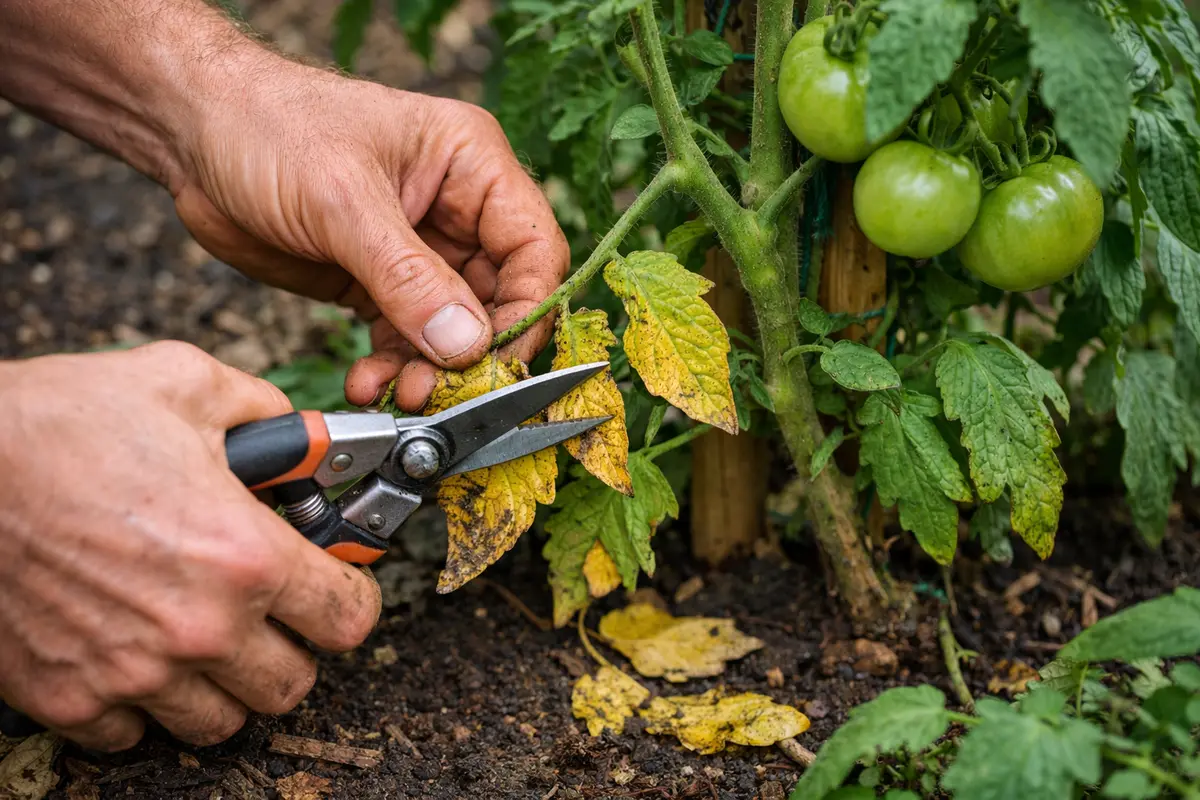
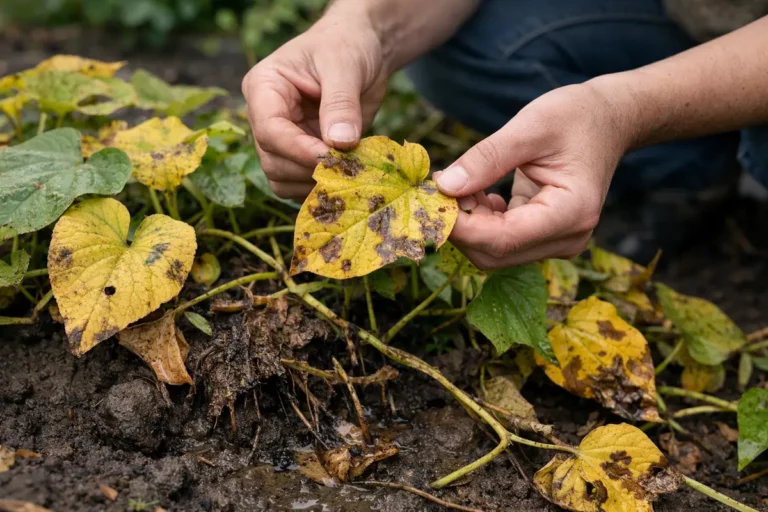
Start by cutting away any yellowing leaves from your tomato plant to prevent the issue from spreading. You should immediately see reduced stress on the plant as it begins to redirect nutrients to healthier leaves.
Inspect for any signs of root rot or mushiness among the roots as you prune. If you encounter damaged roots, trim them off with sterilized scissors and repot the plant in dry, fresh potting soil. This action is crucial, as yellow leaves indicate a possible stress response due to overwatering, which can limit the plant’s ability to absorb nutrients.
In contrast, if the plant shows yellow leaves but the roots are firm, focus on adjusting your watering regimen without risking further root damage. If the yellowing persists without signs of rot, check the soil moisture level and adjust your watering practices accordingly.
Once, a gardener faced significant plant loss by delaying action on yellow leaves. They noticed root rot but waited an extra week to act, ultimately losing several healthy plants. This highlights the importance of immediate intervention as it can prevent further decline and promote recovery.
By promptly trimming away yellowing leaves, you prevent the plant from allocating resources to struggling areas, allowing it to concentrate on healthy parts instead. Additionally, yellowing leaves can be a sign of disease that could spread quickly; therefore, regular inspections after heavy rain are essential.
A common pitfall is assuming yellow leaves will revive on their own. If neglected, these leaves can attract pests, compounding the problem. Swift removal is key; ensure that your gardening tools are sanitized to protect against introducing pathogens.
Step 2 – Diagnose Overwatering Effects on Tomato Roots
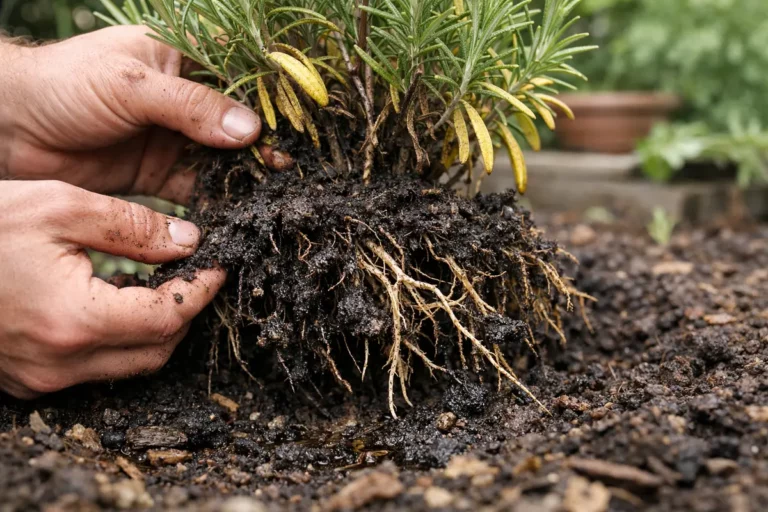
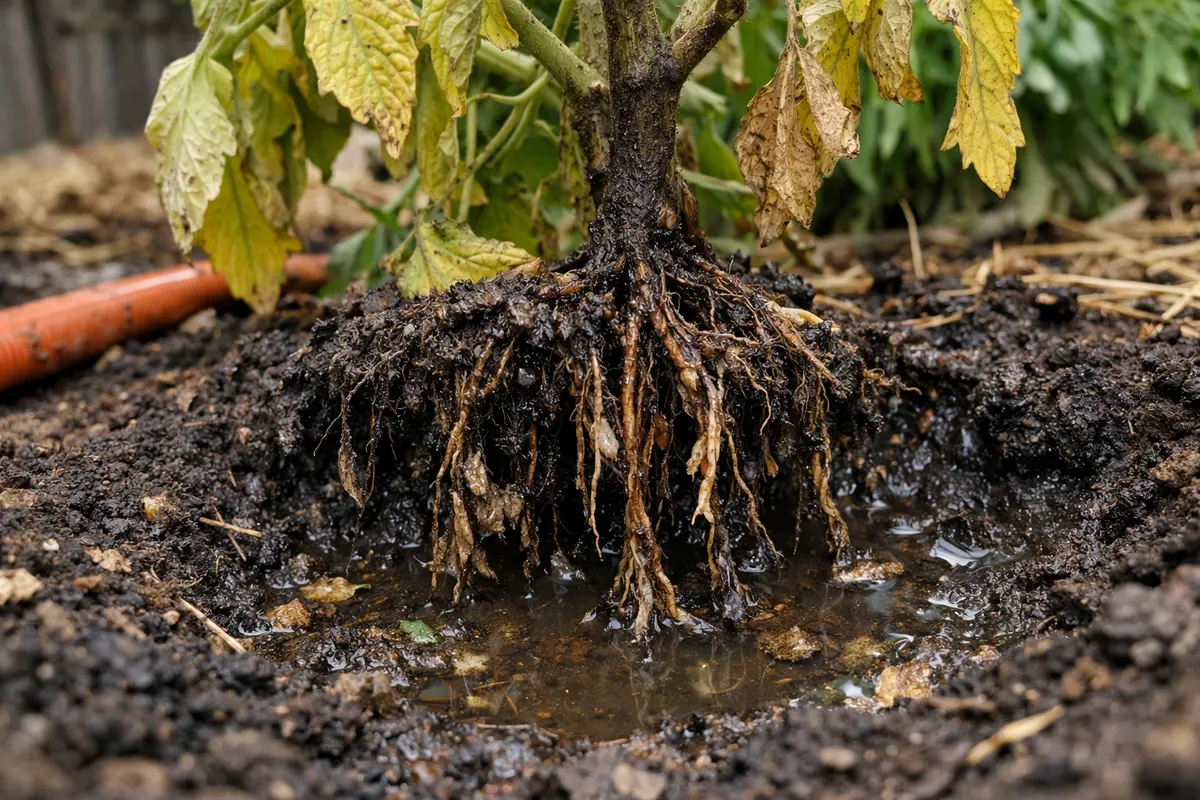
Start by inspecting the roots of your tomato plants to determine the extent of overwatering damage. You will be able to observe either healthy white roots or dark, mushy roots, which indicate a problem. Overwatering occurs when the roots are submerged in excess moisture, suffocating them and preventing the uptake of essential nutrients. Additionally, roots become overwhelmed, promoting conditions ideal for root rot or fungal development, which further complicates recovery.
To correct this issue, gently remove the plant from the soil and visually inspect the roots. Healthy roots should be firm and light in color; if you encounter roots that are dark and mushy, you need to trim away the affected parts. After pruning, repot the plant in fresh, well-draining soil to promote recovery and health. If you find that the roots don’t show any signs of rot and remain firm, evaluate your watering practices. Implement a finger test by inserting your finger into the soil; if it feels moist below the surface, hold off on watering until the top inch dries out. Ensure that your containers have proper drainage holes to mitigate excess moisture accumulation. This adjustment will create a balance in soil moisture, allowing for healthy root development.
Moreover, if you notice a foul odor emanating from the soil, it’s a sign that anaerobic conditions have set in, which can further harm root health. In that case, consider repotting with dry soil. Maintaining optimal aeration through drainage materials like perlite can help prevent future overwatering issues. For enhanced drainage, use pot feet to elevate containers above wet surfaces or choose potting mixtures designed for better airflow, ultimately supporting the recovery of your tomato plants.
Step 3 – Revive Tomato Plants with Nutrient Boosting

Start by drastically reducing the frequency of watering your tomato plants, allowing the soil to dry out to a depth of at least two inches before watering again. Immediately check for signs of progress such as greener leaves, improved leaf strength, and new growth emerging from the tops and sides of the plants within a week or two.
In the context of recovery, tomato plants generally start showing noticeable improvement one to three weeks after adjusting watering habits. Healthy regrowth will include vibrant green leaves and a return of flowering, while slow recovery may indicate persistent root rot or insufficient light. If the soil remains consistently soggy, consider providing additional drainage or relocating the plants to a sunnier spot.
Avoid the mistake of overcompensating by adding more fertilizer or water during recovery, as this can exacerbate the damage from overwatering. If leaves remain yellow despite soil drying, check for pests that may hinder recovery, as infestations can mimic symptoms of overwatering. Monitor watering habits closely, and adjust accordingly to prevent future issues.
Follow up with nutrient applications every two weeks, adjusting based on how vigorously your plants respond. Ideal recovery indicators include rich green foliage and firm stems, clearly contrasting with the previous yellowing. If you notice continued yellowing or no new growth, inspect for soil conditions—excess moisture can hinder progress. A good practice is to use a balanced fertilizer, such as a 10-10-10 NPK blend, starting with 50% of the recommended dosage to avoid overwhelming the recovering roots.
Be cautious not to over-fertilize, as this can result in lush growth at the cost of fruit production; signs of nutrient burn, like brown leaf tips, indicate a need for immediate reduction in fertilizer. If nutrient excess occurs, cease feeding for a short period, allowing the plant to stabilize. Monitor closely for signs that indicate the necessity for adjustments, such as stunted growth or abnormal leaf coloration, which may prompt you to slowly introduce further nutrients.
Recovery typically spans one to three weeks. Ensure your tomatoes receive adequate sunlight and moderate temperatures, which can expedite their return to health. If not improving, check the drainage conditions; poor drainage could be contributing to ongoing stress. Pay attention to how the recovery progresses—significant improvement will include not just greener leaves, but also robust stems that can sustain future fruiting.
Step 4 – Implement Proper Watering Techniques for Tomatoes
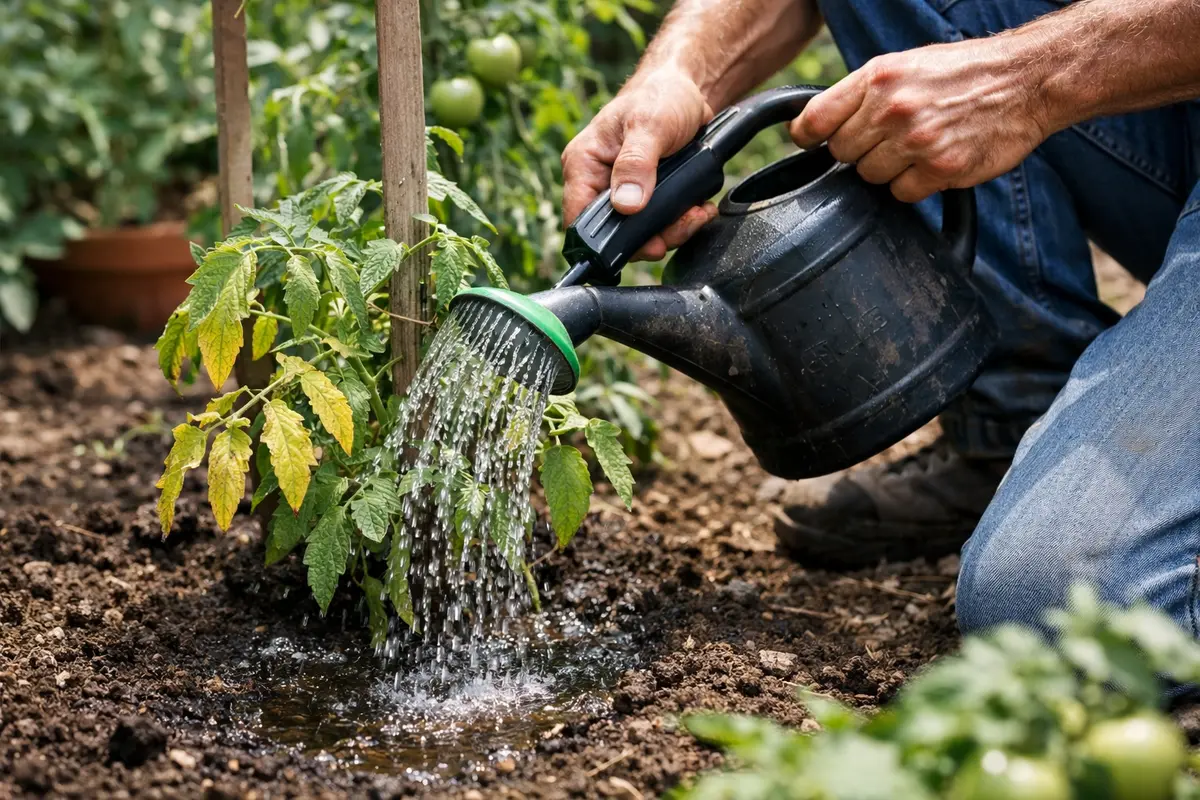
Start by establishing a consistent watering schedule for your tomato plants, ensuring they receive water only when the top inch of soil feels dry. Doing this will prevent the symptoms of overwatering, including yellowing leaves, and should result in a more balanced growth pattern where leaves maintain their green color. Regular checks will help detect moisture issues early on, allowing adjustments before serious damage occurs.
Yellowing leaves often occur due to excessive moisture in the soil, which can be exacerbated by humid conditions or heavy rainfall. When soil remains soggy, it restricts oxygen to the roots, leading to root rot and nutrient deficiencies. By sticking to a watering routine that allows the soil to dry adequately, you address the essential requirement for proper root oxygenation and nutrient uptake. During particularly dry spells, implement a deep watering approach, allowing water to penetrate sufficiently to reach deeper roots without creating a surface puddle that promotes root suffocation.
During particularly rainy seasons, consider using raised beds or containers to enhance drainage and reduce the risk of overwatering. Additionally, applying mulch can help retain soil moisture without creating waterlogged conditions. If you notice persistent yellowing, check for compacted soil, which could inhibit drainage and lead to similar issues. Mulch can also help mitigate water evaporation under warm conditions, balancing the moisture levels more effectively. Reinforcement of drainage methods—such as adding drainage holes in pots or creating ditches around garden beds—can help manage excess water during torrential rains.
Tomatoes thrive when their environment allows for moisture retention between watering sessions, preventing root saturation. Setting a watering schedule helps maintain this balance and encourages deeper root growth. Ensure that your pots or garden beds have proper drainage; this is often where people slip up when it comes to overwatering issues. If water pools at the bottom of a pot or garden bed, it could suffocate roots and induce yellowing. Empty saucers under pots regularly if they collect water, draining any excess to safeguard root health during extreme moisture events.
During hot summers, test the soil moisture every few days, adjusting watering frequency as needed. If rainfall is frequent, reduce your watering habit to avoid excess moisture issues that lead to yellowing. Moreover, utilizing mulch can help regulate moisture levels and temperature in the soil, slowing evaporation while preventing crusting that can impede root access to water. Keeping an eye on the weather can also help you adapt your routine to seasonal changes; a sudden drop in temperature might warrant watering less to prevent freezing roots. Precision in your watering practices not only enhances the plant’s recovery potential but contributes to higher fruit yields in the growing season.
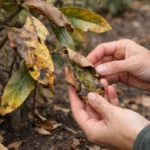
Step 5 – Inspect Foliage for New Yellow Threats Weekly
Start by checking the moisture level of the soil around your tomato plants. Use your finger to dig about an inch deep; if the soil feels constantly wet beyond that point, consider adjusting your watering schedule to once every few days, allowing the topsoil to dry slightly between waterings. Recheck the soil moisture in two to three days to see if the yellowing begins to diminish.
A fully recovered tomato plant will showcase vibrant green leaves with a smooth texture, and new growth should emerge at the tips of the stems. In contrast, if the problem returns, you might observe a dull yellowing of leaves along with a wilting appearance, with leaves feeling crispy to the touch. If the leaves are drooping but still have a bright green hue, this might suggest too much moisture, requiring immediate action.
If yellowing persists despite correcting the watering practices, consider inspecting the root system for signs of rot or pests. If the roots appear mushy, it may be necessary to repot the plant with fresh, well-draining soil. Alternatively, if there are no visible issues and the yellowing continues, consulting a local gardening expert can provide further tailored solutions.
A fully recovered tomato plant displays vibrant green leaves, firm stems, and vigorous growth with healthy blooms. In contrast, early signs of the problem returning include a yellowing of new leaves at the tips and a soft, wilty texture to the stems. If you notice the lower leaves beginning to droop without recovering, it may be an indication of moisture issues returning; check the soil conditions immediately.
If the yellowing persists despite managing your watering schedule, consider adjusting the plant’s environment by increasing airflow or using a well-draining potting mix. If symptoms worsen, it may be time to transplant the tomato into fresh soil or a larger container to alleviate root suffocation. Regular observation will be key in determining further actions necessary to save the plant.
A fully recovered tomato plant displays vibrant, deep green leaves that are firm to the touch, indicating proper hydration. In contrast, if you notice yellowing leaves with a slightly mushy texture, this may suggest that the issue is returning and requires immediate attention. If the plant’s stems begin to show signs of wilting while the soil is still moist, reassess your watering practices.
If the yellowing persists despite adjusting your watering, consider checking for root rot. Carefully remove the plant to examine the roots for black or mushy sections. If you identify rot, trim away the affected roots and repot the plant in fresh, well-draining soil to promote recovery.
A fully recovered tomato plant will display vibrant green leaves, firm to the touch, and show signs of new growth, such as fresh leaf shoots. In contrast, if signs of yellowing reappear—particularly on the lower leaves or spreading throughout the plant—this indicates the issue may still be present, possibly exacerbated by inconsistent watering. If the leaves feel limp or have a mushy texture while turning yellow again, immediate action is required.
If the yellowing continues despite adjusting your watering routine, consider improving drainage by amending the soil with organic matter to enhance aeration. If the problem persists, check for root rot by gently uprooting the plant and inspecting the roots; black or brown, soft roots signal a severe issue that may require repotting in fresh, dry soil.
A fully recovered tomato plant will display vibrant green leaves, firm stem structure, and healthy new growth. In contrast, if the problem returns, you may notice a reappearance of yellowing leaves and a mushy texture, especially at the tips or edges. If the plant feels overly limp or shows spots, these are signs of ongoing moisture stress versus signs of recovery like upright leaves and new shoots sprouting from the stems. Identifying persistently yellowing leaves and differentiating them from naturally older foliage is essential for effective management.
If yellowing persists despite adjusting watering habits, consider repotting the plant into fresh, well-draining soil to improve aeration and drainage. If problems continue after repotting, it might be time to assess for root rot or other underlying issues, potentially requiring more drastic measures like cutting back affected roots or treating with fungicides. Another solution involves removing the top layer of soil to replace it with fresh compost, promoting renewed nutrient availability.
A fully recovered plant will have vibrant green leaves, sturdy stems, and show signs of new growth. As you monitor weekly, look for healthy foliage and avoid any lingering yellowing or wilting, which may signal a recurrence of water stress. Make sure to differentiate between older yellow leaves that have been pruned and new symptoms developing to avoid confusing the situation. A small notebook dedicated to tracking plant activities can help you identify critical patterns over time. When assessing recovery, take care to observe overall plant vigor, noting any discrepancies between individual plants that can indicate variations in responsiveness to care.
If the yellowing resumes despite conscientious care, it may be time to consult a local gardening expert or consider transferring the plant to another spot with potentially better drainage and light conditions. A spot that receives morning sun and afternoon shade often facilitates better drainage and growth. Additional signs to watch for include abnormalities in leaf shapes or sudden leaf drop, which may indicate deeper hydric stress or disease, requiring more decisive action. Keeping accurate records of each plant’s condition can illuminate which changes correlate with positive or negative responses, streamlining care and intervention strategies in the future.
FAQ
How long does it take for tomato plants to recover from overwatering?
Recovery timelines can vary, but typically, you can expect to see improvements within a week after implementing corrective actions. Look for increased green foliage and new growth, which are signs of recovering health. Factors such as temperature, light, and overall plant health can affect recovery time, with warmer conditions accelerating processes.
Will I need to remove all yellowing leaves on my tomato plants?
It’s important to remove only severely affected yellow leaves while leaving some healthier foliage to help the plant recover. Over time, new growth will replace any leaves you cut, fostering healthier development. Be sure to assess the health of the remaining leaves—if they are also becoming discolored, further intervention may be warranted to prevent spreading issues.
Why do my tomato plants keep turning yellow after overwatering?
Repeated yellowing could signal ongoing issues with soil drainage, watering practices, or root health. Ensure that your watering habits are consistent and that the soil remains well-drained to prevent redeveloping yellow leaves. More advanced diagnostics may involve inspecting root structure or evaluating pH levels if the problem persists despite corrective measures.