You may notice your tomato plants showing yellow leaves after heavy rain, which is a clear sign that you need to know what to do when tomato plants have yellow leaves after heavy rain. This yellowing often indicates stress from waterlogged soil or nutrient imbalances, leading to potential drooping and damage. If left unaddressed, the issue can spread and weaken the plant, making recovery harder to fix, but it’s possible to improve the situation now by adjusting watering practices and inspecting soil conditions.
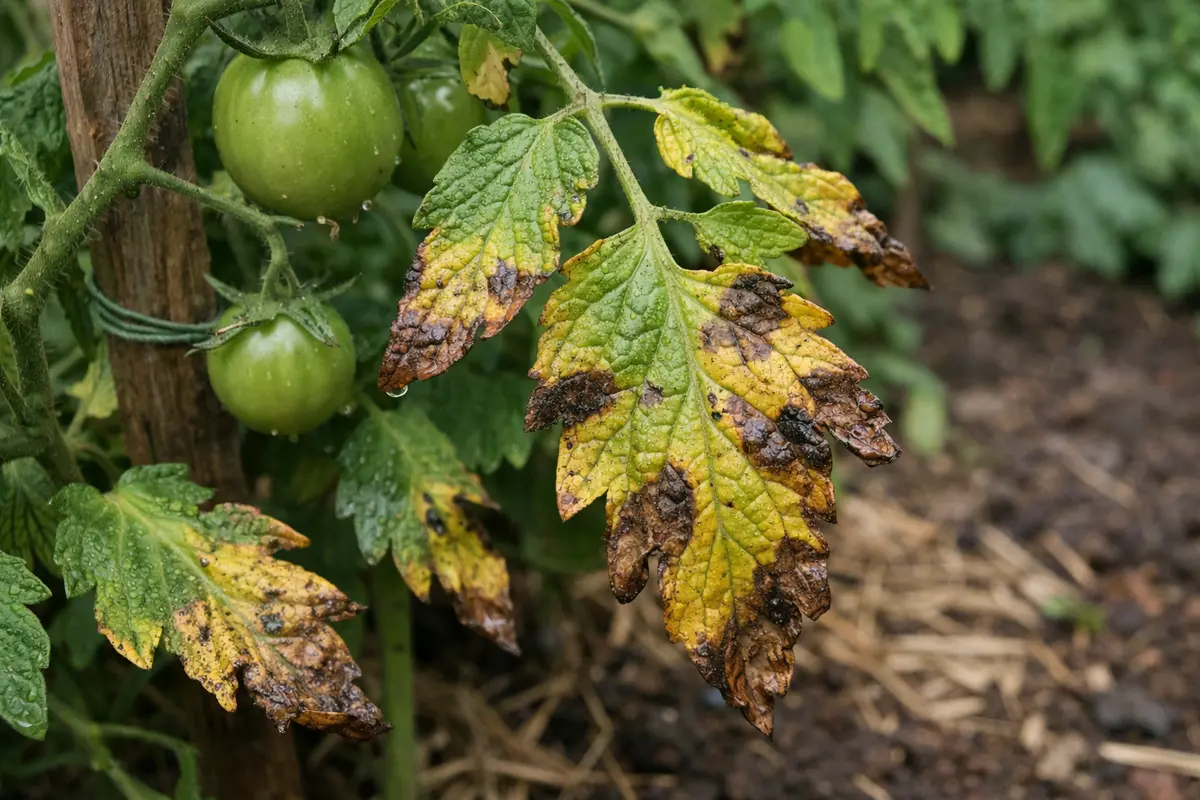
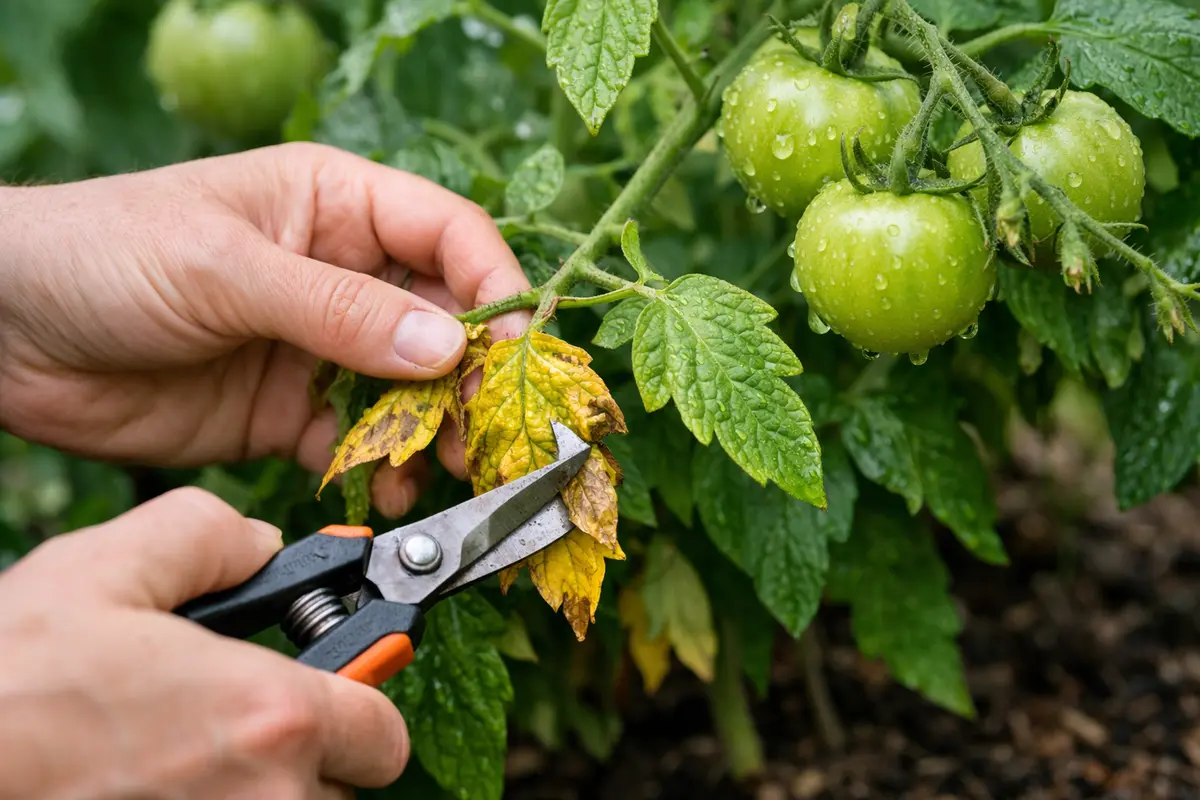
Step 1 – Trim Yellowing Tomato Leaves Promptly
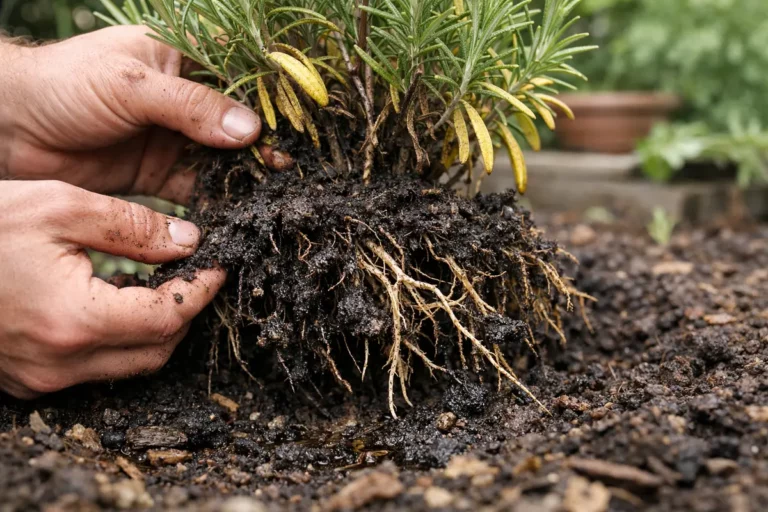
First, check the soil moisture around your tomato plants after the heavy rain. If the soil is waterlogged, gently loosen it around the base of the plants to improve drainage and reduce root rot risk. After a few hours, you should notice the yellowing leaves starting to stabilize or show early signs of recovery, as moisture levels balance out. Excess moisture often leads to problems like lawn yellow spots overwatering.
Acting quickly is crucial because prolonged waterlogged conditions can lead to root suffocation. When roots lack adequate oxygen due to excess moisture, they can begin to die off, causing nutrient uptake to diminish. In contrast, tomatoes that receive a prompt response to heavy rain can bounce back more efficiently, retaining their green color and vigor.
An example of effective timing is when a gardener quickly aerated their soil after a storm and noticed their plants revived within days, while another delayed intervention resulted in widespread yellowing and many lost plants. If the leaves stay yellow despite drainage efforts, check for potential root rot signs, like a foul smell emanating from the soil. In poor drainage conditions, plants may also develop root rot in potted herbs.
Quick action is crucial because yellow leaves indicate that the plant is struggling to absorb nutrients and may be close to suffering from further complications like rot or disease. By removing the affected leaves, you decrease the likelihood of further stress and promote better air circulation around the plant. Yellow leaves often occur due to prolonged exposure to saturated soil, where nutrient absorption is hampered. If left too long, these yellow leaves can harbor pests or pathogens that may affect the healthy parts of the plant.
A common mistake gardeners make at this stage is to delay pruning, thinking the plant will recover on its own. In my experience, I’ve seen plants deteriorate further in such situations, leading to a broader impact on the healthy parts. Swift pruning can lead to a noticeable uptick in vigor within days, helping to expedite recovery. Additionally, ensure you are using clean, sharp pruning shears to avoid introducing any infections to the plant. If you fail to prune correctly, you might notice a proliferation of yellow leaves across the plant in the following weeks, indicating a broader issue at play.
Step 2 – Assess Wet Soil Around Tomato Roots
First, check the soil moisture levels around your tomato plants; if the soil is overly saturated, adjust drainage by mounding the soil and, if necessary, relocating the plants. After making these adjustments, you should observe an improvement in leaf color and overall plant appearance within a week, as the roots begin to receive adequate oxygen.
The yellowing of tomato leaves after heavy rain often indicates waterlogged soil, leading to root oxygen deprivation and subsequent nutrient deficiencies, particularly nitrogen. As roots struggle to absorb water and nutrients, the plant may express this stress through yellowing leaves, starting with the lower foliage. Compare this to plants that have consistent soil moisture but good drainage, which typically show vibrant green leaves.
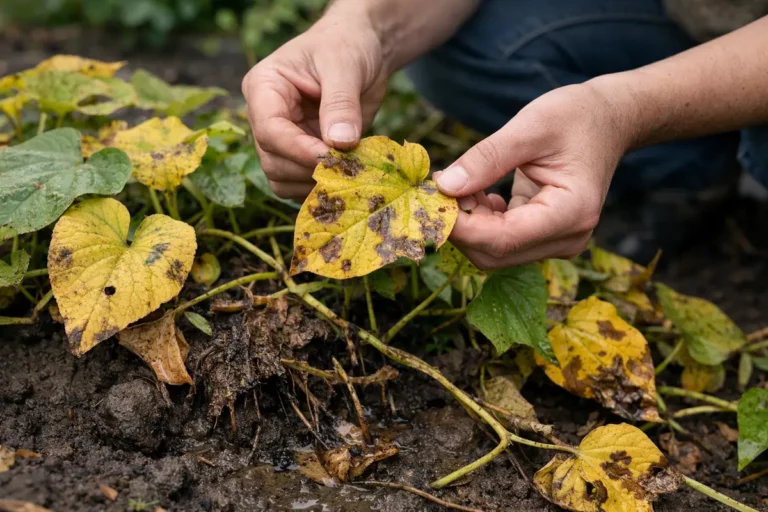
If the soil smells sour, indicating anaerobic conditions, amend it by adding organic matter or peat moss to improve drainage and aeration. Alternatively, if the yellowing is accompanied by brown spots and a wilting appearance, inspect for early signs of disease such as bacterial wilt, which would require a different treatment strategy to manage the infection effectively.
Wet soil can lead to root rot, as tomato plants thrive in well-draining soil. Over time, prolonged exposure to moisture leads to anaerobic conditions, where the essential oxygen needed for root respiration is lacking. If the soil is soggy, tomato roots struggle to transport nutrients, causing the leaves to yellow. Noticeable symptoms of waterlogged conditions are often seen in the texture of the soil, which can feel overly sticky or dense. You might also detect a sour odor, indicating root rot has already begun in severe cases. Excess moisture often leads to problems like root rot in potted cacti.
If you discover that the soil is excessively wet, it’s crucial to consider adjusting your watering schedule. For example, if your soil drains poorly, such as in clay-heavy regions, switching to a raised bed or amending the soil with organic materials can significantly enhance drainage. Creating a mixture with elements like peat moss or compost can improve structure and airflow around the roots. Acting on this observation prevents further stress on the plant. In cases of severe saturation, it may also be necessary to create trenches around the plants to enhance drainage or utilizing porous mulch to facilitate evaporation. If the issue persists without remedy, the longevity of the plant could be at risk.
Step 3 – Boost Tomatoes with Nutrient-Rich Fertilizer

Start by removing any severely yellow or wilting leaves while ensuring the soil is well-drained and not overly soggy. As the newly exposed leaves receive more light and airflow, you should begin to see a gradual return of vibrant green color within a week, indicating healthy growth is resuming. Excess moisture often leads to problems like root rot in potato plants.
Recovery from yellowing due to heavy rain may take one to three weeks, contingent on environmental conditions. In well-drained soils with adequate sunlight, you should notice sturdy, new leaf growth emerging alongside the original green leaves. If the soil remains too wet, however, growth might be significantly hindered, leading to a slower recovery—check for drainage to confirm your soil’s health.
Avoid overcompensating with additional water or fertilizer during recovery, as this can exacerbate stress on the plants. Instead, focus on adjusting watering based on soil moisture—too much nutrient input can lead to burnt roots, while insufficient nutrient support might stall new growth. If the plant shows continued yellowing despite corrected watering, check for root rot or fungal issues in the soil.
Fertilizer application enhances nutrient availability, often depleted during heavy rains. A well-balanced fertilizer, rich in nitrogen, phosphorous, and potassium, provides the necessary elements for recovery. As the roots absorb these nutrients, you will gradually notice the leaves turning a healthier shade of green, signaling recovery. It’s also important to ensure that you are dispersing the fertilizer evenly around the root zone, as concentrated areas can lead to burn or ineffective use.
Be cautious, however, as over-fertilization can lead to nutrient burn, further stressing your plants. A common mistake during recovery is applying too much fertilizer in hopes of quick results; rather, stick to the recommended dose for optimal recovery. Timing matters too—applying fertilizer during warm and sunny days often boosts nutrient uptake dramatically compared to cooler weather conditions. If rain is expected soon after application, consider waiting until the risk of saturation passes. Additionally, if after a couple of applications you don’t see any improvement, you might have a more significant issue at hand, such as an underlying root problem or a soil health issue, which will require further investigation.
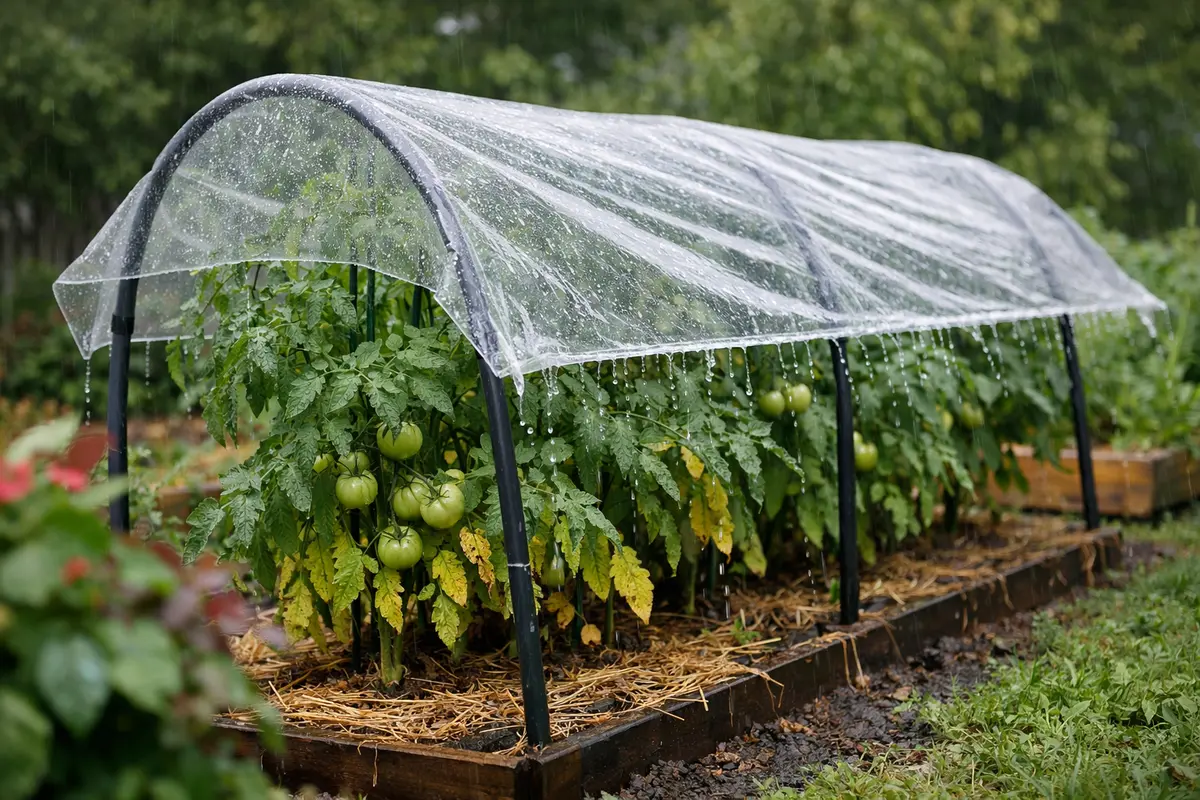
Step 4 – Shield Plants from Excess Rain in Future
Start by ensuring that your tomato plants are planted in well-draining soil and consider adding organic matter, such as compost, to enhance drainage. With this adjustment, you should see fewer instances of yellowing leaves following heavy rain, as the roots will be less likely to sit in waterlogged conditions. In poor drainage conditions, plants may also develop root rot in indoor succulent.
Excess moisture from heavy rain can lead to root rot and nutrient deficiencies, both of which cause yellow leaves. When plants are in saturated soil, they struggle to access essential nutrients, which manifests as yellowing. By improving drainage and soil structure, you effectively minimize these issues, keeping the roots healthy and nutrient uptake efficient. If you notice yellow leaves but the soil is dry, check for any root damage or pest infestations.
During the rainy season, consider using mulch around the base of the plants to further enhance drainage and regulate soil temperature. This added layer can help prevent water accumulation, especially in heavy downpours, thus reducing the risk of yellowing leaves from excess moisture. Additionally, adapt your watering schedule based on rainfall, ensuring that you do not overwater when wet conditions are present.
Heavy rains lead to saturated soil and increased diseases like blight. Protecting the plants minimizes their exposure to excess moisture, ensuring that the roots do not drown and absorb the nutrients effectively throughout different weather patterns. This approach addresses the underlying cause—excess moisture—and prevents recurrence of previous issues. Use lightweight materials like plastic sheeting or cloth for canopies, which can easily be removed when not needed, and ensure these are well-ventilated to avoid heat stress on sunny days.
In seasons where heavy rains are predicted, maintaining a consistent barrier will significantly boost both growth and yield. Depending on your location, consider combining your barrier method with consistent soil amendments, such as organic compost that enhances drainage without sacrificing nutrient availability. This layered approach solidifies a protective strategy against future storms. Remember, regularly inspecting your barriers for wear or damage is vital too; if these aren’t functional, they won’t provide the necessary protection, which could lead to ongoing issues.
Step 5 – Inspect for New Yellowing Leaves Weekly
Start by checking your tomato plants at least every few days after heavy rain. Look for signs of recovery such as new green growth at the top of the plant, which indicates they are returning to health. Monitor leaf color; healthy leaves should be a vibrant green, while yellowing should fade. If you notice the yellow leaves are still prominent, recheck the plants weekly for any worsening symptoms.
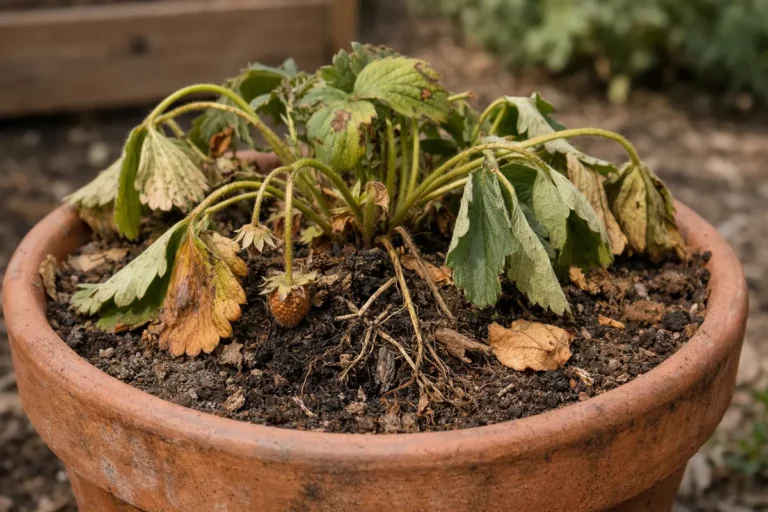
A fully recovered tomato plant will exhibit lush, dark green foliage, along with firm and plump fruit developing if they have started to fruit again. In contrast, early signs of the problem returning include persistent yellowing of lower leaves, which may also feel limp or soft to the touch. If the leaves are crisping up but still yellow, check for excessive moisture in the soil.
If the yellowing returns despite initial steps, take action by adjusting watering practices or improving soil drainage to prevent waterlogging. In addition, inspect for pests or diseases that may have emerged during the heavy rain. If you identify any issues that are excessive or unrelated to water levels, escalate by contacting a local extension service for further advice on managing tomato plant health.
A fully recovered tomato plant should exhibit broad, healthy leaves, with no signs of wilting or discoloration. Early signs of returning problems may include a few yellowing leaves or drooping stems—these cues require immediate action. By maintaining a schedule, you ensure that your plants remain robust and less susceptible to recurring issues like those after heavy rains. Use visual checks as well as tactile assessments; for instance, firm stems that snap when bent indicate vigor, while soft or mushy areas signal distress.
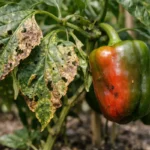
If you notice yellow leaves reappearing, it could indicate continued overwatering, a nutrient imbalance in the soil, or even pest activity. In such a case, reassessing your watering regimen and analyzing soil condition becomes critical. Signs of further problems might include small holes in leaves, which suggest insect damage, or unusual leaf curling—these could indicate pest infestations or disease. If left unchecked, these symptoms can lead to more significant damage, making prompt action essential. For example, if pest activity appears to be affecting recovery, you might need to implement an organic pest control method or consult a local specialist, based on your specific garden conditions.
FAQ
How long does it take for tomato plants to recover from yellowing leaves?
Recovery time for tomato plants can vary; however, you should see improvements within one to two weeks if effective corrective measures are taken. Factors such as temperature, soil conditions, and care practices influence the recovery speed and should be closely monitored for optimal results.
Will yellow leaves spread to healthy parts of the plant?
If the underlying causes, like overwatering or nutrient deficiency, are not addressed, yellow leaves can indeed spread and impact healthy parts. Regular monitoring and prompt action will help reduce this risk and maintain plant health. Always keep an eye out for stress signs that could indicate wider issues that need intervention.
Should I remove all yellow leaves immediately?
It’s advisable to remove only those yellowing leaves that are severely affected. Leaving slightly yellowed leaves might still allow the plant to photosynthesize, aiding in its recovery. Focus on trimming when yellowing becomes significant, but do not over-prune, as this can strain the plant further, especially during recovery.