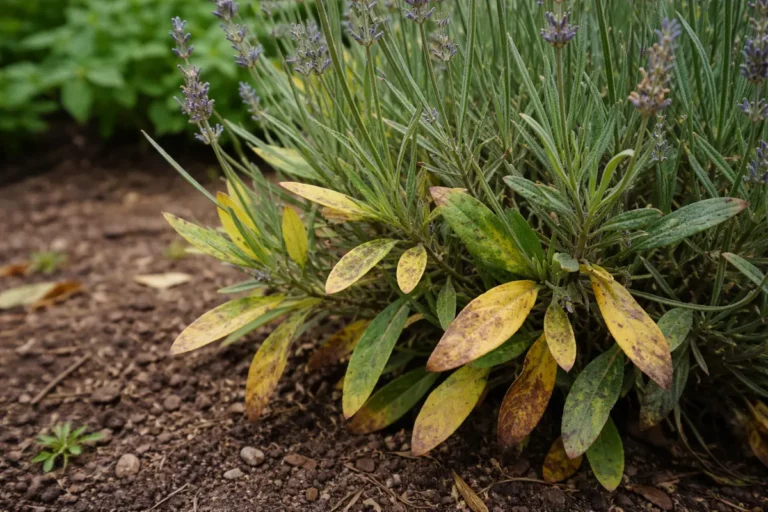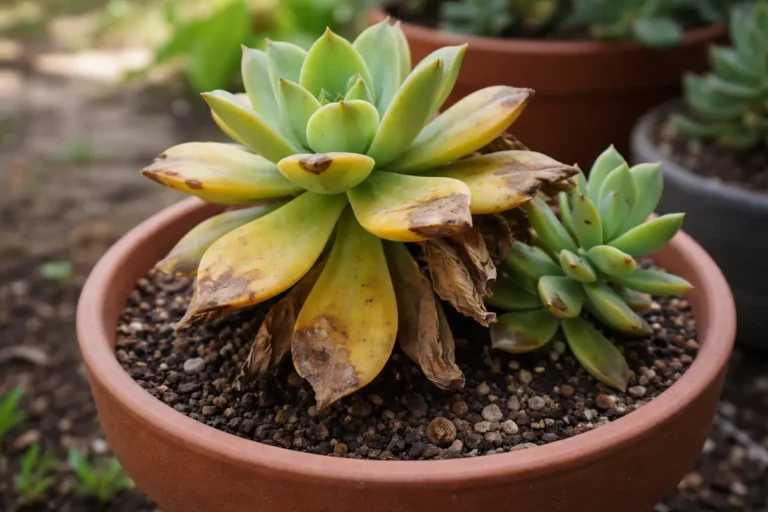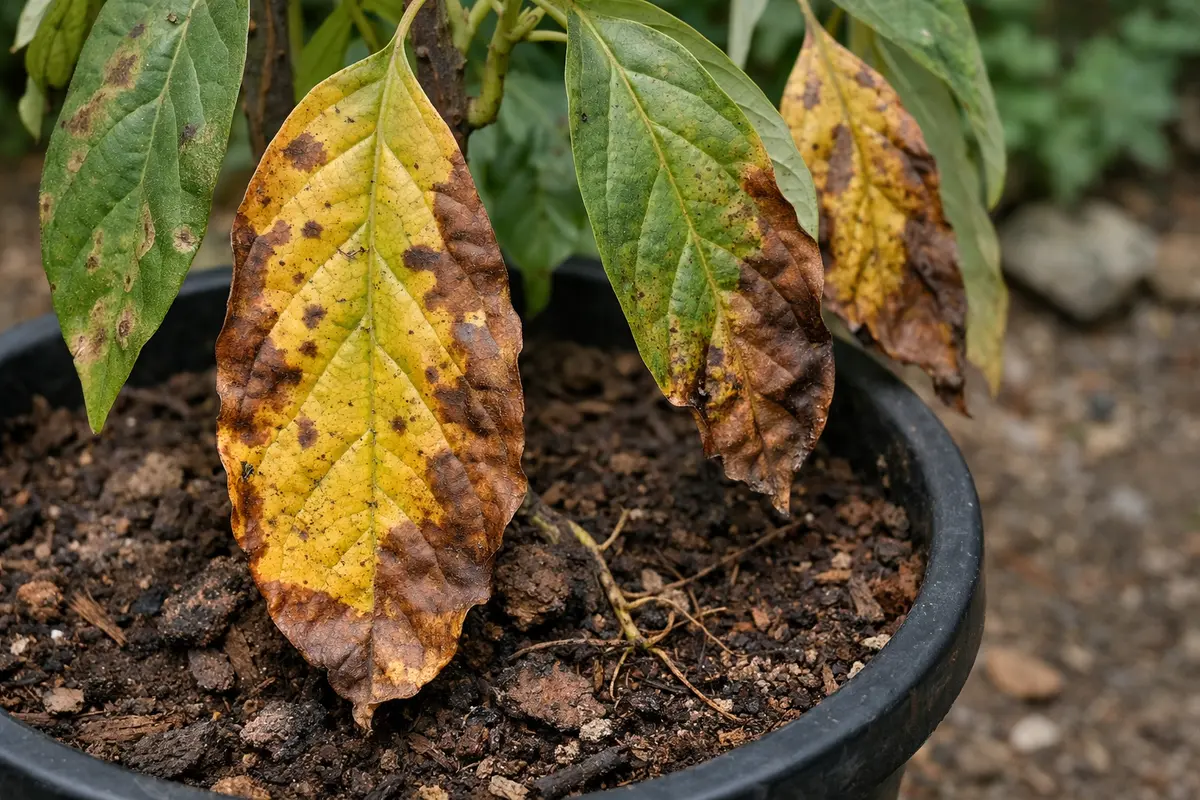
You may notice that your potted avocado starts showing yellowing leaves during summer, which is why you need to know how to stop yellowing leaves on potted avocado during summer. This yellowing is often a sign of nutrient deficiencies or overwatering, leading to wilting and overall poor health of the plant. If left unaddressed, these issues can worsen and weaken the plant, making recovery harder in the long run; however, fixing it is possible now if you inspect the soil, adjust your watering routine, and monitor your avocado’s environment for optimal growth.
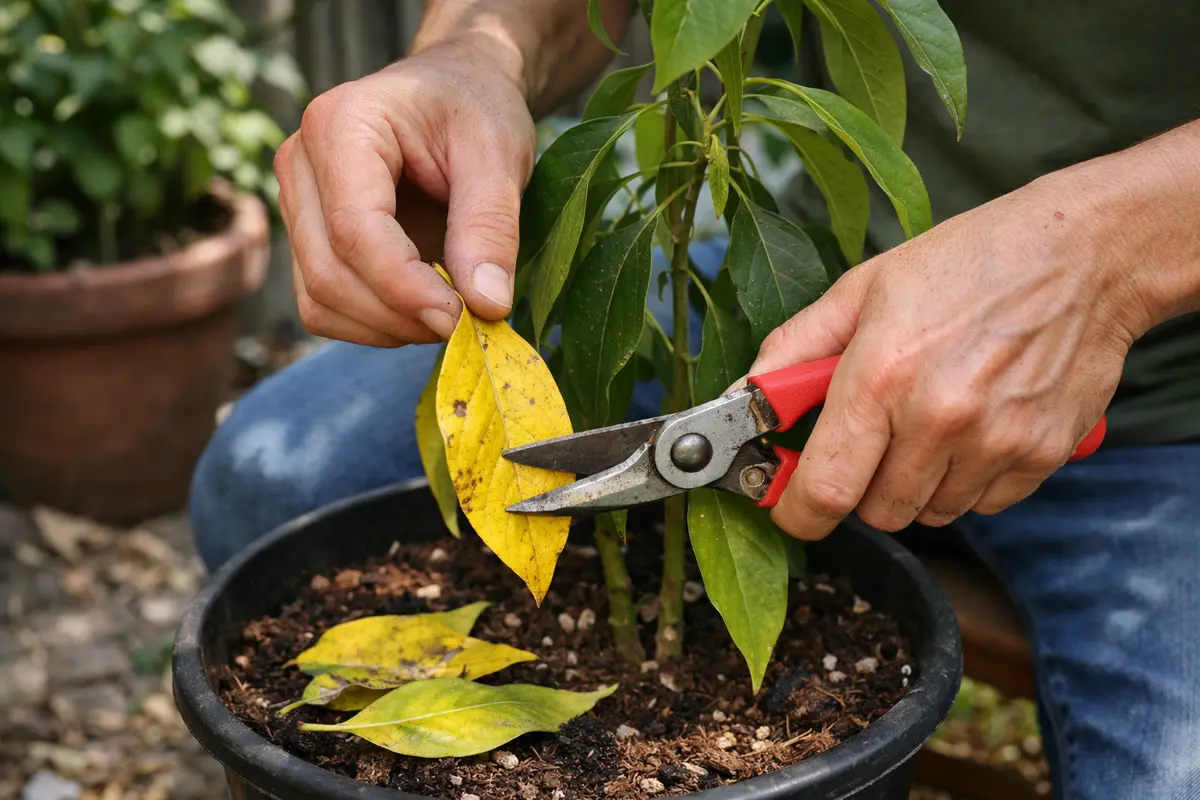
Step 1 – Trim Yellowing Leaves from Avocado
First, inspect the soil moisture level of your potted avocado. Water the plant thoroughly if the top inch of soil feels dry to the touch, ensuring that excess water drains out of the bottom. Within a day or two, you should notice the leaves becoming more turgid and the yellowing may begin to stabilize.
Acting fast matters for your avocado because prolonged dryness can lead to root stress, resulting in nutrient deficiencies that further exacerbate leaf yellowing. If this condition persists, the plant may start dropping leaves, hindering its recovery. Conversely, if you find the soil is overly saturated instead, check for root rot by gently removing the plant to inspect the roots to gauge their health.
For instance, a gardener who noticed yellowing leaves quickly addressed the watering issue and saw a marked improvement within days, while another who waited too long ended up with severely damaged roots and had to begin the recovery process over weeks. A common mistake at this stage is failing to check soil moisture regularly, which can lead to inconsistent watering and unhealthy plants.
Trimming off yellowing leaves is crucial because it reduces the plant’s energy drain. When left intact, yellow leaves can continue to demand resources as the plant tries to sustain them, which often leads to further deterioration. By cutting back these leaves, you’re enabling the plant to concentrate its energy on recovering and promoting healthier growth. Ideally, use sterilized pruning shears for this task to avoid introducing pathogens and infections, which can spread quickly among the healthy sections of the plant. The practice of sanitizing your tools is often overlooked but invaluable for long-term plant health.
A common mistake gardeners make is hesitating to remove yellow leaves, fearing that they might cause further damage to the plant. In reality, those who act promptly usually see noticeable improvements in leaf appearance and overall plant vitality within a few days. If yellowing continues despite trimming, it suggests a deeper issue is at play, such as poor soil quality, pest infestation, or inadequate watering practices—a clear signal that more comprehensive attention is required. Additionally, assess the extent of the yellowing: if it’s only a few leaves, trimming might be sufficient. However, widespread yellowing could indicate systemic issues that necessitate in-depth diagnosis and intervention. If only a couple of leaves show distress post-heatwave, trimming is typically adequate. In contrast, multiple leaves indicating yellowing might point to environmental stressors that need addressing immediately.
Step 2 – Diagnose Nutrient Deficiency in Soil
First, examine the soil moisture level by sticking your finger about an inch deep into the potting mix. If it feels dry, water the avocado plant thoroughly until water drains from the bottom. Expect to see the leaves begin to perk up within a few days as they absorb the moisture they need. If you do not observe any improvement after about a week, it may indicate that other factors, such as nutrient content and soil composition, need your attention.
Yellowing leaves often result from underwatering, causing the plant to experience stress due to insufficient moisture. When the roots fail to uptake necessary nutrients because they lack water, it leads to leaf discoloration. Conversely, if the leaves turn brown and crispy, that typically indicates overwatering conditions, which suffocate roots and subsequently lead to nutrient deficiencies. If you notice that only the top layer of soil dries out quickly while the lower portion remains soggy, this scenario points towards root rot, which can be fatal if not handled promptly.
If the soil smells sour, indicating root rot, promptly remove the plant from its pot and inspect the roots. Healthy roots should feel firm, whereas dead roots will feel mushy and dark. Trim away any damaged roots before replanting in fresh, well-draining soil to ensure the plant can regain its footing and avoid further yellowing of leaves. Alternatively, if the soil is too compacted, preventing water drainage, consider repotting the avocado into a container designed to enhance drainage capabilities—this switch significantly boosts root health and nutrient uptake. Incorporating organic materials like perlite or orchid bark into your potting mix can also improve aeration, making it easier for the roots to absorb moisture efficiently.
Nutrient deficiencies can lead to chlorosis, where leaves lose their vibrant green color due to insufficient chlorophyll production, which is essential for photosynthesis. Such deficiencies commonly arise from poor soil composition or insufficient fertilization, causing the avocado’s growth to stall over time. Addressing the nutrient levels in your soil promptly can reverse these effects; consider using a slow-release fertilizer specifically formulated for avocados as this can provide a steady supply of vital nutrients over the growing season. It is essential to incorporate fertilizers after watering so that the chemical compounds penetrate the soil effectively without burning the roots.
Be vigilant for signs of soil issues such as unpleasant odors or excessive compaction. If either condition is present, it suggests that you may need to enrich or completely replace the soil mix. For instance, if you suspect nutrient deficiency, consider applying a balanced fertilizer. If symptoms persist despite fertilization, evaluate the soil’s pH and existing nutrient levels further. Regularly monitoring soil quality significantly impacts your avocado plant’s long-term health and helps prevent future nutrient deficiencies from developing.
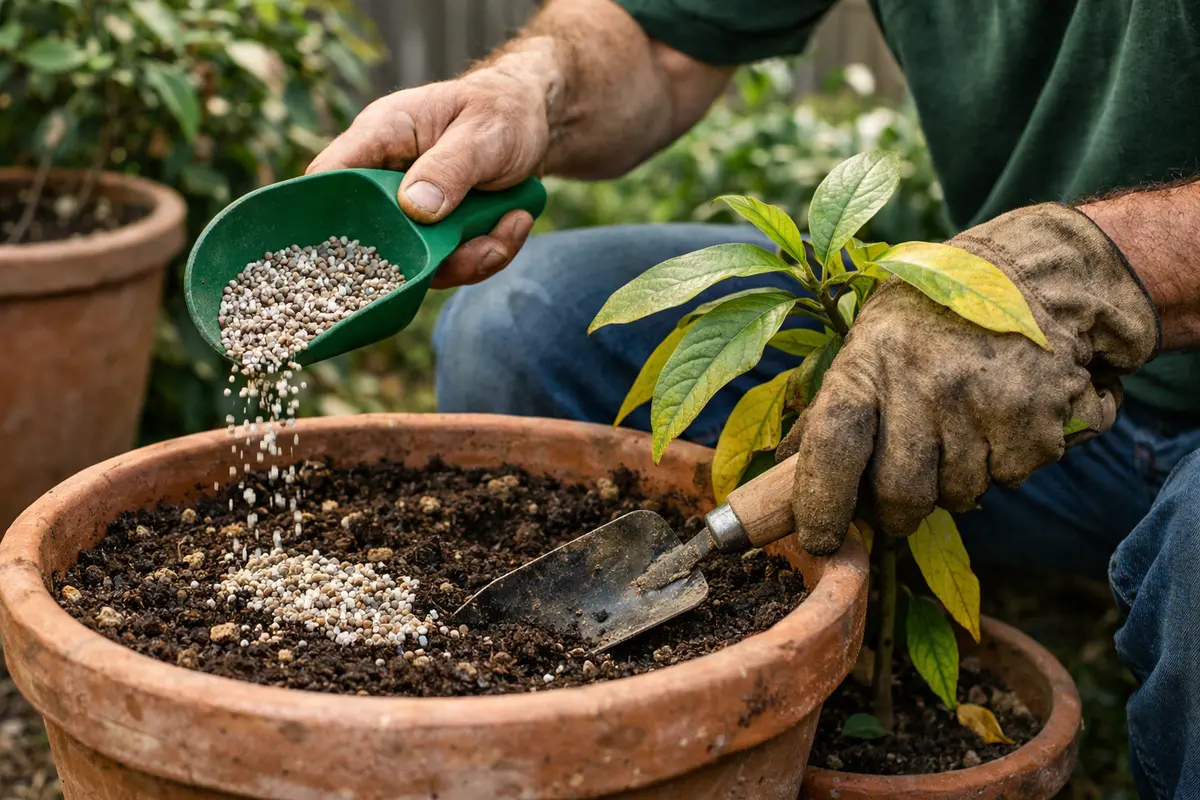
Step 3 – Feed Avocado with Balanced Fertilizer Mix
Start by adjusting the watering schedule for your potted avocado, ensuring the soil remains consistently moist but not waterlogged. After a few days, you should notice a decrease in leaf yellowing, with new healthy growth emerging from the tips of the branches. To prevent future yellowing, establish a routine of checking soil moisture every 3-4 days, especially during the heat of summer.
Yellowing leaves may indicate several issues, including overwatering or nutrient imbalances. Typically, if the leaves turn yellow and droop, it signals overwatering; in contrast, yellowing with brown tips suggests a lack of nitrogen. If you observe consistently yellowing leaves over the next couple of weeks, check your watering technique to ensure it’s not waterlogged.
A common mistake during recovery is to rush the fertilization process, thinking it will fix the issue quickly. If you apply fertilizer too soon and the plant shows signs of stress, cut back immediately to prevent burning the roots. Monitor closely, and only fertilize after new growth is visible to support a healthy recovery.
Correct fertilization restores nutrient balance, which enhances the plant’s ability to counteract stressors like summer heat effectively. A significant improvement in growth is often visible through the emergence of vibrant green leaves and the formation of new stems or branches. It is crucial to fertilize every 4-6 weeks during the growing season while remaining cautious not to over-fertilize, as this can lead to root burn. If leaf burn occurs and the edges turn crispy, a thorough watering session may be necessary to flush out excess fertilizer and prevent further damage.
A common slip-up during this recovery phase is applying too much fertilizer, which can inadvertently harm the plant rather than help it. It is vital to monitor how frequently you apply fertilizer, ensuring it does not exceed the recommended schedule. For example, if nutrient levels rise beyond the plant’s requirements, it can lead to root damage and result in even more stress. Keeping an eye out for balanced growth after fertilization can confirm your approach’s effectiveness. You should also check for shiny surfaces on the leaves, indicating salt buildup due to over-fertilization, which might necessitate a rinsing of the soil with fresh water to dilute excess salts. If your plant continues to struggle despite consistent fertilizing, performing a soil test can provide insights into existing nutrient levels and help identify additional deficiencies requiring correction.
Step 4 – Check Leaves for Green Recovery Signs
Start by checking the moisture level in the soil every few days, ensuring it remains consistently damp but not soggy. Observe leaves for signs of stress, such as wilting or persistent yellowing, which could indicate overwatering or underwatering. Recheck the soil moisture and leaf condition weekly to identify trends and adjust your watering practices accordingly.
A fully recovered potted avocado will show vibrant green leaves, firm texture, and an overall lush appearance, contrast to early signs of yellowing where leaves might appear droopy and have soft, crunchy edges. If you see the leaves returning to a pale yellow hue while remaining firm, this indicates underlying issues such as nutrient deficiency or improper light exposure. If not green and thriving → check nutrient adequacy and light conditions.
If yellowing persists despite adjusting watering and ensuring proper light conditions, consider repotting the avocado with fresh, nutrient-rich soil to reinvigorate growth. You can also apply a balanced fertilizer designed for fruit-bearing plants. Escalate to a pest inspection if yellowing continues after addressing these factors, as infestations can also cause leaf discoloration.
A fully recovered avocado plant will exhibit strong new foliage growth alongside lush green leaf colors, providing a striking contrast to the yellowing initially observed before treatment. If yellowing returns or fresh yellow leaves emerge, it may indicate a recurrence of nutrient deficiency, poor soil conditions, or water management issues. Consequently, maintaining a vigilant approach is crucial; visual cues such as firm, vibrant leaves signify that your avocado is recovering well. Keep a close eye on growth rates as well. An increase suggests that sufficient nutrient levels are sustained. Should recovery stagnate, symptoms like wilting or drooping leaves might highlight root rot or other issues, necessitating your immediate attention.
When yellowing symptoms reappear shortly after treatment, it may be time to reassess your care routines. Adjust your soil nutrient mixture or modify the watering frequency accordingly. Switching to a more well-draining soil mix can significantly mitigate moisture-related concerns. Early intervention is key; spotting problems—such as yellow leaves—promptly enables you to refine your care approach and avert further complications. Monitoring shifts in environmental factors, like sudden heatwaves or prolonged dry spells, will inform necessary adjustments to your plant care. If conditions worsen despite your best efforts, consulting local gardening experts or extension services for tailored advice may provide you with the insights needed to resolve persistent issues.
FAQ
How long does it take for avocado leaves to recover from yellowing?
Recovery typically spans between one to three weeks after implementing changes in nutrient delivery and watering practices. With the right care, you should notice improvements like greener leaves and new growth within this time frame. Consistency in care during this period is essential for achieving optimal results; fluctuations in temperature can impact recovery speed, so it’s important to be observant and make timely adjustments as necessary.
Can yellowing leaves spread to other parts of the avocado plant?
Yes, the yellowing can indeed spread if the underlying issue remains unresolved, particularly if it relates to nutrient deficiencies or diseases such as root rot. Vigilantly monitoring the entire plant and swiftly addressing any signs of distress can help control the situation before it escalates. Keeping affected areas isolated may also contribute to preventing the spread—diagnosing issues early is paramount. Be aware that neglecting symptoms on a few leaves can lead to more extensive problems if the root cause goes uncorrected. Continuous vigilance over both the soil and foliage will allow you to detect potential issues before they affect overall plant health.
Will my avocado plant fully recover after yellowing leaves?
With proper care, focused attention on maintaining nutrient balance, and appropriate watering practices, your avocado plant can indeed recover from yellowing leaves. However, if the yellowing symptoms persist or worsen, consulting a gardening expert may become necessary to prevent further damage. Early detection and proactive care greatly improve the chances of a complete recovery, highlighting the importance of regular monitoring—particularly during the critical summer growing period—when external conditions can fluctuate dramatically. Regular assessments of soil moisture and nutrient levels will significantly aid in this recovery process.