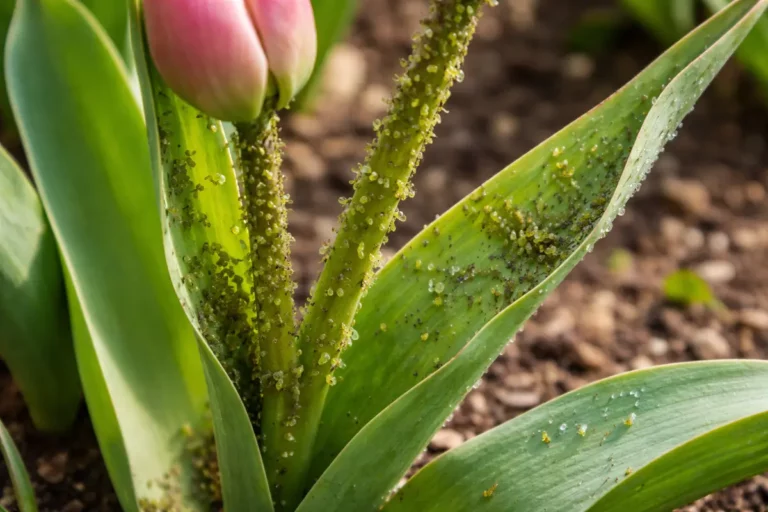
You may notice tiny insects clustering on your tulips just when they begin to bloom, which is why you need to know how to prevent aphids on tulips during flowering season. These sap-sucking pests can lead to yellowing leaves and stunted growth, causing significant damage to your beautiful flowers. If left unchecked, the infestation gets worse and can spread to neighboring plants, ultimately weakening the tulips. Fortunately, you can take action now by inspecting your plants, checking for aphid presence, and using natural treatments to keep these pests at bay.
Step 1 – Spray Insecticidal Soap on Tulips
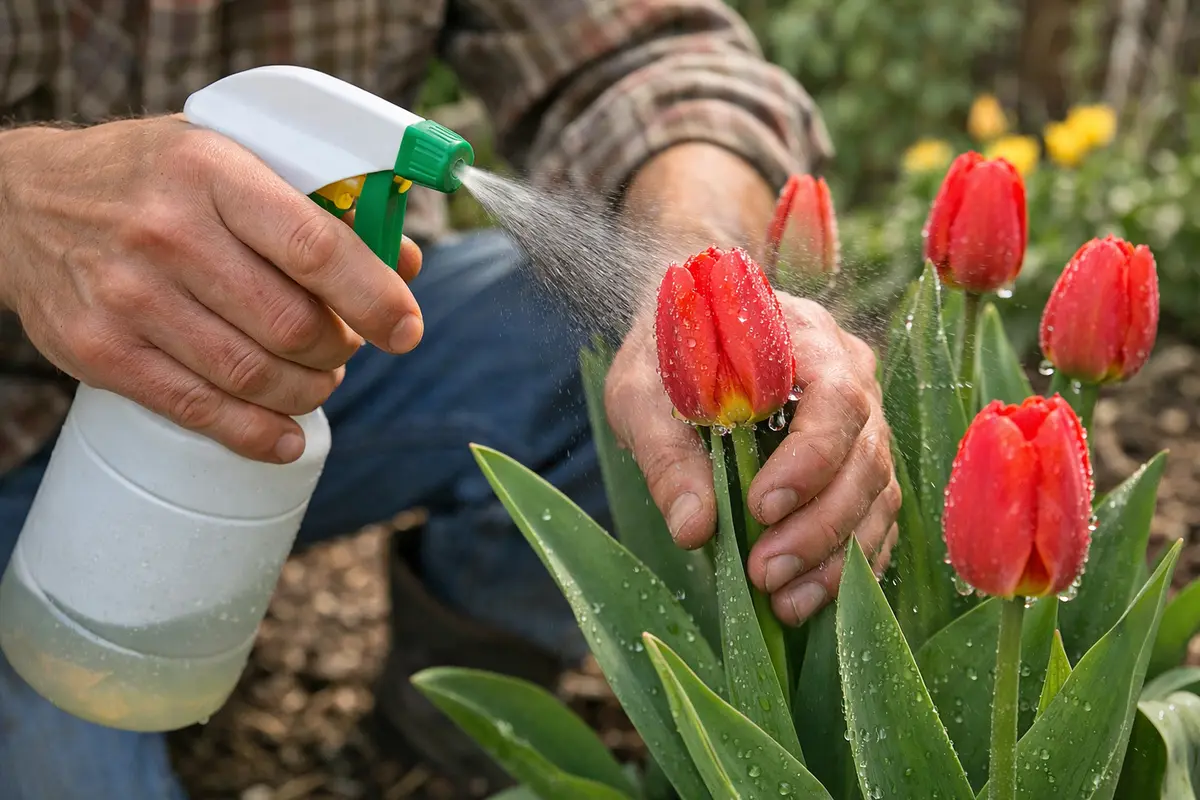
Start by spraying insecticidal soap directly onto the affected tulip leaves and stems. You will see a noticeable reduction in the aphid population within 24 hours. For optimal results, use a concentrated version mixed at a rate of 2-3 tablespoons per quart of water. Make sure every surface of the leaf, especially the undersides where aphids commonly hide, is thoroughly saturated with the solution. If it’s sunny, spray early in the morning or late in the evening to prevent rapid evaporation and maximize contact with the aphids.
Insecticidal soap suffocates the aphids, disrupting their cellular functions to kill them effectively. This treatment is crucial when applied at the first signs of infestation, as quick action can halt further damage to the foliage and maintain plant health. Repeat the application every 7 to 10 days or after heavy rainfall for consistent control. If temperatures soar above 80°F (27°C), add slightly more water to the mixture to protect the leaves from potential damage.
A frequent oversight at this stage is delaying action after spotting the infestation. If the aphids persist for several days, their numbers can escalate rapidly, making control more challenging. Regular monitoring during the flowering season can help you catch infestations early. Look for sticky residue on leaves or sooty mold, as these symptoms indicate a larger aphid issue, necessitating immediate action. Be vigilant after significant rain, as it can wash away beneficial insecticidal treatments, creating opportunities for the aphids to thrive.
Step 2 – Evaluate Soil Health for Aphid Issues
Start by evaluating your tulips’ soil health to identify nutrient deficiencies or drainage problems that may contribute to aphid infestations. A well-balanced and well-draining soil will lead to healthier plants, reducing their susceptibility to pests. Soil that is compacted or overly saturated can create an environment conducive to aphids, allowing them to thrive.
The cause is often related to excess nitrogen in the soil, which leads to lush growth that attracts aphids. At the same time, nutrient-poor or imbalanced soils may not support robust plant health, making tulips more vulnerable to aphid invasion. To correct this, amend your soil with a balanced fertilizer to ensure the proper nutrient levels for tulips, focusing on phosphorus and potassium levels that encourage strong root and leaf development.
If you fail to address soil nutrient levels, you may see curling leaves or stunted blooms, indicating a potential aphid issue exacerbated by poor nutrition. In contrast, tulips thriving in nutrient-rich, well-draining soil will exhibit lush foliage and fewer pest problems. If not this nutrient imbalance → check for moisture retention and drainage issues.
If your tulips emit a sour smell, indicating root rot, take immediate action to improve drainage. Enhance soil aeration by gently tilling the top layer and incorporating organic matter, such as compost or peat moss, to promote drainage and nutrient absorption. Conversely, if plant health appears strong and aromas are pleasant, consider adjusting watering routines or soil amendments to maintain optimal growing conditions.
Monitor for stunted growth or aphid infestation signs that may point to overcrowded conditions or compacted soil. If you see a high aphid presence, it could suggest that your soil lacks essential nutrients that normally promote the plant’s defense mechanisms. In that case, applying a light layer of mulch can help maintain moisture levels while encouraging beneficial micro-organisms to flourish and assist in pest control.
Aphids are particularly drawn to plants stressed by inadequate growing conditions. Therefore, ensure the soil has adequate drainage and is correctly aerated to prevent compaction, which hampers the health of your tulips. To improve conditions, use a spading fork or trowel to aerate the soil around your tulips without disturbing their roots, enabling better water penetration and root access to nutrients.
If your tulips start to wilt despite healthy-looking leaves, it often signals that the soil may not be supporting their needs. Implement a regular soil testing schedule to check nutrient levels and pH balance, adjusting as necessary to create an optimal growing environment. Healthy, well-nourished tulips can better resist aphids and other pests, allowing them to flourish during the flowering season.
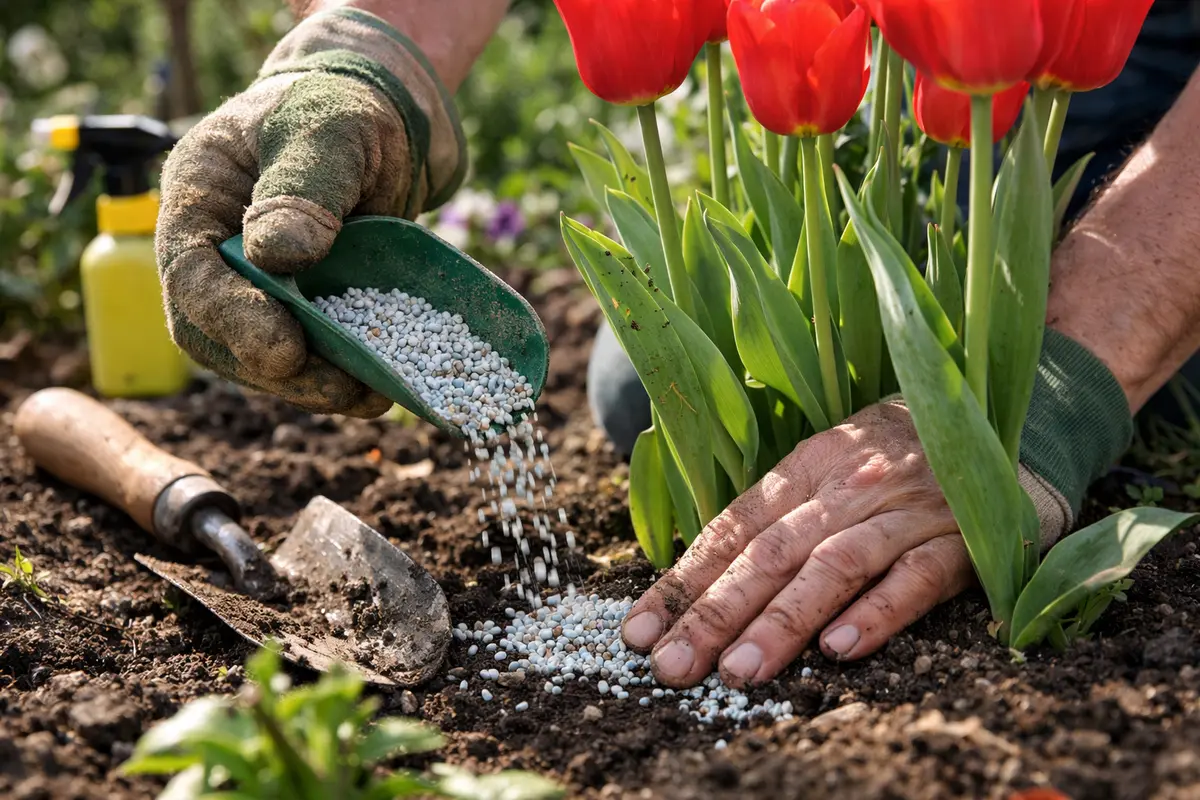
Step 3 – Fertilize Tulips to Strengthen Growth
Apply a mixture of water and insecticidal soap directly to affected tulip foliage, ensuring coverage on both sides of leaves. Within a few days, monitor for a decrease in aphid activity and see the leaves begin to regain their vitality, indicating that the treatment is effective and aphids are being controlled.
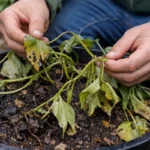
Recovering from aphid damage typically takes about one to three weeks, depending on external conditions like temperature and humidity. In favorable environments, you will observe new leaf growth that is bright green and sturdy; however, in poorer conditions or during extended dry spells, recovery can stall and result in stunted, yellowing growth. If infested plants remain weakened after treatment, check for persistent pest presence or conditions like inadequate watering that might hinder recovery.
Avoid overwatering your tulips during the recovery phase, as excess moisture can lead to root rot, making plants more susceptible to disease. Instead, focus on maintaining consistent, moderate soil moisture. If you notice blooming issues post-treatment, check for aphid residue on the stems or undersides of leaves, as this could indicate that the aphids have not been fully eliminated.
Follow up with additional applications every 4 to 6 weeks during the growing season, watching closely for signs of recovery like vibrant foliage and an increase in flower production. If your tulips exhibit rich green leaves with no signs of wilting, their recovering strength indicates effective fertilization. Alternatively, if you notice continued yellowing or stunted growth, it may signal a need for soil testing to assess nutrient balance.
Be cautious of over-fertilization, as excessive nutrients can lead to burn and stress. Always adhere to recommended rates, ensuring the fertilizer’s macronutrients and micronutrients are balanced. To further monitor recovery, look out for a consistent leaf coloration and firmness; signs of a nutrient deficiency may manifest as uneven leaf colors. Timely fertilization is crucial; avoid applying fertilizers during extreme heat, as it can stress your plants further. Utilizing a slow-release fertilizer can help maintain nutrient availability over time while reducing the frequency of applications, ensuring sustained growth and resilience.
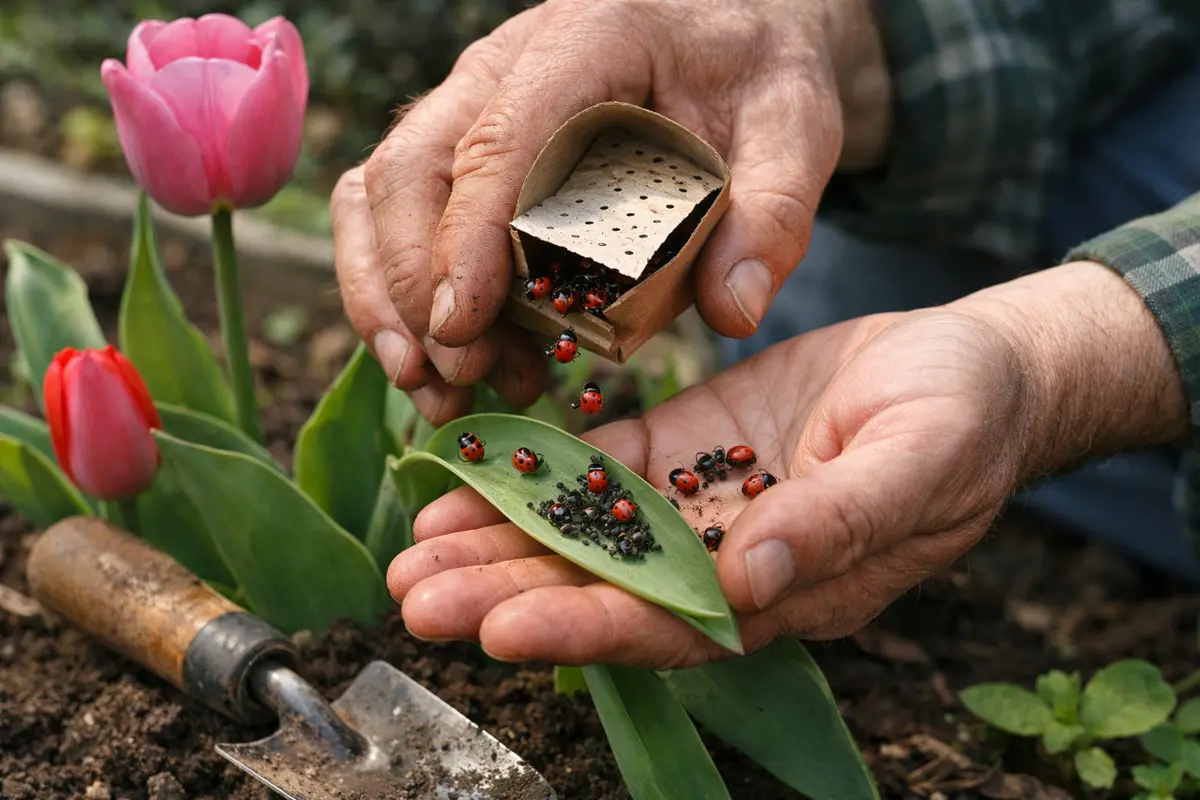
Step 4 – Encourage Beneficial Insects to Control Aphids
Start by applying a mixture of neem oil and water to your tulips once a week during the flowering season. This regular treatment will help deter aphids, resulting in healthier, more vibrant blooms without the stress of infestations.
Aphids thrive in warm, dry conditions, typically when temperatures rise above 75°F and humidity levels drop. By consistently spraying neem oil, which disrupts their life cycle, you create an environment that is less conducive to their survival. If you spot aphids on your tulips, check the air circulation around the plants, as stagnant air can encourage their growth.
In early spring or during unexpected warm spells, increase the frequency of your neem oil application to twice a week. This proactive approach addresses the heightened activity that comes with rising temperatures, serving as an extra layer of defense against these pests.
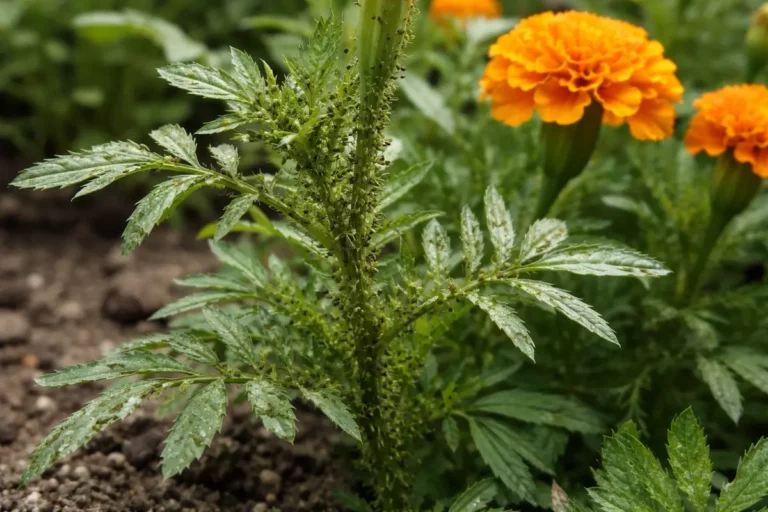
Emphasizing biodiversity in your garden ecosystem is essential for maintaining a pest balance. If possible, introduce insectary plants that flower at different times to sustain beneficial insects throughout the growing season. For instance, consider planting marigolds, which bloom from spring to fall, offering a stable food source. However, ensure not to use broad-spectrum pesticides that may harm these predators as they establish themselves. Creating a habitat that fosters these beneficial insects, such as leaving some sections of your garden undisturbed, encourages their presence.
During late spring, consider adding flowers such as marigolds or dill, which can attract these beneficial species. However, monitoring the introduction of these insects can help gauge how well they are controlling the aphid populations. If you observe that aphid numbers remain high, it may be beneficial to introduce additional larval stages of ladybugs, which can be found at specialized plant nurseries. The more diverse the insect population, the better your tulips will be protected. Be cautious of any insecticidal applications you perform, as they may inadvertently harm the beneficial populations you are trying to establish.
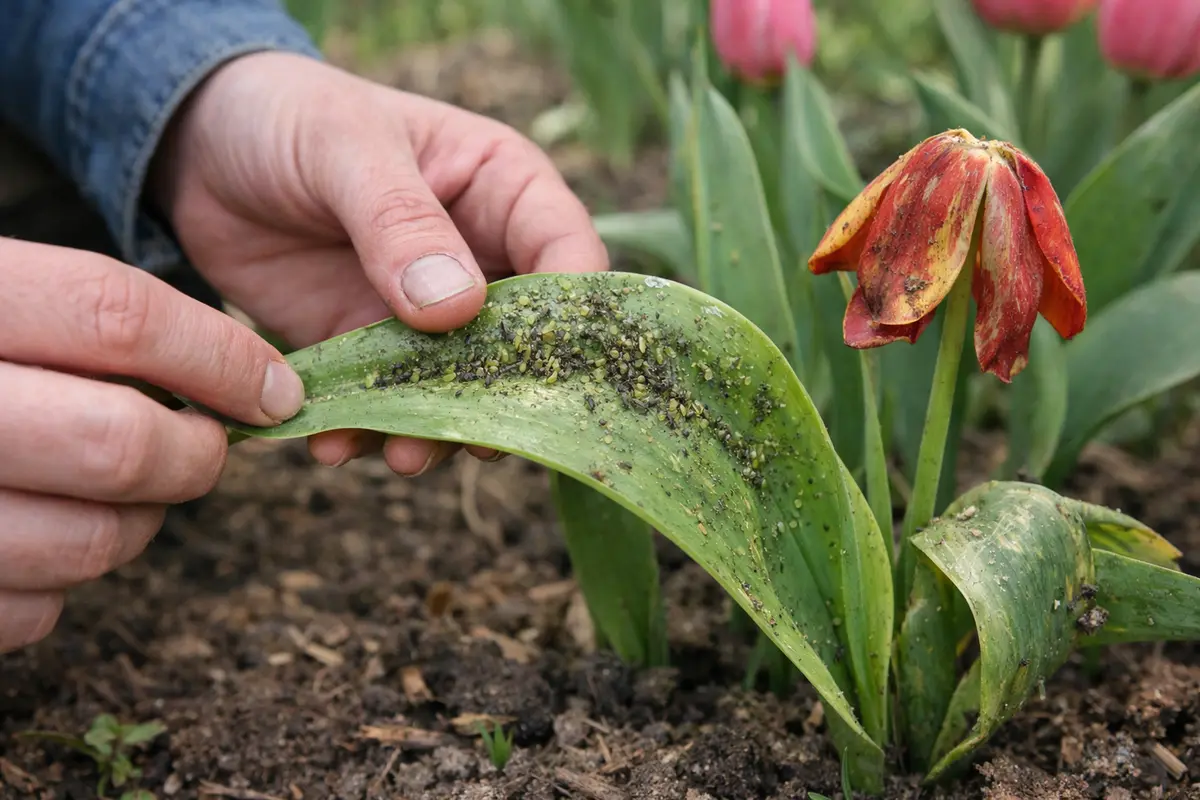
Step 5 – Inspect Tulip Foliage for Aphid Activity Weekly
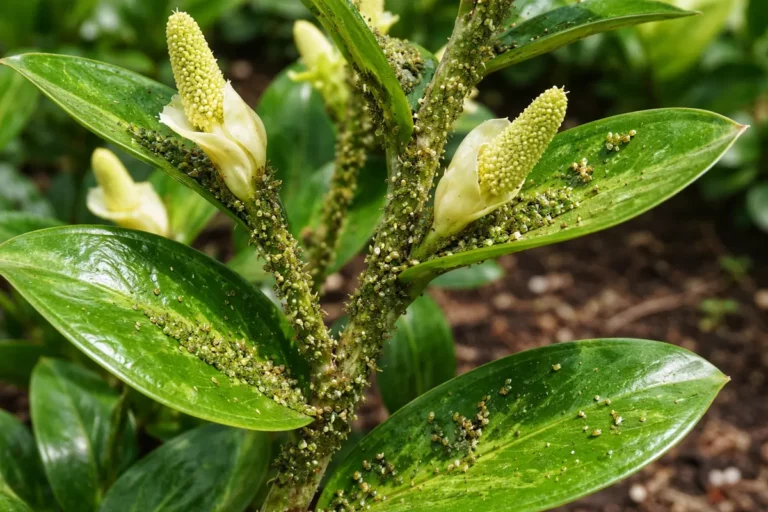
Start by monitoring your tulips every few days during the flowering season, focusing on the undersides of leaves and flower buds. Look for aphids, which are small, soft-bodied insects often in clusters, and observe any distorted leaves or yellowing foliage. Recheck at weekly intervals to spot new infestations early and take action promptly.
A fully recovered tulip will exhibit vibrant, green leaves and open flowers, signaling that no aphids are present. In contrast, early signs of a problem returning include curled leaves and sticky honeydew residue on the foliage. If the tulips begin to show signs of wilting or new clusters of aphids, check for any new growth emerging that might be attracting pests.
If aphids return despite previous efforts, apply a natural insecticidal soap to disrupt their lifecycle and protect any new growth. If the infestation persists after treatment, consider introducing beneficial insects, like ladybugs, or escalate to a more potent commercial insecticide designed specifically for aphids on ornamental plants.
Frequent inspections allow you to catch and address any aphid resurgence before it can spread significantly. Look for clusters of aphids on young leaves or the undersides of older leaves, as these pests tend to hide in these areas. A fully recovered plant will exhibit new growth; if you see new shoots that are robust and green, the plants are bouncing back effectively after treatment. If you find that leaves are curling or showing distorted growth, it’s a sign that aphids are feeding, which necessitates immediate remedial actions.
If you notice a return of aphids despite your efforts, consider reapplying the insecticidal soap or introducing additional beneficial insects. An increase in sticky honeydew on leaves or the presence of sooty mold indicates a return of the pests. Additionally, if you see unusual leaf curling or distortion, these may be signs of aphid feeding damage. Being proactive in monitoring can ensure a healthy blooming season for your tulips, safeguarding against further infestations. Maintaining a journal of your inspections can help track aphid trends, making it easier to counter their resurgence if necessary.
FAQ
Can aphids spread to other plants in my garden?
Yes, aphids can easily spread to other nearby plants through their rapid reproduction and movement. If left untreated, a small infestation can quickly escalate, threatening other flowers or vegetables in proximity, particularly if they are weak or stressed. To mitigate this risk, maintaining strong plant health across your garden can create an environment less conducive to aphid infestation. Proactive measures, such as using barriers or companion planting, can further enhance protection against potential spread.
How long will it take for my tulips to recover from an aphid infestation?
Recovery time can vary, but typically, you should see improvements in the health of your tulips within a week after treatment. Look for signs of new leaf growth and improved color, which indicate that the plants are bouncing back. However, if the infestation was severe, it might take slightly longer for the plants to show resilience against future aphid encounters. Continuous monitoring and proper soil health management can expedite this recovery period significantly.
Should I remove aphid-infested leaves from my tulips?
Removing heavily infested leaves can be beneficial to prevent further spread. If the overall structure and health of the plant remain intact, this could enhance recovery efforts and deter reinfestation by limiting possible breeding grounds. When cutting leaves, make sure to dispose of them properly to avoid reintroducing the pests into your garden. Additionally, inspect any tools you use for cuts to ensure you don’t accidentally transport pests to other plants.