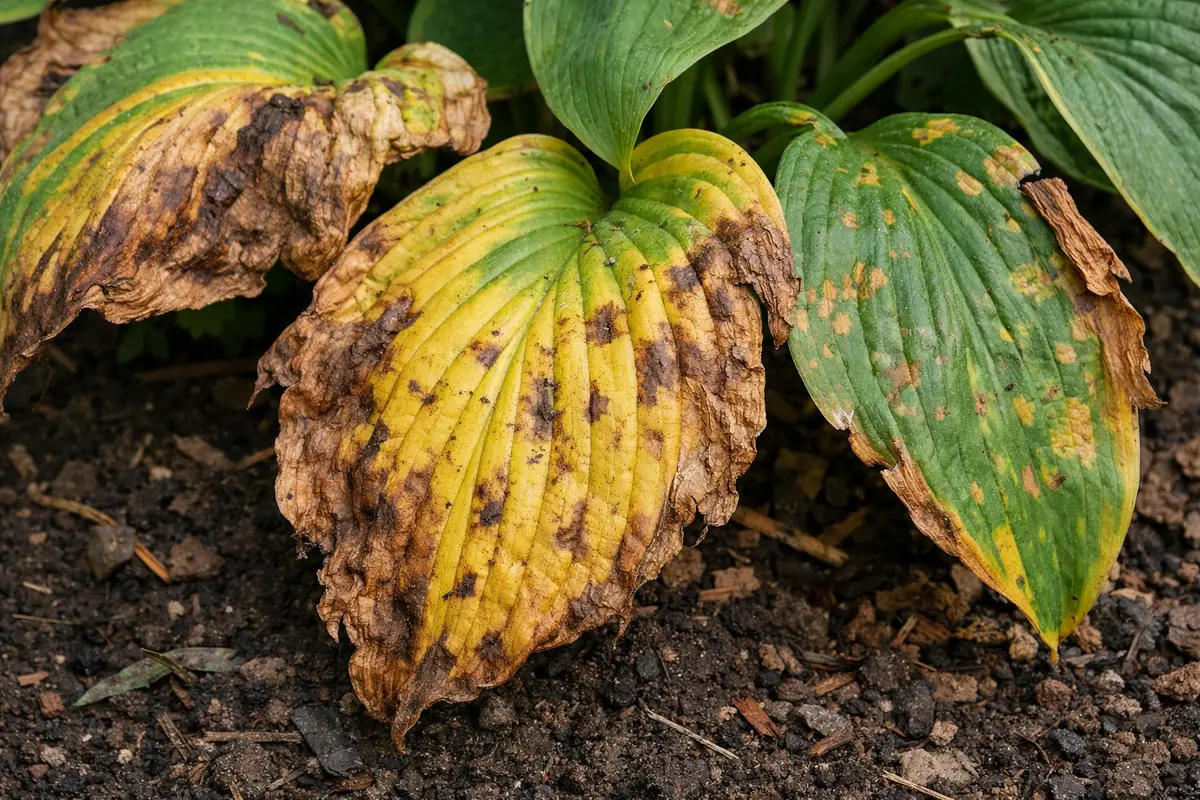
You may notice that your hostas’ once vibrant foliage is now marred by unsightly yellowing leaves after low light exposure, which is why you need to know how to fix yellowing leaves on hostas after low light. This yellowing often results from insufficient sunlight, leading to damage and a decline in the plant’s vitality. If left untreated, the condition can worsen, weakening the plant and making it harder to fix, but taking action now to inspect and improve light conditions can make all the difference.
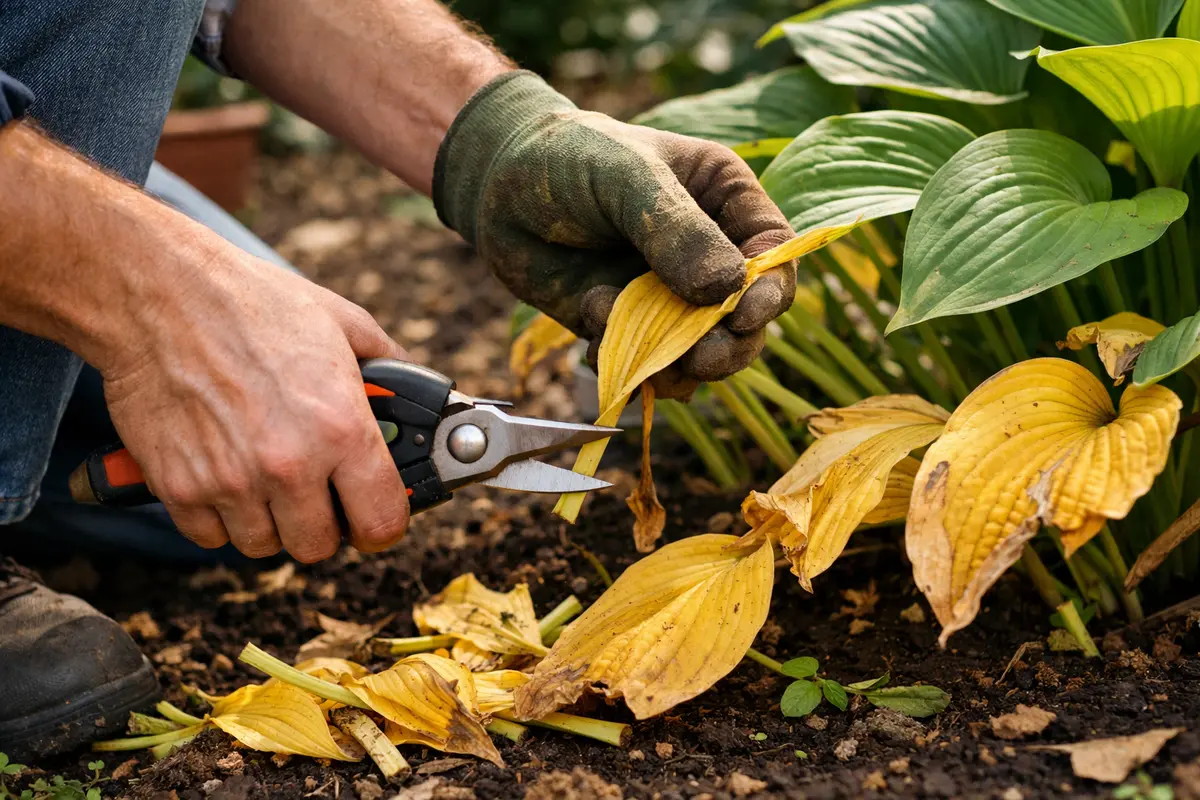
Step 1 – Trim Yellow Hostas Leaves Quickly
First, check the soil moisture level to ensure it’s not overly dry. Water the hostas deeply if the soil feels dry an inch below the surface; this immediate action reduces stress and allows the plant to uptake nutrients more effectively. Within a few days, you should observe the leaves starting to regain their turgor, appearing less limp and more vibrant.
Taking this action promptly is crucial because hostas respond strongly to changes in hydration. If you delay and the roots remain dry, the leaves can continue to yellow due to nutrient deficiency and water stress, which may lead to further decline. On the other hand, if the soil is too soggy, roots can rot, causing yellowing as well; in that case, consider shifting to well-draining soil to prevent drown-out.
A gardener who neglected watering for too long saw their hostas enter a decline that was irreparable in a short span. Conversely, one who corrected moisture issues promptly found their plants bouncing back within a week, demonstrating the importance of timely care. A frequent error is assuming yellowing is due to pests without first checking moisture levels; if not this → check that soil first.
Acting fast prevents further decay, allowing the plant to redirect its energy to healthier parts, thus encouraging new growth and vibrant coloration in the remaining leaves. The improvement in light penetration resulting from this trimming will be noticeable, making the existing leaves green and lush. Moreover, this swift response to remove yellow leaves mitigates the risk of diseases spreading to neighboring plants, maintaining the overall health of your garden. If the situation seems critical, repeat this action bi-weekly to keep yellowing at bay, observing for any new signs of distress that may arise within that timeframe.
Many gardeners often hesitate to cut leaves, fearing damage to the plant overall. However, in my experience, addressing yellowing leaves rapidly encourages the hosta to recover faster. If the entire plant is left alone, the yellowing will continue and may lead to more pronounced issues down the road. A common mistake is trimming too close to the main stem, which can expose the plant to infection; instead, make clean cuts a few inches away from the base of the yellow leaves to promote healing. In cases where yellowing involves larger sections of the plant, consider cutting back to healthy tissue rather than removing all yellowing foliage at once. If newly injured areas do occur, consider applying a light dusting of fungicide on the cuts to minimize infection risk and allow for better healing. Noting the exact location of cuts also provides a point for monitoring recovery as you observe daily changes in response to the trimming.
Step 2 – Diagnose Light Level Issues Affecting Hostas
Check the light levels in the area where your hostas are planted. After adjusting their exposure, you will observe a gradual return of rich green colors in the leaves. Providing adequate light not only revitalizes existing foliage but also helps prevent future incidents of yellowing. If hostas have been in deep shade or filtered light, you may need to wait one to two weeks to see notable color change, as chlorophyll production resumes. If a full week passes without noticeable improvement, consider implementing additional measures like temporary supplementary lighting.
Hostas often thrive in partial to full shade, but low light, especially in the growing season, contributes to insufficient chlorophyll production. Without enough sunlight, the leaves can’t photosynthesize effectively, causing yellowing. Adjusting the situation might involve relocating the plant to a sunnier spot or trimming nearby plants that are blocking sunlight. Pay attention to the time of day when sunlight hits your garden; if your hostas are shaded by taller plants during peak solar hours, you may need to also keep track of seasonal changes that could affect light patterns.
If you notice that even after adjustments the yellowing persists, it might be worth checking soil drainage. If the soil holds water despite improving light, yellowing can worsen due to root suffocation. To check soil moisture, use your finger to probe about an inch deep; if it feels soggy or overly dense, drainage issues may be a concern. Regularly reevaluating nearby plant growth can indicate when to act; for instance, if neighboring plants are growing too quickly, shading your hostas further, then trimming them back may be necessary. Also, keep a vigilant eye on the types of light exposure; if conditions worsen in afternoon heat, consider options like temporary shading to safeguard against sunburn while gradually acclimating the plants to increased light. This balance in exposure is key, particularly in climates that experience extreme temperature fluctuations. If light levels feel inadequate, a supplemental light source can be brought out to enhance conditions until the natural environment can sustain growth better.
Step 3 – Fertilize Hostas to Revive Yellowed Foliage
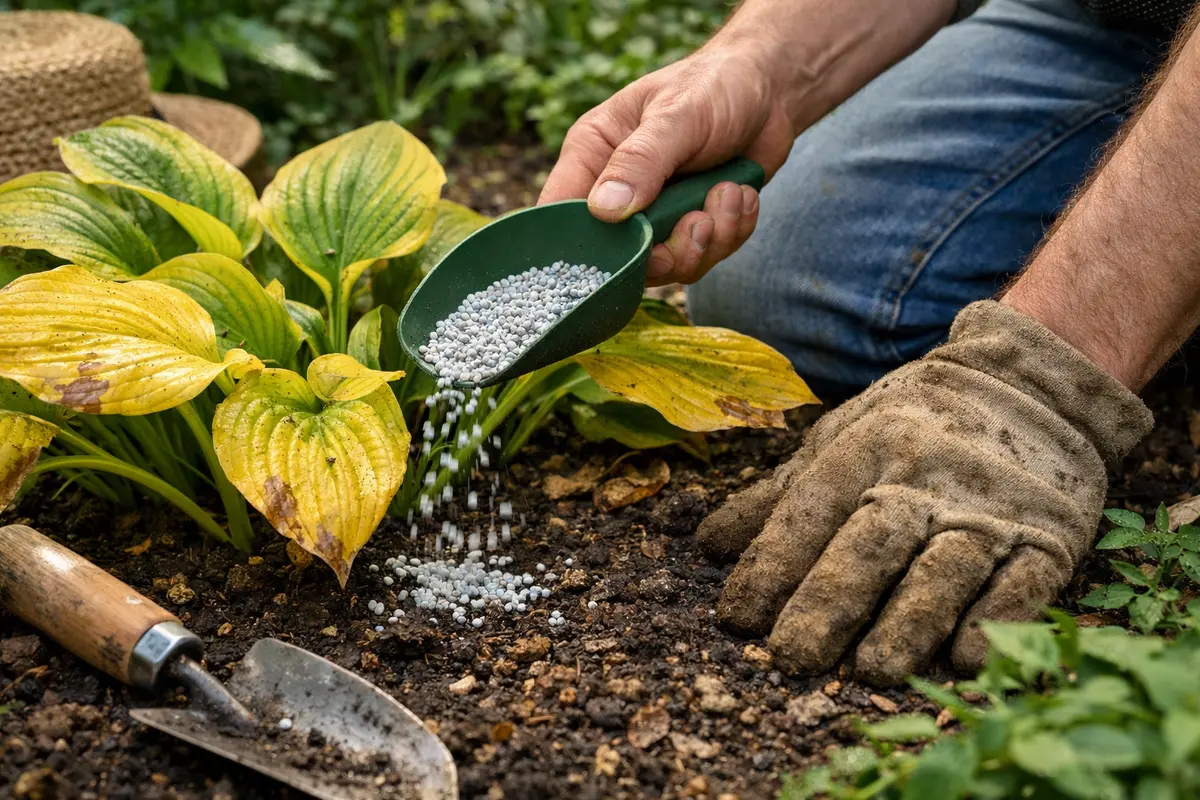
Apply a balanced, slow-release fertilizer formulated for hostas to boost their nutrient intake. You’ll see signs of improvement within a few weeks as the leaves regain their vibrant green color and overall vigor. Fertilization also provides your hostas with the necessary nutrients to thrive during their active growing season. Be diligent in following the recommended dosage suggested on the product label; applying too strong a concentration can lead to nutrient burn, a visible affliction where leaf tips brown or curl, triggering more yellowing.
Nutrient deficiencies, common in low-light conditions, impede new leaf growth and can cause existing leaves to yellow. Fertilizing under optimal moisture conditions—ideally when the soil is slightly damp—ensures that hostas receive sufficient nitrogen and micronutrients crucial for their recovery. If you are in a particularly nutrient-depleted area or experiencing persistent yellowing, consider supplementing with a liquid fertilizer to promote quicker nutrient absorption. It’s also vital to observe your soil texture: fertilization on dry soil can lead to nutrient lockout, values becoming unavailable for the plant. This risk is heightened where soil compaction is present; if a hard crust develops on the soil surface post-rain, aerating the soil may be beneficial prior to fertilization.
Many gardeners erroneously think that the more fertilizer they use, the faster the recovery. Over-fertilization can lead to salt buildup in the soil, which forms crusts and eventually dehydrates roots. If you notice the leaves appearing glossy or the soil feeling gritty, it is a sign that the excess salts have built up, necessitating you to flush the soil with ample water to counteract the issue. Additionally, if the yellowing returns despite effective fertilization, it may signify that factors such as improper pH levels or root damage are inhibiting nutrient uptake. You should regularly monitor soil pH, aiming for a range of 6.0-7.0; soil tests can help assess this effectively. Balance is key here—using fertilizer too late or too early might result in missing the optimal growth window. Observe growth changes during the two weeks following fertilization to assess further adjustments needed; a sudden drop in leaf vigor post-fertilization can signal either a deficiency or the excess of nutrients affecting performance.
Step 4 – Check Hostas for New Yellowing Every Week
Next, monitor your hostas regularly for signs of improvement. Check the soil moisture to ensure it’s adequately wet but not waterlogged; keeping a close eye on leaf colors weekly is also essential. Watch for a rich, vibrant green developing as the plant adjusts to increased light; if yellowing persists after two weeks, further action will be needed. To help in this process, document any color changes or notable observations as they happen.
A fully recovered hosta will display deep green leaves with a firm, slightly waxy texture, showcasing healthy growth. In contrast, early signs of renewed trouble would manifest as fading green hues or brittle, crispy edges, indicating that the plant’s stress level is rising again. If the leaves appear soft and droopy, this may suggest overwatering rather than simply a light deficiency; pay attention to moisture levels, especially after heavy rains.
If yellowing resumes even after improving light exposure and watering consistency, consider re-evaluating the hosta’s growing location. Moving the plant to a brighter area with indirect sunlight could further support recovery, ensuring it’s not overcrowded by neighboring plants that block necessary light. Keep track of changes; for instance, if a specific neighbor plant is identified as the cause of shading, consider removing or thinning it to promote a more inspired growing environment. A good practice is to use trellises or stakes; as hostas grow, gentle arrangements can create space without direct removal of shade plants, maintaining the ecosystem balance while giving your hosta the light it needs.
After monitoring for new yellowing, should symptoms such as curling or spots return, it may indicate stress from inconsistent watering or a pest infestation, necessitating additional interventions. If recovery does not occur, deeper issues such as root damage or persistent deficiencies may exist. In such cases, consider re-evaluating the hostas’ location or checking for potential root rot, especially if soil moisture levels seem consistently high; lift the plant gently and check the roots—healthy roots should be white or light tan, while rotting roots will be dark and mushy. Take action quickly—if yellowing resumes, this could mitigate lasting damage, possibly requiring replanting in better-drained soil. Regular care, monitoring, and adjustments will keep your hostas looking their best for every growing season.
FAQ
How long does it take for hostas to recover from yellowing leaves?
Recovery can vary but generally takes about 2-4 weeks after proper care adjustments are made, such as improved light exposure and fertilization. You should start seeing improvement within a week if conditions are right. It’s essential to maintain consistent care during this period to support robust recovery; otherwise, reversion to yellowing may occur. Regular monitoring will aid in ensuring the hostas’ well-being throughout this recovery process.
Can yellowing leaves spread to other plants?
Yellowing leaves on hostas typically won’t spread to other plants, but the underlying issue, like poor soil drainage or light exposure, can affect adjacent plants. Additionally, if pests are a factor, they may migrate to nearby plants, causing similar symptoms. Prompt action can prevent related issues in nearby vegetation; consistently inspect surrounding plants to catch any secondary problems early, and share findings with neighboring plant caretakers.
Should I remove all yellowing leaves from my hostas?
Yes, you should remove all visibly yellowing leaves immediately to enhance air circulation around healthy foliage and prevent pest attractions. This encourages the hostas to focus energy on producing fresh leaves instead of sustaining damaged tissue. If a significant portion of leaves is yellow and removal will drastically alter the plant’s appearance, ensure that healthy leaves remain to support photosynthesis. The focus should be on preserving the vigor of the plant while ensuring it can recover without becoming overwhelmed by lost foliage; rotation of leaves for sunlight also plays a critical role during this process.