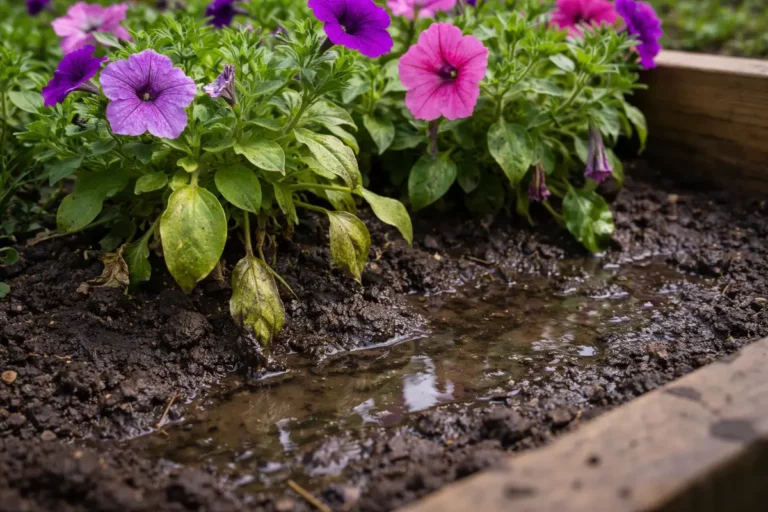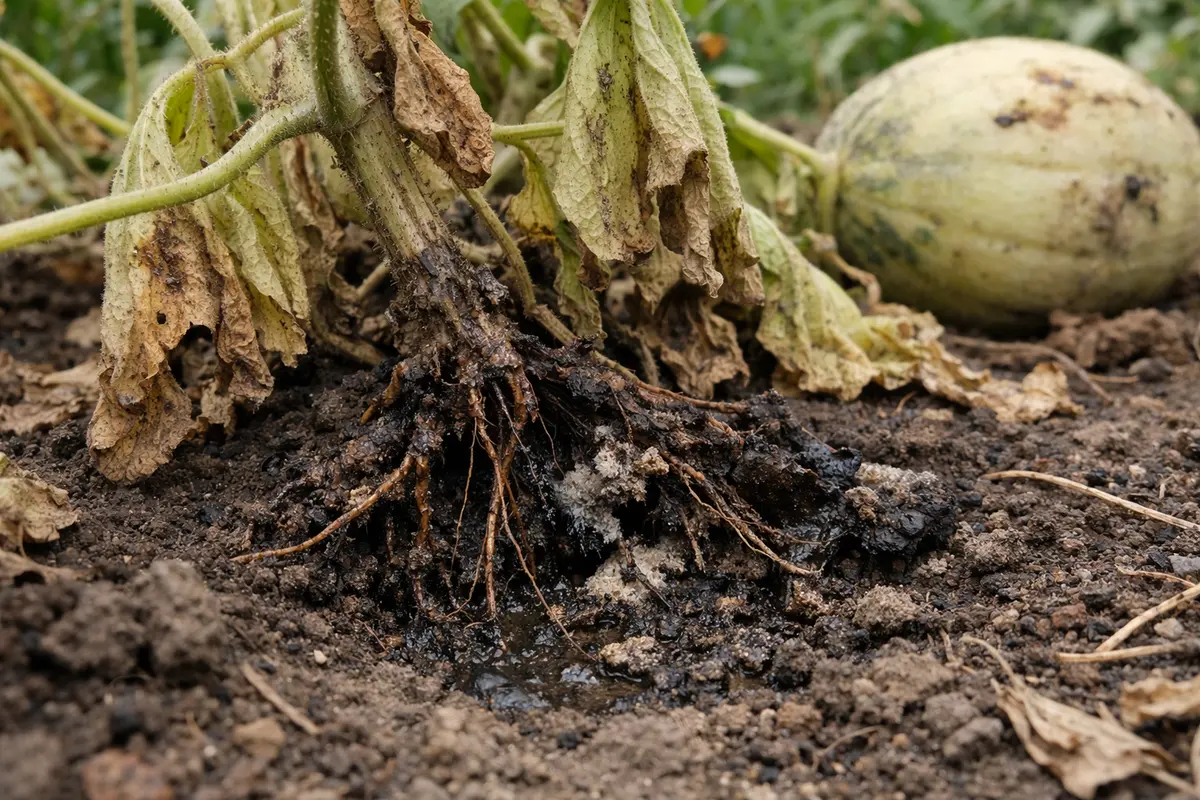
You may notice your melon plants droop after a heavy rain, which is a clear sign that you need to know what to do when melon plants droop from root rot. The roots may be suffering from damage, leading to wilting and mushy spots on the leaves. If left unaddressed, the rot can spread, weakening the plant and making it harder to fix, but you can improve the situation by inspecting the roots, reducing moisture, and trimming away affected areas.
Step 1 – Inspect Melon Roots for Brown Decay
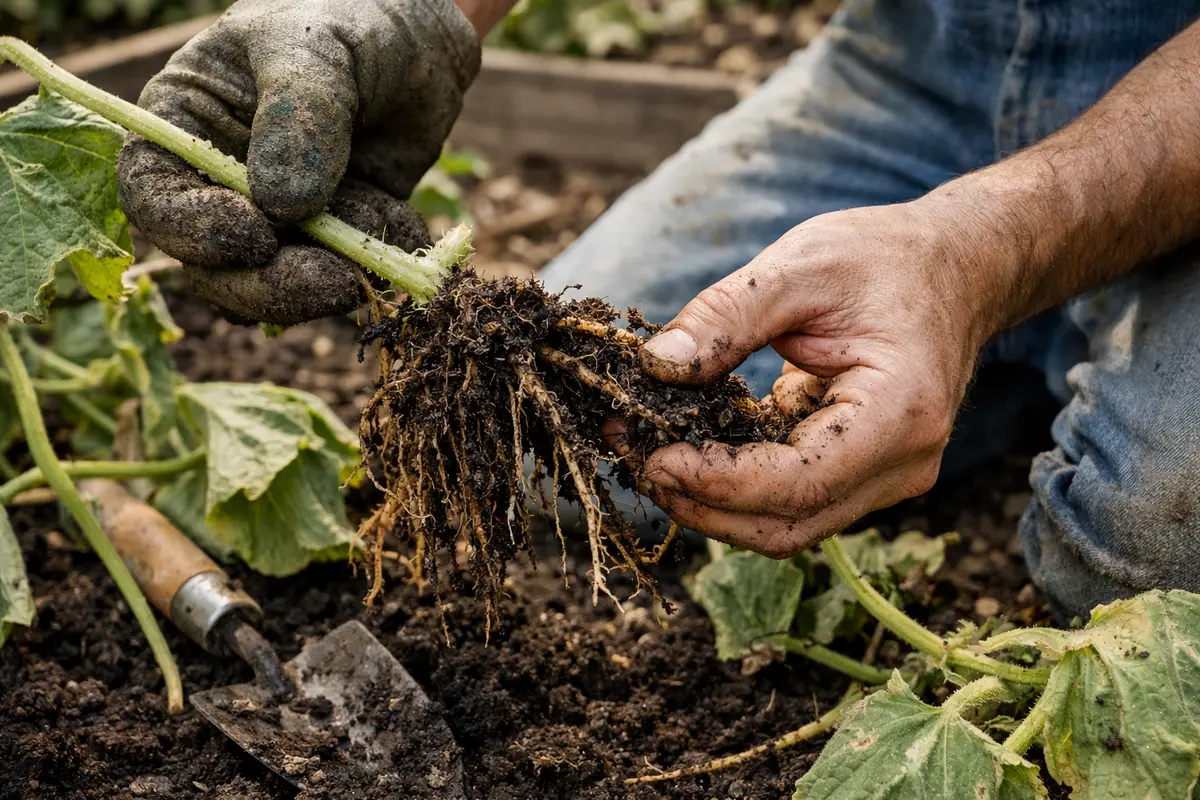
Start by gently removing the plant from its pot or garden bed to inspect the roots for signs of decay. You should see any visibly mushy or brown roots, which indicates rot at the root level. Carefully handle the plant, as rough movements can cause additional stress to the fragile root system. If your plants are in a garden bed, dig around the base with a trowel, taking care to minimize disturbance to the surrounding soil to protect any healthy roots.
Immediate action is crucial because root rot can escalate quickly; delaying your inspection may allow decay to spread further into otherwise healthy roots. Firm, healthy roots should be white or light tan and, when gently squeezed, should feel firm. If you observe any change—such as a shift to darker coloration or a slimy texture—this signifies that rot has begun and is damaging the root network. If nearly all roots show signs of decay, you may need a more drastic approach to save your plant. For example, if roots appear shredded or extensively damaged, consider whether replanting is necessary to prevent further losses.
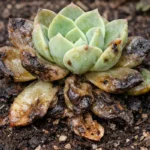
A common mistake at this point is to skip the inspection and simply water the plants further. If you encounter drooping plants after rain, always check the root zone first rather than assuming they just need more water. By bypassing the inspection, you risk worsening the problem; overwatering on top of existing root issues can entirely disrupt water absorption, leading to systemic plant stress and eventual collapse. Gardeners often focus on minor wilting while neglecting the serious underlying damage caused by root rot. In poor drainage conditions, plants may also develop succulent turning mushy heavy rainfall.
Step 2 – Examine Soil Moisture Levels for Root Issues
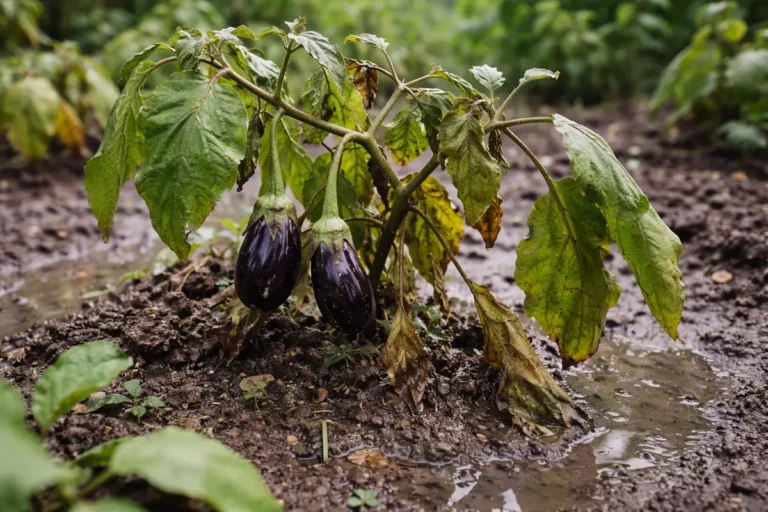
Start by measuring the soil moisture around your melon plants by sticking your finger into the ground up to your second knuckle. If the soil feels overly wet, it indicates that your plants are likely suffering from root rot due to excessive moisture retention. This happens because prolonged exposure to high moisture levels creates anaerobic conditions, where beneficial microbes cannot survive, leading to decay and root disease.
To address this issue, immediately improve drainage by amending the soil with materials like perlite or sand to facilitate better airflow. You should also consider gently lifting the plants to assess the root health; if roots are mushy or blackened, it’s a sign of severe damage. If water pools at the surface after watering, it’s a clear indication that your soil is retaining too much moisture, necessitating a more drastic action.
If the soil smells sour or displays a pungent odor, it signals deeper issues that surpass typical drainage problems, potentially requiring soil replacement. Additionally, ensure the soil moisture remains around 50-70% saturation to allow proper oxygen and nutrient absorption. If, after several days, the soil still isn’t draining, this confirms a critical need for complete medium replacement to prevent reoccurring root rot. Excess moisture often leads to problems like lawn yellow spots overwatering.
Step 3 – Replant Melon in Fresh, Well-Draining Soil

Start by carefully replanting the melon plants into fresh, well-draining soil. You should observe an increase in plant stiffness and healthier leaves within about a week.
Once the decline stops, assess the plants for new growth, as vibrant green leaves will indicate that the roots are recovering and the plants are regaining strength. Typically, recovery may take from a few days to several weeks, depending on how severely the roots were affected. In ideal conditions with warmth and moderate moisture, new shoots will emerge from the stem, while lingering dampness could prevent this and keep the plants in decline.
For follow-up recovery care, avoid overwatering and refraining from using fertilizers until the plants show consistent new growth. Observe the foliage closely; if yellowing leaves appear, this may signal over-saturation of the soil, while stunted growth often indicates that nutrients are lacking. Focus on gradually setting up the environment for improvement rather than rushing the recovery process.
A recovery timeline typically spans two to three weeks before plants produce noticeable new leaves. Healthy growth in this window should appear lush and vibrant, suggesting the plants are reacting positively to the new soil conditions. In contrast, if the plants show no signs of growth and the leaves remain yellow, consider checking for trapped moisture in the soil, as this can stifle recovery and worsen root issues.
Do monitor the watering schedule after replanting to prevent overwatering; many gardeners mistakenly believe that providing more water will solve root rot issues. Allow the top inch of the soil to dry before watering again to promote oxygen access to the roots. If the plants are struggling, check that drainage holes are clear; blocked holes can lead to excess water retention and further complications. Excess moisture often leads to problems like root rot jade in plant.
By ensuring the plants are placed in high-quality, well-draining soil, they are more likely to establish healthy roots and thrive again. In contrast, poor soil may retain too much moisture, increasing the risk of ongoing rot. It’s crucial to keep the planting depth consistent with their previous location, as burying the stem can lead to collar rot. Avoid using typical garden soil or heavy substrates, as they can exacerbate drainage issues and prolong distress for the plants.
As you support recovery, be mindful of temperature fluctuations; sudden changes or too much direct sunlight can further stress the plants. Maintain a warm yet shaded environment to facilitate recovery. If conditions become excessively hot, using a shade cloth can help protect the plants, allowing them to stabilize. Failing to manage temperature appropriately can delay recovery and exacerbate the existing root problems, leading to deteriorating plant health.
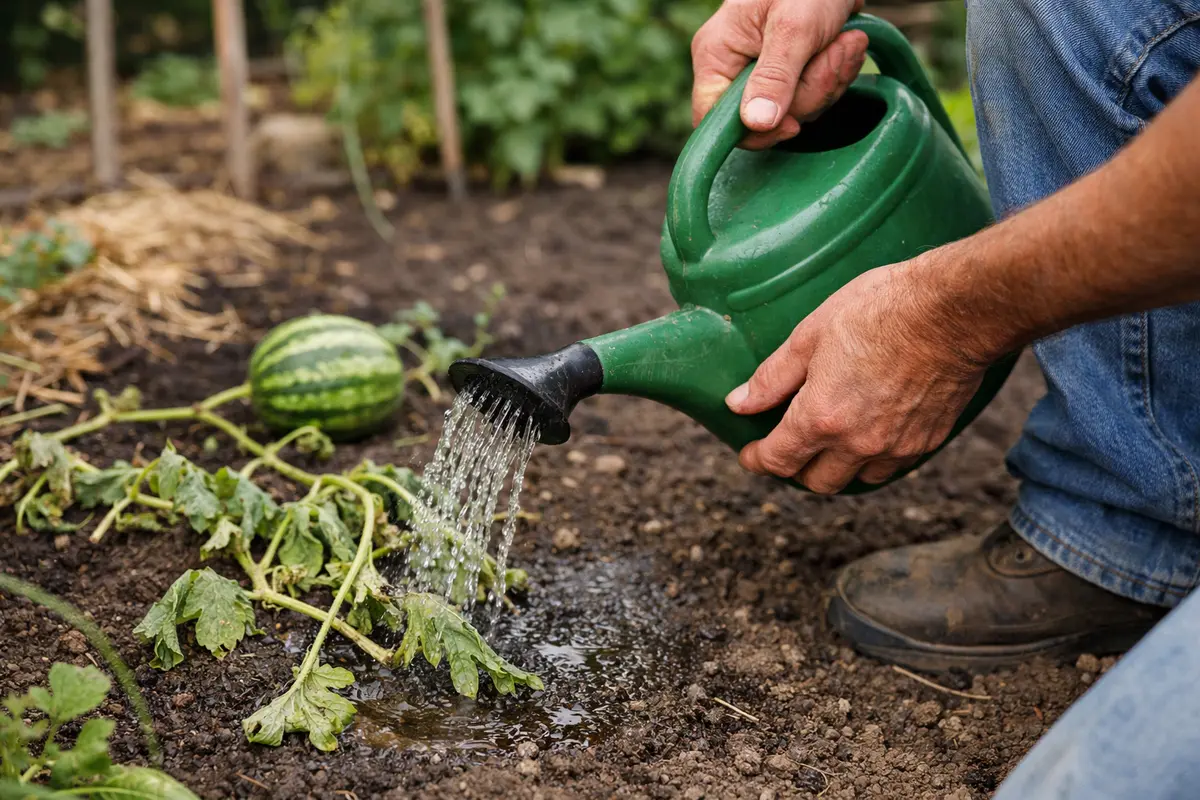
Step 4 – Water Melon Sparingly to Avoid Overstress
Start by improving soil drainage by elevating your melon plants with mounds of well-draining soil, ensuring they are about 12 inches apart. You will notice less drooping as roots become less susceptible to water saturation, promoting stronger overall plant structure and stability. This approach not only allows for better drainage but also helps to encourage air circulation around the roots, leading to healthier growth.
Melon plants droop from root rot primarily in consistently wet or poorly drained soil, conditions that create an ideal environment for fungal pathogens. By mounding soil and ensuring proper spacing, you reduce water retention around the roots and provide airflow, effectively interrupting the cycle of rot. If you discover your plants still droop, it’s critical to evaluate your watering routine for excessive moisture contribution that could exacerbate moisture build-up, leading to further decline.
In cooler seasons, adapt your prevention routine by implementing raised beds that allow for increased drainage during heavy rains. During a drought, consider adding mulch around plants to help retain moisture while also ensuring moisture is not trapped near the roots. This careful timing and adjustment based on the weather will help support root systems without overwhelming them.
Proper monitoring of watering helps avoid recurring stress scenarios where roots may not fully recover. Adjust your watering habits based on environmental conditions, including humidity and temperature; these factors can significantly affect soil moisture retention. For example, during a particularly dry spell or heatwave, you might consider slightly increasing water frequency, but only if you’re certain your soil can handle it. A measure of good practice is to check your soil moisture before deciding to water—this can save you from unnecessary stress induced by overwatering. Keep a consistent watering schedule, but stay adaptable—this may mean adjusting your routines according to changing weather patterns. Excess moisture often leads to problems like wilting tulips after prolonged rain.
During the rainy season, be extra cautious about watering; you might find that natural rainfall provides sufficient moisture. Skipping additional watering entirely during periods of consistent rain can significantly reduce your chances of rot returning. However, if rain is followed by several days of hot weather, you’ll need to monitor the soil again and potentially reintroduce watering based on the observed conditions. Additionally, pay close attention to forecasts; understanding humidity levels can guide your watering frequency and ensure your plants stay healthy.
Step 5 – Check Melon Leaves for Signs of Recovery
Start by checking the soil moisture around your melon plants to determine if overwatering is the culprit behind the drooping. Observe the color and texture of the leaves; they should have a vibrant green, not yellow or mushy. If the leaves appear to be recovering, recheck the soil moisture levels every few days to ensure that the plants remain well-drained. Excess moisture often leads to problems like yellowing leaves in rosemary plants.
A fully recovered melon plant displays firm leaves with a robust green color and steady upright growth, contrasting with early signs of distress, which include wilting and leaves that feel soft or limp. If the plant’s leaves begin to curl or display a brown tint, that signals the problem may be returning. If you see crisp or dry leaf edges, check the soil for excessive dryness.
If the drooping returns despite following previous steps, consider repotting the plants into fresh, well-draining soil to prevent further root damage. Additionally, it’s time to escalate by applying a fungicide specifically designed for root rot, which can offer targeted relief. Monitoring your plants closely during this phase can yield valuable insights for future prevention.
A fully recovered melon plant exhibits upright growth with firm stems and vibrant leaves that showcase a rich green hue. In contrast, early signs of the problem returning include yellowing leaves that feel soft or mushy to the touch, indicating a lack of firmness. If the leaves become droopy again despite initial improvements, closely observe the soil for excessive water retention or foul odors; this could signal a recurrence of root rot.
If the problem returns despite following recovery steps, consider adjusting your watering routine and ensuring proper drainage to prevent waterlogging. Additionally, remove any visibly affected roots and apply a fungicide labeled for root rot if necessary. If conditions do not improve within a week, seek advice from a local gardening expert for more advanced solutions.
A fully recovered melon plant will display firm, green stems, and bright leaves that stand upright, signaling renewed vitality. In contrast, if the problem begins to return, you might notice a gradual wilting or yellowing of the leaves, indicating distress. If the roots remain soft or show signs of blackening, it’s a clear signal that deeper issues may be resurfacing.
If the drooping persists despite following the initial steps, remove the affected plants and improve drainage in the planting area to prevent future occurrences. Additionally, consider applying a root rot treatment to the remaining plants if symptoms continue. If deterioration seems severe, it’s advisable to consult with a gardening professional to explore alternatives like replanting with disease-resistant varieties.
A fully recovered melon plant will have vibrant green leaves and firm, white roots that exhibit a crisp texture. In contrast, early signs of the problem returning include yellowing leaves or a softening root system that feels spongy. If the leaves begin wilting again despite previous signs of recovery, it’s critical to act swiftly to stabilize the plant further.
If your plants continue to droop even after implementing care adjustments, take samples of the soil and roots to test for pathogens. Alternatively, if the typical recovery cues are absent, switching to a fungicide treatment specifically designed for root rot pathogens can address persistent disease issues. Watch for signs of progress that indicate developing new roots, such as healthier leaves and robust growth, signaling established recovery from the earlier fungal attacks.
Successful recovery will be marked by returning leaf turgor, indicating that the plant is regaining strength. Early signs of recovery include lush green leaves that stand upright, suggesting a healthy flow of nutrients and water through the rejuvenated root system. In addition to visual presence, pay close attention to any persistent brown leaves; while they won’t resolve themselves, they shouldn’t multiply if recovery is genuinely underway. If you see ongoing deterioration, revisiting root conditions or consulting with a local gardening expert for professional advice may be necessary.
Continued vigilance will serve to address these ongoing issues before they escalate into irreparable damage. Growth trends can vary widely from plant to plant; thus, noting improvements or changes thoroughly can be extremely beneficial in recognizing what works and what does not. If dropping or discoloration remains persistent after further evaluation, you might consider a more aggressive treatment or re-examining soil culture as an essential action, addressing underlying issues before they worsen.
FAQ
Can root rot spread to other plants?
Yes, root rot can spread if pathogens from decayed roots infest the surrounding soil. Ensure that you practice good sanitation, especially if you notice symptoms in other plants nearby. It is wise to remove any plant material before it can decompose and encourage fungal growth. Furthermore, keep tools disinfected when moving between plants to avoid cross-contamination, as this is a common slip-up that can lead to further issues.
How long does it take for melon plants to recover from root rot?
Recovery can take anywhere from a few days to several weeks, depending on the extent of the root damage and environmental conditions. You may see initial signs of improvement within a week if corrective measures are taken promptly; however, full recovery often requires sustained attention over multiple weeks. During this time, continue to monitor for any signs of re-emerging problems, as vigilance can help mitigate lingering risks.
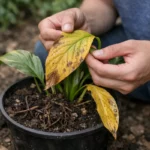
Should I remove all affected parts of my melon plants?
Remove any visibly rotten roots and leaves to prevent further decay. However, only remove the parts that are badly affected; healthy sections can still contribute to overall recovery. It’s also advisable to disinfect your cutting tools between each cut to avoid the spread of any potential pathogens. Make sure to always clean the surrounding area afterwards to minimize risk factors and potential recovery setbacks. Maintaining clean practices is vital to ensuring ongoing plant health.