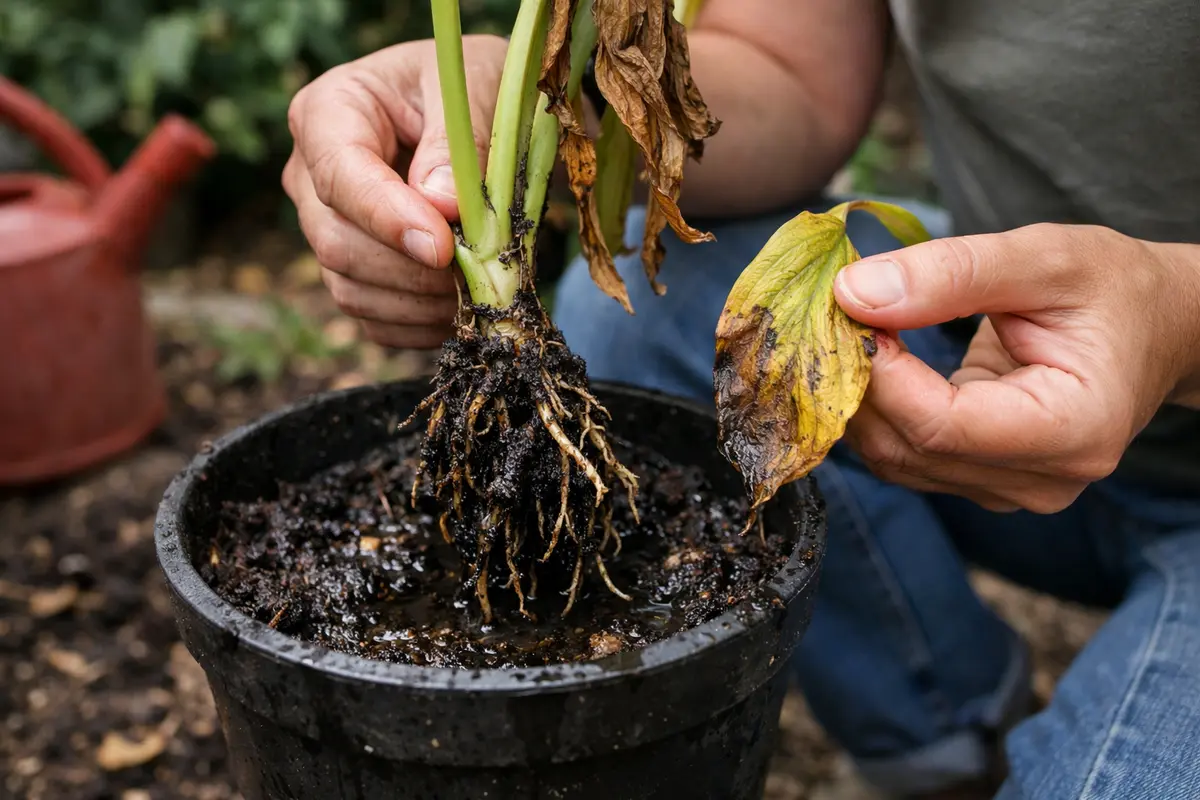
You may notice your indoor plants drooping and developing yellowing leaves during humid weather, a clear sign that you need to know how to fix root rot in indoor plants after overwatering. This occurs when the roots become mushy and start to rot due to excessive moisture in the soil, leading to further damage and a weakened plant. If left untreated, the problem gets worse and can spread throughout the root system, stalling growth, but fixing it is possible now—you can inspect the roots, trim any affected areas, and improve drainage to help the plant recover.
Step 1 – Trim Away Rotting Roots Immediately
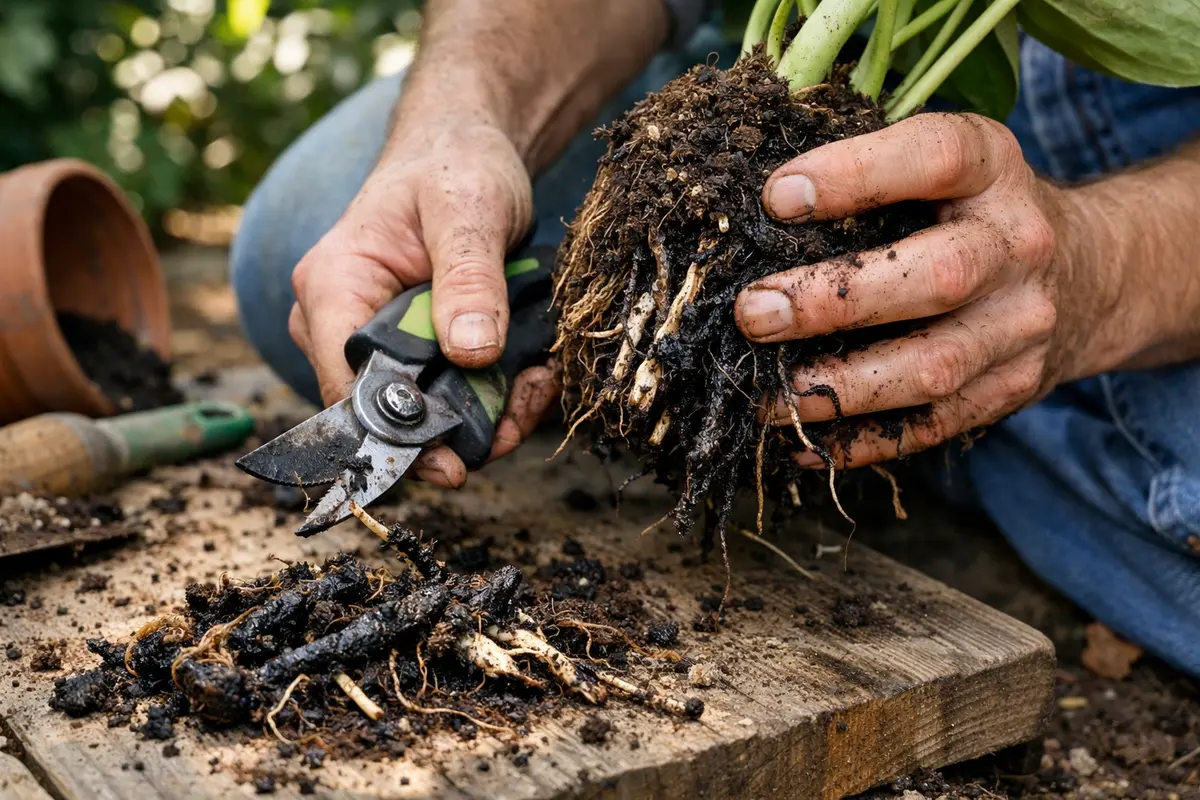
Cut away any visibly rotting roots without delay, ensuring that your cuts are clean and decisive. You will notice an immediate alleviation of the plant’s stress, as the damaged parts are removed and the risk of spreading rot is mitigated. Ideally, you should aim to trim at least 25% of the root mass if it appears compromised; this will allow the plant to focus its energy on surviving and rebuilding, instead of trying to sustain parts that can no longer function.
Removing dying roots is crucial because they can emit toxins that further harm the plant. In cases of root rot, the compromised roots struggle to absorb water and nutrients, leading to an evident decline in plant health. If left unchecked, this toxin build-up creates a cycle where the plant limits its own recovery potential, making the situation worse over time. For example, you may also notice black or mushy root tips, which are straightforward signs of serious damage and should be excised immediately. Look for roots that have a slimy texture or a foul odor, as these are indicators of severe decay.
Many gardeners mistakenly wait to address root rot until they see the plant’s health significantly decline. However, immediate action can drastically improve the situation. For instance, if a plant has been overwatered for only a few days, the roots may only be mildly affected and can survive if properly treated quickly. If inspection reveals several roots in distress, prioritize the most severely damaged ones first. Ensure to differentiate between healthy white or firm roots mixed in; those should be kept as they are still viable. If you notice that the remaining roots are discolored or fragile, they may also require attention.
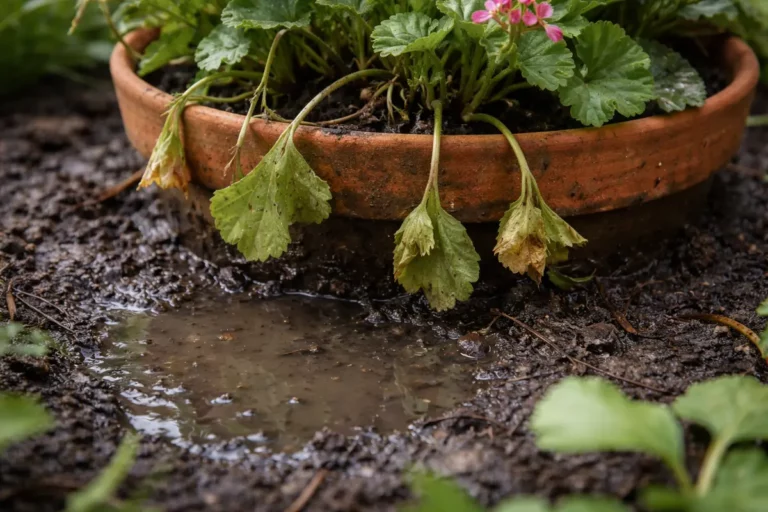
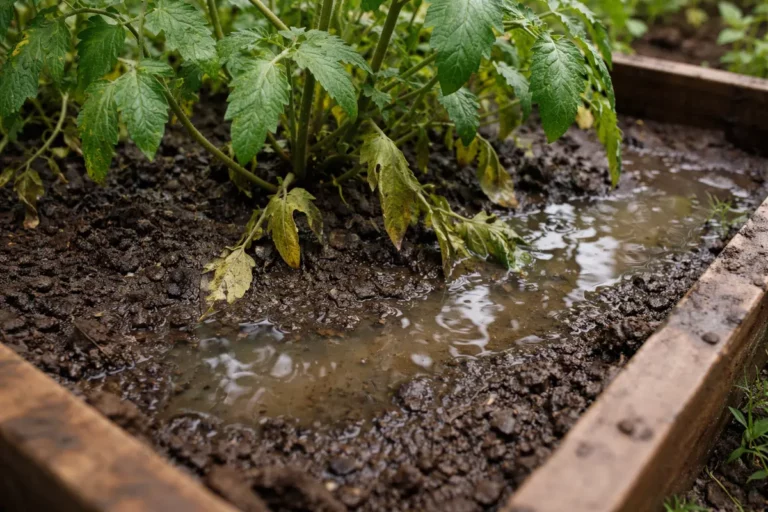
Step 2 – Investigate Water Accumulation Issues
Check the pot and soil drainage to identify any water accumulation issues. You should observe that excess water flows freely from the drainage holes after watering, indicating that the soil is well-draining. If you notice that water is pooling at the bottom, this is a clear sign that the drainage holes are blocked or that the soil mixture is not providing adequate aeration. Be vigilant to observe how long it takes for water to drain after an initial watering—ideally, it should take no longer than 10-15 minutes.
Ensuring proper drainage is fundamental because stagnant water leads to root rot by suffocating roots and fostering pathogens in the soil. Roots need to breathe and be exposed to air pockets within the soil, as this helps prevent fungal growth associated with root rot conditions. A container without adequate drainage can quickly become a reservoir for water, creating a harmful environment for your plants. If water accumulates without draining, the resulting anaerobic conditions can prompt rapid rot progression.
If the soil remains wet for long periods or you notice a sour smell, it suggests that the mix is compacted or too dense. Opt for a soil mix that incorporates materials like perlite or coarse sand, which enhances airflow and promotes drainage. Additionally, consider the size of your pot; using a pot that is too large can retain excess moisture. For example, if you have a small plant in a big pot, the soil may take longer to dry out, leading to prolonged exposure to moisture, which is detrimental to the roots. If assessing reveals inadequate drainage, it might also be necessary to elevate the pot slightly to guarantee more airflow.
Step 3 – Repot Plant with Fresh Soil Mix
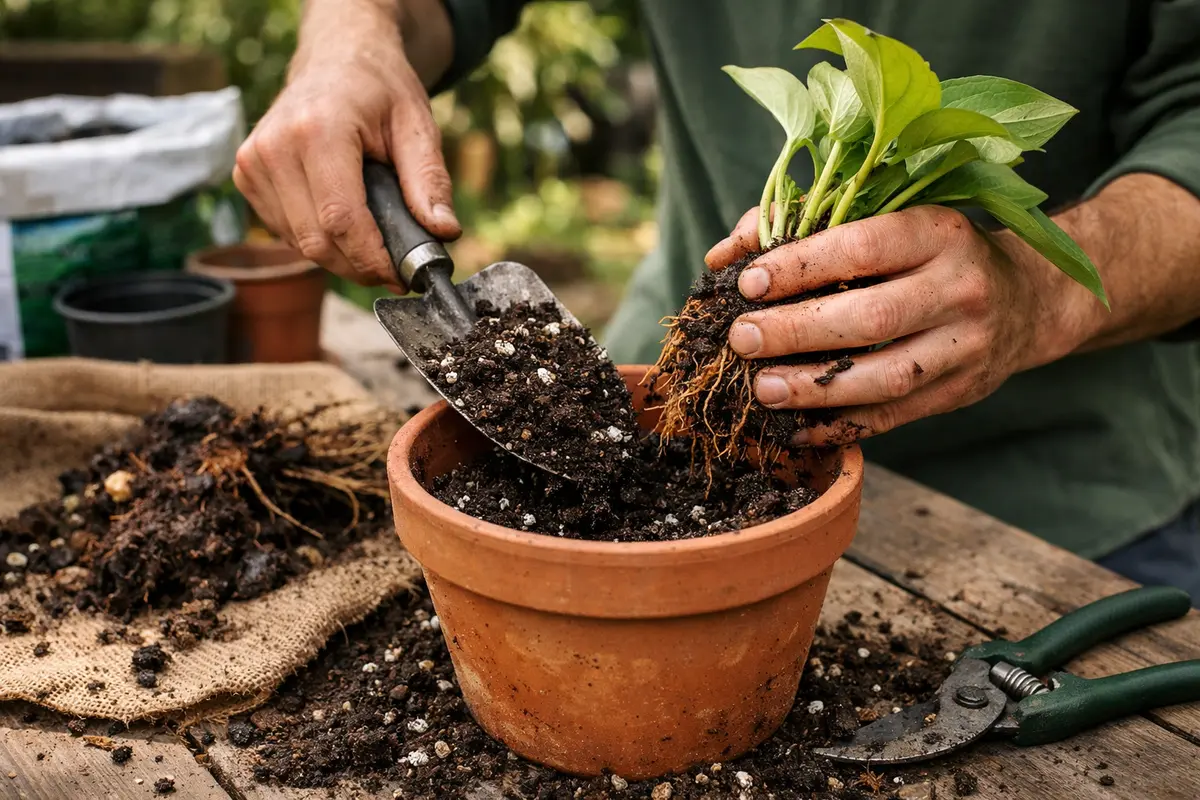
Remove the plant from its pot and repot it with fresh, well-draining soil, making sure to handle the plant by its root ball to minimize stress. You will begin to see the plant stabilize and lay a foundation for recovery within a few days. Ideally, when repotting, select a pot that is only slightly larger than the previous one—preferably 1-2 inches wider—to avoid excess soil retention that can lead to water pooling.
Repotting into fresh substrate is vital as it allows roots to re-establish contact with a healthy medium free of pathogens. This new environment provides essential nutrients and improved aeration, promoting root respiration and overall recovery from rot damage. Depending on the plant type, healthy growth can resume within a week or two post-repotting. Additionally, use sterilized tools to minimize the risk of introducing new pathogens into the soil mixture during repotting. This practice helps ensure that no lingering fungal spores from previous soil conditions affect the plant’s recovery.
A common mistake made during this step is to overwater immediately after repotting. Instead, ensure the new soil is just slightly moist and keep water to a minimum for the first week as the new roots need time to acclimate to their surrounding environment. Watering too soon can lead to re-saturation, stifling the recovery process and possibly leading to renewed root rot conditions. Monitor the moisture of the top inch of soil; if it feels dry, then proceed to water again lightly. However, if the soil remains damp, allow it to dry out completely before applying any more water.
Step 4 – Water Only When Soil Is Dry
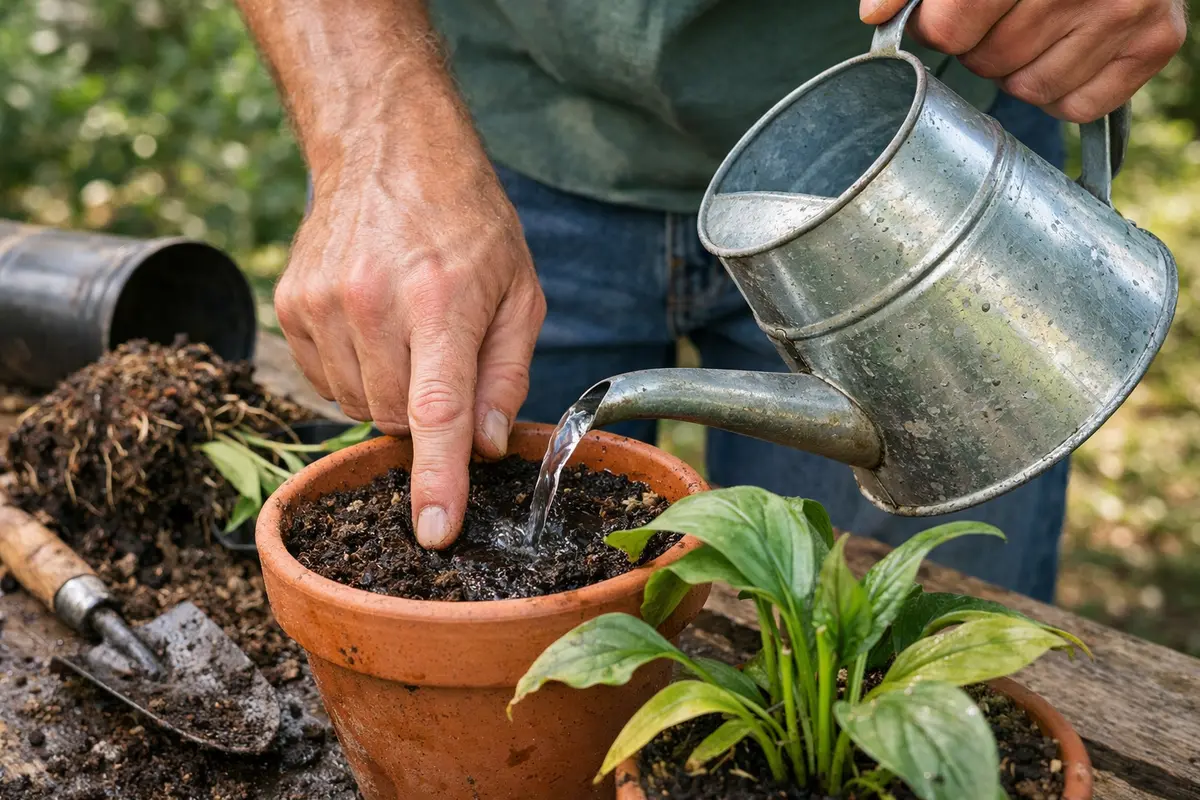
Start by ensuring your indoor plants have proper drainage by using pots with drainage holes and well-draining soil. Regularly check the moisture level of the soil before watering, and aim for an interval where the top inch feels dry — this will minimize the risk of overwatering and root rot.
Overwatering leading to root rot often occurs in environments with poor air circulation and high humidity. If your plants are in a closed space with minimal airflow, the soil can retain moisture longer than necessary, which promotes fungal growth. Adopting a routine where you assess soil moisture before watering directly combats this condition and helps establish a healthier watering habit.
During the winter months, when indoor air tends to be drier due to heating, you should adjust your watering routine to every two weeks instead of weekly. This seasonal change helps prevent soil from becoming overly saturated while still meeting the plant’s lower moisture needs during this time. If you notice the leaves yellowing, check if the soil is overly dry to inform your next watering cycle.
This practice is essential because it mimics the natural dry-down cycles in a plant’s habitat, allowing the roots to absorb necessary moisture while avoiding saturation. Moreover, this method leads to healthier root systems, as they can extend deeper into the soil in search of water if conditions allow. Observe any wilting or drooping leaves as these are indicators that a plant may need water; however, always check the soil first to confirm it is dry at the required depth. An overabundance of water will often lead to a further decline in health, which can revert your progress.
Consider environmental factors, such as seasonal changes, that may impact your watering schedule. If you notice your plant is actively growing during the warmer months, it may require slightly more frequent watering compared to its dormant phase in winter. Always assess the moisture level in the soil before proceeding to water, adjusting based on the plant’s specific needs. For instance, a plant like a cactus might need watering only once every few weeks, while a tropical plant could require weekly hydration during warmer periods. If you observe any persistent yellowing of leaves despite following this schedule, reassess your watering habits quickly.
Step 5 – Inspect Leaves for Signs of Recovery
Start by checking your indoor plants for signs of waterlogged soil and mushy roots, which indicate overwatering and potential root rot. Observe the drainage holes for excess water and assess the moisture level of the soil, making sure it dries out between watering. Recheck the plant every few days, looking specifically for changes in root texture and soil dampness to gauge recovery progress.
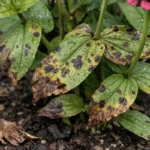
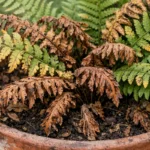
A fully recovered plant will show vibrant, green leaves that feel firm to the touch, while early signs of returning root rot include yellowing leaves that feel limp or soft. Additionally, if you notice a resurgence of unpleasant odors or dark spots on stems, this may signal that the root rot is returning. If foliage becomes wilted despite dry soil conditions, re-evaluate root health.
If the problem persists despite following these steps, repot the plant in fresh, well-draining soil and trim away any remaining blackened roots. If it continues to decline, consider applying a fungicide specifically designed for root rot as a last resort, observing any further changes within a week. If there are no improvements after treatment, it’s advisable to consult a plant specialist for tailored advice.
A fully recovered plant typically has vibrant, firm leaves, and healthy new growth stems. In contrast, a plant showing early signs of the problem returning might have yellowing or wilting leaves again, suggesting that there is still an issue with moisture levels or root health. If wilting occurs despite a proper watering regime, this indicates that the roots may still be struggling to absorb moisture, potentially suggesting lingering rot or compacted soil issues. Compare the decline against previous symptoms; if the pattern is repeating, further action may be necessary.
If signs of decline re-emerge, consider repeating the assessment of the root system and soil moisture conditions. Pay close attention to the frequency of your watering since even a slight excess can reignite rot issues. For example, if over-saturation was the original issue, doubling down on moisture without re-evaluating can exacerbate the problem. If the condition worsens despite your care, consulting a professional might be necessary to explore more advanced treatment options for root health. In cases of extensive rot, further steps may involve aggressive root trimming or even systemic medications that target root pathogens specific to your plant type.
FAQ
How long does it take for a plant to recover from root rot?
The recovery time can greatly vary based on the plant type and severity of the rot. Generally, visible improvement with new growth can take anywhere from a week to several weeks, depending on how promptly you intervene and the plant’s initial health. A quick response within the first few days can lead to quicker recovery periods, while delayed action can lengthen the recovery time significantly.
Can root rot spread to other plants?
Yes, root rot can spread to nearby plants through contaminated soil or water. Pathogens that cause rot can reside in the soil, making it crucial to isolate affected plants immediately. To minimize this risk, ensure that any tools used are sanitized, and avoid sharing soil between affected plants. If you suspect that your plant’s roots are infected, consider treating the entire area by changing the soil around affected plants.
Should I remove all affected parts immediately?
While you should remove clearly rotting roots, it’s best not to prune unnecessary parts too soon. Allow the plant some time to stabilize after the initial intervention before making further cuts to maintain as much healthy tissue as possible for recovery. Over-pruning can lead to additional stress and inhibit the plant’s ability to rebound effectively. Only revisit the pruning step if signs of decline reoccur within a few weeks.