You may notice unsightly dark spots appearing on your zinnias during humid conditions, especially after heavy rain, which is why you need to know how to stop leaf spots on zinnias after heavy rain. These spots often occur due to fungal infections, leading to damage that can weaken the plant. If left untreated, the condition can spread, making it harder to fix, but you can improve the situation by inspecting your plants and trimming away the affected leaves.
Step 1 – Prune Infected Zinnia Leaves Immediately
Start by removing any visibly damaged leaves from your zinnias immediately after the heavy rain has subsided. Use sharp garden scissors to cut the affected leaves at their base, ensuring you discard them away from the garden to prevent the spread of disease. Within a day, you should notice an overall reduction in the leaf spot symptoms, allowing more sunlight to penetrate the remaining healthy foliage.
Acting quickly matters for zinnias because they are particularly susceptible to fungal infections when moisture lingers on the leaves. If removed promptly, the damaged areas decrease the chances of pathogens spreading, while delayed action can lead to rapid colonization of fungus, characterized by an increase in wilting and browning. If you notice quickly that the remaining leaves show no new spots, it indicates successful immediate intervention, whereas a delay can lead to a rampant infestation.
An example of timing making a difference is a gardener who swiftly pruned their zinnias right after a rainstorm, successfully controlling leaf spot, while another waited several days, resulting in widespread infection that required other costly treatments. A common error is neglecting to clean garden tools after each cut; if not this, check that you’re using disinfected tools to prevent cross-contamination between plants.
Acting quickly limits fungal development that typically follows heavy rainfall. If left untreated, the leaf spots may proliferate further, leading to significant foliage loss and stress. Some zinnias may show signs of recovery within days, while others left untreated can appear increasingly wilting or yellowing, indicating a more advanced condition. If you notice the leaf spots spreading rapidly, check for any excess moisture around the base of the plants.
A gardener who removed infected leaves right after the rain found that their zinnias rebounded well, with minimal further damage observed. Conversely, another gardener ignored early signs, leading to widespread infection and stunted growth later in the season. Pay attention to your zinnias: if the plant appears droopy despite dry conditions, check for underlying pests or lingering moisture in the soil.
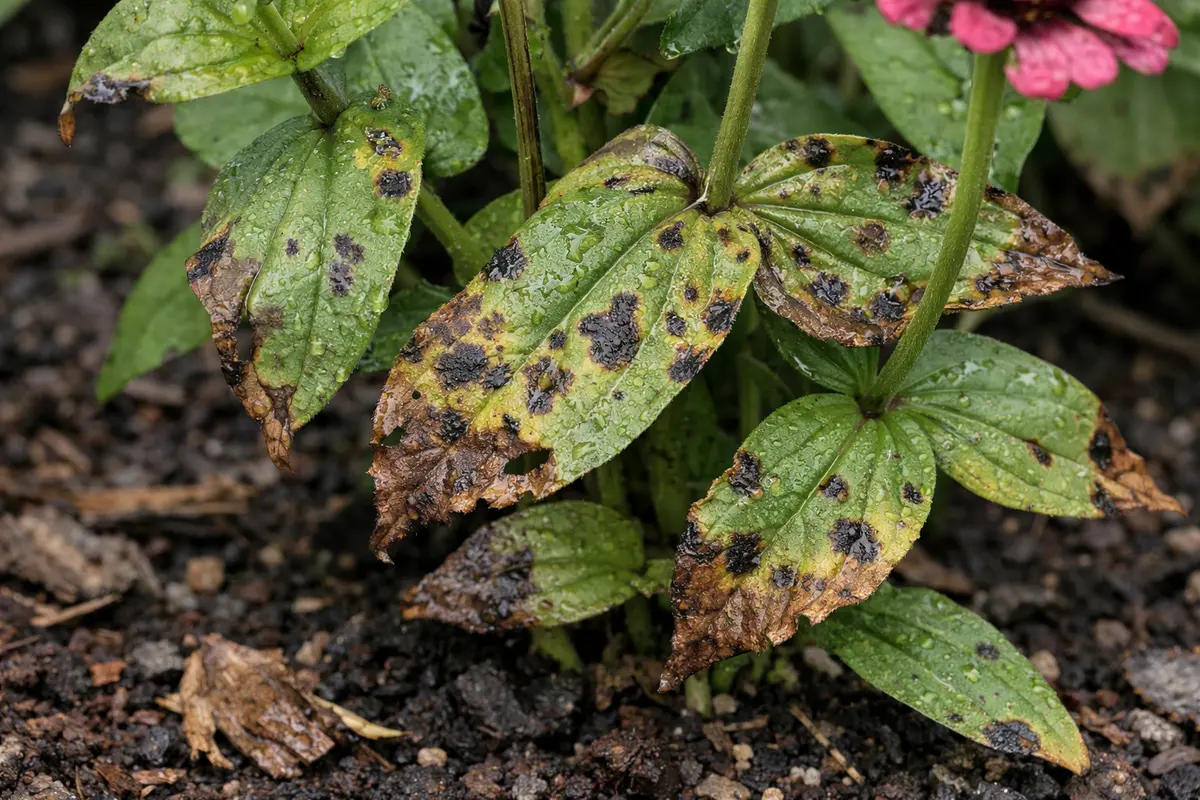
By pruning the infected parts right away, you limit the spread of the disease to other healthy leaves. Fungal spores thrive in damp conditions, so they proliferate rapidly after heavy rain, especially if humidity remains high. For instance, if zinnias are densely planted and congested, moisture retention becomes a significant issue, making these plants especially vulnerable. Failure to act promptly results in greater numbers of infected leaves, often seen as a cascading effect where one infected leaf leads to multiple others being compromised, culminating in sections of the plant wilting, yellowing, or dropping leaves as the infection spreads.
Many gardeners mistakenly opt to ignore the lesser spots, believing they’ll eventually disappear. However, this procrastination often allows the infection to worsen, making recovery more difficult. If you’re unsure which leaves to remove, look for brown edges or dark splotches; removing these leaves right away is critical for your plant’s health. A general rule is to cut 2-3 inches below the visible infection to ensure you’re eliminating the entire affected area, thereby preventing any lingering spores that could cause a recurrence. If the zinnias show signs of spreading discoloration after your first round of pruning, don’t hesitate to repeat this step as needed to ensure cleanliness and resilience against the fungi.
Step 2 – Check for Fungal Sources on Zinnias
Start by inspecting your zinnias for any signs of disease or pathogen presence on the leaves. Remove affected leaves and apply a fungicide specifically designed for leaf spots on flowering plants. You should notice a decline in new leaf spots within a week as the remaining foliage becomes healthier.
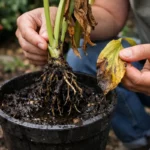
Leaf spots in zinnias often result from fungal pathogens thriving in damp conditions created by heavy rain. These fungi invade the plant tissues, causing visible spots that can lead to more significant damage if left untreated. Healthy soil with good drainage can help inhibit such pathogens, so observing the moisture level in the soil is crucial.
If the soil smells sour, it indicates poor drainage, leading to root rot; amend the soil composition by adding sand or organic matter to improve aeration and drainage. Alternatively, if you notice yellowing around the leaf spots, check for nutrient deficiencies, particularly nitrogen, as a lack of essential nutrients can exacerbate leaf spot symptoms.
Leaf spots on zinnias often develop due to excess moisture in the soil and humidity, which fosters fungal growth. When the roots are waterlogged, they become stressed, leading to weakened plant tissue; this compromises the plant’s ability to ward off pathogens, making it susceptible to infection. Compare this to zinnias in well-drained soil, which typically exhibit robust growth and little to no spotting.
If the soil smells sour, indicating poor drainage, amend it with organic matter to improve aeration and drainage. Alternatively, if the leaf spots appear similar but are accompanied by a sticky residue, check for aphids or other pests that may be contributing to the problem and treat them accordingly.
The leaf spots caused by heavy rain often stem from a fungal infection, which thrives in damp soil conditions. When zinnias sit in waterlogged soil, the roots struggle to absorb nutrients, leading to nutrient deficiencies that manifest as discolored, spotted leaves. This is evident when leaf spots appear alongside wilting, signaling both excess moisture and insufficient root function.
If the soil smells sour, it may indicate root rot, necessitating a switch to a well-draining potting medium and possibly relocating the plants to a drier area. Conversely, if the leaf spots linger even in dry conditions, check for other issues, such as aphid infestations or fungal spores on nearby plants, which could also contribute to similar symptoms requiring targeted pest management or fungicide application.
Fungal infections often arise when plant materials decompose excessively in moist soil, creating an environment ripe for disease. The roots and lower leaves are particularly susceptible to prolonged moisture retention, especially after heavy rainfall—this is a common scenario for zinnias that may lead to leaf spots if not corrected timely. Identifying the source of the infection is crucial to eradicating future outbreaks. Be particularly vigilant about any organic debris, such as fallen leaves, that may harbor fungi. If this debris accumulates alongside perennial plants, it can create a microclimate conducive to fungal growth, which can quickly affect the health of surrounding plants.
If you notice that the soil smells sour or is waterlogged, it is essential to address drainage issues immediately. Improve soil drainage by enriching it with organic materials like compost or coarse sand, or switching the zinnias to pots if the soil remains too wet. This adjustment creates an inhospitable environment for the fungus to thrive. Additionally, ensure that the planting area is slightly elevated to facilitate proper drainage after rainfall. If you frequently battle fungal growth, building raised beds with adequate drainage holes can offer a long-term solution. Furthermore, breathable garden fabrics can cover the soil before major rainfall events to protect against spore introduction into saturated areas.
Step 3 – Fertilize Zinnias for Quick Recovery
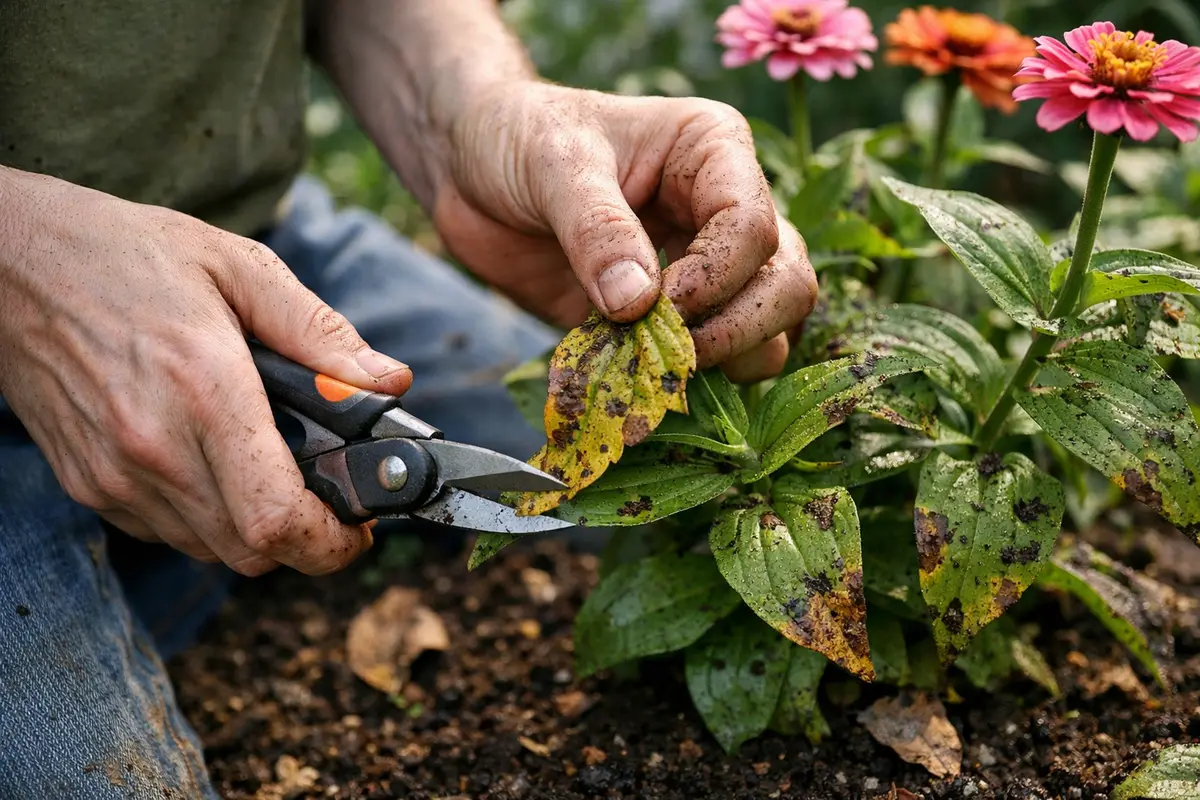
Apply a nitrogen-rich fertilizer to your zinnias as an immediate recovery action. You will see improved leaf color and new growth within just a few days, demonstrating the effect of better nutrition on the recovery process. Timing your fertilization right after pruning ensures that the plants can utilize the nutrients effectively to support new foliage development.
Using fertilizer helps boost the growth of healthy new foliage, which can compensate for the lost leaves due to the pruning process. In the case of zinnias, a balanced fertilizer not only encourages lush growth but also aids in restoring nutrients that may have been washed away during heavy rains. This nutrition is vital for plants recovering from stressors like leaf spots and helps them regain their vitality more rapidly. If you skip this step, the plant may continue to struggle, and stunted growth can manifest within a week, leaving them at the mercy of future fungal attacks.
Avoid over-fertilizing; too much can lead to nutrient burn or excess foliage growth that may overwhelm the plant. Instead, maintain a regular feeding schedule every 4-6 weeks during the growing season to ensure your zinnias have the nutrients they need without overwhelming them. If you notice your fertilizer causing leaf tips to turn brown or appear scorched, this is a warning sign to reduce application rates. Always follow package instructions for measurements, typically around 1 tablespoon per foot of plant height, incorporating it evenly into the soil to prevent uneven growth. If new growth is soft and spindly despite fertilizing correctly, make sure the plant is receiving adequate sunlight and not under too much stress from excessive moisture.
Step 4 – Water Zinnias Carefully After Rain
Water your zinnias sparingly in the days following rain. This ensures the soil remains moist but not saturated, which can help prevent the onset of new fungal problems. A consistent and deliberate approach to watering is crucial, particularly for zinnias that have just experienced heavy rain.
Overwatering can exacerbate fungal leaf spots caused by the previous heavy rain. It’s essential to provide just enough water for recovery, allowing the soil to dry out slightly between watering sessions. Maintaining optimal moisture levels helps keep root health intact while discouraging fungi from thriving in overly damp conditions. If you notice wilting leaves despite the soil being wet, this indicates root dysfunction or rot, often tied to excessive moisture. Adjust your watering regimen accordingly to allow the soil to dry out. If the soil fails to dry within a couple of days post-rain, it may be essential to reassess the garden layout or incorporate drainage strategies more effectively.
As a preventive measure, consider changing your watering schedule to early morning when less evaporation occurs, allowing plants to absorb moisture efficiently. During particularly rainy periods, ensure that drainage around the plants is effective to avoid water pooling in the soil, which could lead to renewed fungal growth. Using mulch to help regulate soil moisture can also be beneficial, as it aids in suppressing weeds while holding moisture at a more balanced level without suffocating the roots. A best practice is to allow mulch to decompose subtly into the soil, enabling nutrient absorption alongside moisture control. If water still pools on the surface or seeps down too slowly, check for soil compaction and make necessary amendments.
Step 5 – Inspect Zinnias for New Spots Weekly
Start by checking your zinnias daily, focusing on the undersides of leaves where moisture can linger. Observe for dark spots, yellowing edges, or any new fungal growth. Recheck at least every other day following heavy rains or prolonged dampness to catch any developing issues early.
A fully recovered zinnia will exhibit vibrant leaves that are green and free from blemishes, while early signs of leaf spots may appear as small, dark brown necrotic patches surrounded by a yellow halo. Additionally, a healthy plant will have a firm texture, contrasting with the soft, mushy feel of a leaf that is starting to deteriorate again. If not this, check for excess moisture retention around roots.
If the problem returns despite previous interventions, apply a fungicide labeled for leaf spot diseases specifically on the affected areas and ensure proper air circulation around the plants. If issues persist after fungicide treatment, consider removing severely affected leaves to prevent further spread and reassess your watering practices to reduce humidity around the plants.
A healthy zinnia plant will start showing lush green leaves without signs of discoloration and may even begin to bloom if they are on the road to recovery. During your weekly inspections, look for any returning discoloration, which may indicate that further treatment or additional preventative measures are needed. Catching these issues early can save your plants from more severe infestations. If new spots appear, assess whether they are localized or widespread; localized spots may suggest continuing fungal activity, while widespread issues could indicate poor air circulation or overly damp soil conditions. If you notice spots multiplying over the course of 1-2 weeks after your initial pruning, this could suggest the need for a fungicidal treatment to further combat the spores.
If you see new spots forming after following the recovery steps, it may be time to reassess your watering practices or reconsider the location of your zinnias, possibly switching to a more well-drained area. If spots persist regardless of your adjustments, it may be beneficial to consult with a local gardening expert for tailored advice on organic fungicides specifically suited for zinnias or to investigate professional treatment options if the issue escalates. Early intervention can often prevent a minor infestation from becoming a major problem that leads to irreversible damage to your zinnias.
FAQ
How long does it take for zinnias to recover from leaf spots?
Zinnias can begin showing signs of recovery within 10-14 days after implementing the necessary steps to treat leaf spots. You’ll know they are recovering when new healthy leaves start to grow without signs of discoloration, showcasing the plant’s ability to rebound with proper care. However, patience is essential, as recovery can vary based on overall plant health and environmental conditions.
Can leaf spots spread to other plants in my garden?
Yes, leaf spots caused by fungal infections can easily spread to nearby plants, particularly in humid or moist conditions. Taking action quickly by removing infected leaves and checking surrounding plants can help prevent the spread. Ensuring good spacing and air circulation around plants is key to curbing potential outbreaks. Additionally, consider rotating crops and avoiding planting susceptible species in close proximity.
Should I remove entire plants if they are infected?
Only remove entire plants if they show severe damage or if the infection is widespread and unmanageable. If you follow the pruning and care steps effectively, many zinnias can recover without needing to be removed. Monitoring their progress and reassessing conditions can significantly inform your decision on whether to keep or remove the plant. If a plant consistently shows signs of recurring issues despite your best efforts, it may be best to replace it with a more resilient variety.