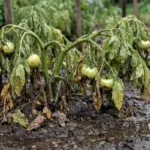
You may notice your spider plant showing signs of distress after a period of consistent overwatering, which is why you need to know How to prevent root rot in spider plants after overwatering. The leaves could be wilting or developing brown spots, indicating that the roots are suffering from excess moisture and beginning to rot. If ignored, this issue only gets worse and can spread through the plant, weakening the overall health and leading to further damage; however, you can fix it now by adjusting your watering routine and inspecting the roots for any signs of rot.
Step 1 – Trim Drowned Spider Plant Roots Immediately
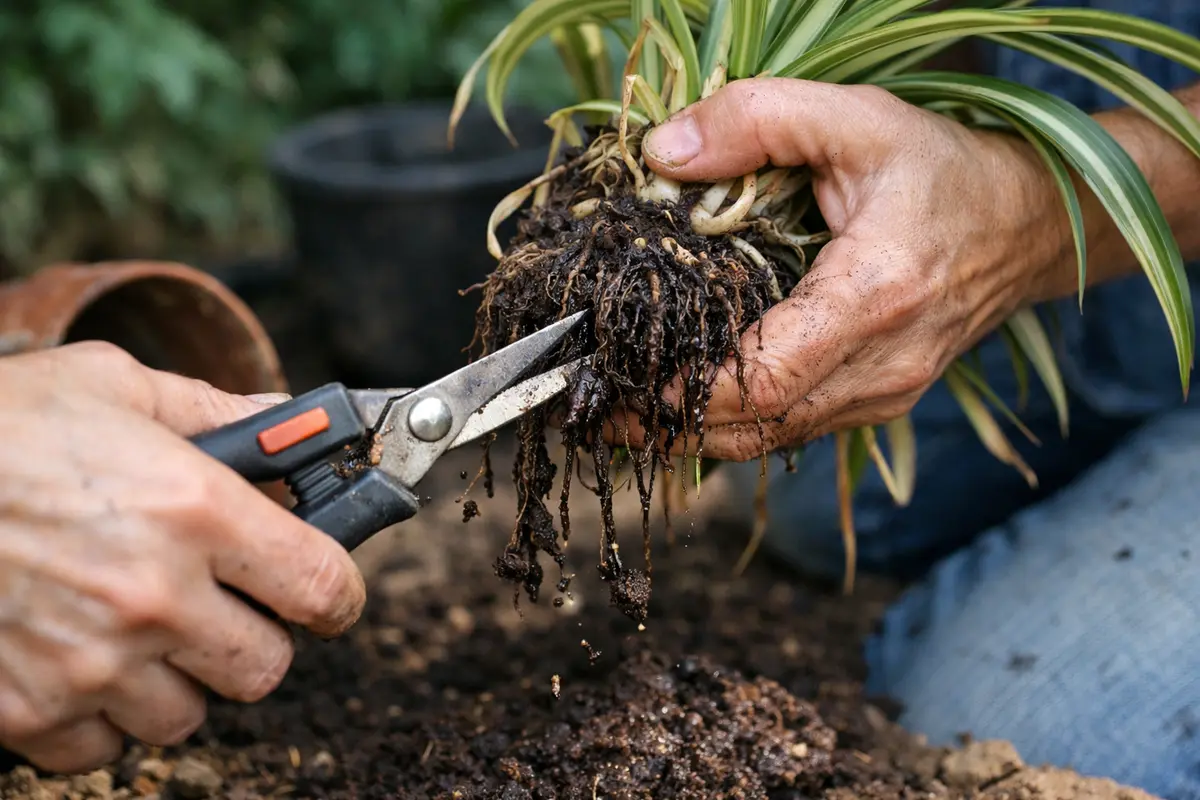
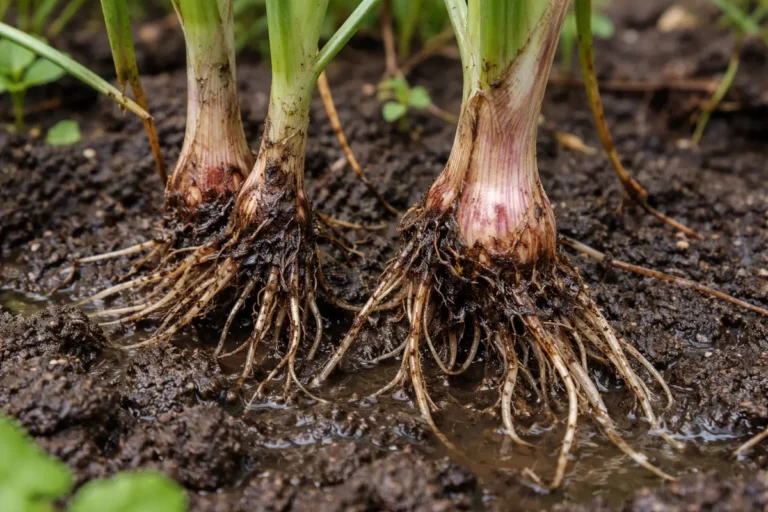
First, remove the spider plant from its pot and carefully inspect the roots. Trim away any dark or mushy sections, which signal rot, and ensure the healthy roots are left intact. This immediate action prevents further spread of rot, allowing the plant to stabilize, and you should notice a more resilient base when you re-pot the plant in fresh, dry potting mix.
Acting swiftly is crucial because spider plants are particularly sensitive to root rot due to their thicker, fleshy roots that retain moisture. If roots are left untreated, they can suffocate and decay further, leading to irreversible damage and leaf yellowing, as nutrients can no longer be absorbed effectively. If you notice limp and droopy leaves, check for mushy roots; if they feel firm, you can still salvage the plant by drying the soil.
A gardener once waited too long to address root rot, resulting in the complete loss of their spider plant. Instead of salvaging it by promptly trimming the rotting roots, they hesitated, allowing the remaining healthy roots to decline as well. This incident highlights how inaction can rapidly exacerbate a problem that could have been resolved quickly with decisive pruning.
Acting quickly is crucial because spider plants are sensitive to excess moisture, which can quickly lead to anaerobic conditions in the soil. If left unchecked, overwatered roots begin to decay, resulting in further nutrient deficiencies and stunted growth in the plant. The faster the damaged roots are removed, the better the plant can regenerate healthier root systems, increasing its chances of survival.
For instance, a gardener who immediately addressed root rot in a spider plant was able to save it, while another that delayed action ended up with a completely dead plant after weeks of neglecting the signs. A common mistake is to wait for visible wilting before acting—if not this, check for soil that remains constantly saturated to avoid root rot altogether.
Acting quickly matters because spider plants are sensitive to moisture levels. The sooner you trim rotted roots, the better your chances of saving the plant. If left untreated, the damaged roots will decay further, leading to a rapid decline in your plant’s health. Trim away any mushy or darkened roots, which are signs of rot. Healthy root tissue should be firm and white, while rotting roots will feel soft and may even emit a foul smell. This foul odor often indicates that the decay process has advanced, signaling an urgent need for intervention.
A common mistake is to delay trimming the roots in hopes of recovery on their own. Delaying the removal of rotten roots allows the degraded area to spread, putting the entire plant at risk. Ideally, check the roots within a day of noticing symptoms, as rotting can progress swiftly in overly moist conditions. If you notice any roots that appear in between healthy ones (such as a soft spot in a handful of healthy roots), be proactive: remove these as well because rot is often insidious, creeping into seemingly healthy areas without immediate detection.
Step 2 – Investigate Heavy Soil for Overwatering Issues
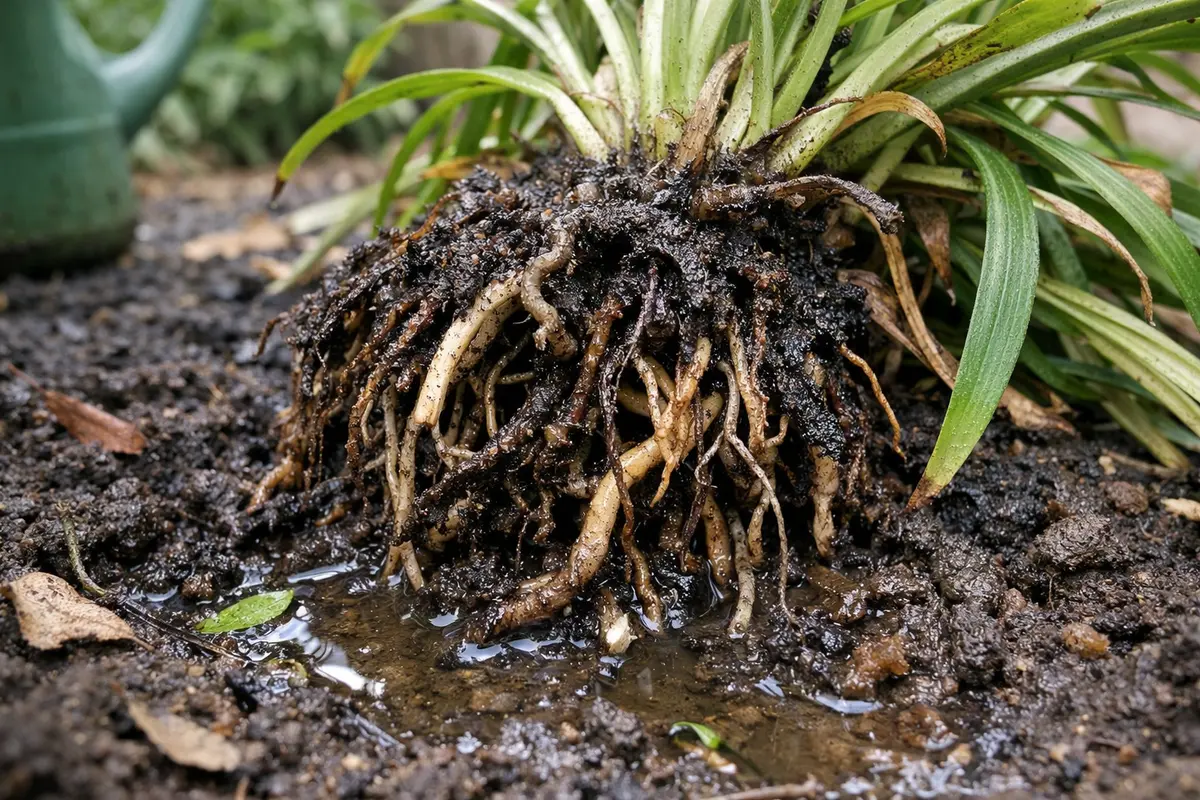
Start by inspecting your spider plant’s roots and soil for signs of overwatering, such as mushy roots or a damp odor. If you find any, gently remove the plant from its pot, trim away the affected roots, and repot it in fresh, well-draining soil. You should observe a decrease in root decay and improvement in the plant’s ability to absorb water within a few days.
Overwatering leads to soil saturation, which can create an anaerobic environment where beneficial microorganisms struggle to survive. This imbalance allows harmful fungi and bacteria to thrive, causing the roots to rot and soft tissue to break down. For instance, healthy spider plant roots appear firm and white, whereas rotting roots turn brown and mushy. If your roots are brown, check the moisture content of the soil; if the soil is extremely wet, you’ve likely overwatered.
If you detect a sour smell in the soil, indicating anaerobic conditions, act quickly by repotting the plant in a pot with drainage holes and incorporating perlite into the soil mix. Conversely, if the soil feels dry but the roots are still rotting, you might be facing a fungal infection rather than simple overwatering, and treating it with a fungicide could be necessary.
Spider plants thrive in well-draining soil that retains some moisture but not to the point of saturation. Excess moisture prevents roots from obtaining the oxygen they need, leading to root rot. If your soil is heavy with clay or lacking drainage holes, it could be exacerbating the rot crisis. When attempting to soften overwatered, compacted soil, it’s often better to gently mix in perlite or coarse sand to enhance drainage during repotting.
If you find that the soil smells sour or feels compacted, consider repotting your plant in fresh, well-aerated potting mix. Ensure to use a pot with drainage holes to prevent water accumulation. Not addressing the soil condition promptly will only compound the rot problem and lead to further plant stress. A visible sign of recovery is if the soil mix drys out quicker after being replaced, pointing toward a healthier root environment.
Step 3 – Repot Spider Plant in Well-Draining Soil
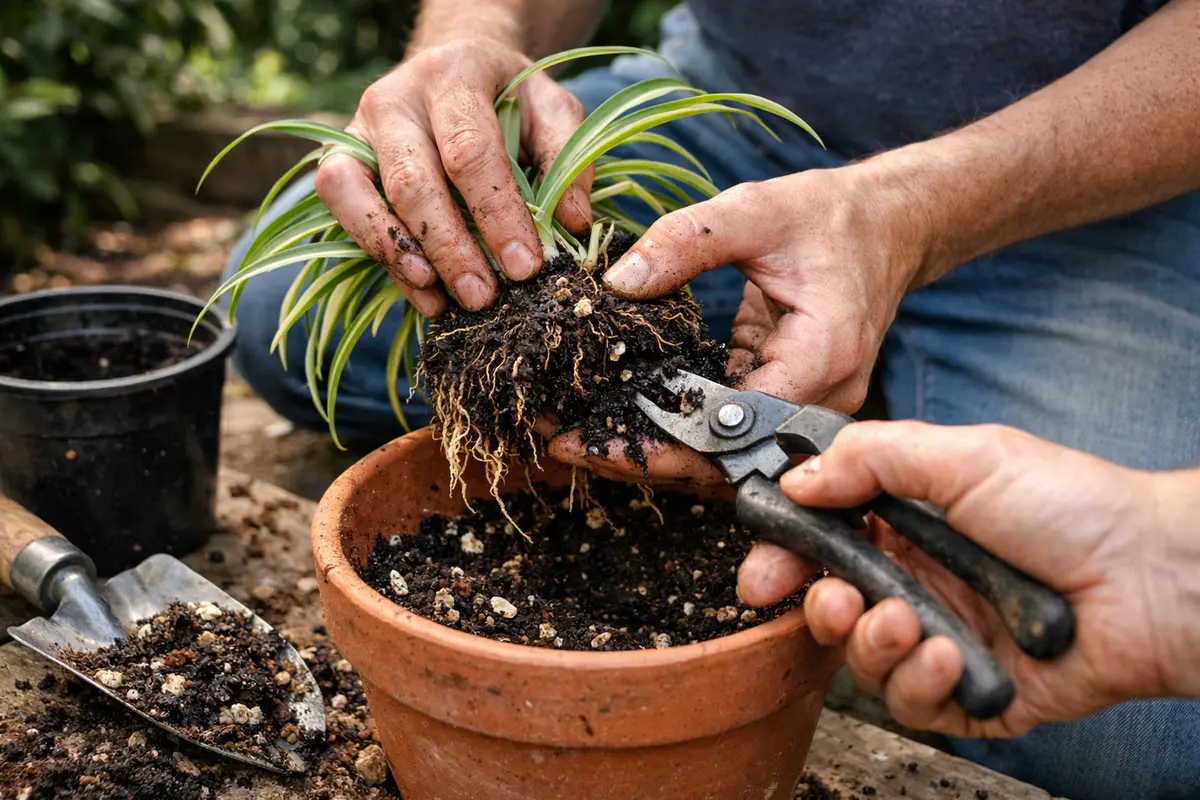
Start by removing the spider plant from its pot and inspecting the roots for any signs of decay. Trim any mushy or blackened roots with sanitized scissors, then replant it in fresh, well-draining soil. After a few days, you should notice new growth emerging from healthy roots and the foliage beginning to perk up.
The recovery timeline for a spider plant varies; healthy regrowth can take anywhere from a few weeks to a couple of months. Look for vibrant green leaves sprouting and a more robust plant structure as indicators of progress. Warm temperatures and bright, indirect light can speed up recovery, while overly cool conditions or low light may hinder regrowth. If you see wilting foliage but strong new growth, ensure that it’s not due to continued overwatering.
Avoid the mistake of overcompensating with extra water or fertilizer during recovery, as this can worsen root rot conditions. Instead, allow the soil to dry out completely between watering to prevent further issues. If leaves are browning while the base is healthy, check for root stability to confirm that alternate care adjustments are needed.
Repotting allows the roots to breathe and absorb moisture effectively without the excess saturation that leads to rot. The new potting mix should contain perlite or a similar amendment to improve aeration and drainage. If you notice the plant starting to grow new shoots, that indicates the roots are adapting well to their new environment, further validating the importance of good soil structure.
Many gardeners underestimate the importance of repotting in a timely manner. The longer a plant remains in soggy soil, the harder it will be for it to bounce back. To prevent stress during the repotting process, be gentle when handling the roots and soil, and ensure to only water lightly until the plant establishes itself. Too much moisture immediately following repotting can lead to a relapse into root rot, especially if the roots are still adjusting to their new environment.
Step 4 – Adjust Watering Frequency to Prevent Root Rot
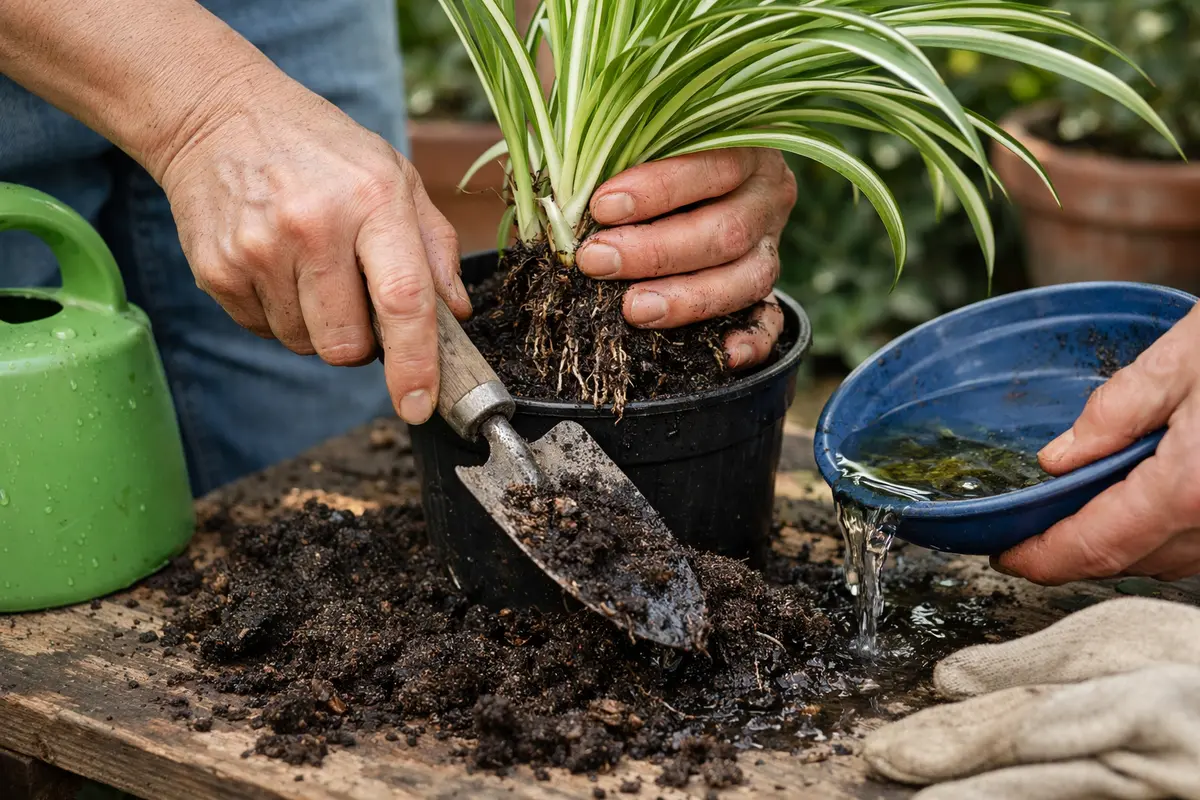
Start by adjusting your watering routine, allowing the top inch of soil to dry out before rewatering your spider plants. This practice will prevent excess moisture accumulation, ensuring a healthier root system and reducing the risk of root rot.
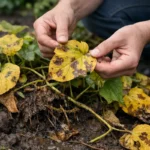
Excessive moisture in the soil is often caused by overwatering, which can lead to waterlogged conditions and root decay. By allowing the soil to dry out between watering sessions, you create a balanced environment that promotes aeration and discourages fungal growth. If you notice yellowing leaves, this indicates root suffocation; check the soil moisture level immediately to avoid further damage.
During the winter months, when growth slows down, reduce your watering frequency even further to match the plant’s decreased need for moisture. Additionally, consider using a pot with drainage holes if you haven’t done so already, as this adds another layer of protection against standing water and root rot.
When you adjust your watering schedule, it is crucial to monitor how quickly the soil dries out. Spider plants prefer to dry out slightly before the next watering; consistently keeping the soil too moist can lead to a recurrence of rot. Consider factors such as humidity and temperature — areas with higher humidity may need less frequent watering compared to drier environments. Use a moisture meter if your memory of environmental changes wavers; these devices can give you a clearer picture of moisture levels over time.
During warmer seasons, increase your checks on moisture retention, especially if temperatures rise. This proactive approach will help you establish a regular watering pattern that aligns with your plant’s needs, ultimately ensuring lasting health. In these high-demand periods, refrain from using any fertilizer until the plant shows strong signs of stabilization — this will prevent over-fertilization in combination with waterlogged conditions, which could further stress your spider plant.
Step 5 – Check Spider Plant Leaves for New Yellowing Signs
Begin by checking your spider plant’s soil moisture levels every 2-3 days after a watering episode. Feel the top inch of soil; if it remains damp for too long, root rot may be developing. Observe the plants for any drooping or yellow leaves, and pay close attention to the soil drainage—recheck this condition regularly to prevent root rot from worsening.
A fully recovered spider plant should display vibrant green leaves that stand upright, with no signs of wilting or discoloration. In contrast, early indicators of returning problems might include limp or browning leaf tips. If you notice leaves turning yellow while the soil remains soggy, excess moisture could be making a comeback; in that case, check the soil aeration and drainage conditions immediately.
If root rot symptoms return despite your monitoring and adjustments, repot your spider plant in fresh, well-draining soil to encourage healthy root development. Alternatively, you can trim away any mushy or darkened roots to halt the spread of decay. Should the situation not improve, consider consulting a local plant expert for further recommendations.
A fully recovered spider plant will exhibit bright, healthy green leaves, firm stems, and overall signs of vigor. If yellowing or wilting starts to return, it indicates that issues like overwatering or nutrient deficiencies may not have been fully resolved. Ideally, each week you should be on the lookout for fresh damage or any signs that worsening symptoms are starting to appear again. If there are any remaining wilted leaves, consider removing them to reduce stress, which can improve energy investment into new growth.
If the yellowing returns, it may be time to reassess your watering routine and check the soil condition once again. Consider re-evaluating factors such as exposure to light and current temperature. If conditions do not improve despite adjusting care, consider consulting a local gardening expert for additional personalized advice. A common pitfall is ignoring root health signs; always link yellowing to prior root and soil problem checks to ensure comprehensive care coverage.
FAQ
How long does it take for spider plants to recover from root rot?
Recovery from root rot varies depending on the level of damage and the care provided but typically, you’ll see signs of improvement within a week after repotting and addressing watering habits. Some roots may take longer to fully regenerate, but with correct care, new growth should become visible after two to three weeks, particularly if the environmental conditions are consistently favorable.
Can root rot spread to other plants in the same pot?
Yes, root rot can spread to other plants in the same container if they share the same soil conditions. It’s crucial to monitor neighboring plants for similar symptoms and take immediate corrective actions to prevent further spread, such as adjusting watering regimes or repotting. Dividing plants that show signs can also help eliminate shared root concerns in crowded potting situations.
Should I remove all affected parts of the spider plant during recovery?
If the damage is extensive, it is advisable to remove dead and mushy roots to encourage healthier growth. However, if only minor areas are affected, focus on correcting the watering and soil conditions without over-trimming. Maintaining some healthy root structure is essential for recovery, so inspect thoroughly but avoid excessive trimming that could hinder recovery potential.