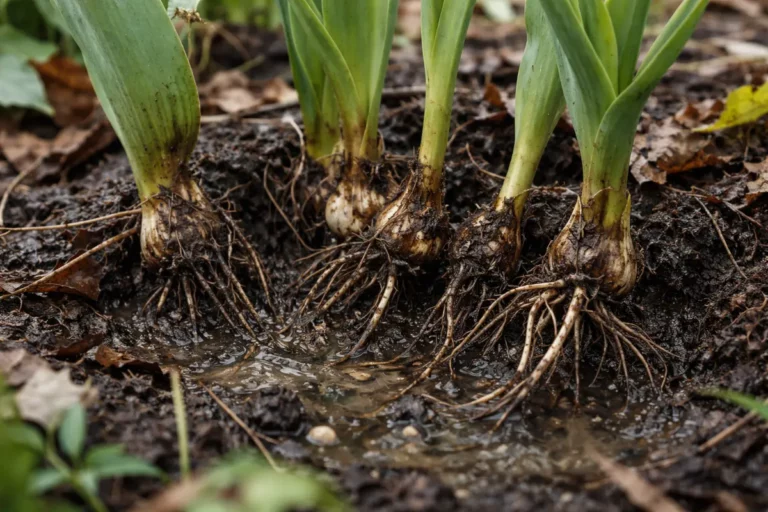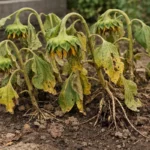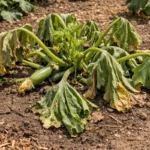
You may notice your butternut squash plants showing signs of distress with drooping leaves and a mushy base after overwatering, which is why you need to know how to stop root rot in butternut squash after overwatering. This condition often arises as excess moisture leads to rotting roots, causing yellowing and wilting that threatens the plant’s vitality. If left unaddressed, this issue can spread and worsen, ultimately weakening the plant and stalling its growth, but by inspecting the roots and adjusting your watering practices, you can restore its health.
Step 1 – Remove Affected Butternut Squash Leaves Immediately
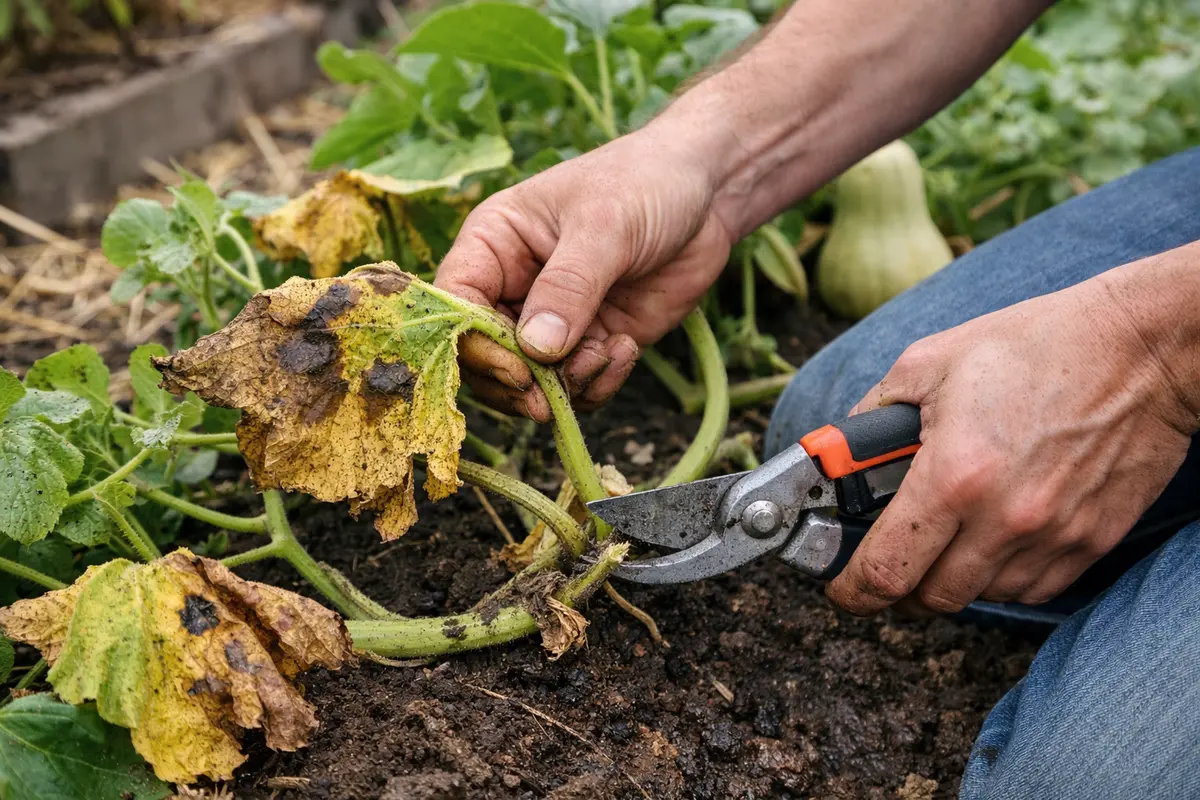
Start by cutting away any yellowing or wilting leaves from the butternut squash plant. This action visibly improves airflow and light penetration around the remaining healthy foliage. Acting promptly will prevent the spread of root rot and give the plant a better chance to recover.
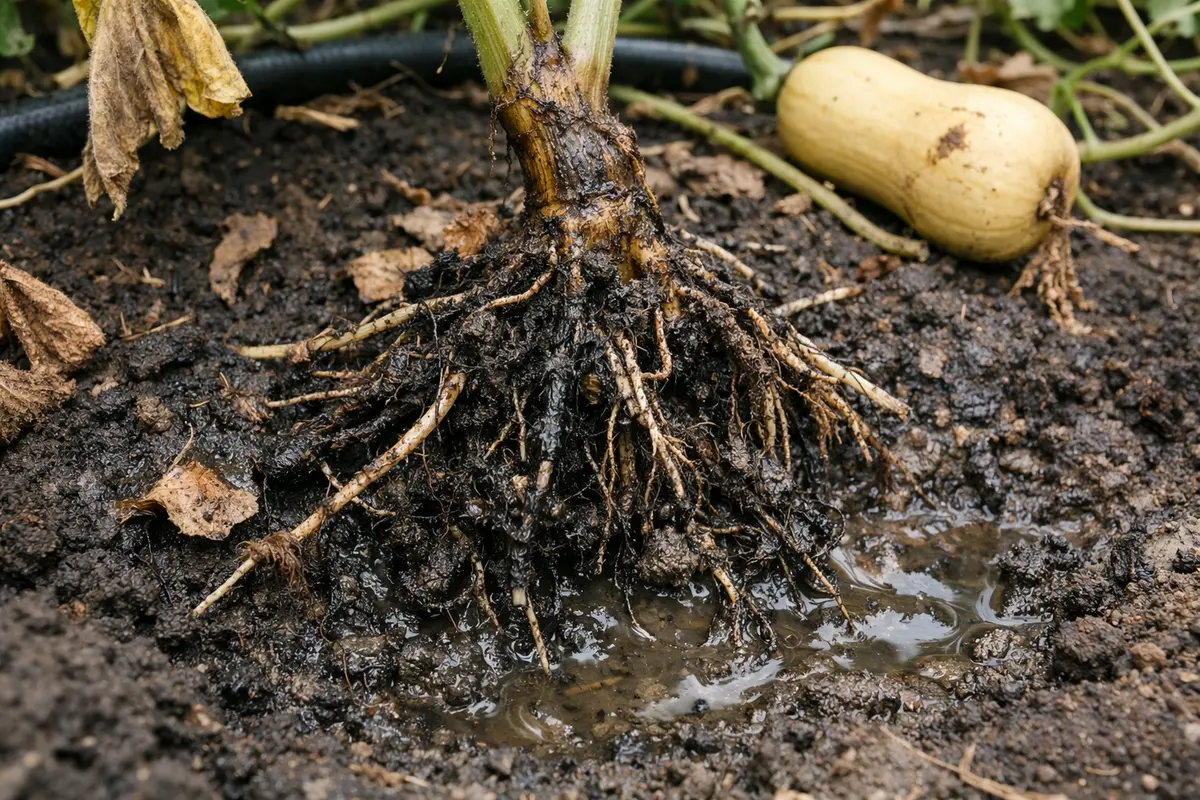
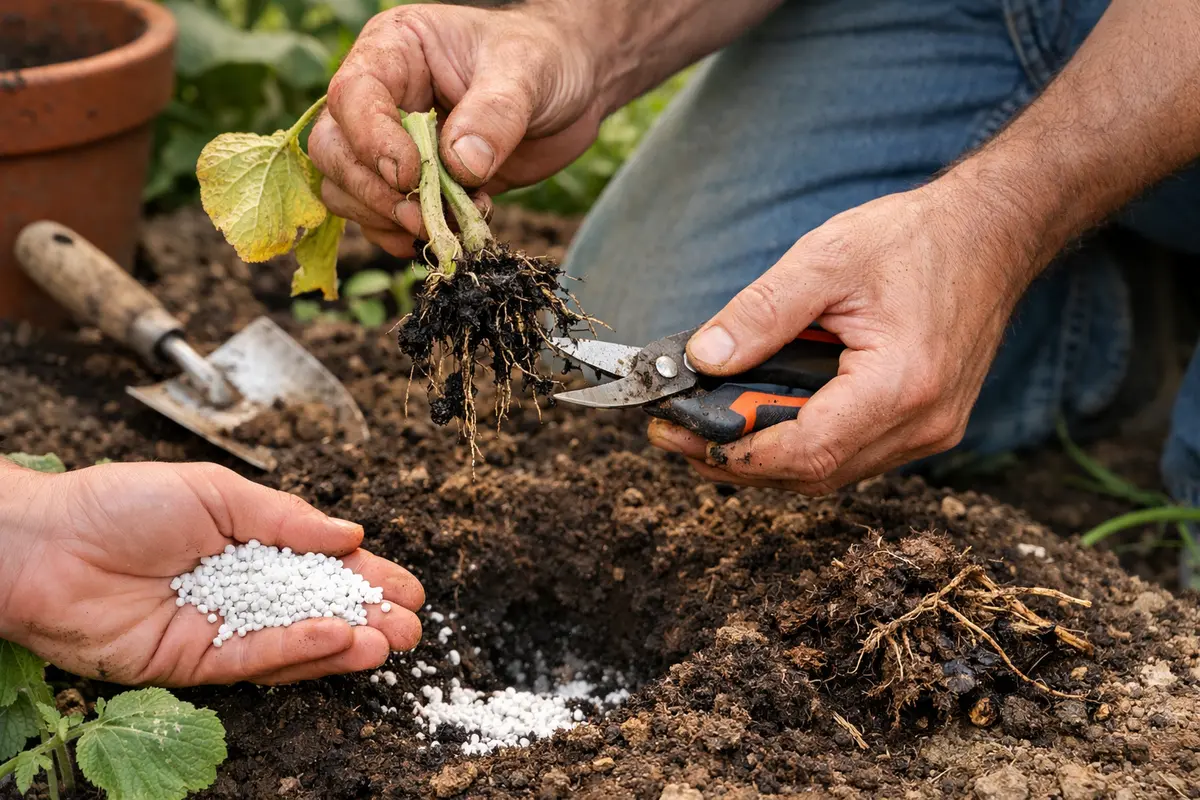
Inspect the roots for brown, mushy areas that indicate root rot, and trim away any affected sections with sterile shears. Removing unhealthy roots allows the remaining healthy roots to absorb nutrients and water more effectively, potentially kickstarting a recovery process. If the roots appear mostly healthy but the leaves are wilting, the problem may still be related to overwatering.
It’s essential to perform these actions swiftly, as a butternut squash plant can deteriorate rapidly due to prolonged moisture in its root zone. In contrast, if you quickly remove damaged tissue, you may notice resilience within days, as the plant can redirect energy to support new leaf growth rather than struggling to sustain any remaining diseased sections.
Consider a real-world example: a gardener who hesitated to prune their plants found that their cucumbers succumbed to extensive root rot after just one week of heavy rain. On the other hand, a neighbor who acted promptly and removed affected leaves saw their butternut squash regain health and even produce ripe fruit shortly thereafter. If you notice yellowing leaves and a slimy texture on roots, assess for root rot; if leaves are crisp but limp, check your watering routine.
Quick intervention is crucial because root rot can impede nutrient uptake, leading to wilting and discoloration, which can ultimately result in plant death. The distinction between healthy and rotting roots is pivotal: healthy roots can absorb moisture effectively, while damaged roots fail to perform this essential function. If you observe persistent yellowing or wilting despite proper care, examine the root system for rot; if rot isn’t visible, you might be facing a different issue, such as nutrient depletion.
A gardener’s timely action can be the difference between life and death for their butternut squash. By addressing yellowing leaves and inspecting the roots promptly, you will save the remaining healthy parts, allowing the plant to focus on rejuvenating rather than succumbing to decay. If any leaves show signs of severe wilting, it’s time to act immediately before the health of the entire plant diminishes further.
Step 2 – Diagnose Overwatering Problem in Butternut Squash
Inspect the soil surrounding the butternut squash for excess moisture. You will find that the soil feels waterlogged and may even have a sour smell, indicating poor drainage and contributing to root rot. Checking for root rot should involve digging a few inches into the soil to verify how damp it is at varying depths. If the top layer feels overly wet, the deeper layers might still retain moisture, fostering conditions for root rot.
Overwatering leads to anaerobic conditions in the soil, which suffocates the roots and promotes fungal growth. Because butternut squash thrives in well-draining soil, recognizing and correcting drainage issues is crucial for reversing damage. Soils high in clay may retain water longer and exacerbate root rot symptoms, making it critical to test soil composition. Alternatively, sandy soils drain quickly but require more frequent watering, making it essential to match your watering schedule to the soil type.
If you notice that the soil has a sour odor, it is essential to replace the soil in your container or raised bed rather than simply allowing it to dry out. Furthermore, if the squash is growing in clay-heavy areas, considering amending the soil with organic matter such as compost or peat moss to improve drainage in the future is wise. This not only creates more space for air pockets—helping with root respiration—but also improves moisture retention in dry spells of the growing season. If practical, you can implement a raised bed system that encourages better drainage overall, which would help to eliminate standing water around the plant’s root zone.
Step 3 – Treat Root Rot in Butternut Squash with Care
Start by applying a fungicide specifically designed for root rot to the base of your butternut squash. You will notice a decrease in the plant’s wilting within a few days, with signs of new healthy growth emerging after a week. Ensure that the fungicide reaches the root zone fully by applying it directly to the soil or mixing it into the top layer to aid absorption. Use a product that contains ingredients like propiconazole or azoxystrobin, which have proven effective against the pathogens causing root rot.
Recovery begins when the fungicide targets the pathogens responsible for root rot, prompting healthier root systems that can better absorb moisture and nutrients. Look for visible signs of improvement, such as a change in leaf color from yellowing to vibrant green, typically within three to four days. If the plant was exceptionally stressed before treatment, this process might take longer—continue to monitor closely and note any visible differences.
From here on, avoid overcompensating with excessive fertilizer or water, as this can worsen root rot. Maintain a careful outdoor watering schedule by allowing the top inch of soil to dry out between sessions. Watch for signs of progress; if leaves remain limp or there is no improvement after a week, check the root system for further issues. Alternatively, investigate gentle amendments, like diluted compost tea, which can support recovery without overwhelming the affected plant. If you note persistent distress despite these efforts, consider reapplying the fungicide and reassessing overall plant health.
Step 4 – Water Butternut Squash Sparingly in Rainy Seasons
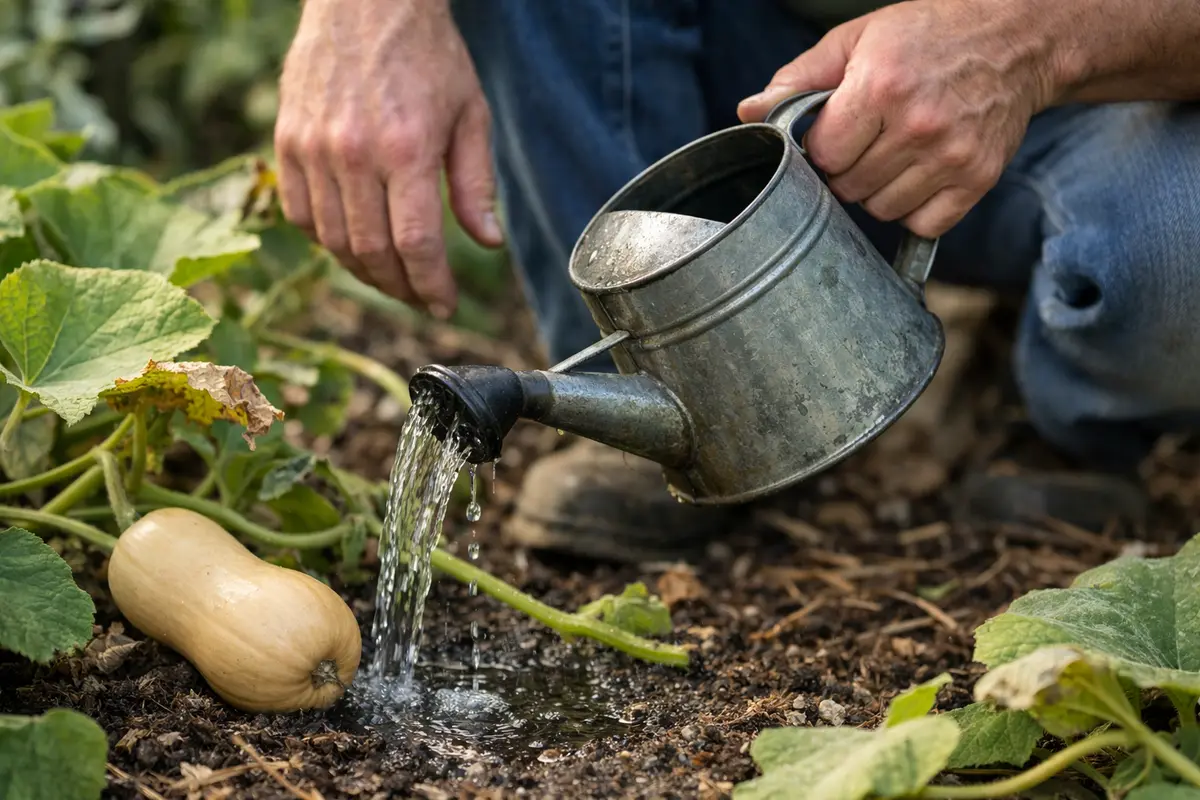
Begin by monitoring rainfall levels and adjusting your watering habits accordingly. This practice will help prevent excessive moisture accumulation around the roots and promote healthier growth. Water only when the top inch of soil feels dry to the touch, particularly after heavy rains, to maintain optimal moisture balance.
To prevent root rot in rainy conditions, set a weekly schedule to check soil moisture, especially during prolonged wet weather. If the soil remains soggy, simply delay watering until conditions improve. To enhance drainage, consider implementing raised beds, which can significantly alleviate waterlogged situations.
In periods of wet weather, consider a routine to apply a layer of mulch around your butternut squash plants. This layer helps regulate soil moisture effectively by preventing excessive evaporation and shielding against heavy downpours that may exacerbate wet conditions. If you notice pooling water near your plants, increase the mulch depth to provide better moisture management.
Regularly assessing soil moisture levels will allow for swift adjustments; if you find your soil remains persistently damp in humid climates, use a soil moisture meter as a reliable tool. By monitoring with more precision, you can avoid the telltale signs of rot, distinguishing between healthy, slightly dry soil and over-saturated conditions. If the soil feels excessively wet post-check, verify that your drainage systems are functioning optimally.
In addition to moisture control, be proactive; if flooding is anticipated, increase your mulch layer in preparation to prevent root exposure to excessive moisture. This barrier will not only combat moisture influx but also help maintain consistent soil temperatures, creating a more stable environment for your squash plants. If soil condition checks aren’t made frequently during wet seasons, stagnation may occur, allowing root rot to thrive unnoticed.
For effective irrigation practices, consider implementing drip irrigation to provide a consistent, controlled water supply directly to the roots while avoiding oversaturation of the surrounding area. Schedule these checks to coincide with weather forecasts, aiming for twice a week during rainy periods to ensure the health of your squash plants. Keep an eye on signs of wilting; if your plants show distress despite altered watering practices, reassess your drainage capabilities urgently.
In rainy conditions, prioritize the implementation of both monitoring strategies and moisture control methods to ensure your squash does not fall victim to root rot. If necessary, use a rain gauge to track precipitation levels closely, adjusting your irrigation accordingly. In contrast, when summer’s heat returns, remember to reduce mulch if it appears overly dry or compacted, ensuring that water still penetrates to the roots effectively.
Step 5 – Check for New Root Growth in Butternut Squash
Start by checking the moisture level in the soil around your butternut squash plants. Use a moisture meter or your finger to probe the soil about two inches deep; if it feels excessively wet, adjust your watering schedule immediately to allow the soil to dry out. Recheck the moisture two days later to ensure it has improved and that the plant starts showing signs of recovery. Observing consistent moisture levels without wet spots indicates positive progression.
A fully recovered butternut squash plant will exhibit lush green leaves, with firm and vibrant foliage contrasting against the earlier droopy and yellowish leaves that indicate distress from overwatering. You should notice new leaf growth emerging; however, if you see a resurgence of wilting or mushy leaves, root rot may be returning. If the stem feels soft and spongy instead of firm and solid, that’s a sign to act quickly. Checking the roots visually for rot can be valuable—healthy roots should appear white and firm, while decayed roots look dark and mushy.
If the signs of root rot return despite your efforts, immediately halt all watering until the soil dries out significantly. Consider repotting the plant into fresh, dry soil mixed with a drainage-enhancing amendment like perlite. If the problem persists, it may be necessary to trim away any affected roots, ensuring proper care is given to prevent further overwatering. Always wear gloves and clean your tools between handling different plants to avoid transferring pathogens.
During this monitoring phase, visible improvements may manifest as the leaves start to perk up and exhibit a darker green hue rather than yellowing or browning. Healthy roots typically lead to robust foliage, with tendrils becoming firm again. Observing these changes indicates that the plant is reconnecting with its nutrient cycle, emphasizing the importance of both root health and moisture levels. It’s helpful to keep a gardening journal to track changes and the success of treatments, giving you insights into the efficacy of your interventions over time.
If your squash does not show signs of improvement after a week, consider re-evaluating the soil’s moisture content and the previous treatment’s effectiveness. By this stage, if the problem persists, you may need to consult a gardening professional who specializes in plant diseases for further examination of your plant’s conditions. This ensures that any residual issues relating to soil composition or root health are properly addressed before they escalate further. If the issues are isolated to certain areas, consider potential soil infill options to improve drainage consistently, which might alleviate chronic moisture retention.
FAQ
How long does it take for butternut squash to recover from root rot?
Recovery from root rot typically takes about 1-2 weeks and varies depending on the severity of the damage and treatment effectiveness. During this time, you should observe gradual improvements in leaf color and strength. If issues persist beyond two weeks, further diagnostic evaluation may be necessary, potentially exploring root structure rebuilding or soil amendments for improved organic material balance.
Can root rot spread to other plants in the garden?
Yes, root rot can spread if infected plant material is moved or if water splashes infected soil onto nearby plants. To prevent this, ensure that you promptly remove affected plants and disinfect any gardening tools used to minimize the risk of spreading fungal spores. Additionally, consider isolating infected plants to monitor them directly away from healthy specimens, which limits potential contamination pathways.
Should I remove affected roots when treating root rot?
Yes, it is essential to prune any visibly affected roots during treatment. Removing dead or mushy roots allows for healthier roots to regenerate and prevents the spread of fungal pathogens. If root systems are compromised beyond recovery, it may be necessary to replace the plant entirely to safeguard neighboring crops from potential infection. Moreover, examining neighboring plants for similar symptoms helps ensure that root rot issues do not propagate beyond the initial affected area.