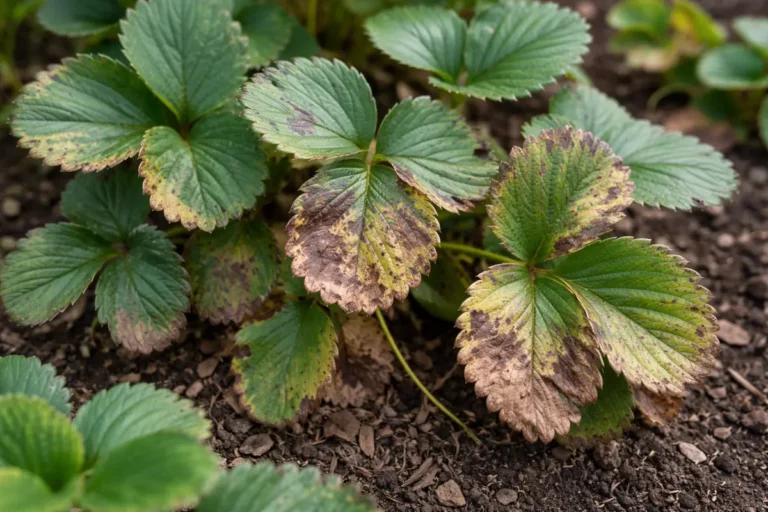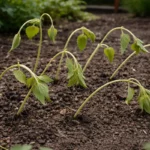
You may notice brown patches appearing on your strawberries during hot, humid days, which is why you need to know what to do when strawberries develop brown patches. This discoloration often signals underlying issues caused by fungal infections, leading to the spread of wilting and damage in the fruit. If ignored, the problem gets worse and can spread to nearby plants, but fixing it is possible now if you inspect the affected areas and remove any compromised leaves or berries.
Step 1 – Remove Affected Strawberries Immediately
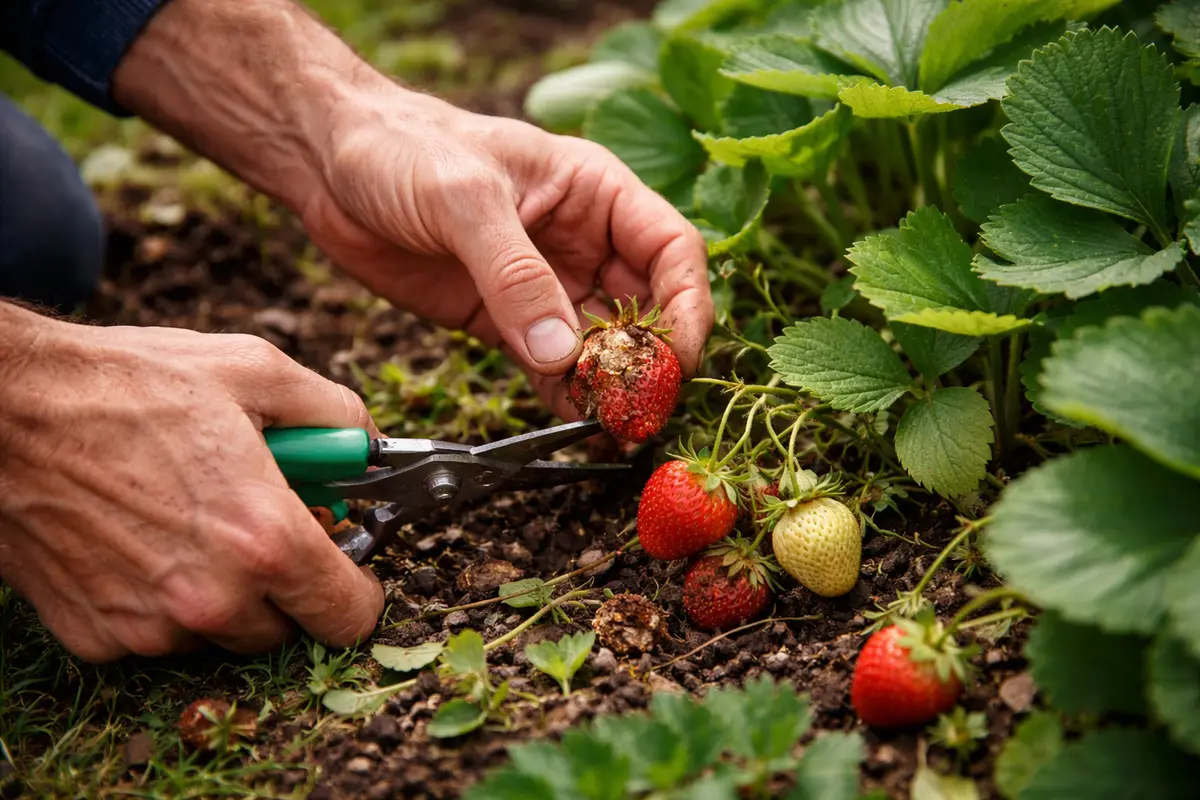
First, remove any affected strawberries and surrounding leaves that show brown patches to limit further damage. Immediately after doing this, you should notice a reduction in visible disease spread, as well as improved air circulation around the remaining healthy fruits and foliage.
Acting fast against brown patches is critical, as fungal infections can spread rapidly through the plant’s vascular system. If you delay, areas of decay can lead to a more widespread infestation, causing the entire plant to decline more significantly than the initial patches. If you notice wilting alongside browning, check for signs of root rot which can exacerbate the situation.
A gardener once faced a severe outbreak of brown patches but managed to save their strawberries by immediately removing affected parts, allowing the healthy sections to thrive. Conversely, those who wait to take action often witness their plants deteriorating beyond recovery, leading to crop loss. When you see browning, it’s essential to act swiftly before the health of the entire plant is compromised.
Immediate action is essential because injured parts can become breeding grounds for spores, further harming healthier tissues nearby. The moment you notice brown patches on strawberries, they are particularly susceptible to rot, especially in humid conditions. By systematically eliminating damaged fruit, not only do you prevent the spread of pathogens, but you also reduce competition for resources among the remaining strawberries. Healthy fruit can then develop optimally, enhancing your yield for the season. Furthermore, note that these brown patches may appear larger or darker within 24 hours following rainfall due to increased moisture. This situation necessitates rapid action to minimize any further damage.
A common mistake gardeners make is delaying removal, thinking the patches will resolve on their own. This kind of procrastination can have serious consequences. If you notice patches after a period of wet weather, acting promptly is crucial. Post-rain, strawberries may become soft and mushy, exacerbating the issue. Any delay increases the likelihood that rot will set in and spread. Revisit the area after heavy rainfall, checking systematically for any developing patches in both visually impacted and nearby strawberries. Also, inspect the leaves closely for signs of trouble, as they may harbor fungal spores waiting to infect healthy fruit.
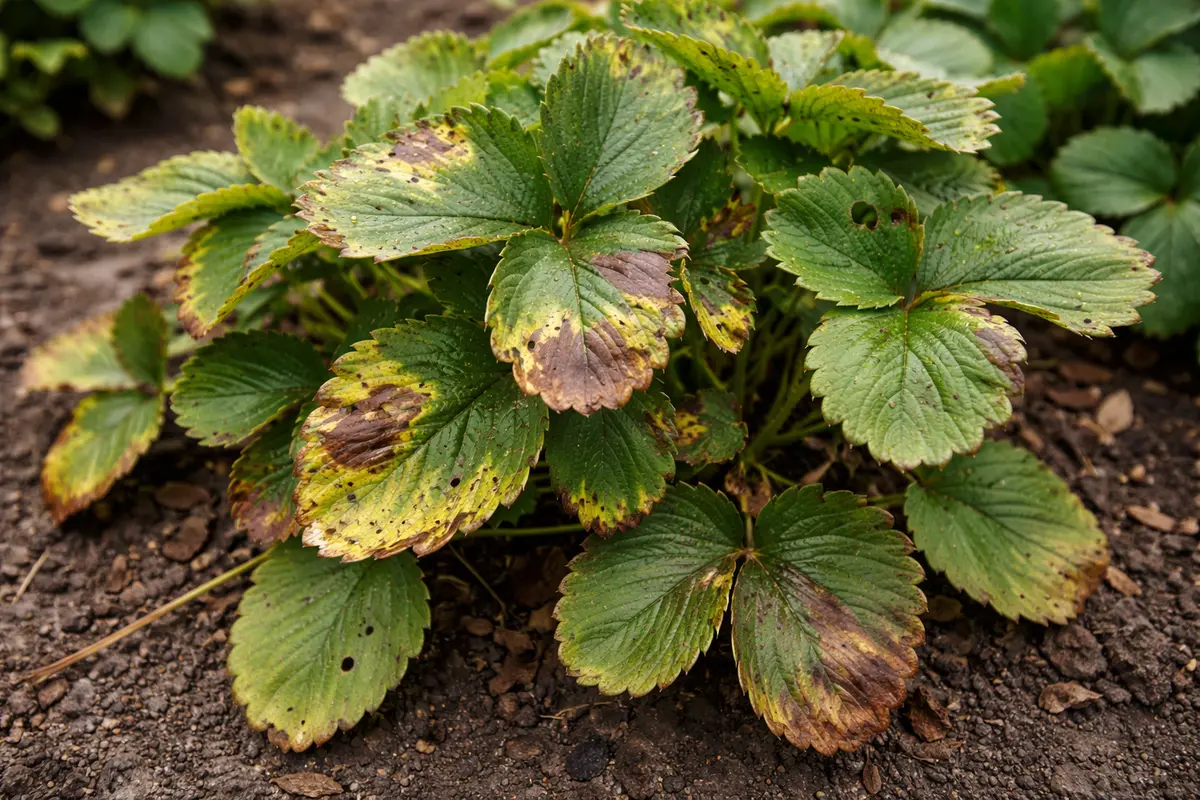
Step 2 – Diagnose Fungal Infection in Strawberries
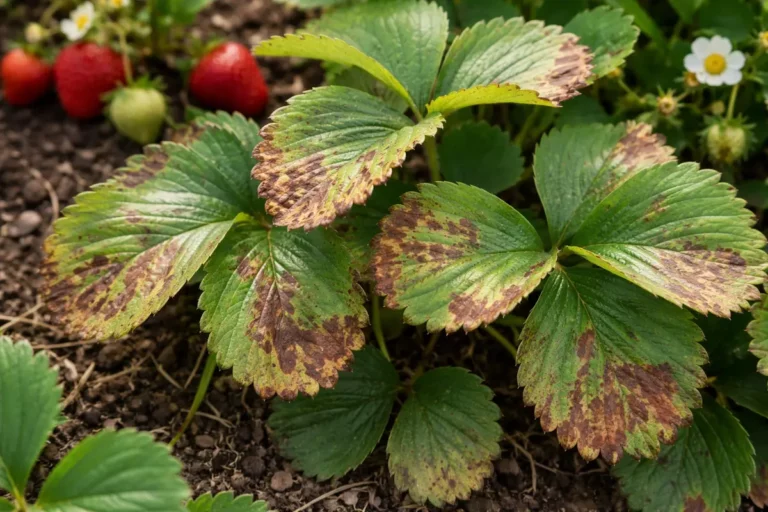
Check the remaining strawberries for any signs of fungal infection. Look for changes on the surface, such as visible dots or fuzzy growth, which typically indicate a fungal infection. Additionally, it’s crucial to identify whether any patches exhibit abnormal aromas, as this can give you a clue about the type and severity of the infection. Different molds may produce distinct smells; for instance, a musty odor suggests powdery mildew, while a sour smell may indicate more aggressive rot.
Fungal infections thrive in moist, warm environments, making freshly watered soil during a wet spring an ideal breeding ground. If you notice both discolored spots and a fuzzy substance, it’s likely a sign of rot, which can further weaken the plant tissue. Correctly diagnosing this issue is crucial for implementing a treatment plan that effectively targets the source of the problem. Regular inspections are vital for catching any early signs, particularly looking beneath leaves where moisture may collect unnoticed. Pay close attention to environmental cues as well; if air temperatures consistently surpass 70°F with high humidity, the chances for fungal infections increase significantly.
If you detect a sour smell emanating from the roots, combined with soft spots, this indicates root rot rather than superficial damage. Extended exposure to high moisture levels in the soil can slow root growth, leaving the plant more vulnerable to diseases. It’s imperative to respond accordingly—remove the affected areas immediately and assess root health, paying attention to any dark or mushy sections. Alternatively, if the soil smells fresh but visible patches appear, lean toward treating the foliage with an antifungal spray combined with improved air circulation. Making this distinction during inspection can guide your treatment plan; if left unchecked, an early fungal infection can lead to larger areas of decay, significantly hindering the plant’s overall vitality.
Step 3 – Fertilize Strawberries to Promote Recovery
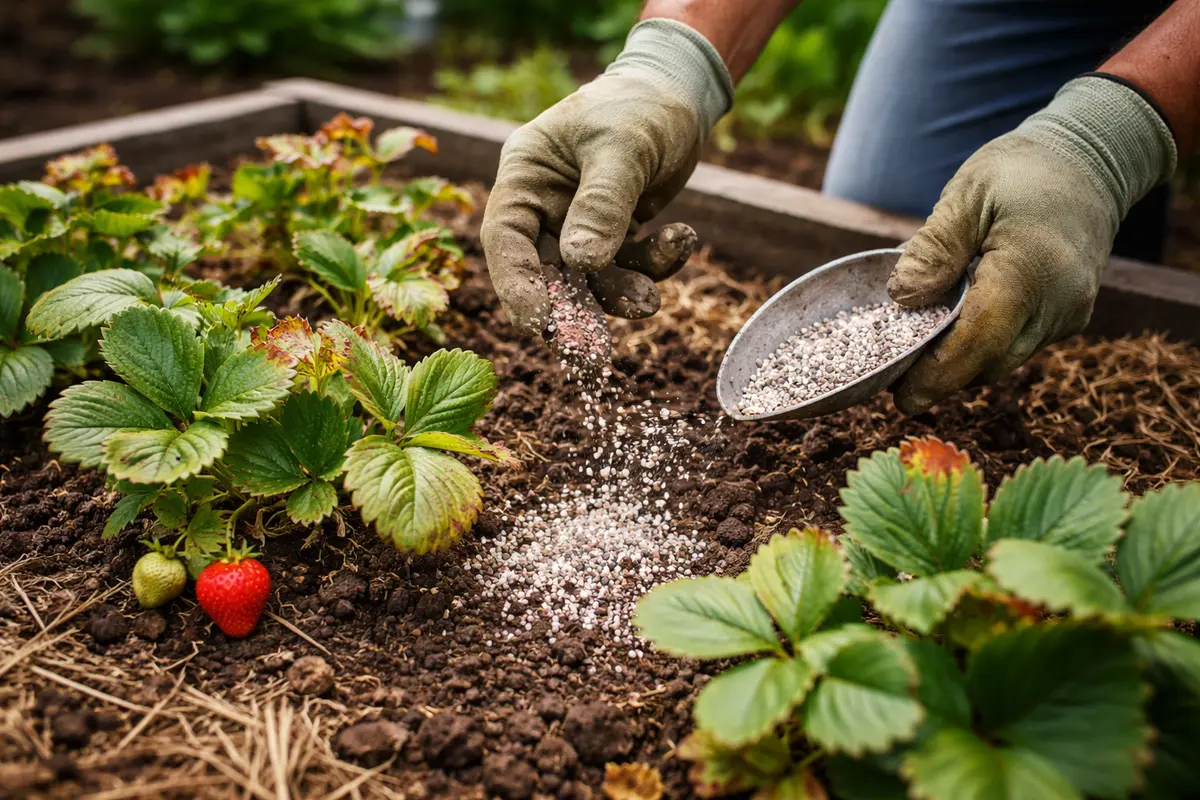
After removing any affected fruit or foliage, apply a balanced fertilizer to your strawberries right away. You should start noticing noticeable improvements in health with new leaves and blossoms typically emerging within a week or so, indicating a positive response to nutrient input. A well-formulated fertilizer specifically designed for strawberries enhances nutrient absorption, which is crucial during the recovery process, as nutrients help the plants handle stress.
Healthy fertilization not only facilitates recovery by supplying essential nutrients that may have been depleted during stress—such as following an infection—but it also better equips plants to fend off new issues. The right balance of nitrogen, phosphorus, and potassium is critical; it fuels recovery and enhances your strawberries’ resilience against further infections. Always adhere to the recommended application rates on the packaging to avoid nutrient overload or deficiency. Over-fertilization often manifests through symptoms like yellowing leaves and burnt tips, both of which can further stress the plants and exacerbate existing problems.
A common mistake during the recovery phase is over-fertilizing. This leads to nutrient burn, potentially harming your plants even more. Aim to apply fertilizer sparingly and monitor the plants closely for signs of improvement, such as greener leaves and new growth. Pay attention to unexpected symptoms; instead of vigorous growth, signs like lacy leaf edges or irregular growth patterns may indicate a chemical imbalance in the soil. If brown patches reappear in the weeks following fertilization, it may be time to conduct a soil test. An assessment will accurately identify nutrient levels, allowing you to adjust your nutrient input based on real data for maintaining a balanced environment that encourages healthy strawberry growth.
Step 4 – Water Strawberries Wisely to Prevent Patches
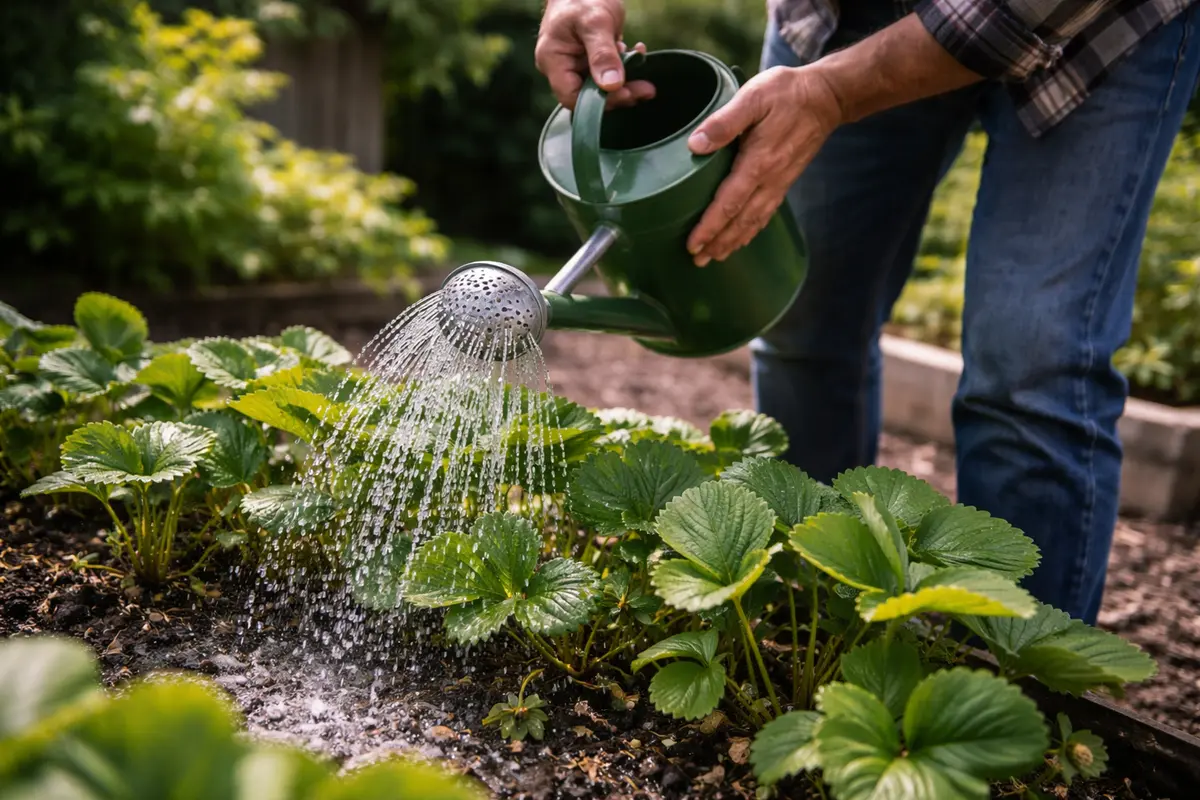
Start by ensuring there is adequate airflow around your strawberry plants by spacing them at least 12 inches apart. This practice significantly reduces the risk of fungal infections and will result in fewer brown patches on the leaves. Careful spacing helps plants avoid trapping moisture, an essential factor in maintaining healthy strawberries.
Strawberries thrive in well-ventilated areas, which helps keep humidity levels lower and prevents the development of fungal diseases such as leaf spot—a common precursor to brown patches. When plants are overcrowded, moisture lingers longer, creating an ideal environment for infections to establish. Proper spacing minimizes these conditions, tackling the root causes of infections early on. Furthermore, during the peak of summer heat, consider moving your strawberries to a location that receives partial shade in the afternoon to protect the plants from heat stress, which can often exacerbate browning.
If the browning persists despite implementing these spacing and shading practices, check for soil quality issues or water drainage problems. Overwatering is a leading culprit in the development of these brown patches, as it creates conditions ripe for fungal growth. Be vigilant with soil moisture levels; allowing the soil to dry slightly between watering helps mitigate the dampness that encourages rot. Establishing a consistent watering routine will aid in maintaining optimal moisture levels without causing saturation. Using drip irrigation or soaker hoses can help further by minimizing wetting the leaves during watering sessions, which is crucial for reducing the likelihood of disease proliferation.
Additionally, consider adjusting the frequency of your watering during hot weather since increased evaporation may necessitate daily checks to ensure soil moisture remains adequate. It’s crucial to ensure your chosen method does not create pooling around the roots, which could lead to diseases; standing water is a serious concern that can promote root decay. If you experience prolonged humid conditions, especially during heatwaves, it’s wise to cut back on the amount of water applied in each session. This practice supports healthy strawberry development by encouraging the roots to grow deeper in search of moisture while preventing disease transmission due to over-saturation.
Step 5 – Check Leaves for Recurring Brown Spots Weekly
Inspect your plants for brown spots on the leaves at least once a week. The presence or absence of new spots provides essential information about your ongoing care strategy and the health of your plants. Ideally, you should observe either the absence of new spots or signs of healthy growth within a month. This preventive check will allow you to identify any fungal infections before they spread, enabling you to take immediate action when necessary. Early detection can save your crop from significant setbacks; new spots emerging can indicate that environmental conditions remain conducive to rot.
A fully recovered strawberry plant will showcase firm, rich green leaves, which starkly contrast with those exhibiting patchy discoloration or malformations. Monitoring for signs of recurrence during your inspections allows you to catch any future issues early. During these checks, pay attention to changes in leaf texture, color dullness, or any new spots; these are clear indicators of ongoing stress that could escalate if not addressed. The overall health of your plants can often be reflected in their foliage; healthy plants will exhibit robust leaves, intact leaf edges, and vibrant colors, all of which signify a strong recovery.
If brown patches reappear, it’s vital to reassess your watering habits and overall soil condition immediately. Check thoroughly for any signs of excess moisture, such as surface mildew or pooling water, and consider improving soil drainage by incorporating organic matter like compost. Also, utilizing mulch can help regulate soil temperature and maintain consistent moisture levels; neglecting this may lead to temperature fluctuations that stress the plant. By tightening these practices, you create a sustainable environment for your strawberries, safeguarding against potentially lethal infections that could spread if addressed too late, and preserving your harvest for future seasons.
FAQ
How long does it take for strawberries to recover from brown patches?
Recovery can take anywhere from 1 to 3 weeks, depending on the severity of the infection and your response measures. With proper care and attention, you may start seeing new growth in just a few days if environmental conditions like adequate sunlight and appropriate watering practices are in place. If conditions remain favorable, anticipate observable signs of recovery—such as firm fruit and vibrant green leaves—within this timeframe, setting the stage for a fruitful harvest.
Can brown patches on strawberries spread to other plants?
Yes, if a fungal infection is the root cause, it can easily spread to nearby plants, especially in warm and humid conditions. Regular inspection of neighboring plants for any signs of infection is essential; promptly remove any affected specimens to prevent widespread damage. Additionally, make sure to dispose of infected plant material properly, avoiding composting, to eliminate any risk of pathogens re-entering your garden, as this could compromise your entire crop.
Should I remove all affected leaves from my strawberry plants?
Yes, it’s crucial to remove all leaves that display brown patches to halt the spread of disease. Be sure to dispose of these leaves properly to avoid reintroducing spores into your garden environment. After removal, you can also trim back healthy leaves if they are competing for resources, allowing for better air circulation within the plant canopy. This increased airflow is vital for preventing future issues related to humidity and excess moisture accumulation.