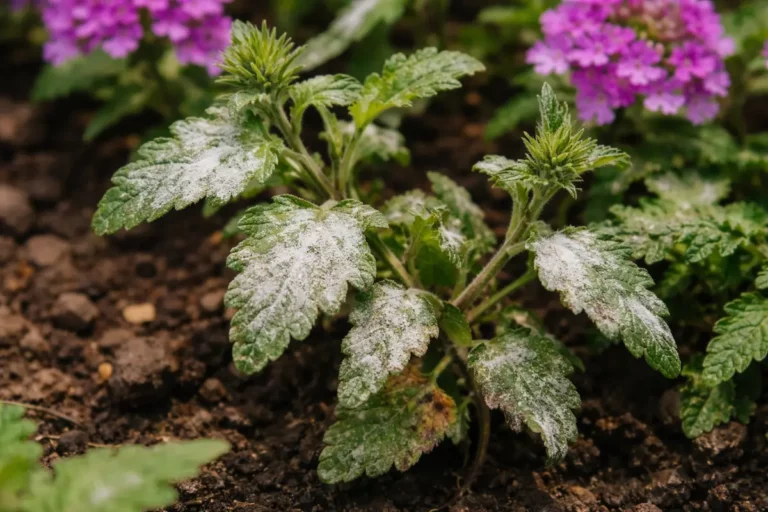
You may notice a fuzzy, discolored growth on your sweet potatoes after a heavy rain, which is why you need to know what to do when sweet potatoes develop mold after rain. This mold is typically caused by excess moisture, leading to spots and potential damage to the tubers themselves. If left untreated, the problem can spread, weakening the plant and making recovery harder. However, fixing it is possible now if you inspect and remove affected areas promptly.
Step 1 – Act Quickly to Remove Moldy Sweet Potatoes
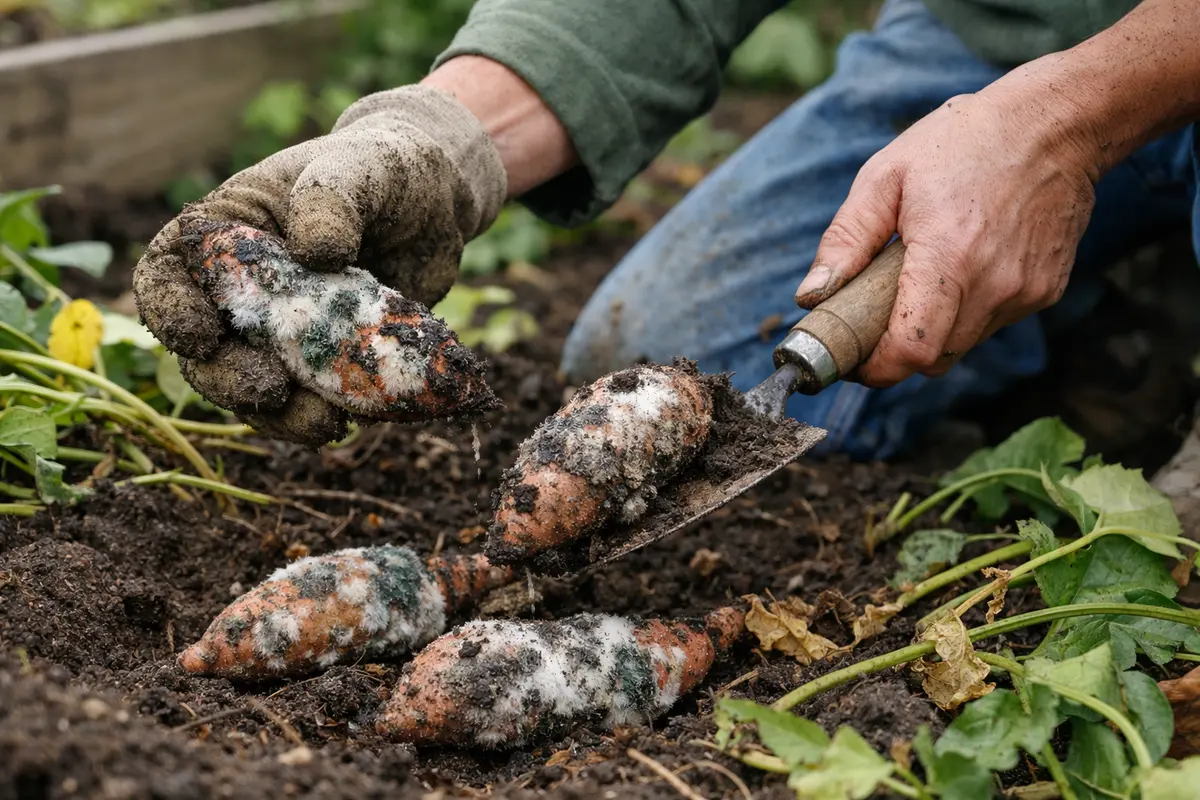
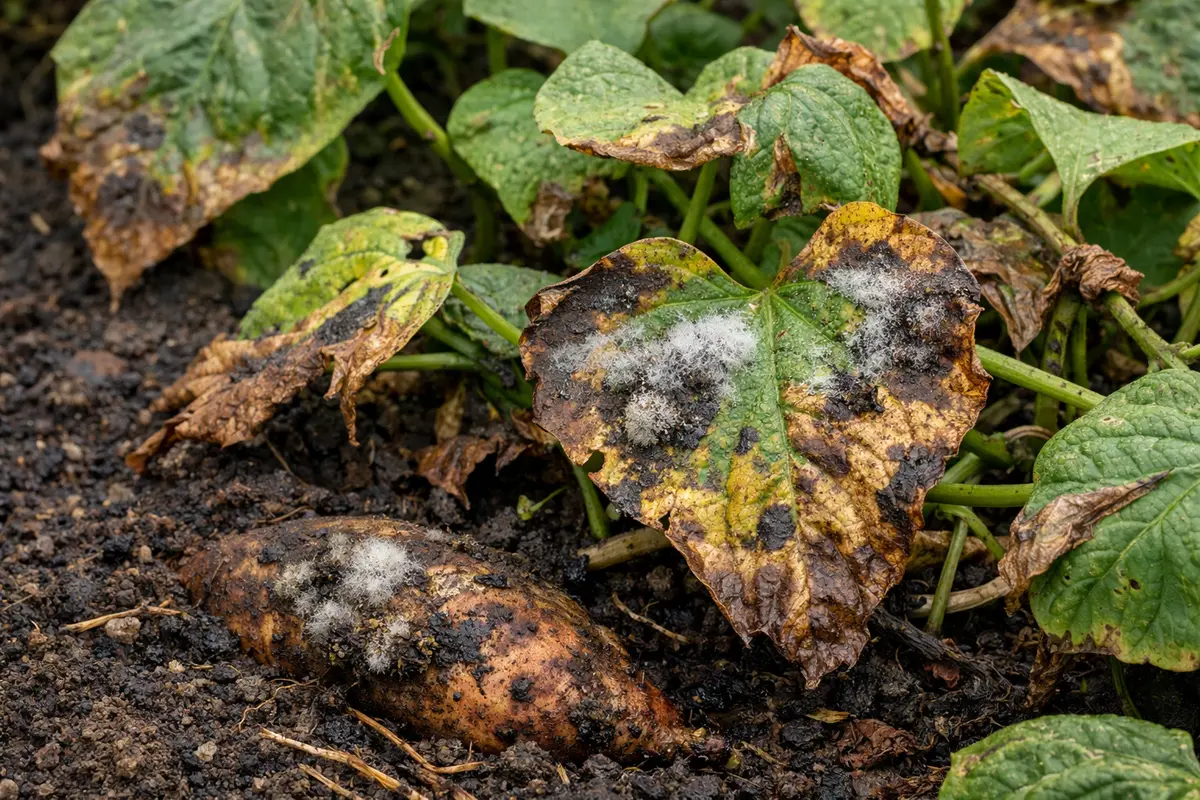
Begin by removing any visibly moldy sweet potatoes immediately. You will see a significant reduction in mold spread within a day as the remaining healthy potatoes gain better airflow. Mold can spread to nearby potatoes quite rapidly, turning a minor issue into a widespread problem within a matter of days. If not acted upon swiftly, it can often lead to a complete loss of the crop. Look closely for any sign of wilting or staining on the tubers, which indicates that mold may be present.
Swift removal is essential because mold can penetrate the potato skin, affecting the edible flesh underneath. As the roots develop mold, they release spores that can quickly infect adjacent tubers, especially in humid conditions. If you notice healthy potatoes that have begun to take on a sheen from excess moisture, this may indicate a risk of mold growth. Addressing any pooling moisture at the base of your remaining potatoes while checking for mold ensures you combat the underlying conditions promoting it. It’s crucial to inspect the entire bed because areas of soil that maintain high humidity can harbor mold spores.
Many gardeners make the mistake of simply ignoring moldy potatoes, especially if they appear merely “unattractive.” However, mold growth can escalate quickly, with spores affecting adjacent, healthy tubers. Removing moldy potatoes right away minimizes the risk of an extensive infestation throughout your crop and helps keep the fungal issue localized. If you encounter potatoes with only a few small moldy areas, do not cut away the mold; doing so can compromise the skin and encourage further growth. Limiting the handling of moldy potatoes is equally crucial to prevent the spread of spores to other tubers. After you have removed several moldy potatoes, clean your tools thoroughly to avoid contaminating healthy ones in subsequent tasks. Brightly colored mold, such as blue or green, is particularly aggressive and indicates an urgent need for removal.
Step 2 – Check for Overwatering as Root Cause
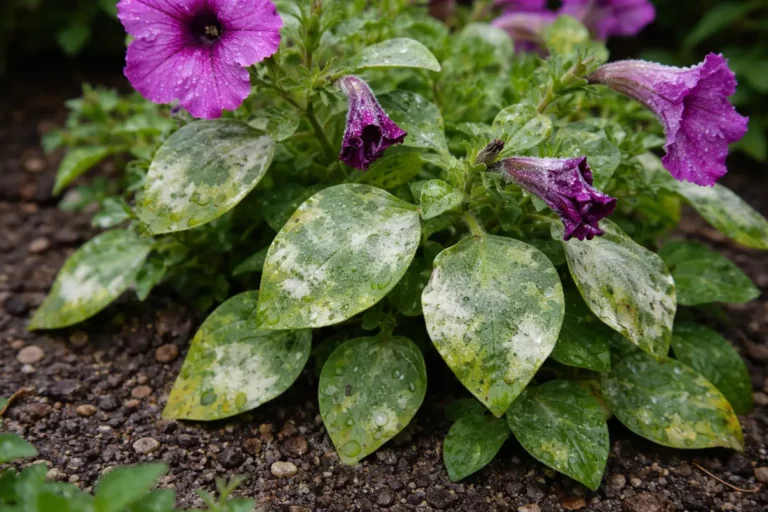
Begin by assessing the moisture levels in your soil to identify overwatering as the root cause of mold development. You will observe that if the soil remains overly saturated, mold conditions worsen, putting your sweet potatoes at greater risk. If your plants are in a low-lying area, the risk escalates with standing water, especially in the days following heavy rain when excess moisture lingers. Look for signs of runoff or puddles, as this can indicate poor drainage.
Sweet potatoes thrive in well-drained soil and cannot withstand excessive moisture. Overwatering creates anaerobic conditions conducive to mold and rot. If you find the soil soggy after rain, that indicates a drainage issue contributing to the mold presence. A quick diagnostic step is to stick your finger or a soil moisture meter into the ground near your plants; if the soil feels muddy and waterlogged, this warrants immediate corrective actions. For sweet potatoes, a moisture reading above 24% signals danger and inadequate air circulation to the roots. If your plants are wilting even when the soil is too wet, that often signals root compromise.
If your soil emits a sour smell and remains wet a few days post-rain, it’s essential to act promptly. Start by aerating the soil gently with a fork or trowel to enhance airflow. You may also consider amending your soil with organic matter, such as compost or perlite, to improve drainage; alternatively, relocating your sweet potatoes to a raised bed could provide better water management. Regularly inspecting the moisture levels before and after rain will prepare you for preventative measures moving forward. If water levels persistently remain high despite your amendments, it may be time to seek a professional soil evaluation. A common mistake is to assume that rainfall alone is sufficient for moisture management; adjusting your watering schedule is often necessary, especially if rain is frequent.
Step 3 – Treat Affected Sweet Potatoes for Recovery
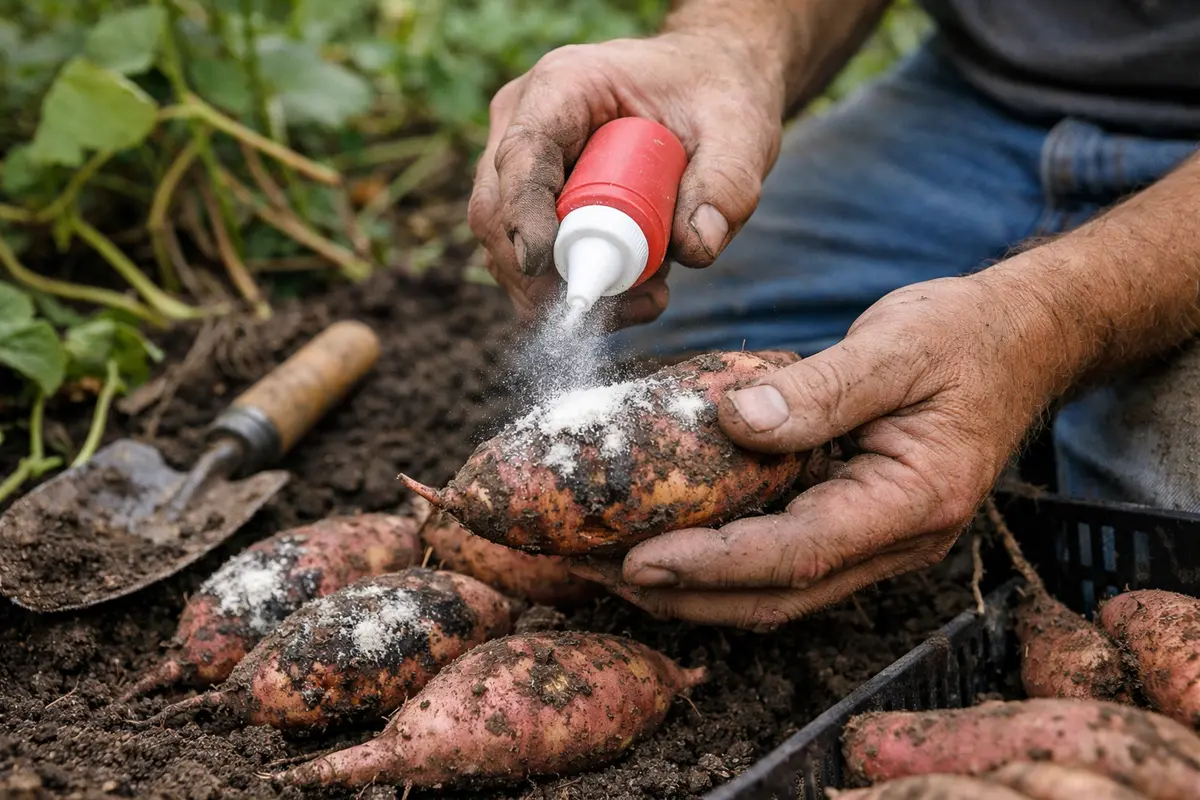
Begin by applying an anti-fungal treatment to affected sweet potatoes to facilitate their recovery. Within a week, look for visible improvements such as healthier-looking tubers and the absence of new mold growth. Use commercial fungicides formulated specifically for vegetables, ensuring they are safe for your plants by reading labels carefully. Products containing copper or sulfur are effective against soft rot, but always adhere to the recommended application rates to ensure safety and efficacy. If you notice any signs of adverse reactions, such as leaf burn or yellowing, discontinue use immediately.
Next, spray the fungicide directly onto the surface of the potatoes, creating a protective barrier that prevents mold spores from developing further. During the recovery phase, signs of rejuvenation will become apparent—such as firmer skin and new roots developing within days of application. If the treated potatoes begin to develop unusual color changes or soft spots, this may indicate that the mold’s penetration was more severe than initially thought, necessitating further inspection. A failure to notice these signs can result in the mold re-emerging even after treatment.
One key diagnostic is to check for moisture levels; overwatering can lead to a resurgence of mold, especially after heavy rain. Feel the soil around the sweet potatoes—if it is damp or overly saturated, hold off on watering. Timing is crucial; observe the weather conditions and plan applications around expected rainfall. If the fungicide requires a specific waiting period before reapplication (as stated in the product instructions), make sure to adhere to these guidelines closely. Ignoring label directions can compromise the treatment effectiveness and diminish your plants’ overall health. Remember that mold can become resistant over time, so alternating between different fungicides can sometimes yield better results.
Step 4 – Water Sweet Potatoes Strategically During Rain
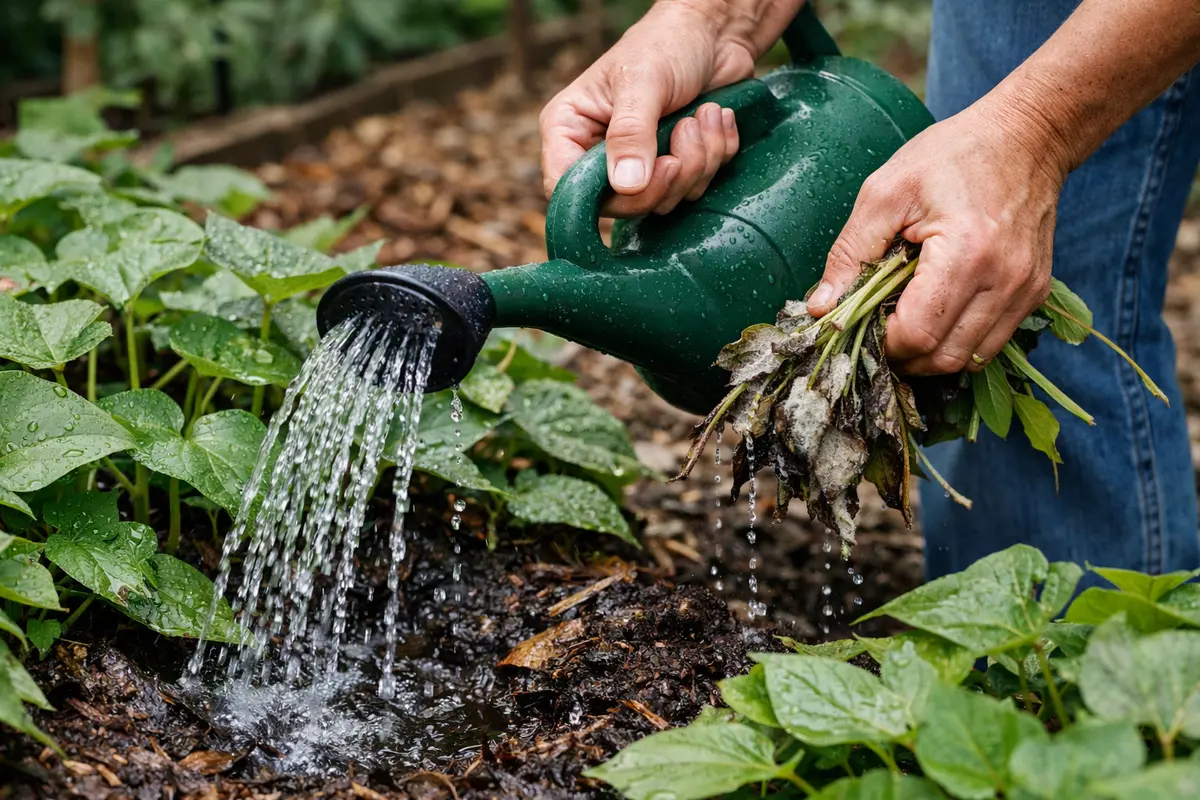
Begin by adjusting your watering schedule to ensure sweet potatoes receive adequate moisture without becoming waterlogged. This consistent practice results in healthier plants and significantly reduces mold risk in wet conditions. Establish a routine of checking soil moisture before watering, especially after rainfall—this ensures the soil stays balanced and retains moisture without promoting rot. Recognizing soil capillarity is also vital; moisture can move upward, affecting tubers even if the surface seems dry.
Water sweet potatoes with caution; they typically require about 1 inch of water per week. During periods of heavy rain, suspend all supplemental watering until the soil dries. If the top 2 inches of soil remains moist after rainfall, refrain from watering; doing otherwise will trap moisture and enhance conditions favorable to mold growth. If you notice wilting leaves, this can indicate the roots are suffering from excessive wetness, suggesting you need to reassess your watering habits. Implementing drip irrigation can help regulate moisture levels more effectively, as this method minimizes excess water exposure to the plant base and surrounding soil.
Implement a specific moisture-check routine in the warmer months, particularly after rain. Dig a small hole with a trowel to assess deeper soil moisture—this allows you to confirm whether excess moisture is just below the surface. If you peek beneath the top layer and find that soil remains overly wet, skip watering entirely. Monitor the weather forecast regularly to plan timely watering, aligning your actions with expected rain patterns. This proactive strategy minimizes excess moisture and greatly reduces the risk of mold, fostering healthy sweet potatoes. If you find that conditions remain persistently soggy even after adjusting watering habits, check drainage solutions or soil management techniques to correct the issue. Adjusting mulch layers around the plants can also aid in moisture retention while preventing rot. In water-retaining soil, it is not unusual to see discover why your succulent is turning.
Step 5 – Inspect Sweet Potatoes for Mold Recurrence Weekly
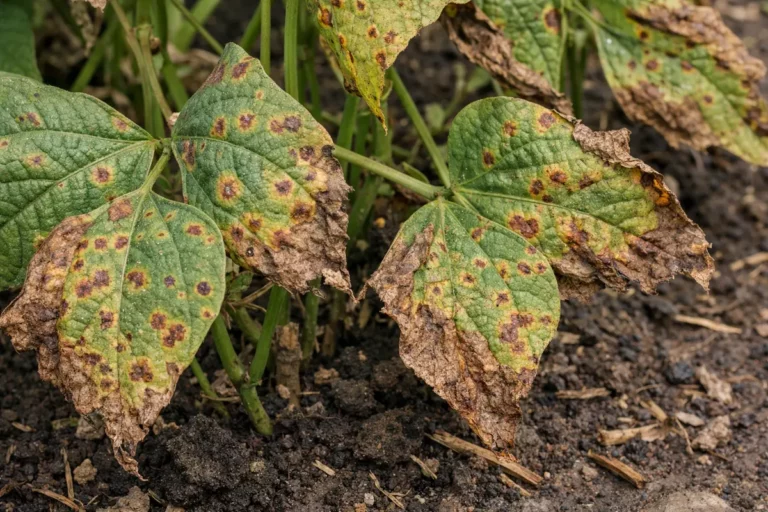
Inspect your sweet potatoes weekly for any signs of mold returning. You should notice a decrease in the mold presence as long as there aren’t any new occurrences. Focus your inspection on areas close to the soil where moisture can accumulate unnoticed, and look for surface changes like unusual softness or discoloration, which indicates potential rot developing underneath. If you detect a musty odor during your inspections, it often parallels hidden mold issues.
Plan to check immediately after rain and at least once a week thereafter to monitor moisture levels and any possible new mold growth. A fully recovered sweet potato will have firm, smooth skin and show no visible spots or fuzziness. During each inspection, watch for changes in texture, any unexpected spots, or off-putting odors that could signal mold development. Maintaining a journal of these observations will help you track your crop’s health over time and identify any emerging patterns associated with specific watering schedules or weather conditions. If you find your crop was previously healthy but now has a sudden rise in mold, reassess your environmental controls immediately.
If you detect early signs of mold returning, immediately consider re-treating with your anti-fungal solution according to the product’s instructions. Should the problem persist after multiple applications, it may indicate deeper issues like root rot; in such cases, removing severely affected plants may become necessary to protect the healthy ones. Regular monitoring is essential for maintaining healthy sweet potato crops. The critical point is to prevent the recurrence of mold, which often requires proactive measures like adjusting watering methods and improving soil aeration. If you find that the soil stays overly moist even after adjustments, seek professional agricultural advice to assess further soil issues or think about switching to a more suitable planting location. This proactive care not only safeguards your current harvest but also contributes to the long-term health of future crops.
FAQ
How long does it take for sweet potatoes to recover from mold?
Sweet potatoes can show signs of recovery from mold within a week after applying treatment. You’ll observe healthier, firmer structures without fuzzy spots as the anti-fungal takes effect. However, full recovery can be contingent on the extent of mold damage and the overall health of the potato prior to treatment. A deeper inspection may be necessary if recovery isn’t noticeable within that timeframe, especially in cases where mold penetrated deeply into the tuber.
Can mold spread from one sweet potato to another?
Yes, mold can easily spread to healthy sweet potatoes if the infected ones are left in proximity. Immediately removing any moldy potatoes will protect the rest of your crop from contamination. Additionally, if any storage containers or tools have come into contact with moldy potatoes, those should be sanitized to prevent further spread. Similarly, practice hygiene when handling potatoes post-harvest to avoid cross-contamination. Mold spores can remain airborne and contaminate nearby crops if precautions are not taken.
Should I remove sweet potatoes that show early signs of mold?
Yes, it is advisable to remove any sweet potatoes exhibiting early signs of mold as soon as possible. This action minimizes the risk of spreading mold to your other potatoes, allowing healthy ones to thrive. If you encounter a potato with only minor fuzziness but are unsure, it’s safer to remove it to ensure the rest of your crop remains healthy. Early intervention is always more effective than later exposure; an ounce of prevention at this stage can save your entire harvest.