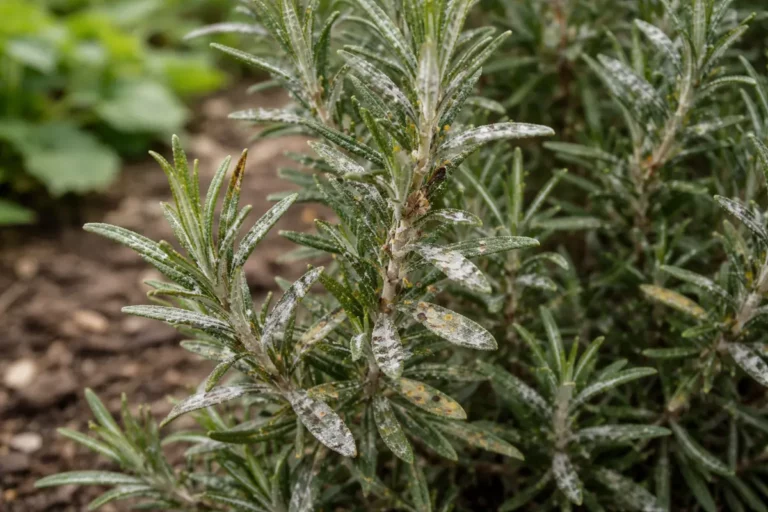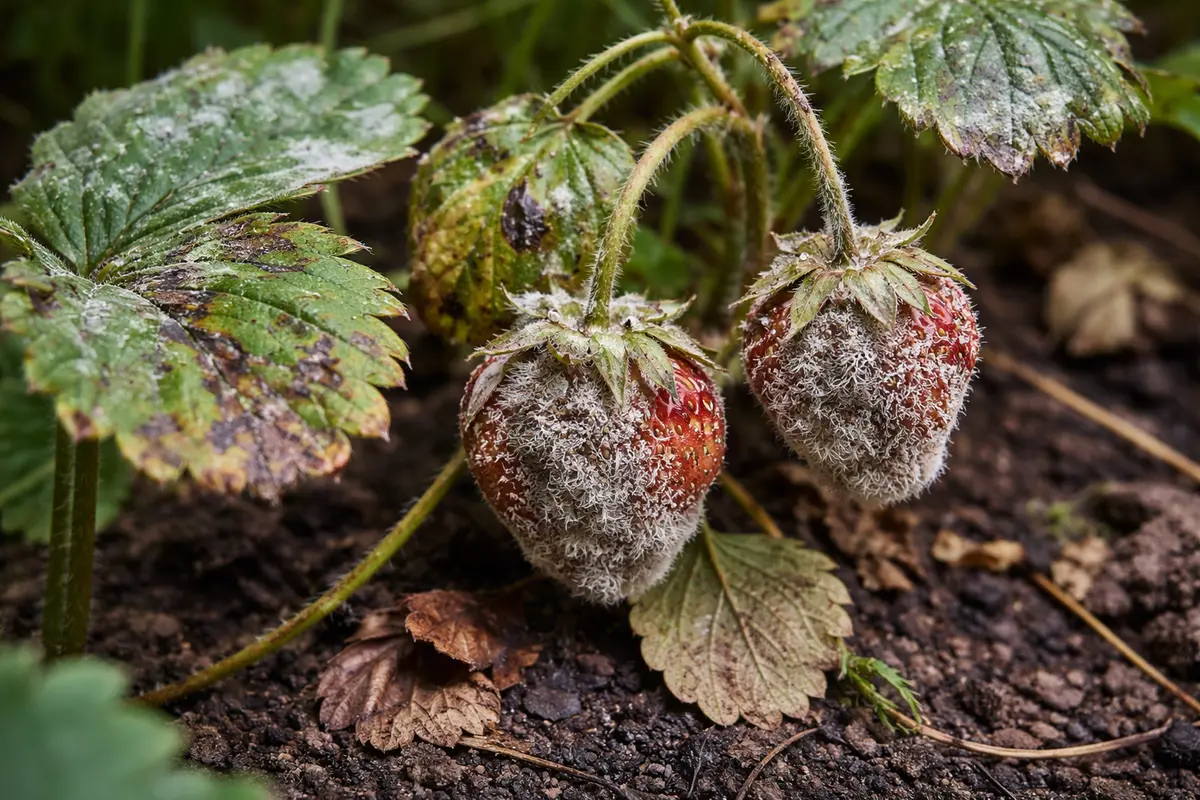
You’ve probably seen unsightly white or gray fuzz taking hold on your houseplants during high humidity, which is why you need to know how to stop mold on houseplants during high humidity. This mold can lead to spots or a powdery coating that indicates an unhealthy environment for your green friends. If left unchecked, the issue gets worse and can spread, thus weakening the plant’s vitality and stalling growth. Fortunately, you can fix this problem now by inspecting your plants, reducing moisture levels, and improving air circulation.
Step 1 – Prune Fungal Leaves on Houseplants
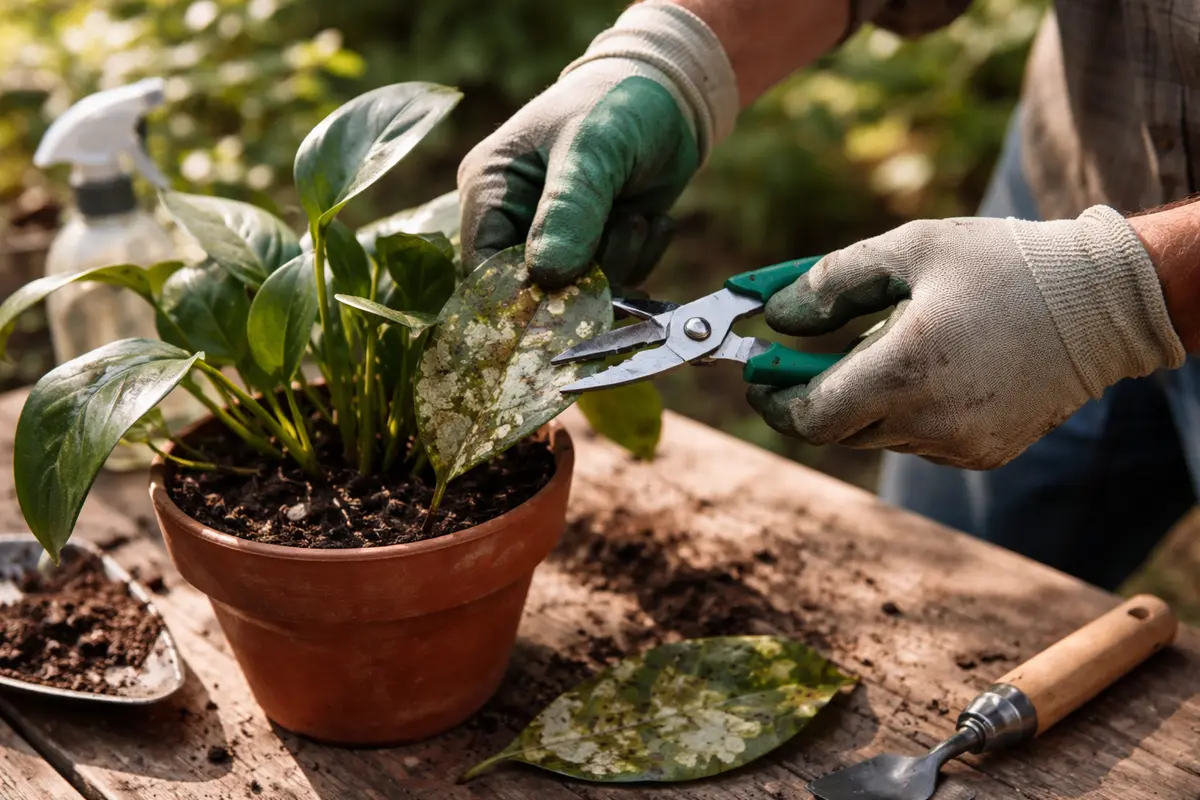
Start by removing any visibly infected leaves immediately. You will notice a cleaner appearance on your plants and a decrease in the spread of mold within a day. Be sure to clean your pruning shears with rubbing alcohol after removal to prevent spreading spores between plants.
Acting quickly to prune away affected leaves is crucial because it minimizes the potential for spores to multiply and infect healthy plant tissue. In high humidity, mold spores can thrive rapidly, especially on older leaves where moisture gets trapped, inhibiting airflow. When you prune, aim to cut leaves at the stem to ensure no infected tissue remains. Removing these damaged leaves not only freshens up the plant’s appearance but also halts potential spread to other healthy areas. After this step, your remaining healthy leaves should show clearer growth over time, and you may see new growth emerging from the plant. However, a few days later, you should perform another check to confirm the absence of new fungal signs. New growth, when monitored, should be free from spots, indicating your immediate correction was effective.
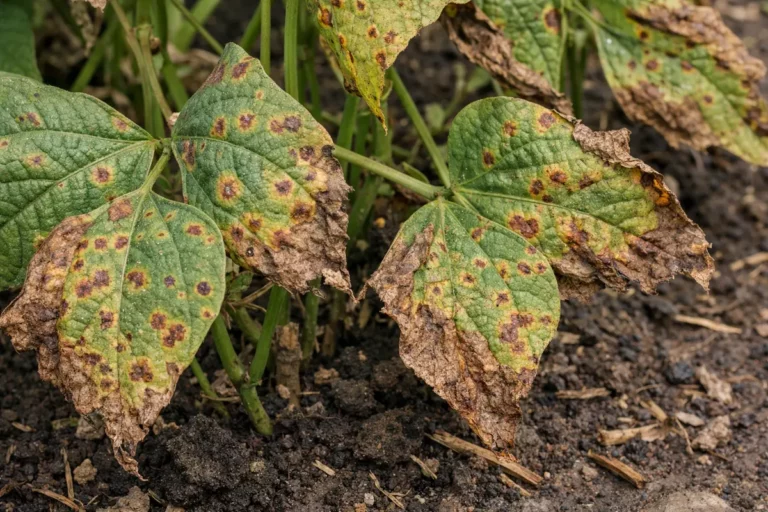
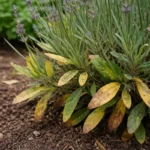
A common mistake gardeners make during this phase is to delay removing affected leaves, thinking it will resolve itself. However, mold can worsen quickly in damp conditions. You might see healthy foliage turning brown or yellow if the issue is allowed to escalate; removing a few infected leaves can stop a cascade of problems before they start. If you’re still seeing dark spots on the remaining leaves a couple of days after pruning, that indicates mold resurgence, and further action is necessary. Check adjacent nearby leaves as well during this phase because mold can easily jump from one area to another if left unaddressed. If the plant appears dusty or sticky even after pruning, inspect closely — moisture on the surface can nurture further mold development.
Step 2 – Diagnose High Humidity Effects on Leaves
Inspect the remaining leaves for signs of mold and check the air circulation in your plant’s environment. You will clearly see whether remaining leaves are healthy or if they show any risk of mold regrowth. A well-lit area with proper airflow can help considerably in this context.
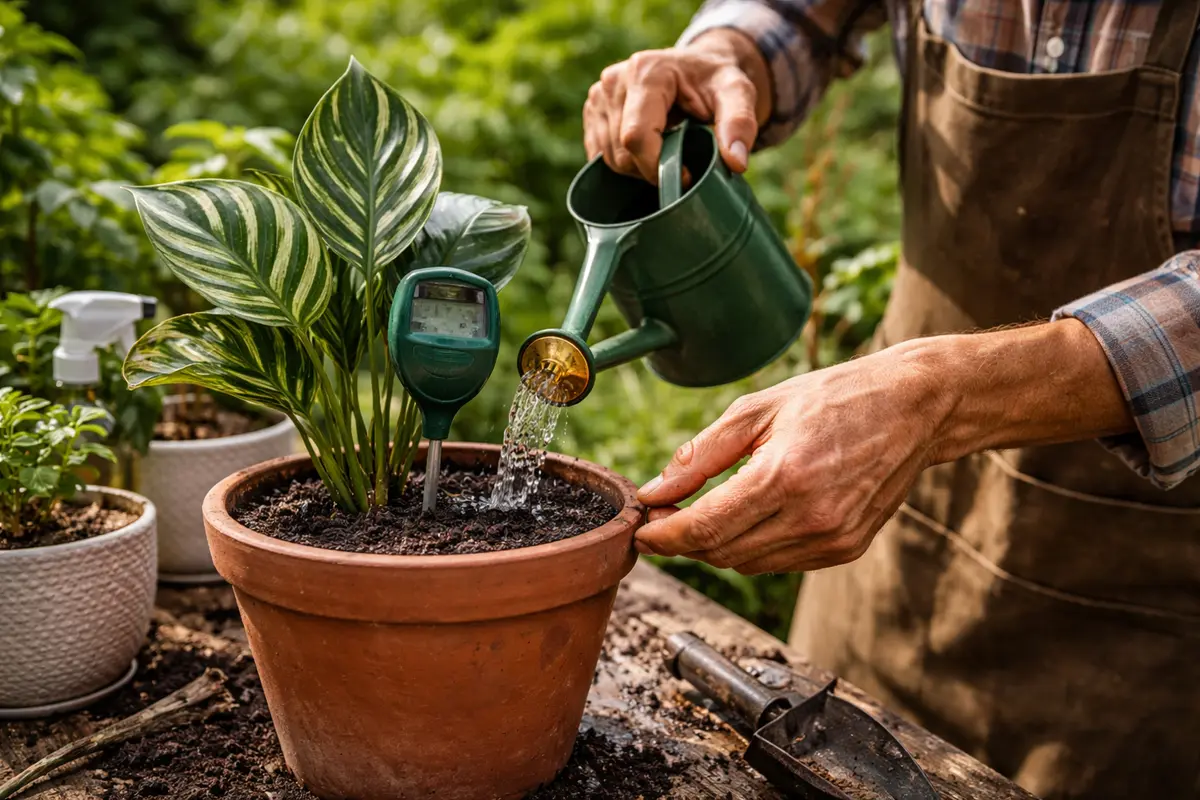
Identifying high humidity effects on leaves is essential because it illuminates the conditions that lead to diseases like mold. When humidity is elevated, water cannot evaporate from leaves, creating an ideal environment for fungal growth. Check for thin webs or a sticky texture on the leaves; these can signal the presence of mold or other pests thriving due to high moisture. It is beneficial to observe the humidity levels in real time; for instance, if the humidity is above 60%, that’s a substantial risk factor for mold. Understanding this allows you to adjust environmental conditions proactively, such as increasing airflow or using a dehumidifier. Monitoring indoor humidity levels with a hygrometer can provide insights into necessary adjustments, ensuring a more grounded response based on specific data.
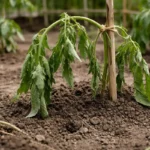
If you find that the soil feels overly damp and has a sour smell, you might need to think about improving the drainage of your pot or switching to a more suitable potting mix. Heavy, compact soil can retain moisture excessively, exacerbating mold issues. In contrast, if the leaves are simply drooping without any visible mold, that might indicate an issue of underwatering rather than humidity. In this case, checking the moisture levels in the soil more closely might help: if the top inch feels dry, that’s a further indication your plant needs water. Recognizing that a fully saturated soil profile may indicate root rot, look for symptoms such as blackened roots or an unpleasant odor to confirm that there is excessive moisture, potentially necessitating an immediate repotting into a drier mix.
Step 3 – Treat Plant Fungal Growth with Remedies
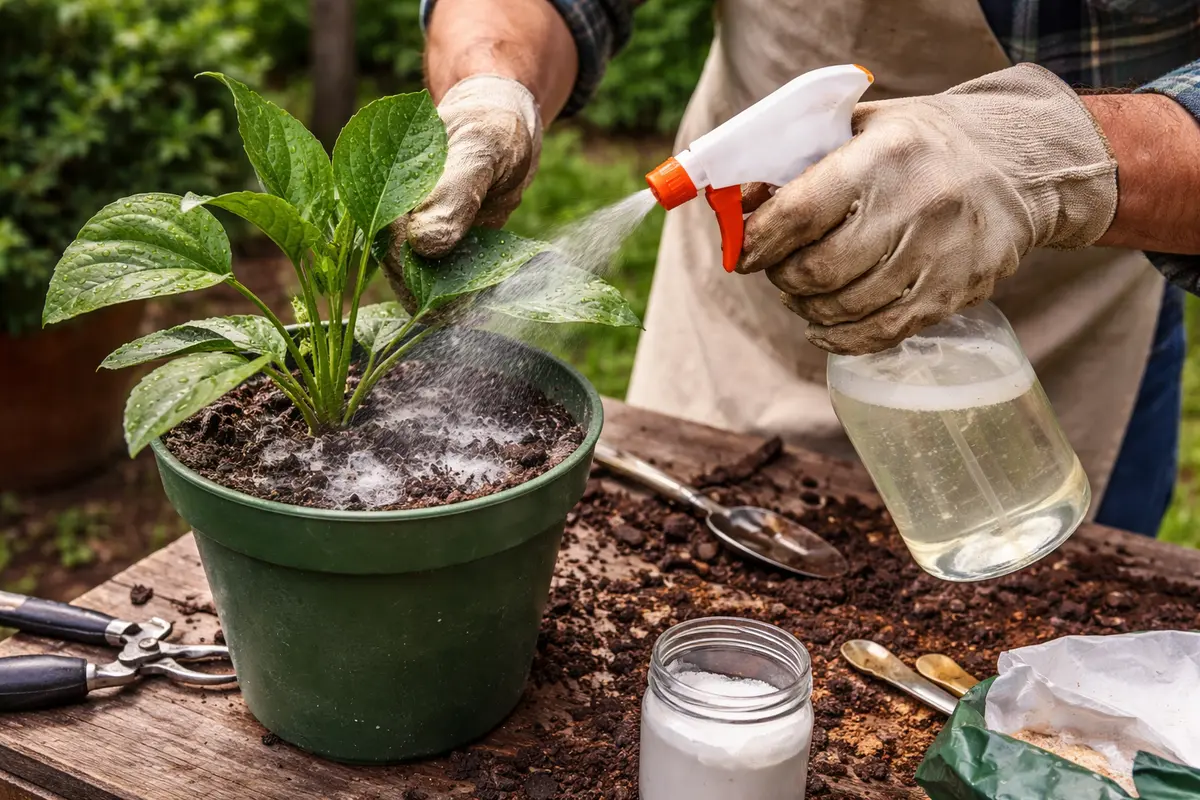
Start by removing the affected areas of your houseplants, including any visibly moldy soil or leaves. Ensure you allow the remaining soil to dry out completely before the next watering, and within a week, you should notice a reduction in mold presence and improved airflow around the plant.
Typically, recovery may take 2 to 4 weeks, depending on the specific plant. Healthy regrowth includes new leaf shoots that are vibrant and green, contrasting with any yellowed, dying leaves from mold stress. If mold persists despite proper care, check for hidden moisture sources, such as overly compacted soil that retains too much water.
Avoid the mistake of over-fertilizing your plant during recovery, as this can further stress it if the roots are compromised by excess moisture. If your plant requires less than average water during this recovery period, check for signs of wilting before adding more. Recovery timing may vary based on the plant type but keeping the soil drier generally helps prevent future mold outbreaks.
Step 4 – Control Moisture Levels Throughout Summer
Start by ensuring that your houseplants are in well-ventilated areas, using fans if necessary to increase air circulation around them. This action will lead to a noticeable decrease in excess moisture, making your indoor environment less conducive to mold growth. Experiment with fan placements to find the best angles that facilitate airflow without directly blowing onto any delicate leaves, which can cause further issues. Consider a rotation setup for fans so that airflow is consistently varied; this can help in preventing localized moisture pockets from forming.
Mold thrives in environments with stagnant air and high humidity, especially when water from leaf moisture or soil is not evaporated quickly. By improving airflow, you disrupt the conditions that allow mold spores to settle and multiply, effectively reducing the risk of recurrence where previously it flourished under low circulation. If you see mold developing in certain areas, check the surrounding airflow as a possible cause. If the environmental setup still doesn’t improve conditions, reevaluating the plant placement to a more open space may help, as different areas in a room can have varying levels of humidity and airflow. For instance, placing plants too close to a window without direct sunlight can enhance humidity levels due to condensation without providing evaporative drying, leading to issues.
During colder months, consider using a dehumidifier to further control the moisture in the air, especially in spaces where humidity tends to collect, like basements or enclosed areas. This secondary prevention layer will help maintain appropriate humidity levels, further minimizing mold chances when outdoor humidity rises, enabling your plants to thrive without fungal interference. Ensure to monitor the dehumidifier’s settings and check water levels regularly to maintain efficient operation without forgetfulness leading to mold issues. Neglecting regular service or emptying may lead to mold proliferation in the device itself, creating a new source of spores.
It is essential to manage moisture levels because stagnant water can lead to mold, especially during summer months when humidity is generally higher. Standing water promotes mold growth on both leaves and within the soil, creating an environment where harmful microbes thrive. This management ensures that the soil retains its ability to drain excess moisture, which thwarts fungal growth. Using pots with drainage holes and improving airflow around your plants can further support this routine. For example, you may want to group pots together but allow enough space so air can circulate among them without holding moisture. Additionally, consider adding materials like perlite or coarse sand to potting soil to enhance drainage properties, which can mitigate moisture retention issues.
Step 5 – Check for Mold Spots on Leaves Weekly
First, check the moisture level of the soil before watering by sticking your finger about two inches deep; if it feels wet, delay watering. Observe the surface of the leaves for any fuzziness or discoloration, which could indicate mold growth. Recheck every few days to ensure consistent soil moisture balance, aiming for dryness before the next watering.
A fully recovered plant exhibits vibrant green leaves that are firm and perky, contrasting sharply with early signs of mold, where leaves may appear dull and soft or develop a powdery texture. If the plant returns to displaying fuzzy white or gray patches on the leaves, it indicates that mold is reestablishing despite previous treatments. If the leaves are wilting, yet no signs of mold are visible, check the root system for potential rot.
If mold persists despite following these steps, consider removing any heavily affected foliage to improve airflow around the remaining healthy parts. Additionally, change the potting mix to one that drains faster, and if the problem continues, treat with an appropriate fungicide specifically labeled for houseplants to eliminate fungal spores effectively.
FAQ
How long does it take for houseplants to recover from mold?
Recovery from mold typically takes one to two weeks, depending on the extent of the infestation and the effectiveness of your treatments. Monitoring during this time is crucial, as returning growth and cleaner leaves indicate improvement. If symptoms don’t improve after two weeks, you may need to reevaluate your treatment method or watering technique to focus more on long-term resolutions. A longer recovery may indicate underlying issues such as poor soil drainage or persistent humidity, which will require a more thorough investigation.
Can mold spread from one houseplant to another?
Yes, mold can easily spread from infected plants to healthy ones, especially in close proximity. If you notice mold on one plant, ensure to separate them and treat the affected plant promptly to prevent further spread. Fungal spores can travel through the air, which is why maintaining distance between plants can significantly reduce the risk of mold propagation. If you have a high-density plant area, consider creating barriers between plants to prevent spore transfer. Using physical barriers can also redirect airflow, which is beneficial in preventing further spread.
Should I remove affected leaves completely?
Yes, removing any affected leaves is crucial to stopping the spread of mold. This immediate action not only improves the appearance of your plant but also helps prevent healthy tissue from being infected. If you notice the entire leaf is affected, it should be discarded entirely instead of just trimming off the spots, as any remaining spores may continue to infect healthy parts of the plant. Utilize a trash bag for disposal to limit spore reentry into the environment. Disposing of waste responsibly, using sealed bags, can significantly reduce the risk of spore recontamination in your indoor gardening space.