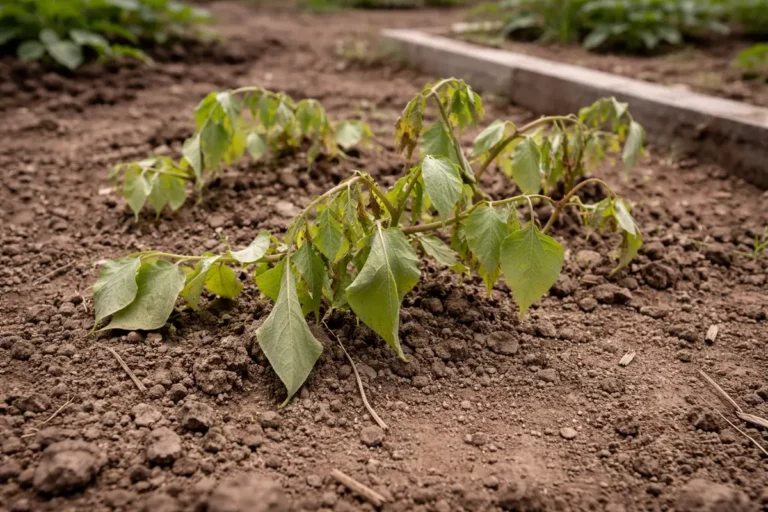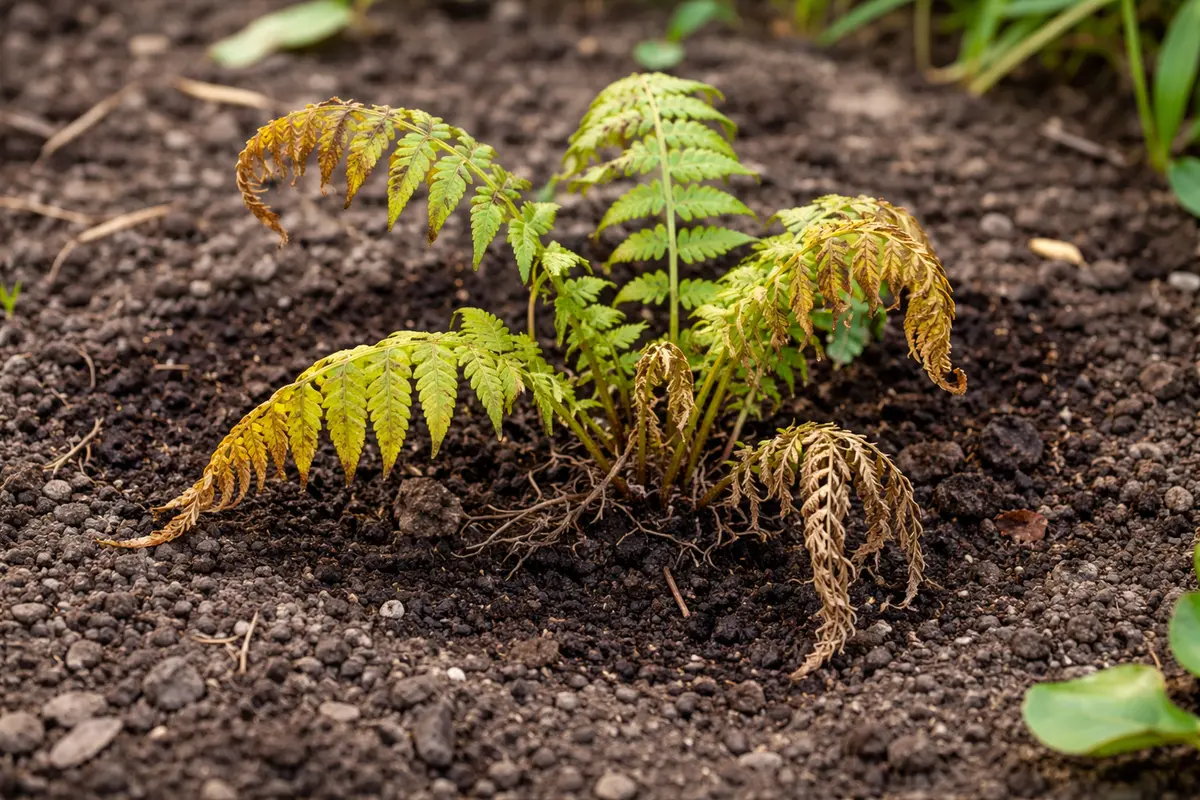
You may notice your ferns struggling with wilting and yellowing fronds, which is a clear sign that you need to know how to recover ferns after transplant shock in spring. This stress is often caused by disturbed roots during the transplanting process, leading to damage that can manifest as drooping leaves or even leaf drop. If ignored, this condition can worsen and set the plant back, making recovery harder to fix, but addressing it now by watering and checking the soil can greatly improve their chances of bouncing back.
Step 1 – Water Ferns Deeply to Reduce Stress
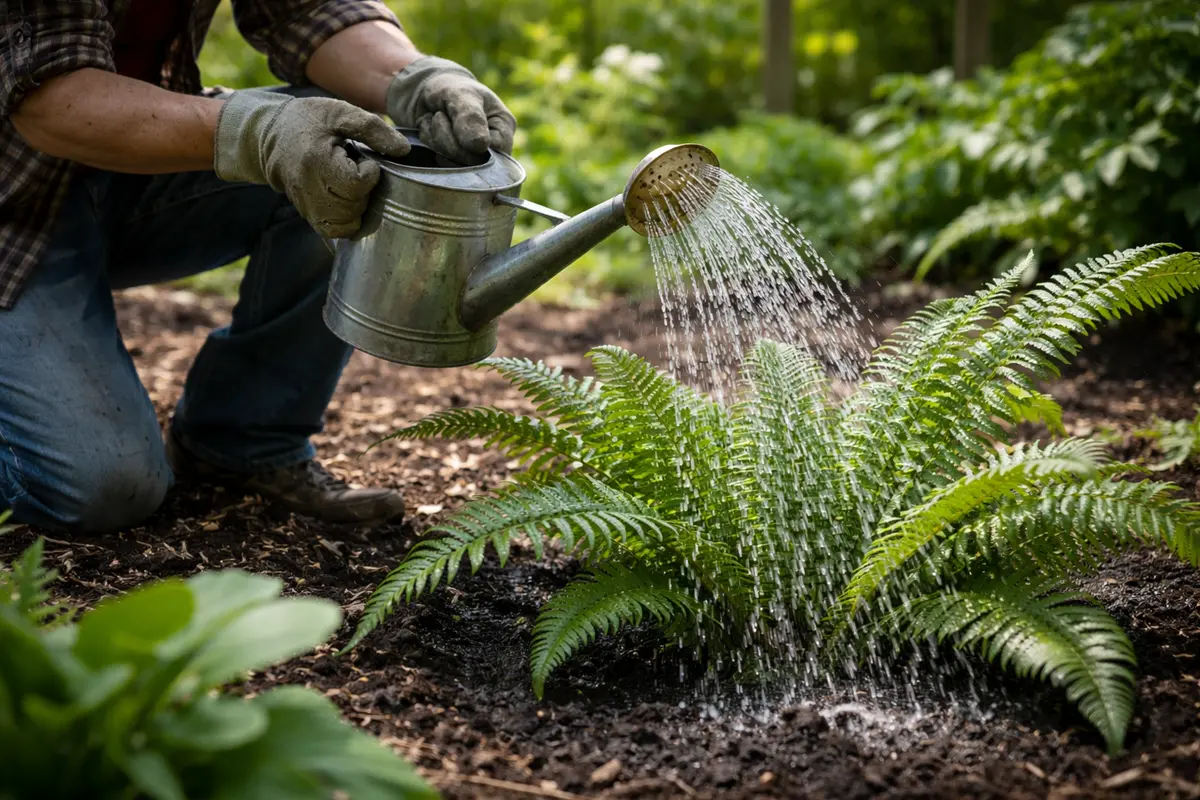
Start by immediately watering the ferns deeply, ensuring the soil around their roots is thoroughly moist. After this action, you should notice the leaves beginning to perk up slightly and a reduction in wilting, indicating that the plants are starting to respond positively to the water. Aim for consistent moisture in the following days to support their recovery process.
Acting quickly is crucial with ferns, as they have delicate root systems that can desiccate rapidly when subjected to transplant shock. When delayed, the ferns may experience cellular damage due to dehydration, leading to more severe wilting or even death of leaf tips as they struggle to absorb necessary nutrients and moisture from the stressed soil. If still drooping after watering, check the soil moisture levels to ensure they are adequately damp.
A gardener who waited too long to water their ferns noticed that some leaves turned brown and crispy, while others perked up after immediate watering. This contrast highlights the importance of timely intervention, as the surviving ferns began to revive, but the damaged ones required much longer to recover. A common mistake at this stage is underestimating the need for watering; it’s easy to overlook that newly transplanted ferns may require significantly more water than established plants during their adjustment period.
Acting quickly is crucial because ferns have delicate root systems that can become stressed when disturbed. When transplant shock occurs, the plant’s metabolic processes slow down, limiting nutrient uptake and water absorption. If you delay in providing the fern with a stable environment, it risks further dehydration, leading to browning or even complete frond loss.
For example, a gardener who immediately secures their ferns in a quiet location often sees them improve within days, while one who ignores the stress signs may face several weeks of recovery due to increasing damage. If the fronds show signs of wilting despite placement, check the surrounding foliage for overcrowding that could restrict air circulation.
Acting quickly is essential because ferns have sensitive root systems that can go into shock when disturbed. If left without adequate moisture, the roots may suffer irreparable damage, leading to droopy leaves and stunted growth. Ferns rely on a steady supply of water to perform photosynthesis, and delayed intervention can result in the entire plant dying off due to tissue desiccation.
In one instance, a gardener transplanted ferns but delayed watering for several days, causing the leaves to wilt beyond recovery. Conversely, another gardener who promptly watered their ferns noticed them thriving within days, illustrating how timing affects recovery. If leaves are still drooping despite watering, check for compacted soil that might be restricting root access to water.
Deep watering is essential to alleviate transplant shock because it saturates the root zone, helping restore wilting leaves while driving away initial tension. When you see leaves crisping up, it means they are losing moisture rapidly, an indicator of their stress level. This encourages the roots to re-establish and promotes beneficial soil microbiome activity, critical for nutrient absorption. Timing is vital; if the soil remains dry for too long after a transplant, the roots may struggle to rehydrate, leading to irreversible stress that can set back your plant’s progress dramatically.
A common mistake gardeners make at this point is only giving a light surface watering, which fails to penetrate the soil adequately to reach the roots. This often leads to further stress as the top few inches may appear moist while the deeper roots remain parched. Ensure the pot has good drainage to avoid standing water, as excessive moisture can lead to root rot. If your ferns fail to show any signs of improvement after the initial watering, it may be essential to assess the soil for compaction or drainage issues, which could hinder water access to the roots. In adverse cases, you may require replacing the soil entirely to facilitate better moisture retention without suffocating the roots.
Step 2 – Check for Soil Compaction Near Fern Roots
Start by examining the soil to identify drainage issues that may be causing your ferns to show signs of stress. If the soil feels overly compacted or retains excessive moisture, aerate it carefully and consider amending it with organic material to improve drainage. As the soil begins to dry out and aerate, you should notice a reduction in wilting and yellowing of the fern fronds.
When ferns are transplanted, the roots may struggle to adapt to their new environment, leading to transplant shock characterized by wilting, browning, or stunted growth. A lack of air in compacted soil prevents roots from absorbing necessary nutrients and water effectively, stressing the plant. If your ferns are wilting but the soil feels dry, it’s a sign they might not be getting enough water rather than suffering from overwatering.
If your soil smells sour, indicating anaerobic conditions, immediately improve drainage by incorporating perlite or sand to encourage aeration. Alternatively, if your ferns are showing signs of nutrient deficiency, such as yellowing fronds but the soil is well-drained, check for imbalances in soil pH or consider adding a balanced fertilizer. Each situation requires a different approach to restore your ferns to their healthy state.
Soil compaction can prevent roots from spreading out and absorbing the essential moisture needed for recovery. If the compacted soil traps air and water, new roots face difficulties accessing these resources, jeopardizing the overall health of the plant. Compacted soil often results from heavy equipment use, watering in a way that compresses the soil structure, or environmental conditions that lead to soil settling. This can be especially severe in regions where the soil is clay-heavy, as moisture retention can exacerbate compaction. When roots are too constricted, they fail to grow effectively, which can stifle the overall vigor of your ferns.
If you encounter a bad odor from the soil while checking, this could indicate root rot, connecting the problem to overwatering or poor drainage. If the soil smells sour, reassess your watering methods, and consider repotting your fern into fresh, well-aerated soil that facilitates proper drainage. Ignoring compaction can impede recovery and leave your ferns vulnerable to further decline. Be careful not to damage superficial roots while loosening the soil; gently work around them to avoid causing more stress to your fern. In cases where you see only brown or black roots during inspection, root rot may have already set in, and the solution may involve a more serious intervention like total root trim and repotting.
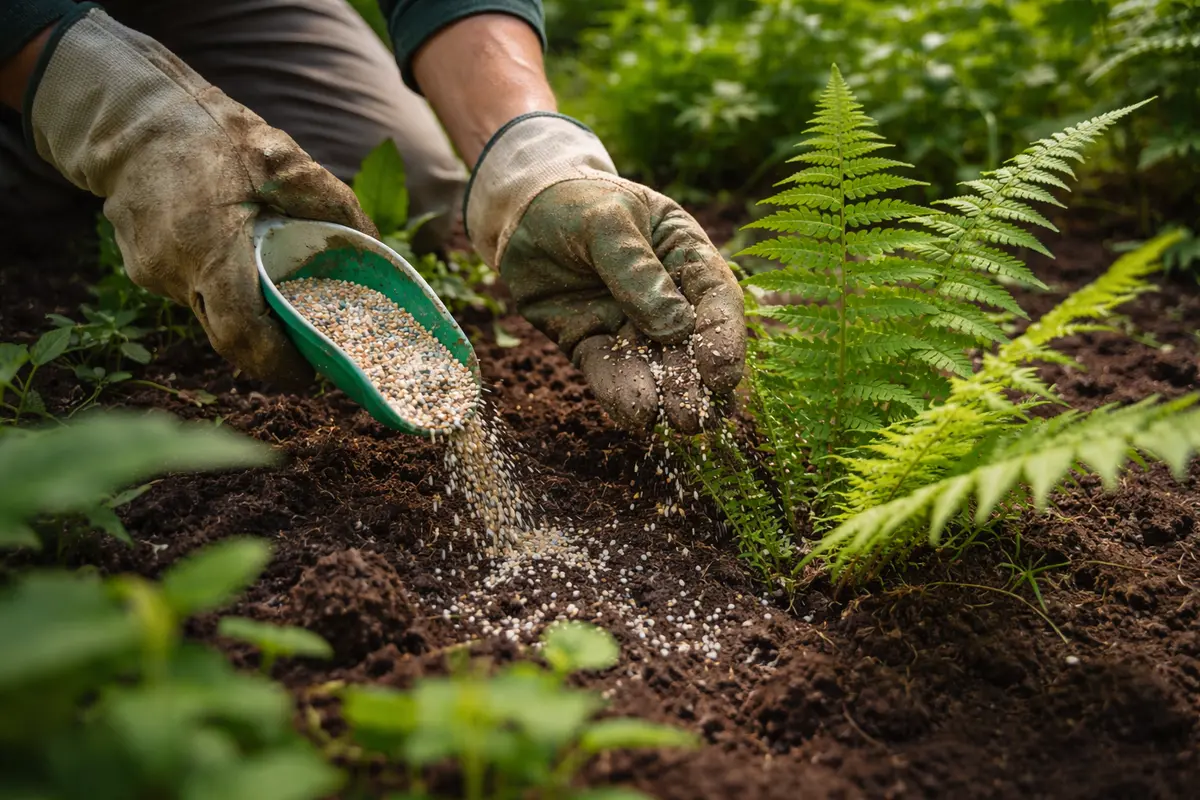
Step 3 – Feed with Nutrients to Aid Recovery
Begin recovery by ensuring your ferns receive consistent moisture without being waterlogged. You should see signs of improvement, such as new frond growth and the swelling of buds within a few weeks. To prevent further transplant shock, establish a routine watering schedule and compost application timing aligned with their growth cycle in spring.
Recovery generally spans several weeks, with noticeable fresh growth beginning about two to four weeks after proper care. Stress factors such as fluctuating soil moisture levels or inadequate sunlight exposure can trigger a recurrence of transplant shock. If your ferns are wilting despite consistent watering, check for signs of root rot from overwatering.
A frequent error during recovery is over-fertilizing, which can exacerbate stress rather than alleviate it. When nutrient levels are high but fronds remain pale and limp, consider adjusting your fertilizer application based on recent growth. If the plants still show no signs of recovery despite careful attention, check for root damage from too much disturbance at transplanting.
Nutrients play a vital role during this stressful period; they provide essential elements that stunted roots need to rebuild and support new growth. Fertilizers rich in nitrogen, phosphorus, and potassium can significantly boost the ferns’ resilience as they adapt to their new environment, helping offset issues stemming from transplant shock. Timing is crucial; feeding too soon after planting can further stress the newly established roots. Therefore, ensure that watering is stable and the plant appears to be settling in well before applying any nutrients. A good practice is to check the moisture levels in the soil before feeding; if the soil feels dry, wait another couple of days before fertilizing to avoid overwhelming the roots.
A common pitfall occurs when gardeners hesitate to fertilize, fearing overdoing it. However, consider that under-fertilization can stunt growth and prolong the stress process. If you implement the nutrient routine yet see no signs of improvement within two weeks, it may be time to reassess your watering schedule; overwatering can wash nutrients away from where roots could access them. After each application, closely monitor the ferns for signs of fresh growth or other indications of recovery, such as an increase in leaf color vibrancy. For instance, if leaves continue to droop despite fertilization, check whether the fertilizer is clumping or overly concentrated, which can indicate incorrect application and nutrient lockout.
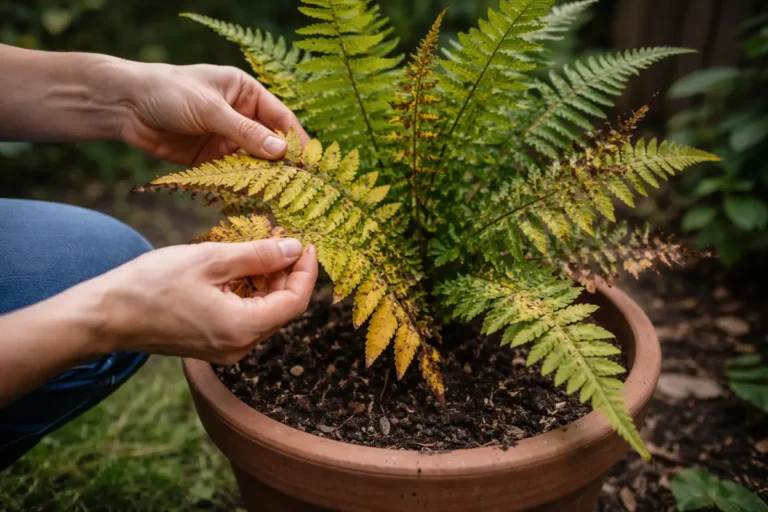
Step 4 – Inspect Ferns for New Growth Progress
After completing the earlier steps, begin checking your ferns for new growth every week for the next two to three weeks. You should observe clear signs of recovery, such as unfurling fronds or an expanding layer of green leaves. These indicators reflect a successful adjustment as your fern adapts to its environment. In successful instances, new growth will not only be visible but also lush and healthy, differing significantly from the earlier stressed appearance.
A healthy fern will display signs of new growth alongside firmness in its existing fronds. A clear indication that your fern is on the mend would be the leaves becoming more vibrant in color and standing upright instead of drooping. Watch closely; if any leaves exhibit a yellowing or browning out, revisit your previous steps to reassess moisture levels and nutrient access. This might mean your watering needs adjustment or that the soil should be refreshed or better aerated. When left ignored, stunted growth will make the fern more susceptible to diseases and pests; therefore, timely interventions are key.
If signs of stress recur despite your efforts, it may be time to admit another transference issue within the environment or reconsider the sunlight exposure your ferns are getting. For example, if the ferns are positioned in full sun and are struggling, moving them to a shadier location could prevent additional stress in the immediate aftermath of transplanting. Alternatives like using shade cloth or moving ferns to a partially shaded area can also ease the transition. An early response in adjusting their locale will help mitigate any long-term damage. Keeping a regular monitoring schedule allows you to promptly identify and correct recurring issues for healthy fern growth moving forward. Beyond simple adjustments, continuous assessment will afford you the time and insight to make critical decisions along your plants’ recovery journey.
FAQ
How long does it take for ferns to recover from transplant shock?
Ferns typically need about two to four weeks to show significant recovery from transplant shock, depending on their condition before handling and the specific care provided afterward. Patience is essential during this phase, as ferns are particularly sensitive to both water and nutrients. Adjustments in their new environment must be precise and consistent for effective recovery, as wrongful care can lead to further setbacks.
Should I remove damaged fronds after transplanting?
Yes, if the fronds appear severely wilted or dead, trimming them back can help direct energy toward healthy growth. Focus on pruning only the most damaged sections, as maintaining adequate foliage allows the plant to photosynthesize effectively, contributing to general recovery. However, avoid cutting back too much foliage too quickly to prevent shock. In practice, monitoring the health of remaining fronds can guide your decision to prune further, allowing the plant to retain reserves while it recovers.
Will ferns recover if planted in the wrong spot?
Ferns may struggle to recover if planted in an unsuitable location, particularly with exposure to too much direct sunlight or insufficient moisture levels. If signs of stress persist despite attempted recovery steps, consider relocating your ferns to a more favorable environment that better matches their preferred conditions, such as dappled sunlight or consistently moist soil. Effective timing in making these adjustments can significantly enhance overall recovery potential.