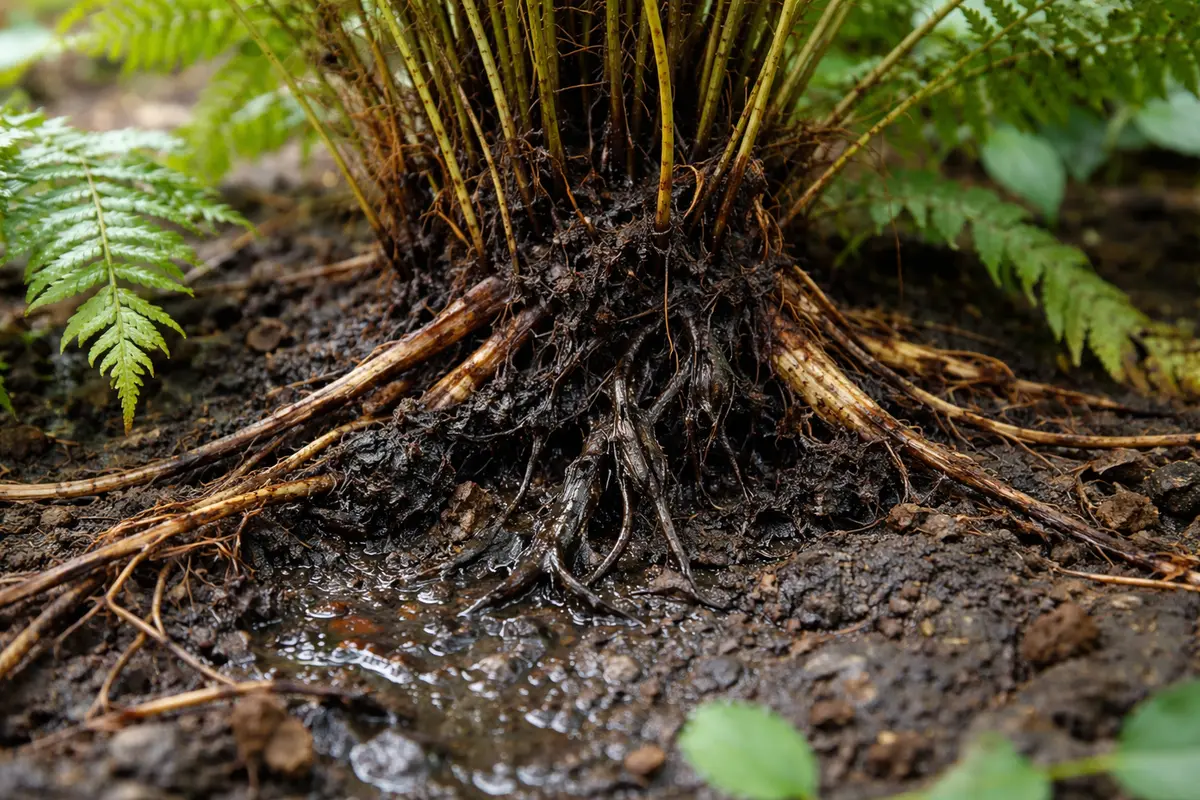
You may notice your ferns struggling after heavy rain, a clear sign that you need to know how to treat root rot in ferns during heavy rain. The roots can become waterlogged and begin to rot, leading to wilting and yellowing leaves. If left untreated, this can spread throughout the plant, weakening it and making recovery harder. Fortunately, addressing this issue now means you can check the roots and improve drainage conditions to save your ferns.
Step 1 – Trim Affected Fern Roots Immediately
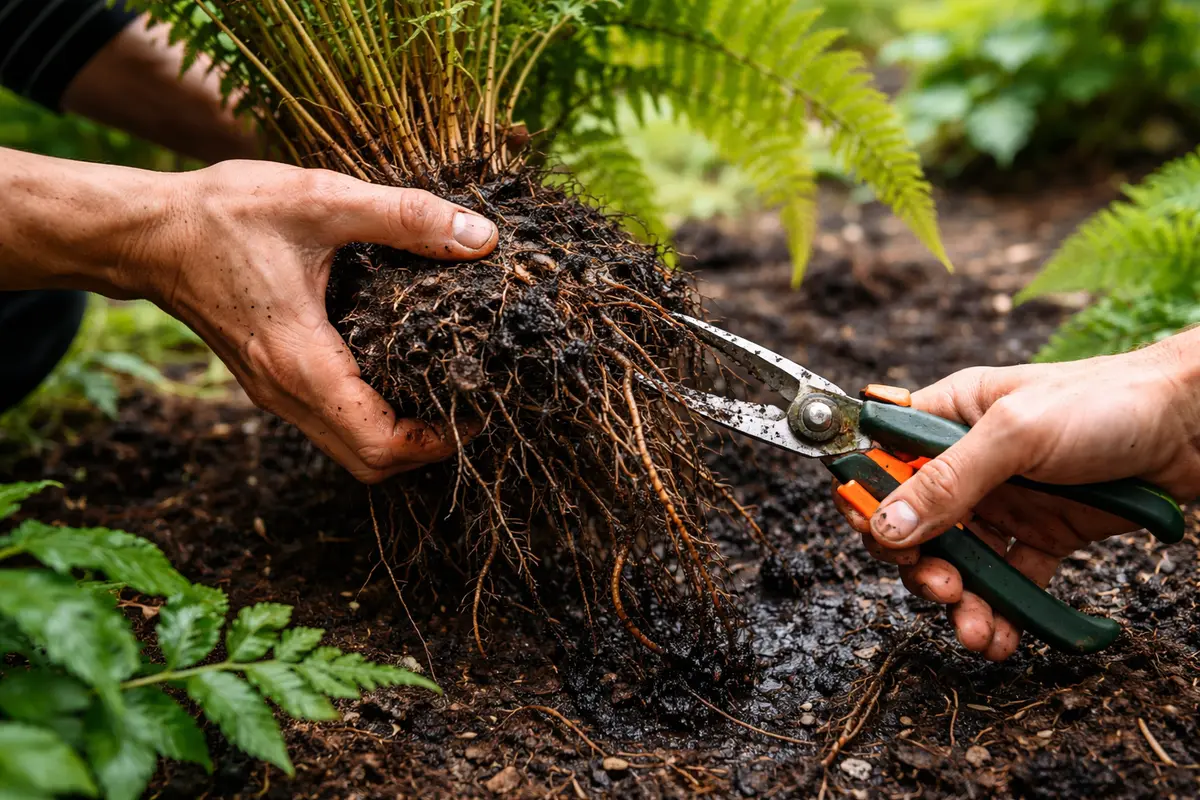
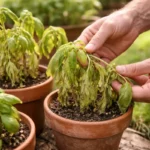
Start by trimming any visibly rotting roots from your ferns. You will see immediate evidence of improvement as healthier roots are exposed, leading to better water absorption. Ensuring you remove all affected areas is crucial, as it limits further damage and prevents the rot from spreading. Aim to use sterile pruning shears to minimize any risk of introducing further pathogens during this process.
Acting quickly is essential because rotting roots cannot properly absorb nutrients and water, impairing the plant’s overall health quickly. By trimming the rotting roots, you essentially remove the dead tissue, allowing the fern to focus on developing healthy roots instead. Early intervention can prevent the fern from deteriorating, sparking a more robust recovery phase. If you find more than 50% of the roots are rotting, consider the overall health of the plant and whether repotting is necessary.
A common mistake is to delay trimming, thinking the plant will recover on its own. Gardeners may hesitate to cut back even when roots smell sour or appear mushy. If the rotting roots linger, they can jeopardize undamaged parts of the plant, prolonging the recovery timeline. If you’ve delayed treatment and conditions appear dire, evaluate the soil’s drainage properties next, moving swiftly onto corrective measures. When cutting root sections, be sure to keep healthy roots intact. If you cut away too much of the root system, it can lead to additional stress, inhibiting recovery. Additionally, observe if there’s a significant difference between roots that still look firm and those that are blackened; the healthy ones may need protection from excess moisture or lack of air circulation in their environment.
Step 2 – Diagnose Waterlogging in Fern Soil
Start by inspecting the roots of your ferns for signs of brown, mushy areas, which indicate root rot caused by excessive moisture. If you find compromised roots, prune them away using sterilized scissors to prevent further infection, and you should see the remaining healthy roots appear firm and white over time.
Root rot occurs when ferns are overwatered, especially during heavy rain, leading to waterlogged soil that suffocates roots and promotes the growth of pathogens. This anaerobic condition results in the breakdown of root tissue, causing the observable symptoms like wilting and yellowing leaves. If your fern is not showing signs of root decay but still appears lethargic, it may be suffering from nutrient depletion rather than rot.
If the soil smells sour, it is likely anaerobic, and you should repot the fern in fresh, well-draining soil immediately. Conversely, if you notice white fuzz on the soil surface, this could indicate mold rather than root rot; switching to a more breathable potting mix would be necessary to address this issue effectively.
Understanding waterlogging is crucial to this process since ferns thrive in moist yet well-drained soil conditions. Too much water deprives roots of oxygen, causing them to become blackened and mushy, which leads to root rot. Recognizing this problem early means you can adjust your watering practices and amend soil drainage before facing larger setbacks. If soil remains soggy days after rainfall, it indicates that water cannot escape effectively, which necessitates corrective actions.
If the soil remains soggy days after the rain, consider changing your watering routine or adding drainage materials to your potting mix, such as perlite or sand. A common mistake gardeners make is to overlook soil moisture checks, leading to the assumption that the plant is merely stressed from its surroundings rather than from improper drainage. If the issue persists despite changes, you might need to repot the ferns into a drier mix, which is particularly important with heavier potting soils that retain moisture longer. Furthermore, if the soil at the bottom of the pot has a noticeably darker color compared to the topsoil, this visual cue often indicates consistent water retention that worsens root health. Gardeners should also monitor how quickly the water drains after watering; if it takes too long, it reinforces the need for adjustment.
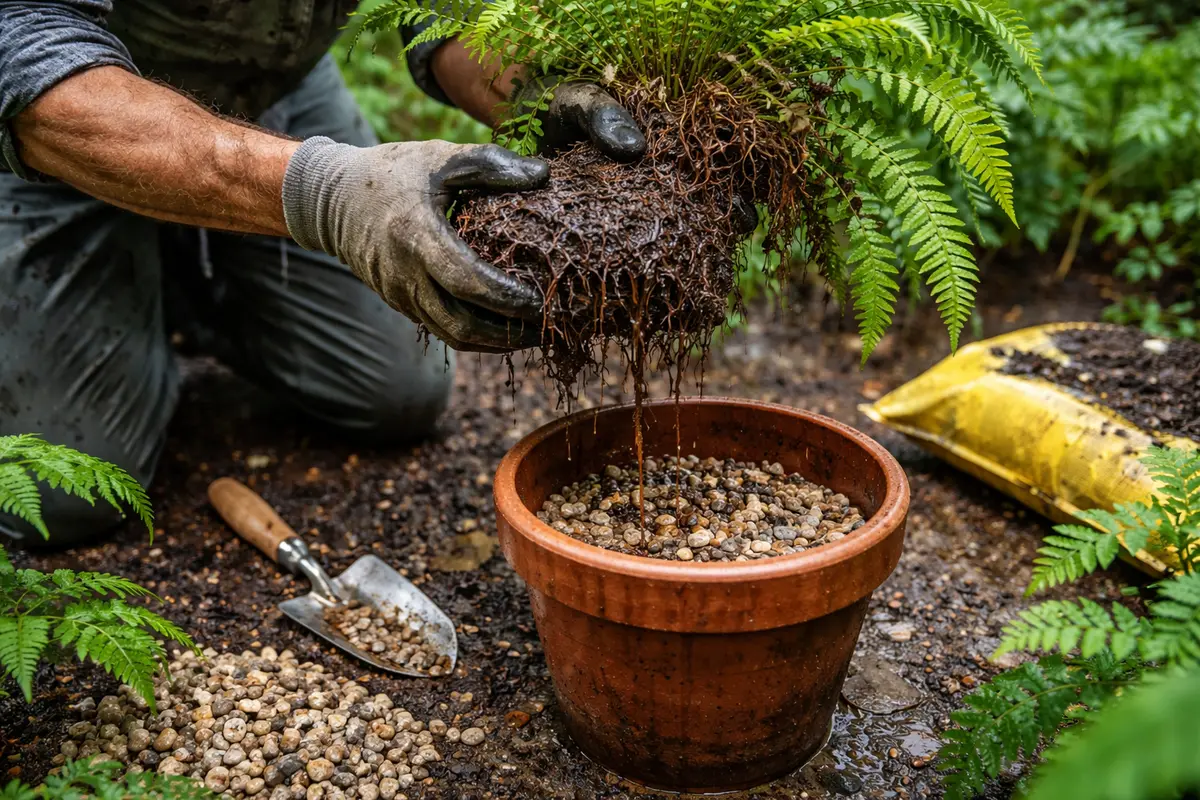
Step 3 – Repot Ferns to Promote Recovery
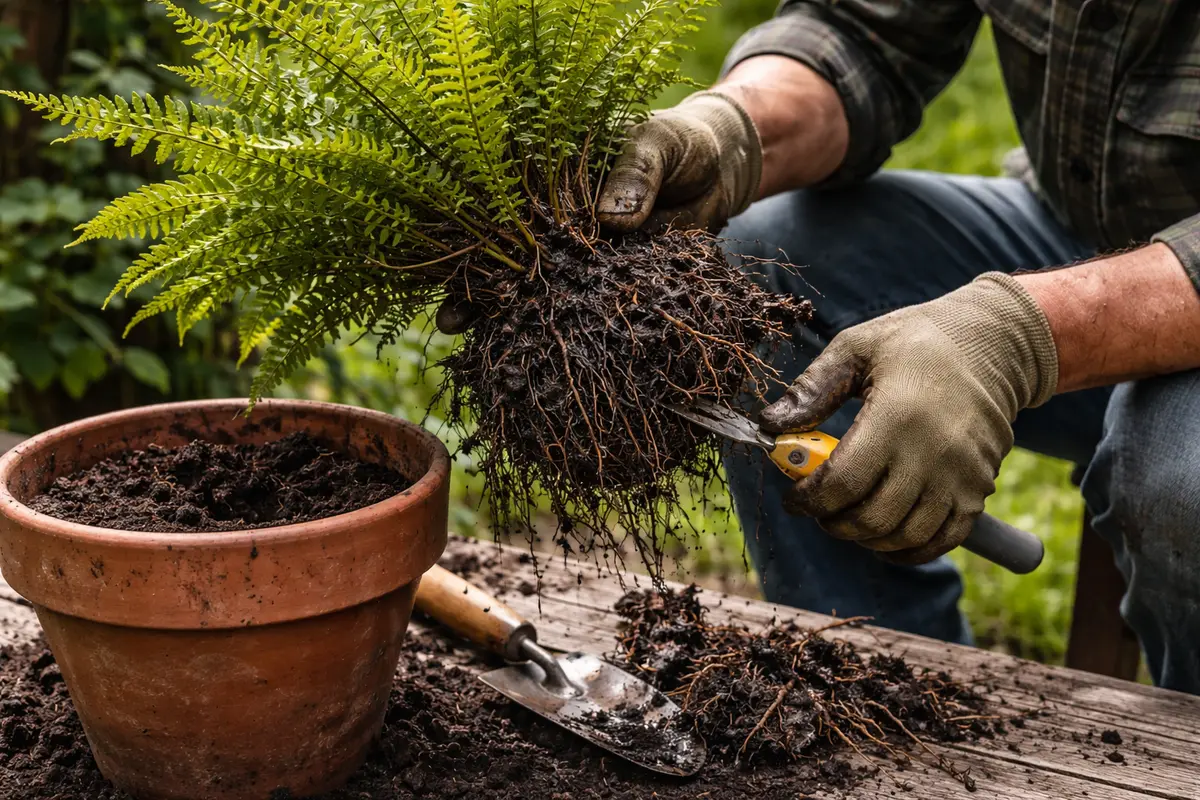
Remove the affected fern from its pot and trim away any blackened or mushy roots with sterilized pruning shears. After repotting in fresh, well-draining potting mix combined with perlite, you should observe new green growth within a couple of weeks as the plant starts healing.
The recovery timeline for ferns experiencing root rot is typically between two to four weeks. Healthy regrowth will appear as vibrant, new fronds unfurling from the center of the plant. Warm temperatures, bright indirect light, and maintaining slightly moist but not soggy soil can facilitate faster recovery, while cool temperatures and prolonged waterlogged conditions can hinder progress.
Avoid the mistake of overwatering or over-fertilizing during the recovery phase, as this can lead to further root damage. Instead, ensure that the top inch of soil is dry before watering again. If fronds remain wilted even after proper care, check for pests like aphids, which can stress the plant further.
New soil provides essential nutrients and better moisture control, crucial for recovering ferns. Fresh potting mix reduces excess moisture and encourages proper drainage, allowing roots to thrive and absorb nutrients effectively. Without repotting, the ferns might continue struggling with the stagnant moisture levels in their current environment, leading to additional stress and continued rot. Observing soil texture and drainage capabilities becomes vital when selecting new potting materials. For optimal results, selecting a potting mix designed explicitly for ferns can be beneficial, as these mixes typically contain the right balance of organic matter and drainage materials.
A common mistake during this recovery phase is to overwater newly repotted ferns, mistaking sogginess for hydration. This oversight can lead to another cycle of root rot. It’s important to wait until the top inch of the soil feels dry before watering again, ensuring that you provide just enough moisture without causing further issues. Lastly, be cautious not to bury the crown of the fern deeper than its original soil line, as this can suffocate the plant. Note that if you experience excessive bending of the fern fronds after repotting, it usually indicates overwatering or insufficient light, both of which need addressing. If it appears wilting after repotting, check the moisture levels in the soil; this can help you identify problems early in the recovery phase.
Step 4 – Ensure Proper Drainage in Rainy Seasons
Start by ensuring your ferns are planted in well-draining soil and positioned in pots with drainage holes. This immediate action will help reduce water accumulation around the roots, preventing the onset of root rot and establishing a routine of drier conditions that your ferns will thrive in.
Fern root rot commonly arises from prolonged exposure to saturated soil, especially during heavy rain when irrigation systems may be unnecessary. By planting in well-draining soil and elevating pots off the ground, you mitigate the risk of waterlogged roots, contrasting a thriving fern in structured soil against a wilting one in compacted mud. If your ferns show yellowing fronds and mushy roots, check the soil moisture levels immediately.
During the rainy season, apply a layer of mulch around your ferns to regulate moisture levels and promote drainage. As the weather shifts, adjust the watering schedule based on existing rain patterns, reducing water input when rainfall is frequent to further safeguard against root rot.
Environmental conditions during rainy seasons can exacerbate root rot if not accounted for. Ferns prefer a moist but well-drained environment; thus, being proactive about drainage is key during periods of heavy rain. By routinely checking that your ferns aren’t sitting in water, you’ll foster a better growth setup that withstands wetter conditions. Keeping a close eye on local weather forecasts can also inform when to increase checks on these plants. Also, consider rotating pots occasionally to promote even exposure to light and air circulation; stagnant condition effects often make plants more susceptible to root issues.
Depending on local weather patterns, consider increasing the frequency of your checks on these plants during the rainy season. A secondary prevention method could be adding a layer of protective mulch on top of the soil, allowing air to circulate while retaining moisture without over-saturating the roots. This balanced approach will help keep your ferns healthy even in downpours. However, be cautious—too thick a layer can hinder air exchange and create conditions ripe for decay. If you detect any signs of mold, such as a white or fuzzy layer on the soil, it often indicates a moisture overload, requiring immediate adjustment in your drainage strategy.
Step 5 – Inspect Fern Leaves for Signs of Revival
Monitor your ferns closely by inspecting the leaves for signs of revival. Check at regular intervals to see if new growth appears and leaf color becomes vibrant. By continuing this observation, you can track improvements or determine if issues persist after your interventions. Ideal intervals for checking include every few days after treatment, focusing on leaf firmness and overall vitality.
A fully recovered fern will display fresh green leaves, with no signs of wilting or yellowing over time. Look for increased leaf firmness and a healthy texture, indicating the plant is again receiving adequate nutrients and hydration. Signs of the rot returning would include any re-emerging yellowing of leaves or a lack of new growth. If you see sporadic yellowing among some leaves while others appear fine, this could indicate localized stress, requiring troubleshooting. If some new fronds lack health and vigor, check if they are in direct contact with moist soil; prolonged contact may lead to similar stress as experienced previously.
If you notice signs of the problem returning despite having taken initial corrective steps, re-evaluate your watering and drainage practices. When the symptoms persist, it may be necessary to reassess the soil conditions again and repeat some prior steps. Identifying the underlying issues early can save your ferns from ongoing distress and permanent damage. Additionally, verify whether other nearby plants are healthy, as mutual influences can occur in confined spaces. Regular checks on water quality may also be prudent; if treated water is used for irrigation, make sure that chlorine levels or chemicals are within acceptable boundaries. A sudden change in leaf texture or color can often foreshadow upcoming stress if not detected early.
FAQ
How long does it take for ferns to recover from root rot?
Ferns can take several weeks to months to recover fully from root rot, depending on how severe the damage was and the care taken afterward. Regular monitoring and ensuring ideal conditions can significantly speed up this recovery process. After the initial recovery phase, continual care will be necessary to foster enduring health.
Can root rot in ferns spread to other plants?
Yes, root rot can spread to other plants if they are kept in the same pot or soil. It is crucial to separate infected plants to contain the issue and prevent further damage to healthy specimens. In severe cases, all plants in close proximity may suffer if the issue is not curbed quickly.
Should I remove all affected parts of my fern?
Yes, it is advisable to remove all affected parts of your fern, including rotten roots and damaged leaves. This preventive measure stops the spread of rot and promotes healthier growth. Pay attention to the areas where the fern meets the soil, as damage can often be hidden at this junction.