You may notice your potted succulents looking wilted and sad, especially after a heavy rain or when the soil remains excessively moist, which is why you need to know how to treat root rot in potted succulents after overwatering. The roots can start to rot, leading to mushy tissues and yellowing leaves that signal serious damage. Ignoring this issue only weakens the plant and can lead to more damage down the line, but it’s possible to turn things around by inspecting the roots, cutting away any affected sections, and adjusting your watering routine.
Step 1 – Trim Affected Succulent Roots Promptly
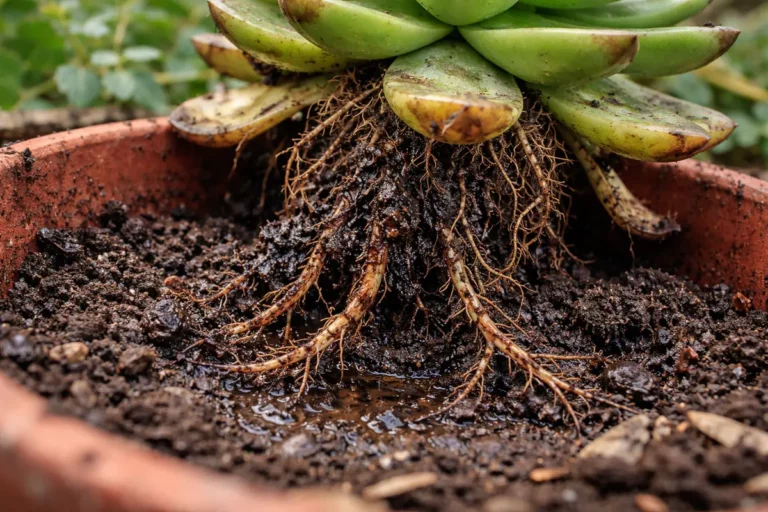
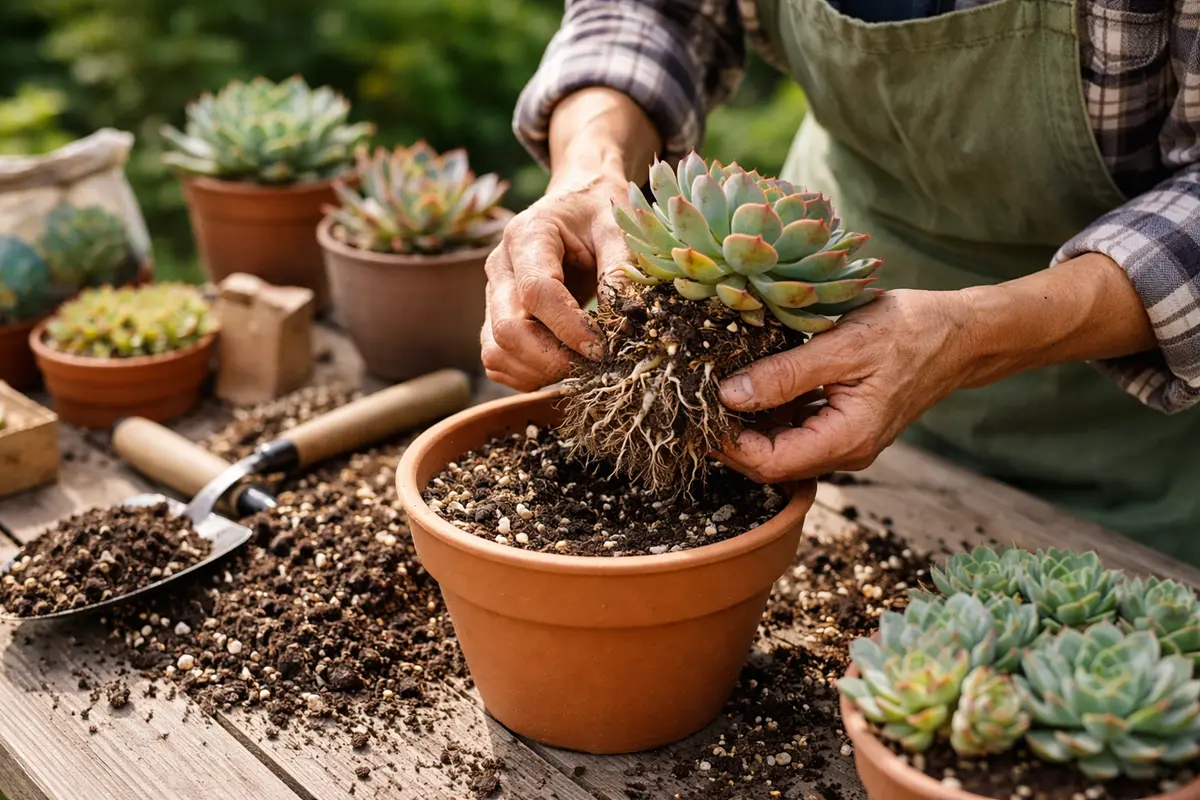
First, remove the potted succulent from its container and gently shake off as much excess soil as possible. Inspect the roots for any signs of mushiness or discoloration, which can indicate root rot. Once you’ve freed the roots, you should see a reduction in waterlogged soil around the plant, allowing it to dry out faster and prepare for treatment.
Acting quickly is essential because overwatering leads to anaerobic conditions in the soil, causing root tissues to break down and rot. In a healthy succulent, the roots should be firm and white; if they become brown and mushy, rot has already started to set in. If you delay this action, the roots will continue to deteriorate, making recovery increasingly difficult.
A gardener once discovered root rot in a jade plant after a week of heavy rain; by that time, most roots were already decomposed. Conversely, another grower who acted immediately noticed only slight discoloration and successfully salvaged their plant. If the roots appear stiff and firm, you’re likely dealing with overwatering; if they’re soft and black, immediate action is crucial.
Removing the affected roots is crucial because it prevents the spread of rot to healthier sections. When rot occurs, the plant struggles to absorb vital water and nutrients, rendering it weak and withering. If left untreated, the rot can creep into the remaining healthy roots, making recovery significantly more difficult and prolonged. The sooner you trim these roots, the better the chances are for the plant to gain strength; clear, healthy roots can quickly take over the absorption of water and nutrients.
A common mistake during this step is to wait too long, hoping the plant will bounce back. This often results in further deterioration, as rot spreads. If you notice brown, mushy roots, act quickly—don’t hesitate. Think of the roots like an unchecked infection; the longer it’s left alone, the more extensive the damage becomes. If the rot seems extensive, cutting away one section may still leave other roots susceptible, so evaluate each root carefully while you’re inspecting. Remember that symptoms can progress rapidly; by checking weekly, you can catch any signs of slowdown before they escalate into severe decay.
Step 2 – Diagnose Overwatering Issues in Succulents
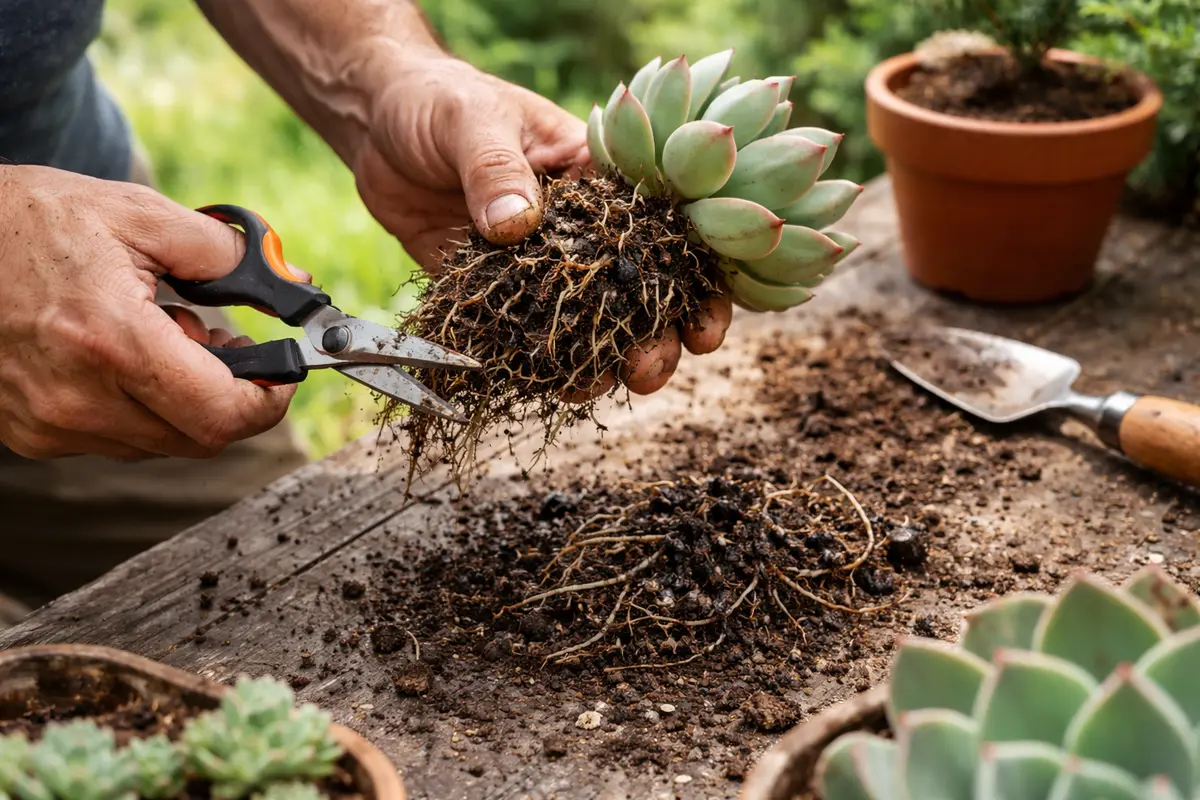
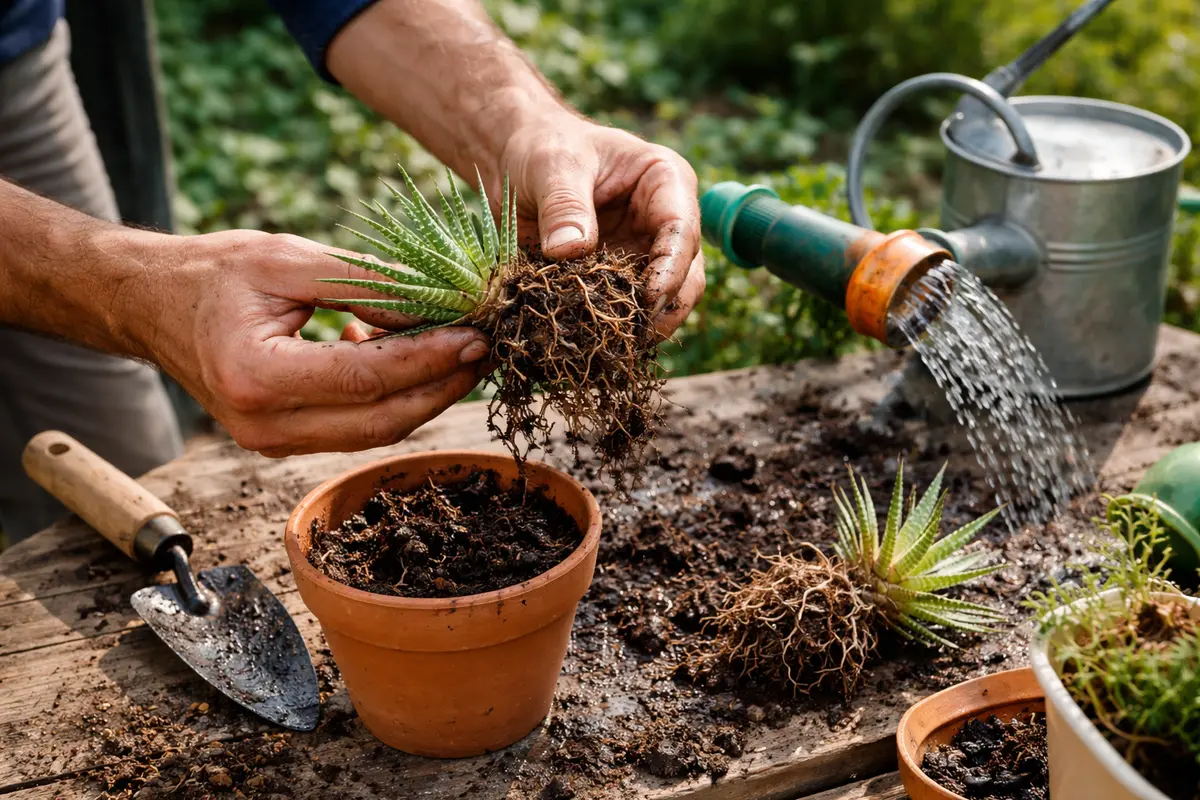
Start by removing your potted succulent from its container, inspecting both the roots and soil. Trim away any mushy, brown roots with sterilized scissors, then repot the plant in fresh, dry cactus mix. You should see the plant firm up within a few days as it adjusts to the new soil.
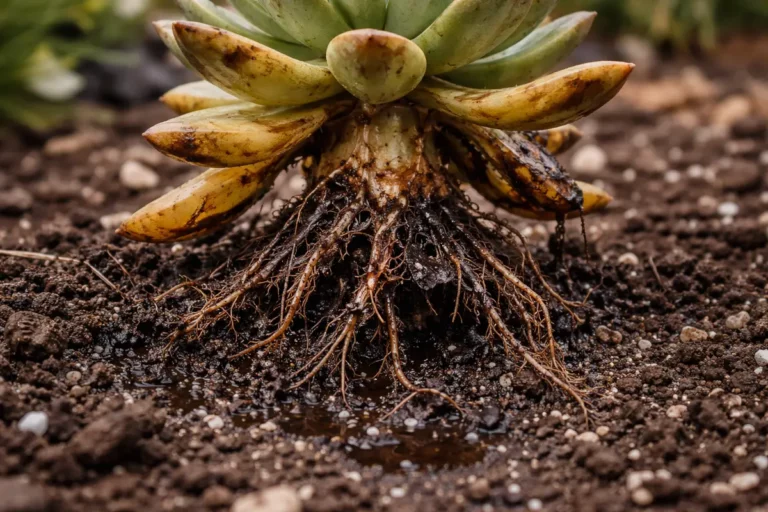
When roots suffer from rot, they lose their ability to absorb water and nutrients effectively, leading to yellowing leaves and wilting. This is caused by the anaerobic conditions in overly wet soil, which fosters the growth of harmful pathogens. If roots appear healthy but the plant is still wilting, check for compacted soil, as this can also lead to drainage issues.
If the soil smells sour, it indicates bacterial decay; in this case, dispose of the soil entirely. Instead of repotting with standard mixes, switch to a well-draining blend designed specifically for succulents. If the leaves are turning shriveled instead of yellow, it may suggest underwatering, prompting you to reassess your watering routine.
Overwatering typically happens due to a combination of factors, including inadequate drainage holes and using soil that retains too much moisture. Succulents thrive in well-draining soil, which allows them to adopt a balance between hydration and air exposure. This balance is critical; too much water leads to conditions that promote rot, while high humidity can also create an environment ripe for fungal growth. If your plant sits for extended periods in a puddle, consider whether the pot is too deep for the soil type—deeper pots often retain excess moisture at the bottom.
If you notice a sour smell coming from the soil or if it feels excessively wet even days after watering, it may be time for a serious adjustment. Repotting could be necessary to switch to a lighter, more suitable soil mixture that allows better drainage. Remember, a soil mix designed for cacti or succulents typically includes sand or perlite, which aids in water retention without suffocating the roots. Checking if your pot has drainage holes is equally essential; using pots without holes can lead to stagnant water and subsequent root decay. If the soil consistently holds onto water, consider combining your succulent mix with additional perlite or gravel to enhance drainage capabilities.
Step 3 – Repot Succulent with Fresh Soil Mixture
Start by gently removing the succulent from its pot and examining the roots. Trim away any blackened or mushy roots with sterilized scissors, and repot the succulent in fresh, dry soil that offers good drainage. Within a week or two, visible signs of progress include the plant stabilizing its leaves and showing new growth at the tips, indicating recovery.
Succulents typically recover in about two to four weeks, but this can vary based on species and environmental conditions. A healthy succulent will start to develop firm, plump leaves and later show new growth points. Warm temperatures, good airflow, and bright, indirect light can accelerate recovery, while high humidity or cold drafts will slow it down. If the leaves remain limp and droopy after several weeks, check for other issues like pests or fungal infections.
A common mistake during recovery is overcompensating with excessive water or fertilizer, thinking the plant needs more to bounce back. Focus instead on allowing the soil to dry out completely between waterings, as too much moisture can worsen root rot. If the succulent hasn’t started to perk up after the initial recovery period, re-evaluate the root conditions for potential remaining rot or check the light exposure to ensure it’s sufficient.
Using fresh soil not only replenishes lost nutrients but also dramatically improves aeration around the roots. This process is essential; after trimming the damaged roots, transferring your succulent into a fresh mixture helps eliminate residual moisture from the previous soil, which could harbor lingering rot. A good mixture should be composed of equal parts potting soil, perlite, and coarse sand to promote drainage and prevention of moisture retention. Applying some slow-release fertilizer during this step can also encourage additional recovery. When repotting, ensuring that the roots are not crammed into the container can prevent future stress on the plant, allowing for adequate space for expansion.
A common mistake is to use standard potting soil, which can retain excessive moisture. If your succulent has been exposed to a heavy, moisture-retentive soil for a prolonged period, recovery may be hindered despite repotting. Pay careful attention to the pot’s size; if it’s too small, consider moving to a slightly larger container to allow for future growth without added crowding. Once you repot, avoid watering immediately; give the succulent a few days to settle into its new environment. Inspect closely for any signs of stress such as wilting or shriveling leaves during this waiting period, as premature watering can lead to further complications.
Step 4 – Adjust Watering Routine to Avoid Rot
Start by ensuring that your potted succulents are placed in well-draining soil and pots with drainage holes. Implementing this will significantly reduce the likelihood of overwatering and help maintain proper moisture levels in the soil, leading to healthier plants.
Excess moisture in the soil commonly occurs in environments with high humidity or poor drainage, which enables root rot to develop. By prioritizing appropriate soil and pot types, you mitigate these environmental risks, as this setup allows excess water to escape more efficiently, preventing root suffocation. If you notice yellowing leaves or a mushy stem, check for drainage issues first before making any adjustments.
During winter months, reduce watering frequency as succulents enter dormancy and require less moisture. Layering additional drainage materials, such as perlite or pumice, in the bottom of the pot can also provide an extra safeguard against excess water retention during colder, wetter weather.
By allowing the soil to dry fully after watering, you significantly reduce the likelihood of root rot returning. Succulents require substantially less water than most houseplants, especially during the cooler months or in high humidity conditions. Adjusting your routine to be more intentional helps maintain a healthy water balance. During hotter months, it’s crucial to check the moisture more frequently; established succulents may still require more frequent watering as they can dry out rapidly. Techniques such as the “lift test” — lifting the pot to feel its weight — can help gauge dryness accurately.
To further refine your care, inspect the leaves for signs of stress; if they start to wrinkle or shrivel, it is a signal that your plant needs moisture. Alternatively, if you observe leaf discoloration or mushiness, it’s an indicator of overwatering. To tailor your watering frequency for changes in your environment, try keeping a log for at least a month; note temperatures, humidity levels, and soil moisture alongside watering dates. Always employ the ‘drench and dry’ method; water thoroughly until it drains from the bottom, then wait for the soil to completely dry out before watering again. This disciplined approach will help you find the sweet spot for your specific succulents.
Step 5 – Inspect New Growth for Root Recovery Signs
Next, check the moisture level of the soil by inserting a finger two inches deep. If it feels soggy, observe any discoloration at the base of the leaves or signs of wilting. Recheck the soil moisture every few days, ensuring it dries out appropriately between waterings to confirm improvement in these specific symptoms.
A fully recovered succulent showcases firm, plump leaves with a vibrant color, indicating adequate water absorption. In contrast, early signs of root rot returning include a dull appearance, mushy leaf texture, and brown spots near the base. If you notice the leaves feeling soft and wrinkled again, check for possible overwatering by inspecting the soil’s moisture levels closely.
If the problem of root rot persists despite following these steps, repot the succulent into fresh, dry soil and ensure the new pot has adequate drainage holes. If after that the signs continue, escalate your approach by trimming away any remaining affected roots to prevent further spread of rot and help the plant focus its energy on healthy growth.
A fully recovered succulent displays firm, plump leaves with vibrant color, whereas early signs of trouble include leathery, discolored leaf tips and a notable softness when touched. For example, healthy leaves resist pressure, while dehydrated areas feel spongy and start to wrinkle. If the leaves have dark mushy spots, check the roots by gently pulling the plant from its pot.
If you notice signs of root rot returning despite your initial treatment, consider repotting into fresh, dry soil with improved drainage. This can help reset the environment after overwatering. Alternatively, remove any rotting roots to promote healthy growth; if the condition worsens, escalate to using fungicide to combat potential pathogens lingering in the soil.
Observing new growth signifies that your succulent is beginning to regain strength following your intervention. Look for signs such as firm leaves that hold their shape and color, indicating both hydration and nutrient uptake are functioning effectively again. Consistent checking will also help you respond quickly should any symptoms of rot reappear; salvaging earlier observed new growth could be easier than trying to revive a completely wilted plant. If you notice any stagnation in growth after a week, it may indicate continued issues; a more thorough inspection might reveal pests or further root damage you weren’t aware of initially.
If recovery is not observed within the first week, reassess your succulent’s conditions. Consider looking for underlying issues, such as disease or pests that might also affect its recovery. Environmental factors like temperature changes or inadequate light exposure can also hinder growth. If symptoms recur despite your treatment efforts, it may be time to consult a local gardening expert who could provide guidance on additional strategies or recommend effective fungicide treatments. Remember, a plant under stress is often more vulnerable to pest infestations, especially if it has been weak for some time, so keep a close eye on its overall health and condition during recovery.
FAQ
How long does it take for a succulent to recover from root rot?
Recovery can take anywhere from a few weeks to several months, largely depending on the degree of rot and the specific type of succulent. You should begin to notice new growth within two to four weeks if the conditions for recovery are optimal. The recovery time can also be affected by environmental factors, such as light exposure, moisture levels, and temperature.
Can root rot spread to other plants nearby?
Yes, root rot pathogens can spread to nearby plants, especially if they share the same pot or growing medium. It’s crucial to isolate affected plants until they show clear signs of recovery. If multiple plants show symptoms, it might indicate that your overall watering routine needs to be reassessed to prevent any further issues from emerging.
Should I remove all of the affected plant parts?
It’s best to trim away all severely affected parts, including mushy roots and decaying leaves. However, retain any healthy-looking sections that can still recover and be potentially propagated for new growth. This selective trimming will maximize the chance of saving your succulent while also giving it the opportunity for a new start, as healthy sections can survive independently. After cutting back, ensure that the remaining parts of the succulent receive adequate light and air flow to encourage regeneration.