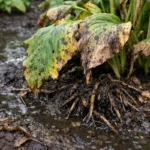
You may notice your indoor peace lilies looking less vibrant during winter, which is why you need to know how to prevent root rot in indoor peace lilies during winter. This condition often manifests through yellowing leaves and wilting, indicating excess moisture in the soil. If left unaddressed, it can lead to more damage and weakens the plant, but fixing it is possible now by adjusting your watering schedule and ensuring proper drainage. Monitor your plants closely and inspect their roots regularly to keep them healthy and thriving.
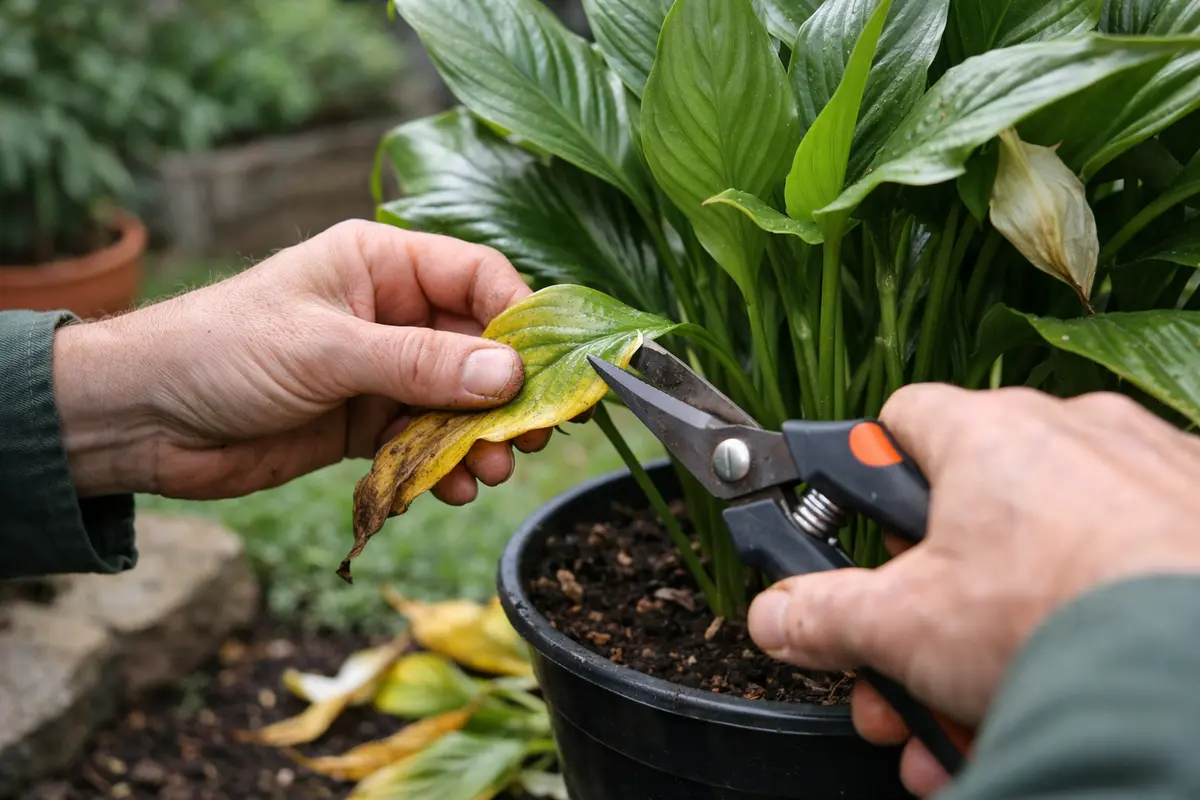
Step 1 – Trim Yellowing Leaves on Peace Lilies
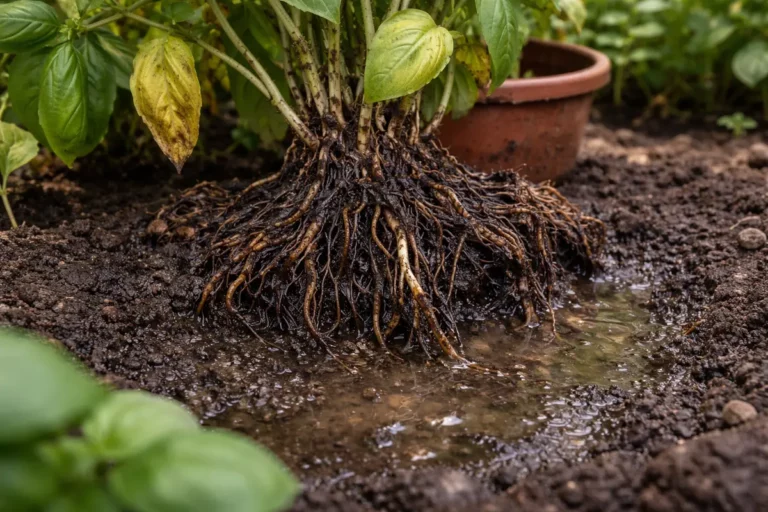
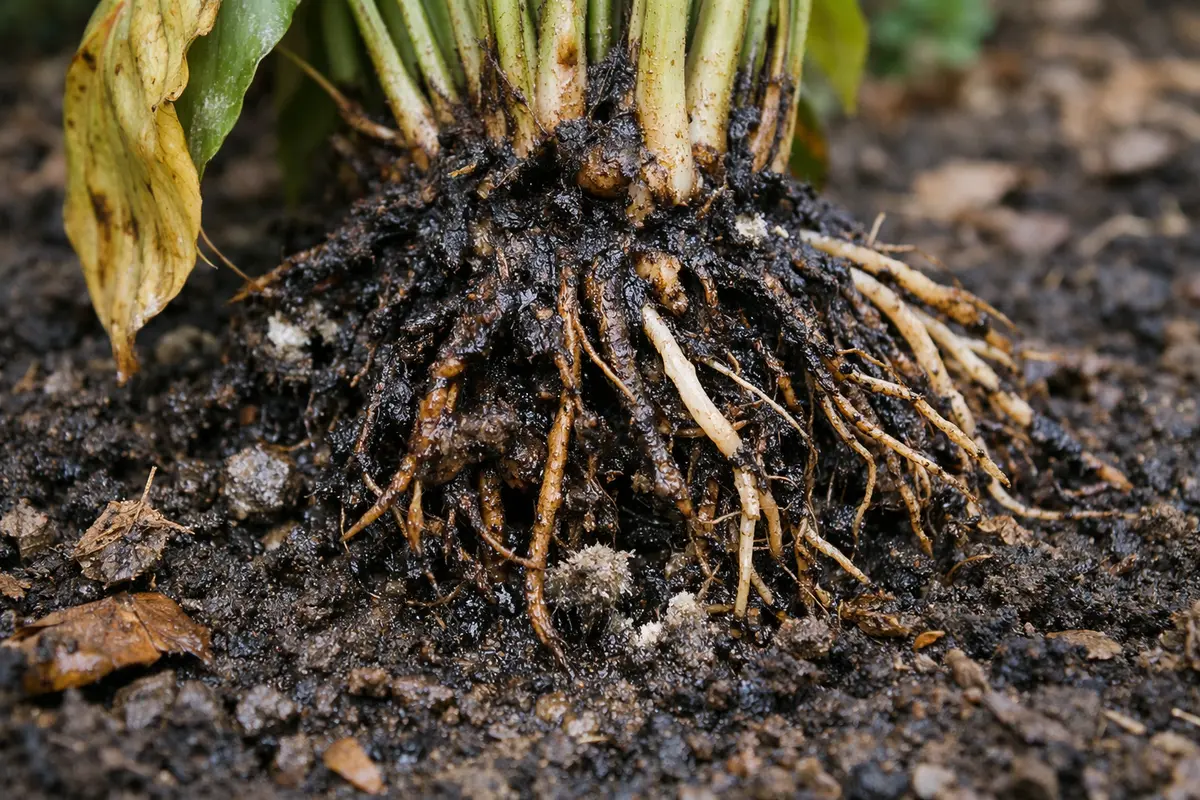
First, remove the peace lily from its pot to check the roots for any signs of rot, which appear dark and mushy rather than firm and white. If you notice rot, trim away the affected roots with sterilized scissors, ensuring only healthy roots remain. After replanting in fresh, dry soil, observe a significant reduction in water retention around the roots, preventing further stress.
Acting quickly against root rot is crucial for peace lilies, as delay allows the rot to spread. Healthy roots should feel firm and firm; if they become mushy, they cannot absorb water or nutrients effectively. If not treated promptly, the plant’s ability to thrive diminishes significantly, leading to wilting and ultimately plant death.
A common scenario involves a gardener who waited too long to address root rot and witnessed his plant decline rapidly. When he finally checked, he found that the roots had decayed beyond recovery, in contrast to his neighbor’s proactive approach, which preserved the integrity of their peace lily roots. If you see wilting despite proper watering, check for root damage immediately.
Taking this action is crucial because yellowing leaves can be a sign of stress due to excess moisture around the roots. When you cut away these parts, you remove the areas that are no longer supporting the plant effectively. This encourages the peace lily to focus its energy on producing new, healthy growth instead of trying to sustain dying foliage. Additionally, removing dead leaves can improve air circulation around the plant, reducing humidity levels that contribute to rot. For optimum results, make clean cuts with sharp scissors to prevent introducing pathogens into the plant.
A common mistake at this point is to delay trimming, thinking that the plant will recover without intervention. However, if yellow leaves are left untouched, the issue will often worsen, leading to even more extensive root damage. Failing to cut away the damaged leaves can also attract pests that thrive in unhealthy plants. If you overlook these signs and continue to maintain the regular care routine, you may also find that the remaining healthy leaves begin to exhibit yellowing. By acting quickly, you can improve the plant’s chances of recovering fully.
Step 2 – Diagnose Overwatering Causes for Root Rot
Start by carefully inspecting the roots of your peace lily if you suspect root rot due to overwatering. Gently remove the plant from its pot and check for any brown or mushy roots, which signal deterioration. Trim away these affected areas and repot the plant in fresh, dry soil, ensuring improved drainage. You should observe firmer roots developing within a few weeks, indicating recovery.
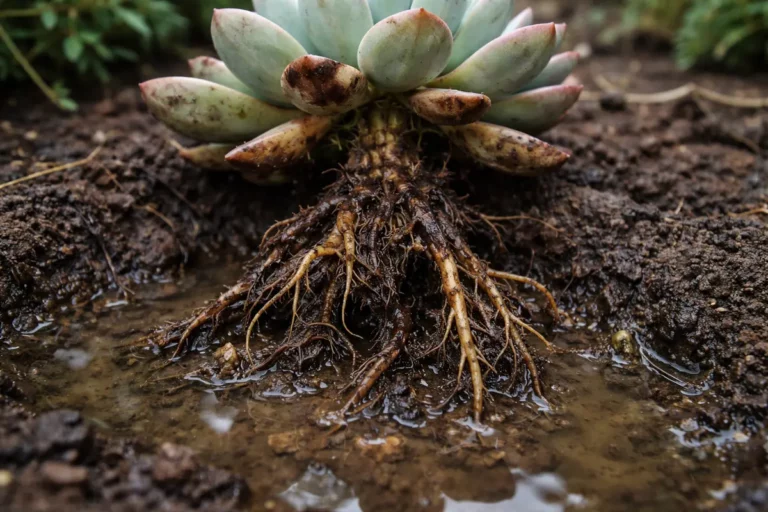
Root rot occurs when excess moisture lingers in the soil, leading to oxygen deprivation for the roots. Healthy roots appear white and firm, while decayed roots become brown and mushy due to microbial growth in waterlogged conditions. If you notice a foul odor coming from the soil, it’s a clear indication of anaerobic bacteria, thriving in saturated environments. If not this, check the drainage holes of the pot for blockages that might trap water.
If the soil feels overly wet and compacted, then consider switch to a well-draining mix designed specifically for houseplants. You might confuse this with symptoms of underwatering, where leaves appear droopy but the soil remains dry. However, droopy leaves coupled with soil saturation indicate root issues that need immediate attention, so adjust your watering schedule accordingly.
Overwatering can cause soil saturation, which hinders the oxygen that roots need to thrive. When roots stay too wet for too long, they become incapable of nutrient absorption, leading to degeneration. This condition can be exacerbated if the peace lily is kept in a pot without proper drainage holes, trapping water around the roots and creating a breeding ground for root rot pathogens. Signs of overwatering also include wilted or mushy roots, and very often, this can be detected further down in the soil. If your potting mix is composed mainly of high-retention materials like peat, it tends to hold moisture longer, which can exacerbate overwatering issues.
If the soil smells sour during your inspection, that indicates the presence of anaerobic bacteria, which thrive in overwatered conditions. To rectify this situation, replace the soil with a well-draining mix or check if the drainage hole in the pot is blocked. If you’re using store-bought potting soil, try to mix it with perlite or pumice to enhance its drainage capabilities. If your potting mix retains too much moisture, consider transitioning it to a soilless potting mix or one specifically designed for better drainage. When dealing with particularly moisture-retentive soils, upgrading to a mix composed of perlite, orchid bark, and potting soil can enhance drainage significantly. In extreme cases where root rot is identified, the roots may need a trim as well; look for brown, mushy sections and cut them away before repotting to promote healthy regrowth.
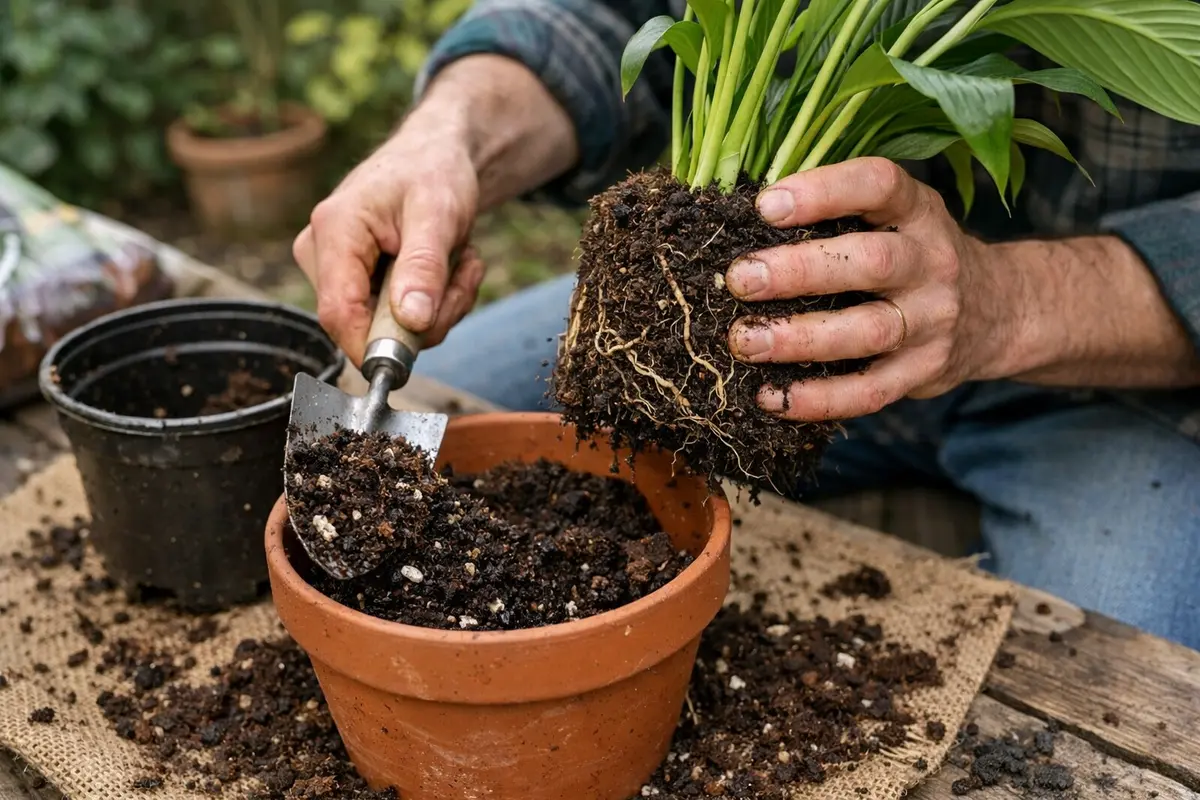
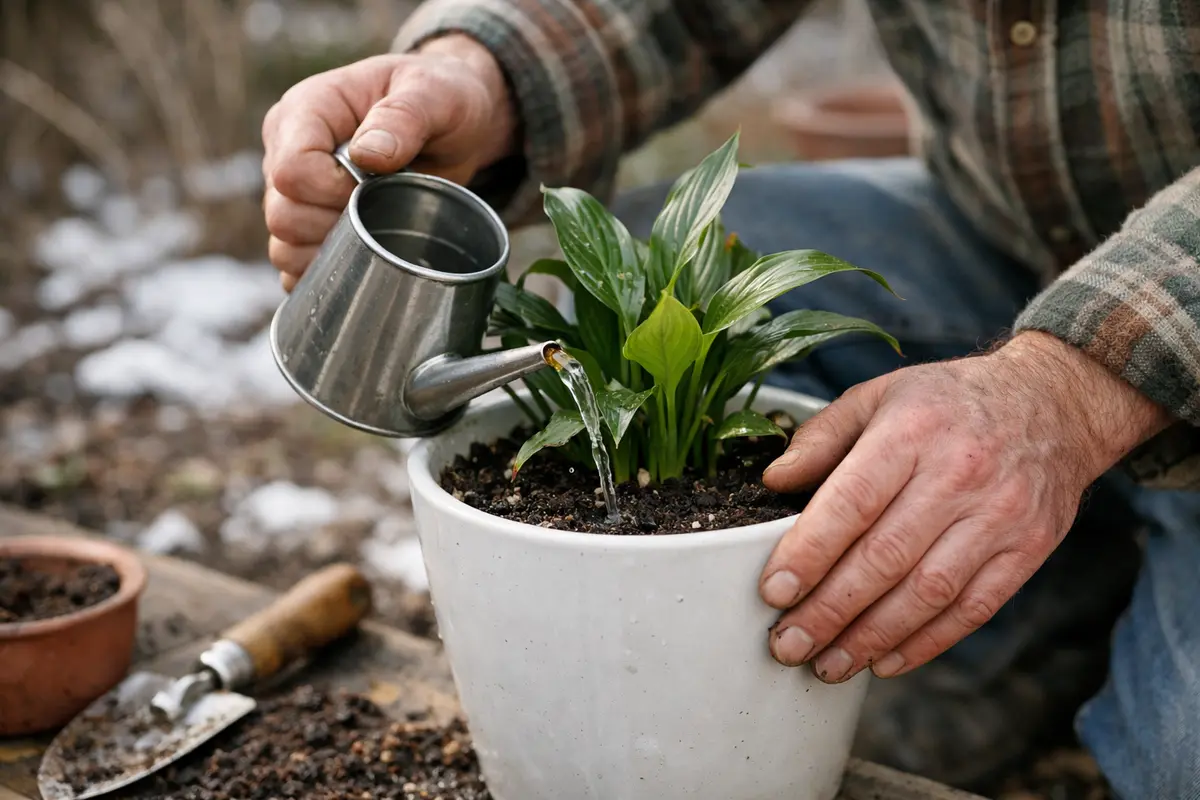
Step 3 – Repot Peace Lily in Fresh, Well-Draining Soil
Start by allowing the soil to completely dry out before watering your peace lily again. Observe the leaves; as they perk up and regain turgor pressure after a few days, you’re on the right path to recovery.
Recovery from root rot can take anywhere from a few weeks to several months, depending on the extent of damage and environmental conditions. If you see new leaf growth appearing, this indicates that your peace lily is regaining strength, while yellowing leaves persist might suggest ongoing root issues. Proper light and humidity levels can significantly speed up recovery; however, excessive cold can hinder it.
Avoid the mistake of overwatering in an effort to help your peace lily bounce back. Too much water can lead to further root damage, while under-watering may not provide the moisture needed for recovery. If leaves remain limp despite careful watering, check the drainage and ensure that the pot has adequate airflow.
Repotting allows the lily to establish itself in a suitable environment where it can access essential nutrients and oxygen without being waterlogged. This step is vital since compacted soil can become a further hindrance to root health, leading to continuous issues with water retention and root suffocation. A well-draining soil mix will improve aeration and create a healthy balance of moisture for the plant’s roots. When repotting, make sure the new pot has drainage holes, and select one that allows root expansion to prevent future binding. Ideally, the new pot should be 1-2 inches larger in diameter than the previous one.
One mistake many gardeners make is to over-fertilize during recovery, thinking that the plant will grow faster. Instead, the focus should be on maintaining a careful watering routine while allowing the plant to adapt to its new environment. Additionally, if the pot seems too big relative to the present root system, select a smaller pot to help prevent overwatering. Using a pot that is excessively large can lead to soil retention and over-saturation, complicating recovery efforts. After repotting, allow the plant to acclimate to its new environment without fertilizing for about a month. This way, you’ll encourage the plant’s energy to settle into its roots rather than pushing new growth prematurely.
Step 4 – Water Peace Lily Sparingly During Winter
Water your peace lily sparingly during winter months. You should notice the top layer of soil drying out more completely between waterings, which helps prevent water from accumulating at the roots. This strategy adjusts for the reduced light levels and lower overall water uptake that naturally occur during colder months.
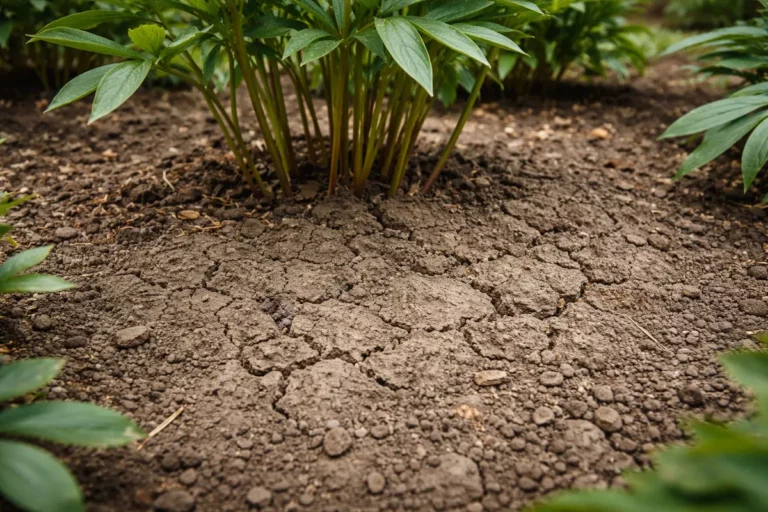
Winter conditions often lead to lower light availability and cooler temperatures, both of which can affect the plant’s water needs. Overwatering at this time can lead to root rot due to increased soil moisture retention. By adjusting your watering schedule to allow for dry spells, you create a healthier environment where root systems can breathe and access needed nutrients. For optimal conditions, check the soil moisture by inserting your finger about an inch deep; if it feels moist, refrain from watering.
In colder months, it may be useful to adopt an every two-week watering routine instead of the weekly schedule common during summer. Keep an eye on humidity levels indoors, as too much moisture in the air can also contribute to discomfort for your plant. If you find the space is humidified, consider adjusting any humidifiers or other moisture sources. In fact, if the humidity levels exceed 50%, it’s advisable to monitor soil moisture closely, as this might complicate the plant’s water uptake. Over time, a consistent watering schedule that responds to observed conditions will vastly improve the peace lily’s health.
Step 5 – Inspect Soil for Moisture Levels Weekly
Next, check the soil moisture of your peace lily every few days and observe the leaves for signs of wilting or yellowing. If the top inch of the soil feels consistently damp, it indicates overwatering; if it is dry, your plant may need water. Recheck this condition weekly to see if moisture levels stabilize and the leaves start to perk up.
A fully recovered peace lily will exhibit vibrant, upright leaves with a dark green hue, while signs of returning root rot appear as yellowing leaves that droop and may develop brown spots along the edges. If you notice the texture of the leaves becoming mushy rather than firm, the problem may be returning. If not strong and fresh → check for waterlogged soil and adjust your watering habits.
If you encounter symptoms of root rot reappearing despite preventative measures, it’s time to take action by removing the plant from its pot to inspect the roots. Trim away any dark, mushy roots before repotting in fresh, well-draining soil. If issues persist, escalate by considering a deeper investigation into the watering schedule or the pot’s drainage system.
When the soil feels just slightly damp, it’s an indication that you are in the safe zone for watering. Signs of improvement will include fresh, vibrant green leaves and a general perking up of the plant’s overall posture. Consider visually comparing your plant to prior weeks; notice if the leaves have regained their firmness or if new growth is noticeably bright and healthy. For enhanced accuracy, utilizing a moisture meter can provide valuable insights into the soil condition, avoiding the guesswork of potential over or under-watering.
If you begin to see yellowed leaves reappearing or if the plant starts drooping despite your efforts, consider troubleshooting the watering habits once more. Look for signs of too much moisture that may indicate a need for more drainage in your pot or a heavier soil mix that holds moisture too long. Notably, temperature fluctuations can also impact moisture retention in the soil, so be cautious if your peace lily is sitting near drafty windows or heating vents. This proximity can lead to rapid variations in soil moisture, potentially overwhelming the plant’s root system. A well-planned watering strategy emerges as a key defense against uneven moisture distribution during the winter months.
FAQ
How often should I check my peace lily for root rot?
You should check your peace lily for root rot at least once a week during winter months. Look for signs like yellowing leaves or a sour smell from the soil, which can indicate overwatering or poor drainage. Additionally, inspecting soil moisture levels can help catch issues early, between your regular watering schedule.
Can root rot spread to other indoor plants?
Yes, root rot can spread to other indoor plants if the soil or potting materials are shared. This can lead to systemic issues with moisture and root health, so it’s important to isolate affected plants until the problem is resolved. Ensure that soil from any affected plants is disposed of properly and sterilize pots before reuse. Monitoring nearby plants for similar symptoms is also wise, as they may develop root rot if conditions favor the spread.
Will my peace lily recover from root rot?
Absolutely, your peace lily can recover from root rot if you take corrective measures promptly. Early interventions such as trimming, repotting in well-draining soil, and careful watering can help ensure a successful recovery. Be vigilant during the recovery process and be prepared to adjust your care methods accordingly for the best results, understanding that recovery will take time and may require further attention, especially if root health was severely compromised.