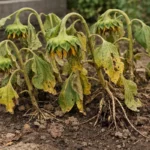
You notice your indoor plants are struggling during winter, with wilting leaves and mushy roots, which is why you need to know how to prevent root rot in indoor plants during winter. This condition arises when excess moisture blankets the roots, leading to rotting and ultimately causing leaf drop. If ignored, this problem weakens the plant and can spread, making recovery harder to fix, but you can remedy it by adjusting your watering schedule and inspecting the root system for damage.
Step 1 – Inspect Potting Soil for Excess Moisture
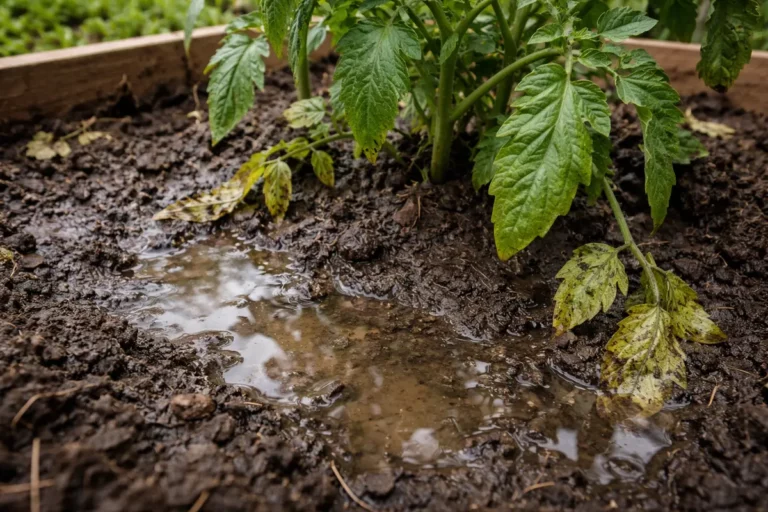
Start by digging your fingers into the top inch of the soil to check for excess moisture. You should feel a wet, saturated texture if root rot is developing, which indicates that your plant’s roots are potentially drowning. Ideally, you want the top inch of soil to be dry to the touch, signaling that it’s time to check further down. If you find the soil is overly wet throughout, you need to take swift corrective action—damp roots can begin to decay within 48 hours if left unchecked.
Identifying moisture levels quickly is crucial because roots need oxygen and can rot if submerged in waterlogged soil for extended periods. Most common indoor plants require dry conditions between waterings during winter, allowing the topsoil to dry out completely before watering again. As you check deeper, if the moisture penetrates more than two inches down, that may signify persistent overwatering, necessitating immediate amending of care practices. Failing to act leads to reduced oxygen availability, resulting in roots succumbing to decay within days. If the bottom of the pot feels excessively moist, that can be an indicator of poor drainage or overwatering, leading to inevitable root failure.
A common mistake is to water again as soon as the soil appears dry on the surface, without checking lower soil layers. If this happens, you may inadvertently worsen the problem. Ideally, the moisture should feel similar to a damp sponge, but remain solid without dripping or oozing water. Newly emerging issues, such as a sour odor from the soil or mushy roots, indicate that root rot has already set in, thus timely soil inspection is key to preventing widespread damage. Pay attention to signs like any darkening of the leaves or even a sudden drop in temperature around the plant; these aspects often compound the effects of excess moisture and can signal deeper issues requiring a quicker intervention.
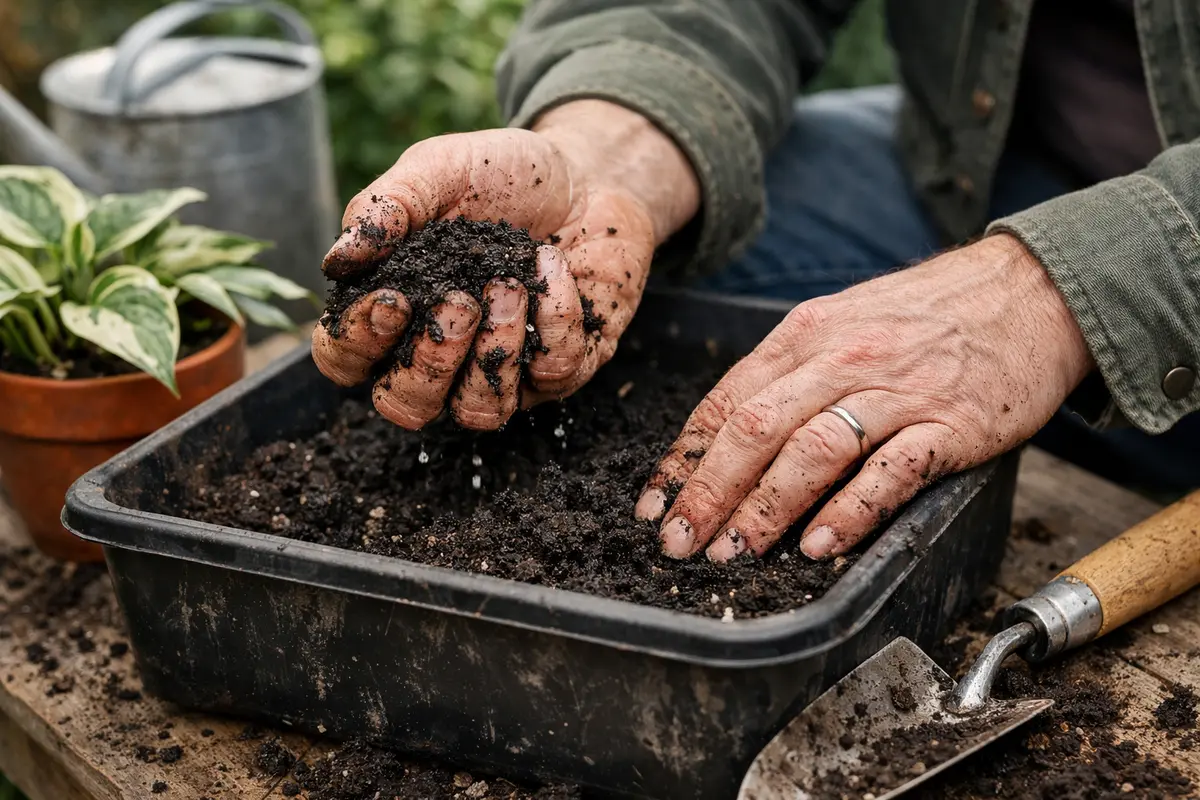
Step 2 – Diagnose Soil Compaction Around Roots
Examine the root zone by gently removing the plant from its pot to inspect for soil compaction. Once removed, you should see loose, fluffy soil surrounding healthy roots, signaling good aeration. If the soil appears dense and sticky, this is an indicator of compaction that needs addressing. The soil should crumble easily when handled; if it clumps, this can trap moisture against the roots and suffocate them. Roots must have space to breathe; compaction traps moisture and prevents air circulation crucial for root health.
Soil compaction tightens around roots, making it difficult for them to absorb water, air, and nutrients. This often leads to stunted plant growth and, if not corrected, can exacerbate the root rot situation. Compacted soil retains excess water, leading to the same suffocation risks as excess moisture, prompting immediate intervention. You might notice that roots move less freely in the soil or that they look increasingly ragged and discolored, which signals a loss of health. Common signs of compaction include roots that are growing in a circular pattern around the pot, indicating they are searching for space, or an overall lack of new growth during the winter months.
If you find the soil smells sour along with being compacted, consider replacing it entirely to prevent root rot from deepening. Compacted soil often occurs in heavy potting mixes or when plants are not repotted frequently enough. Many gardeners overlook the repotting aspect, but ensuring the selected potting soil provides good drainage and aeration can drastically improve plant health, fostering an environment conducive to growth. In cases of high compaction, using a soil mix with consistent particle size, such as one containing bark or coco coir, can prevent future issues. If the potting material contains little to no perlite, this might be a significant factor in soil compaction and play a role in your root rot issue. Remember, if plants are not repotted or inspected regularly, the chance of an undetected compaction problem becomes much higher, particularly with species requiring more aerated environments.
Step 3 – Repot Indoor Plants to Revive Soil Health
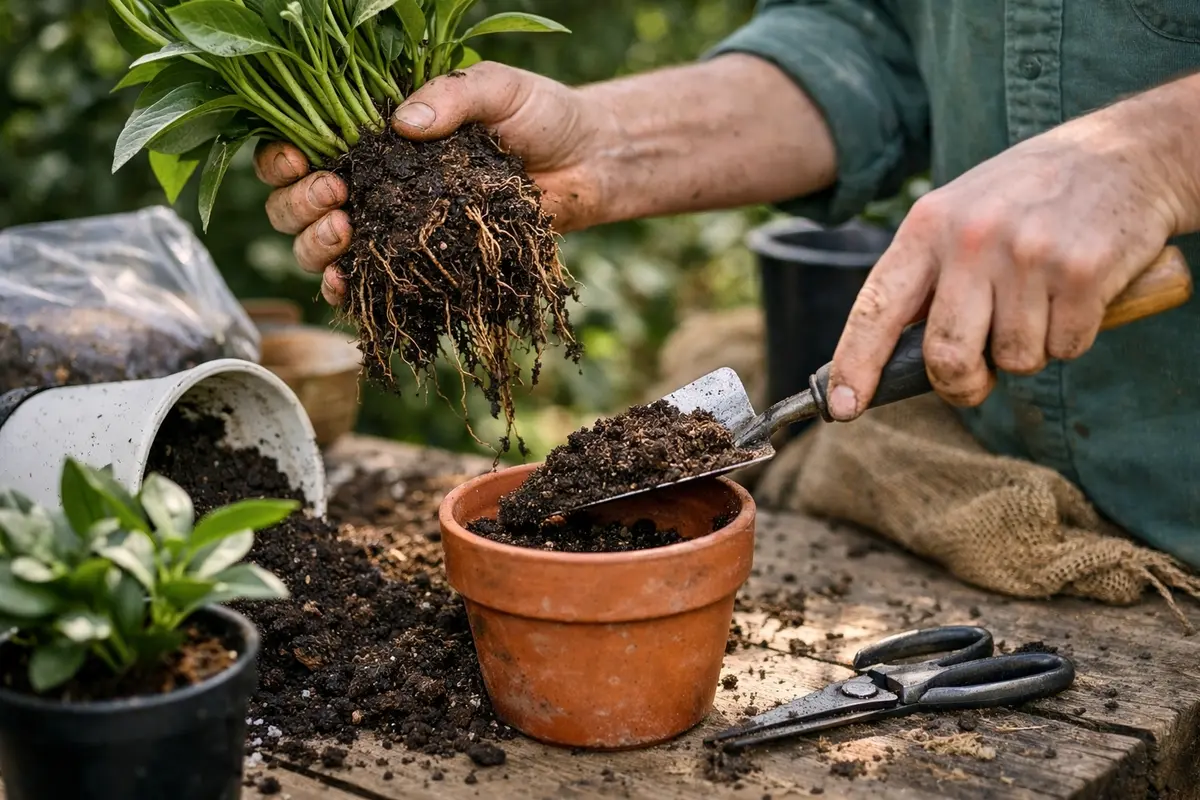
After identifying root rot caused by fungal infections, remove the affected plant from its pot immediately. Trim away any mushy, brown roots using sterilized scissors to prevent spreading the disease. Replant in fresh, well-draining soil and make sure to see new white root growth emerging within the next few weeks, indicating the plant is recovering from the disease.
Typically, after taking these recovery actions, signs of improvement may appear within three to four weeks. During this time, healthy regrowth includes new green leaves or shoots and firm, white roots. Conditions like moderate humidity and indirect light can accelerate recovery, whereas overly damp conditions may hinder it. If you notice stunted growth after several weeks, check for adequate drainage and proper watering practices.
Avoid overwatering during recovery, as this can lead to a resurgence of root rot despite your efforts. Instead, allow the top inch of soil to dry out before watering again. If the plant’s leaves begin to yellow significantly, check if you’re fertilizing too soon after the treatment; sick plants require less fertilizer until they establish strong growth again.
Realistically, recovery from root rot can take several weeks to months, depending on the plant species and the severity of damage. Healthy regrowth is usually marked by new leaves emerging, a vibrant color of existing foliage, and robust root development. Warmer temperatures and increased light can accelerate recovery, while overly cold drafts or low light can hinder it significantly. If you notice no growth after a month, check the roots for continued signs of decay.
Avoid the mistake of overwatering during recovery; it’s easy to think that more water will help the plant bounce back, but this can lead to further rot. For instance, if you have a snake plant, allow the top two inches of soil to dry completely before watering again; if not this level of dryness, check for poor drainage or compacted soil that might be restricting airflow to the roots.
Recovery from root rot can take several weeks, with noticeable improvement marked by the appearance of new leaves or sturdier root systems. Conditions that favor rapid recovery include consistent warmth and indirect sunlight, while excessive humidity or cold drafts can slow down the regrowth. If you see growth that looks wilting or stunted instead of firm and upright, check that you aren’t overwatering.
Avoid the mistake of overcompensating with fertilizer during recovery, as this can lead to further stress on the plant. Instead, focus on providing balanced moisture and occasional light feeding once new growth begins. For specific plants like succulents, which prefer drier conditions, ensure the soil dries out thoroughly between watering to prevent relapsing into root rot.
Repotting refreshes the plant’s habitat, introducing new nutrients and aeration, which are essential for root health. A proper potting mix—often containing perlite or vermiculite—allows for better drainage and reduces the risk of water retention, creating a healthier root environment. The natural response of the plant is to begin repairing itself, which should show as perkier and greener foliage. As you repot, ensure that you gently loosen any compacted soil clinging to the roots, so they are free to expand and absorb nutrients more effectively in their new home. If, during repotting, you find dead or mushy roots, prune them away carefully with sterilized scissors; this helps to prevent any pathogens from spreading into the fresh soil.
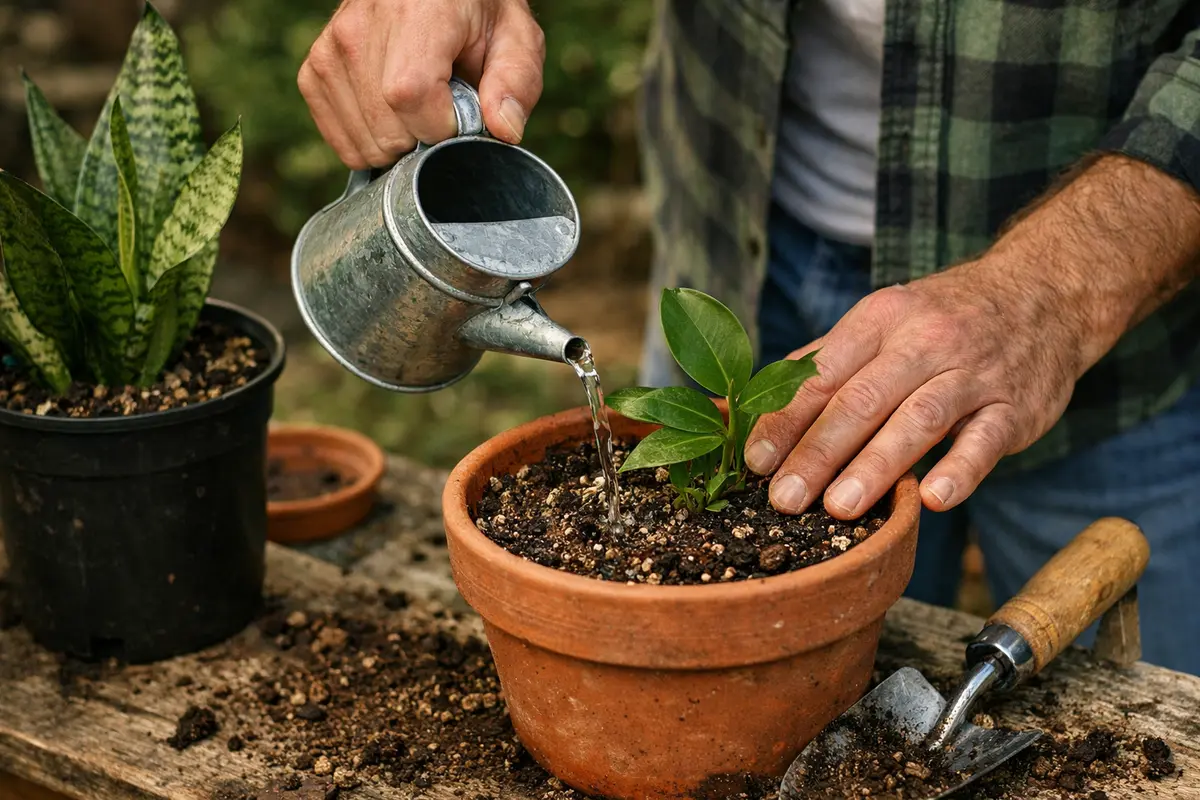
When repotting, avoid the temptation to overwater the newly potted plant immediately. Many make the mistake of loosening the soil too much or adding too much water post-repotting, both of which can stress the roots. Instead, allow the fresh soil to establish before introducing additional moisture through regular watering routines, aiming to keep the first watering light and only moistening the top inch well. This allows the roots to adjust to their new environment without the added stress of being overly wet, which could initiate root rot concerns again. Monitor how quickly the new soil dries out over the next few days; if it stays damp longer than expected, consider that the watering technique may need alteration as you adjust to the new setup.
Step 4 – Water Sparingly to Prevent Winter Rot
Start by ensuring your indoor plants are in well-draining pots filled with a lightweight potting mix. This action reduces excess moisture retention, which is essential for preventing root rot; you should notice healthier, more stable roots over time.
Cold temperatures and inadequate sunlight during winter can create a damp microenvironment, triggering root rot. By using pots with drainage holes and a mix that allows excess water to escape, you alleviate the root’s exposure to stagnant moisture, which leads to decay. If you find your plant’s leaves yellowing but not drooping, check for waterlogged soil, which can indicate overwatering, the primary cause of root rot.
In addition, consider adjusting your watering schedule based on the season. During winter, indoor plants often require less frequent watering due to lower evaporation rates; instead, focus on ensuring that the top inch of soil dries out completely between waterings. This seasonal adjustment not only prevents root rot but also encourages your plants to adapt to the changing environmental conditions.
Maintaining a schedule where the soil is allowed to dry out fully between waterings nullifies the chance of overwatering, which is particularly crucial in winter when plants are not actively growing. In many indoor environments, the combination of low light and reduced growth causes plants to need significantly less water, and forgetting this can lead to a quick return of root rot symptoms. You can also place a moisture meter in the soil to gauge the moisture levels more accurately, making it easier to determine when to water your plants. Investing in a simple soil moisture meter can yield better results and keep you informed about soil conditions deep within the pot, potentially avoiding hairy situations with overwatering. If the soil tends to remain overly soggy, it may also indicate that the pot lacks drainage holes, requiring immediate alteration before further damage occurs.
During winter, indoor humidity can drop drastically due to heating systems running frequently. Therefore, it may be wise to monitor your humidity levels and adjust your watering schedule accordingly. If humidity levels are particularly low, consider misting around the plant instead of increasing watering, providing moisture without oversaturating the soil. This additional humidity can be beneficial without exposing the roots to excessive moisture that could lead to waterlogging. Keeping humidity at an optimal 40% to 60% will foster overall plant health; when using a humidifier, ensure it’s placed within a reasonable distance to avoid excess moisture on the leaves, which can cause other issues over time.
Step 5 – Look for Wilting Leaves Daily After Care
Start by checking the moisture level of the soil weekly during winter. Use a moisture meter or your finger to probe about two inches deep; if the soil feels damp, hold off on watering. Observe the drainage by ensuring water flows out of the pot’s bottom—if it doesn’t, recheck in a few days to prevent water accumulation.
A fully recovered plant displays vibrant green leaves with firm, plump texture, indicating robust growth. In contrast, early signs of root rot include yellowing leaves that feel soft and mushy, as if waterlogged. If the leaves begin to droop despite adequate light, check the roots for signs of decay rather than waiting until deterioration worsens.
If the problem returns, remove the plant from its pot and inspect the roots, trimming away any that are dark or mushy. Repot into fresh, dry soil to encourage healthy root development. If that fails to resolve the issue, consider applying a fungicide specifically designed to combat root rot.
A fully recovered plant displays firm, green leaves that feel smooth and invigorated, while early signs of returning root rot include yellowing, wilted leaves that may appear soft or mushy. This stark contrast indicates a crucial change; healthy roots are able to absorb moisture efficiently, whereas affected roots fail, compromising the plant’s vitality.
If root rot symptoms reappear despite preventive steps, take immediate action by changing the soil and inspecting the roots for blackened or mushy areas. If worse comes to worst and the rot persists, consider repotting with fresh, sterile soil and a clean pot to eliminate fungal spores lingering in the environment.
A fully recovered plant will display robust leaves with no sign of wilting or discoloration, which is a good indicator that root health has returned. Conversely, signs of continued wilting, yellowing, or brown edges mean that the problem may have returned, and you should redefine your approach based on what issues persist. If you notice that new growth appears stunted or absent, this could indicate that root rot still lurks, requiring further assessment. Be sure to look for fresh growth near the stem; this often signifies that your adjustments have aided recovery.
If you observe any returning symptoms, such as wilting, revisit previous steps to check for soil compaction or excess moisture. Recovery can take time, but with diligent monitoring, you will establish whether the current methods are effective or if urgent adjustments are needed. If no improvement is observed after a week, it might be necessary to reassess your watering schedule or consider more drastic measures, such as changing the pot or completely refreshing the soil to eliminate any latent root rot issues. Lastly, consider that if a pattern of wilting continues, you may need to check for other environmental stresses such as temperature fluctuations or pests, both of which could further complicate recovery.
FAQ
How long does it take for plants to recover from root rot?
The recovery time for plants can vary, but typically, you may start to see signs of improvement within 1-2 weeks after correcting the conditions. Consistent monitoring will help identify any setbacks early, allowing for timely interventions. Factors such as the plant species, severity of the rot, and environmental conditions all play crucial roles in determining recovery time. Key indicators to watch for during recovery include the growth of robust new leaves and a noticeable firmness returning to previously damaged foliage.
Can root rot spread to other plants?
Yes, root rot can spread to neighboring plants, especially if they share a watering source or are in close proximity. It’s advisable to isolate affected plants to minimize spread and check neighboring plants for early signs of rotting. This is vital as pathogens that contribute to rot may thrive in shared soil, potentially leading to multiple plants exhibiting symptoms. Keeping an eye on neighbor plants’ soil health can prevent cross-contamination and help maintain an overall healthy plant ecosystem.
Should I remove the affected parts of my plant?
If you notice mushy roots or visibly decayed areas, these should be removed to prevent the disease from progressing. Make sure to sanitize your tools to avoid transferring pathogens to healthy plants. Additionally, cleaning any affected pots with a bleach solution can further prevent the spread of root rot. Incorporating the practice of checking and maintaining tools seasonally can avoid unnecessary risks of cross contamination of plant diseases.