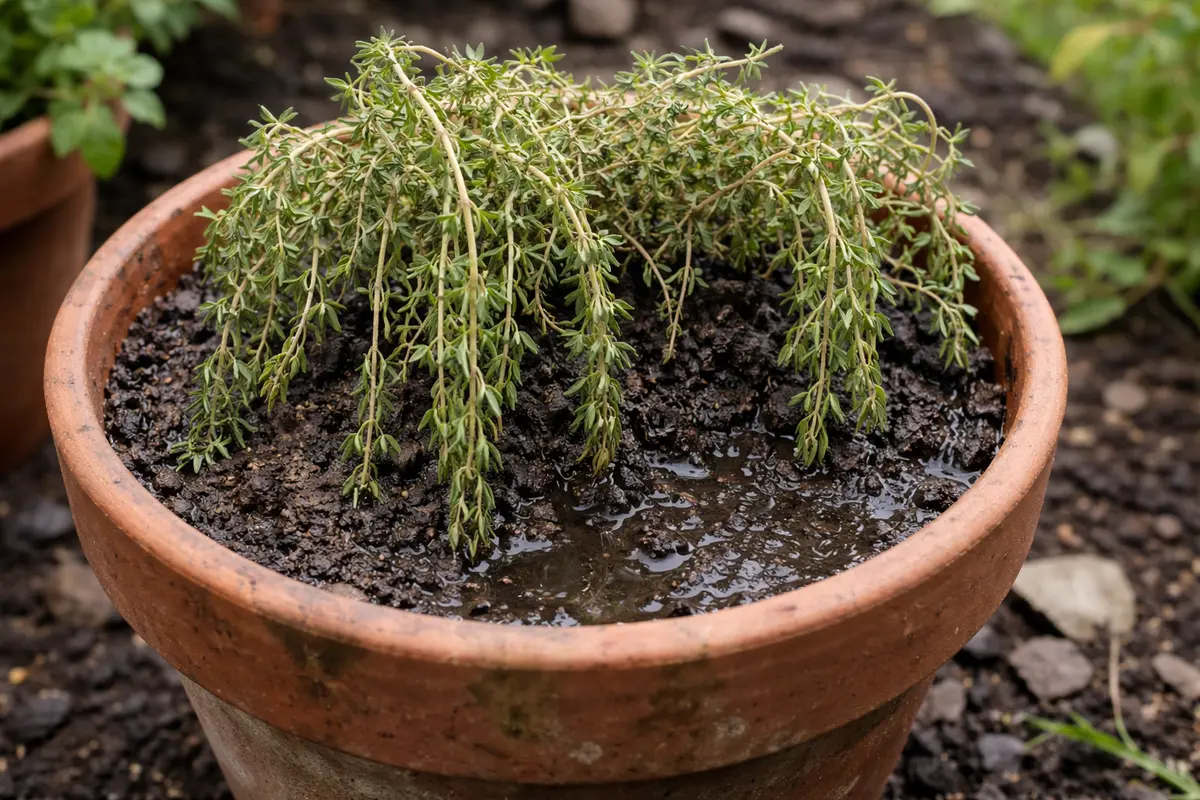
You may notice your thyme droops in pots during the heat of summer, which is why you need to know what to do if your thyme droops in pots. This drooping often signals underlying issues such as wilting caused by over or under-watering. If left unaddressed, the problem can worsen, leading to more damage that weakens the plant and makes recovery harder, but fixing it is possible now if you inspect the soil, adjust your watering routine, and monitor overall plant health.
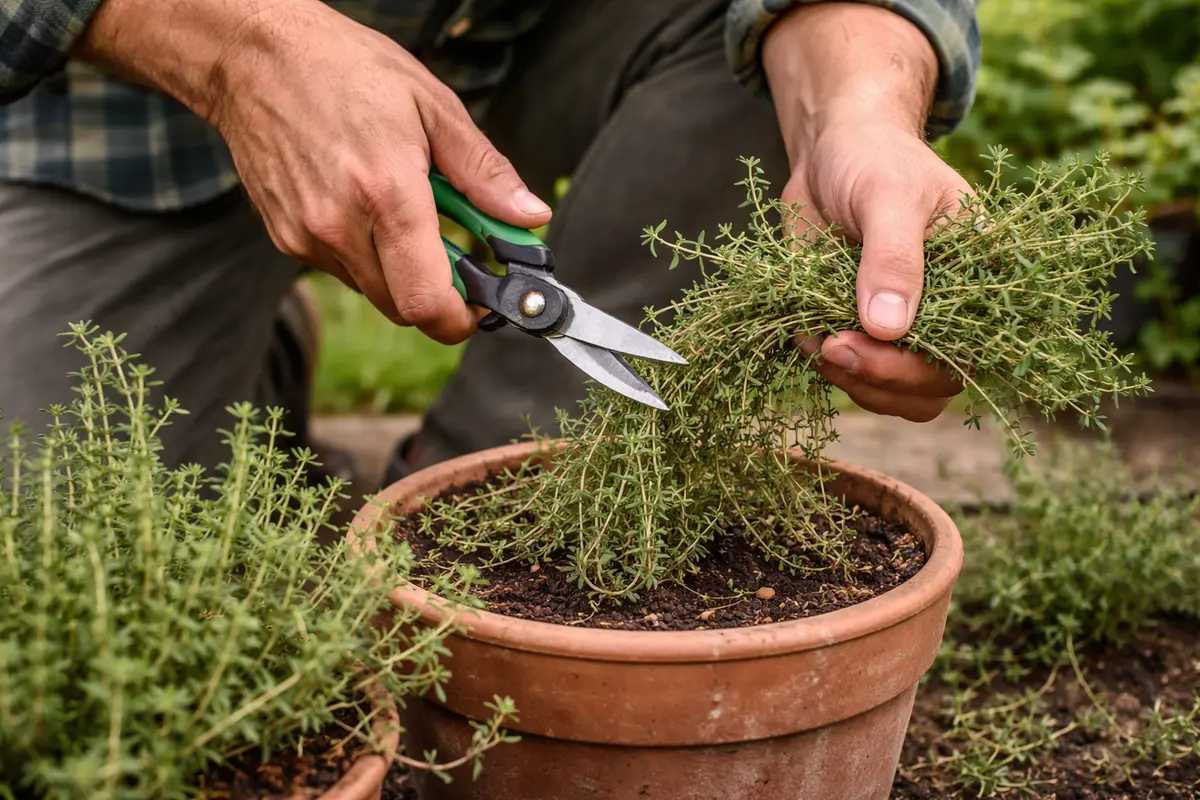
Step 1 – Trim Drooping Thyme to Encourage Growth
Start by gently lifting the thyme plant out of its pot and checking the soil moisture. If the soil feels dry, water the plant thoroughly until excess moisture drains from the pot’s bottom. Within a few hours, you should see the thyme visibly perk up, with leaves regaining their firmness and foliage showing improved color.
Acting fast is crucial because thyme is sensitive to dehydration and can start to wilt and die if the roots are not hydrated quickly. When drooping occurs, the plant struggles to uptake water and nutrients effectively, leading to a rapid decline in health. If the drooping continues unchecked, the cells may lose turgor pressure, making recovery significantly harder.
One common mistake gardeners make at this stage is assuming the drooping is purely cosmetic and delaying the watering process. In one instance, a gardener waited two days after noticing drooping, resulting in the thyme becoming overly stressed and requiring a complete soil change to reverse the damage. If you see the leaves turning brown alongside drooping, consider checking for root rot instead of just thirst.
Acting swiftly is crucial because thyme, like many herbs, can quickly succumb to root rot if left unattended. The longer the plant’s roots are in unhealthy conditions, the more difficult it becomes for the plant to recover, as it struggles to absorb water and nutrients. In contrast, a well-timed intervention results in a noticeable improvement in leaf turgor and overall vitality; if the roots do not respond positively after treatment, check the drainage holes for blockages.
A common mistake gardeners make at this stage is neglecting the potting mix. If you re-pot thyme too late, you could end up with a plant that continuously droops despite intervention. For instance, a gardener who realized the importance of repotting early saw a vibrant recovery, while another who delayed missed the critical window, resulting in a dead plant.
Pruning helps the thyme recover by reducing the strain on its weakened branches and promoting airflow within the plant. By cutting back the drooping stems, you prevent the plant from expending energy on parts that are not supporting its health. Decomposing leaves can also attract pests and diseases, which is another reason to remove them promptly. If the drooping leaves remain untrimmed, they can rot and introduce pathogens to the rest of the plant, leading to even more serious damage. Acting quickly is crucial; if left untrimmed, the energy spent on dying leaves can exacerbate the plant’s stress, potentially leading to irreversible damage. In worst-case scenarios, excessive foliage dieback can weaken the plant so much that it cannot produce new growth. This is especially important if the plant has been fighting off pests or diseases, as weakened branches can become more susceptible.
A common mistake that gardeners make at this stage is trimming too little or only removing the least affected parts. For example, if you only snip the tips of the drooping stems, the underlying problem may persist, and the new growth remains weak. The new growth often stems from areas just above where the cut was made, so trimming down to healthy nodes is necessary. On the other hand, responsible pruning will leave the plant with enough healthy stems to absorb sunlight and nutrients. Conversely, when more substantial cuts are made, they allow the plant to focus its nutrients on developing healthier foliage. Aim to cut back the droopy, unhealthy parts entirely for the best recovery. If you notice a lot of woody stems, consider cutting back those that are too long compared to the rest of the plant. Waiting too long to trim can worsen the issue, leading to further drooping or even death of the plant tissue. Remember, frequent light trims are often better than major cuts to avoid stressing the plant too much at once.
Step 2 – Assess Soil Moisture for Drooping Thyme
First, check the moisture level in the potting soil to identify the cause of your thyme drooping. If the soil feels overly dry, water your thyme thoroughly until you see water draining from the bottom of the pot. After this action, you should observe the leaves perk up within a couple of hours. Make it a habit to check the moisture level weekly, as thyme can be particularly sensitive to sudden changes in its watering schedule.
The drooping of thyme often occurs when the roots are either under-watered or have become overly dry, leading to wilting. When soil moisture is insufficient, the plant can’t uptake enough water, causing dehydration in its tissues. Conversely, if the soil remains too wet, root rot may develop, suffocating roots and preventing nutrient uptake, which also results in drooping leaves. The upper part of the soil may appear dry while it may still be holding water below, reinforcing the need for thorough checks beyond surface appearances.
If the soil smells sour or has a mushy texture, this indicates root rot, and you need to repot the thyme in fresh, well-draining soil instead. Alternatively, if the plant droops but the soil is moist and not sour, check for signs of pests or disease, which can also cause similar symptoms and require different treatment measures. Regularly looking at the drainage holes of your pot can help determine if the water is flowing out freely, which could indicate whether you have a drainage issue.
Excess moisture can lead to suffocated roots and possible root rot, characterized by a foul smell. The thyme plant requires well-draining soil to thrive; if the roots sit in water for too long, they cannot access the oxygen they need to function. When soil is saturated, it also prevents nutrients from being absorbed, making it essential to correct this issue quickly. Keeping thyme in heavy, compacted soil increases the likelihood of root rot, especially in pots without drainage holes. An overloaded watering schedule can also contribute to moisture problems, even in well-draining soil. As a precaution, consider using pots with built-in moisture meters to prevent future mishaps if you’re prone to over or underwatering.
If you discover that the soil smells sour, it’s an indication that root rot may have already started. In this case, consider repotting the thyme into fresh, dry soil immediately to halt any further damage. Choose a light, well-draining potting mix with added perlite or sand to improve aeration. Make sure that the new pot has drainage holes to prevent recurrence. If the root rot is extensive, evaluate the entire root system; if more than half of the roots are brown and mushy, prune them out before relocating the plant to healthy soil. Inspecting the roots not only helps determine the extent of damage but also sets the stage for the best possible recovery. Look for clean, white roots, which indicate a healthy root system; if many roots are left damaged, you may need to consider starting over with a new thyme plant.
Step 3 – Revitalize Thyme with Proper Fertilization
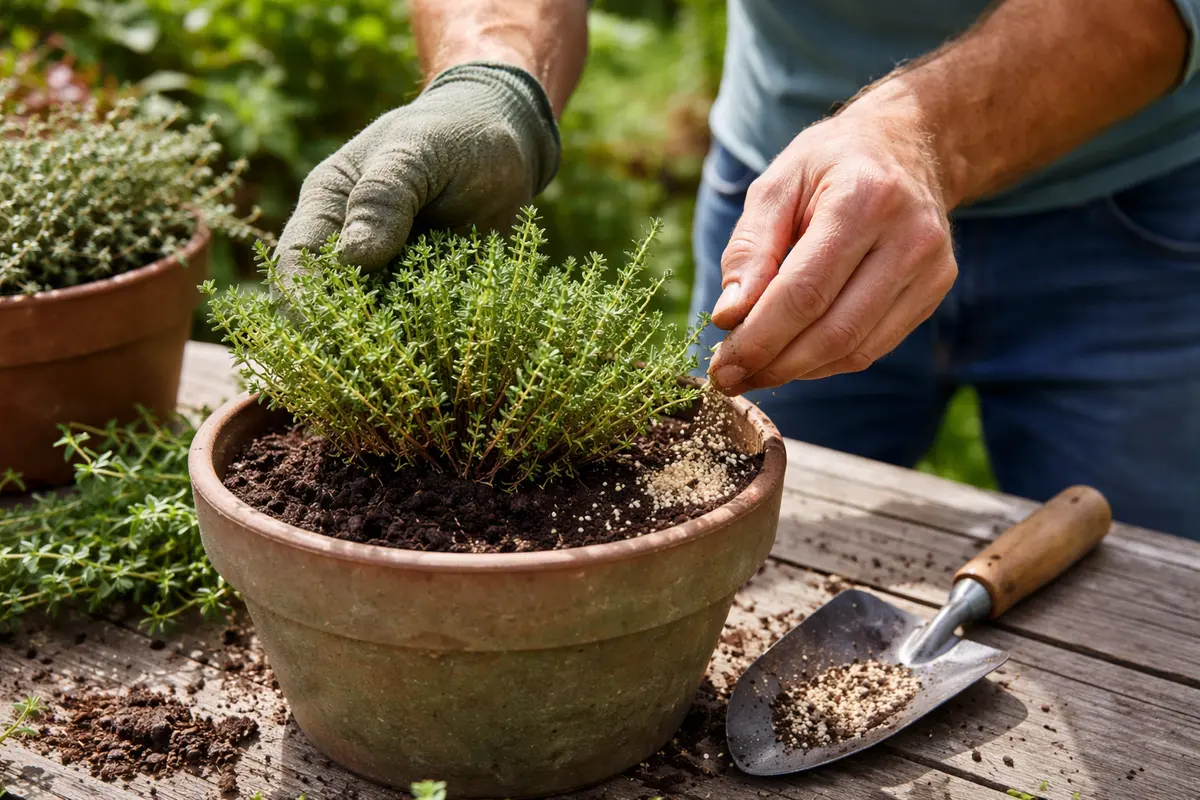
Apply a balanced, diluted fertilizer to your thyme to promote rapid recovery. You should begin to see new growth within one to two weeks, indicating that your plant is bouncing back. A diluted solution—typically at half the recommended strength—ensures that you don’t overwhelm the plant while allowing it to utilize the nutrients without the risk of burning. Always opt for organic, slow-release fertilizers, which provide a more gentle boost and lessen the chance of nutrient overload.
A balanced fertilizer provides essential nutrients that thyme needs to recover from stress and drooping. After pruning and addressing moisture issues, it will give the plant the extra support it needs to strengthen its roots and develop a fuller canopy of leaves. Conditions such as sunlight and temperature also contribute to the recovery; ensure your thyme receives good indirect sunlight during this period for optimal photosynthesis to support new growth. Rotating your pot weekly can also ensure that all sides of the plant receive adequate light for growth.
A mistake to avoid at this stage is over-fertilizing your thyme in hopes of a speedy recovery. Over-fertilization can lead to burning the roots and foliage, causing further stress instead of aiding recovery. A good rule of thumb is to dilute the fertilizer to half the recommended concentration when dealing with a stressed plant. Striking a balance is crucial; too much fertilizer may cause salt buildup, which can further harm the roots. Failing to follow these guidelines can have severe consequences; rapid and abundant foliage growth may lead to an unstable plant that might droop again under its own weight. Regularly observe for signs of nutrient burn, such as leaf browning, and if noted, stop fertilizing temporarily. Regular soil testing can also help assess nutrient levels before applying additional fertilizer.
Step 4 – Water Thyme Every Few Days in Summer
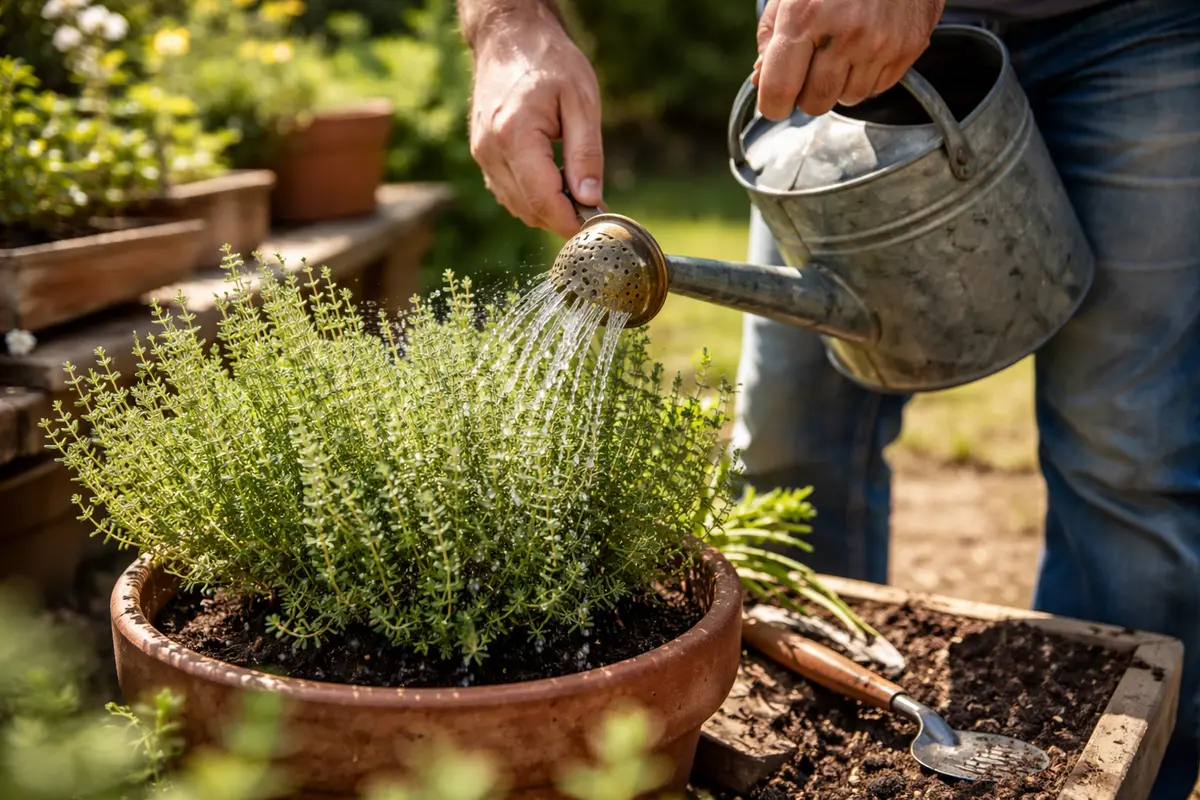
Water your thyme every few days in the summer, ensuring that the top two inches of soil dry out completely between waterings. This routine will keep the plant hydrated without overwatering, promoting healthy growth. It’s essential to establish a regular schedule; set a reminder to check the soil moisture consistently, especially if the weather is particularly hot. Using a moisture meter can take the guesswork out and reveal when it’s time to hydrate.
During hot summer months, thyme can quickly dry out. Therefore, it is critical to monitor its watering needs closely. An established routine prevents both dehydration and waterlogging, as thyme prefers slightly drier soil conditions. Remember, the potting soil should feel damp, not soggy, and ensuring good drainage at all times is essential. To facilitate drainage, consider using pots with larger drainage holes or adding a layer of gravel at the bottom of the pot. Instead, if heavy rains wash through your area, consider temporarily moving pots to a sheltered area during downpours to avoid saturation.
As temperatures fluctuate, review your watering schedule accordingly. For instance, if a heatwave occurs and temperatures soar significantly above average, your thyme may need more frequent watering or a slightly deeper soak to ensure stability. If, after a few days, the leaves still appear droopy, or if the soil seems to dry out too quickly, consider increasing your watering frequency or enhancing the pot’s drainage by adding perlite or sand to the soil mix. Alternatively, group your containers closer together to create a microclimate that retains humidity but still allows for drainage; this can help with water management. However, don’t overcrowd them as it can create a humid environment conducive to fungal growth; space them properly to prevent this. Regularly evaluate the soil’s condition and adjust the watering as needed throughout the growing season.
Step 5 – Check Thyme for New Growth Each Week
Inspect your thyme for signs of new growth at least once a week. You should observe new shoots or leaves unfurling, which indicates your plant is recovering. By consistently checking your plant, you’ll be able to catch potential problems early and address them before they escalate into more severe issues. With time, healthy new growth will replace the drooping foliage while creating a fuller look.
To confirm that recovery is in progress, look for firm, vibrant leaves that are perking up rather than wilting or drooping again. If the plant fails to improve or continues to show droopy leaves, it could signal unresolved underlying issues, such as nutrient deficiency or a lingering root rot problem. If issues persist, it may be prudent to record your observations to share with a gardening group or local expert who may offer insights. Keeping a weekly log of your observations can aid in identifying patterns that might reveal deeper issues affecting your thyme.
If the issue persists despite your intervention, it may be necessary to re-evaluate the moisture levels once more. Overwatering remains a common culprit, and it may require unpotting the thyme to check for root damage. When evaluating the root system, if it appears to be suffering, consider repotting the plant into moisture-retaining soil specially formulated for potted herbs. Frequent checks not only assist in recovery, but they also help promote more vigorous growth over time as the plant responds positively to attention. If there’s cadaver-like material remaining on the upper soil or within the pot, removing that material immediately can reduce the risk of future pest infestations.
FAQ
How long will it take for my thyme to recover after trimming?
Recovery after trimming typically takes about one to two weeks as the plant redirects its energy. You should start to notice new growth during this period if it’s kept under optimal conditions, such as balanced light and moisture levels; inadequate attention may slow down the recovery process. Monitor for browning on the edges of new leaves as this could indicate further problems.
Can overwatering damage my thyme even if the weather is hot?
Yes, overwatering can still harm thyme in hot weather. While it’s essential to keep the plant hydrated during hotter months, soggy soil can contribute to root rot, which can severely compromise the plant’s health. Always keep an eye on soil moisture levels irrespective of the temperature, and adjust your watering schedule based on the moisture content and the plant’s needs.
Should I remove any brown leaves or stems?
Yes, you should remove brown, unhealthy-looking leaves and stems to encourage new growth and stop any potential spread of decay. This pruning not only revitalizes your plant but it also helps the thyme focus its energy on healthy growth instead. However, ensure that the stems you’re cutting do not contain new leaf nodes that could still be useful for recovery; sometimes, leaves that appear slightly wilted might still recover if fed properly. It’s equally important to avoid cutting back branches again if you’re unsure that the stems are dead; sometimes a minute cut can breathe life back into an otherwise stunted branch.