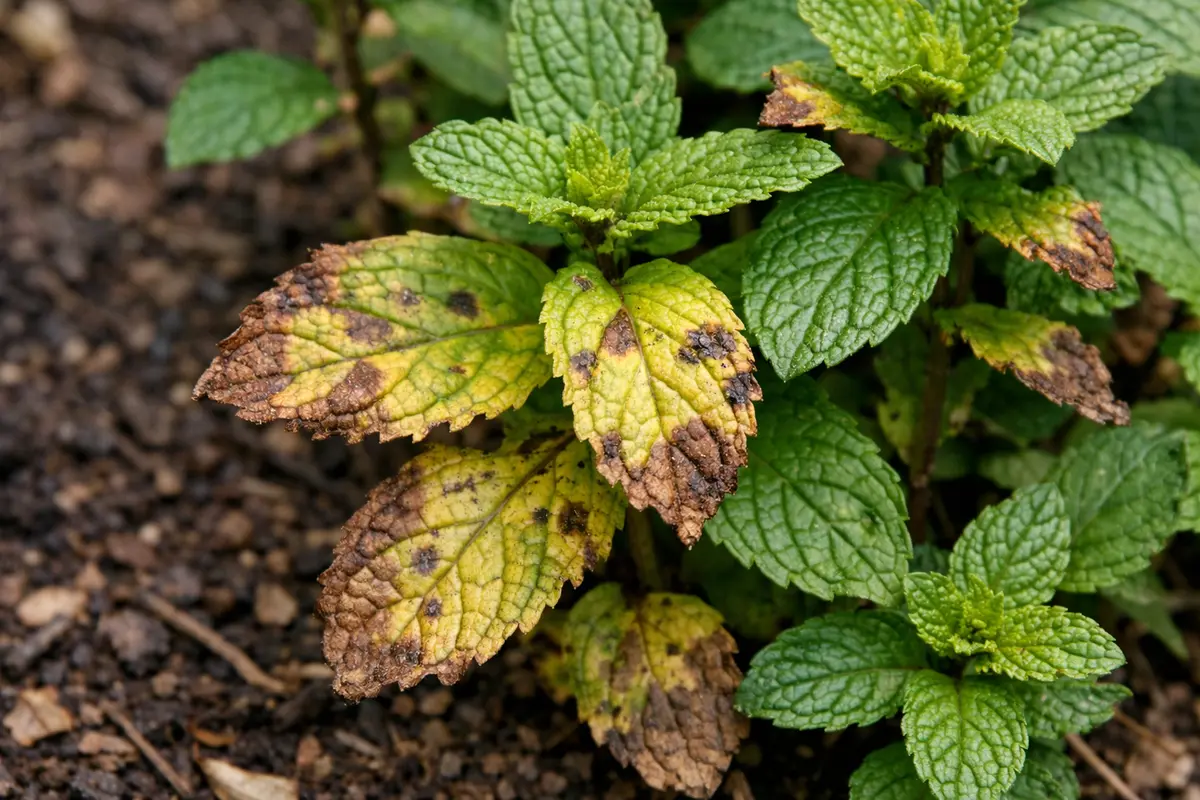
You may notice that your once-vibrant mint is developing a troubling hue when you check on it after a recent bout of overfertilizing, which is why you need to know about fixing yellowing leaves on mint after overfertilizing. This yellowing is a clear sign of nutrient imbalance, often resulting in spots or other issues that indicate stress on the plant. If left unchecked, the condition worsens and can spread, ultimately weakening the plant and leading to more damage down the line; however, fixing it is possible now if you inspect the foliage closely and adjust your fertilization practices accordingly.
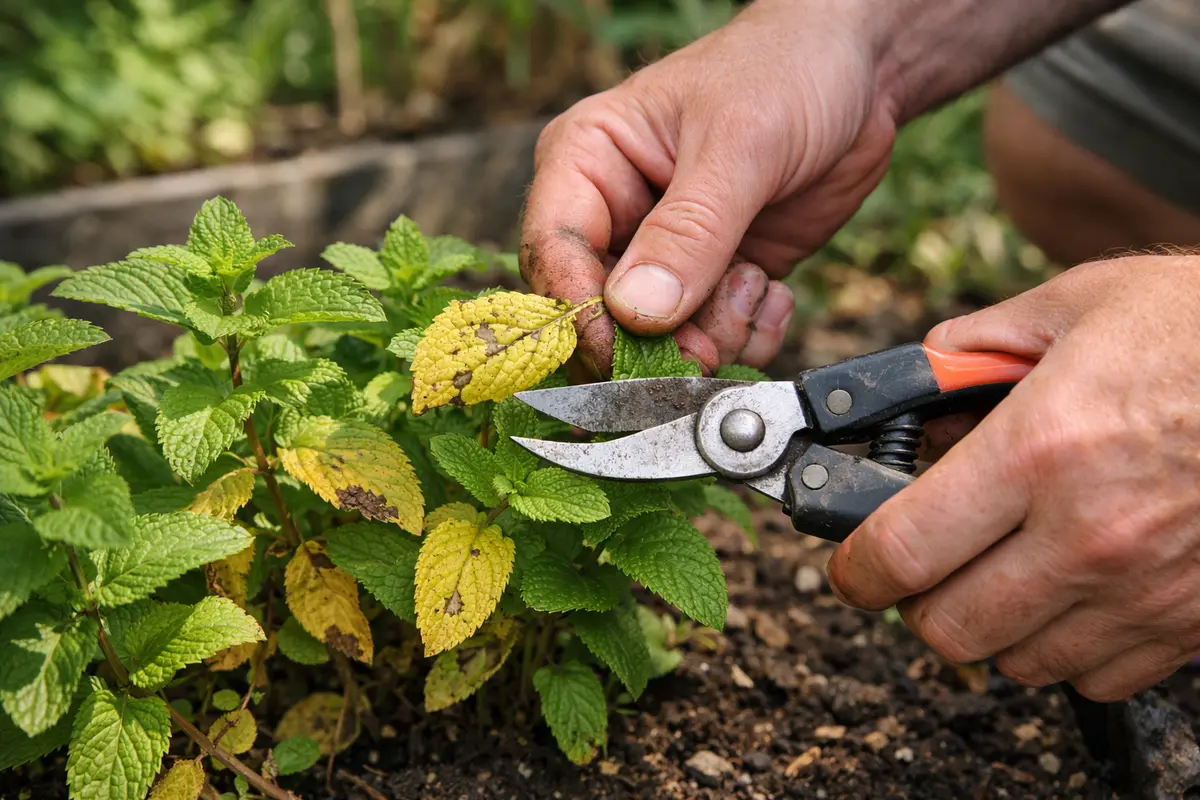
Step 1 – Prune Yellowing Mint Leaves Immediately
First, remove the mint plant from its pot to assess the roots. Gently wash away any excess fertilizer from the root system using lukewarm water to limit further damage. Once cleaned, you should see the roots appear less compact and surrounded by more fresh soil, which helps reduce the immediate stress on the plant.
Acting fast is crucial because the nitrogen overload from overfertilization can lead to root burn, preventing the plant from absorbing water and nutrients effectively. If you delay this removal and cleaning process, you will observe the leaves continuing to yellow and wilt, signaling irreversible damage to the tissue. If you notice dark, mushy roots instead of healthy white ones, it further indicates that immediate action was neglected.
A common mistake gardeners make at this stage is failing to flush the soil when they first notice the yellowing. For instance, an experienced gardener once waited a week too long to rinse out the roots, resulting in a total loss of the plant, whereas another at the first signs of distress rinsed promptly and successfully revived their mint. If you see wilting in addition to yellowing leaves, immediately check moisture levels to ensure overwatering is not compounding the issue.
Pruning yellow leaves not only improves the appearance of your plant, but it also removes parts that can harbor diseases or pests. By addressing the issue quickly, you reduce the plant’s energy drain from maintaining dying foliage. When the foliage is healthy, it can photosynthesize effectively, which is vital for the plant’s recovery. Aim to prune back to healthy green leaves; these indicate that the branch or stem is still viable and capable of producing new growth. If you encounter stems that are brown and brittle, trim them back as well, as they indicate lack of vitality.
Many gardeners mistakenly believe that plants will naturally shed yellow leaves. If they fail to remove these leaves promptly, they risk allowing pests or disease to spread, which can stunt recovery. This delay often results in further yellowing or browning of adjacent healthy leaves. Act quickly to limit further damage by pruning all affected foliage within 48 hours of noticing the issue. If you see a large portion of the plant is yellowing, consider pruning it back more aggressively to promote robust regrowth. Also, observe how pruning responds over the next few days; if new growth appears vibrant and green, your decision was correct.
Step 2 – Check for Overfertilization of Mint Soil
Examine the soil for signs of overfertilization by investigating its moisture and nutrient levels. If the soil appears compacted or dry on the surface but soggy underneath, you know it is overloaded with nutrients. This is a clear sign that you need to intervene to restore the balance that mint plants thrive on. If the soil feels gritty instead of crumbly, it may be retaining too many nutrients while also limiting air availability to roots, prompting them to struggle for oxygen.
This condition occurs when excess fertilizer disrupts the plant’s ability to absorb water and nutrients effectively, leading to root burn. Roots exposed to a hyper-concentrated nutrient pool can’t function correctly and start decaying faster than they should. Over time, this leads to harmful buildup that promotes yellowing leaves and weakens overall plant health. It’s important to grasp the root cause, which is often linked to imbalanced nutrient levels. Signs of nutrient imbalance can also include leaf curling, browning at the tips, or lesions on stems.
If you notice a sour smell in the soil or brown patches around the roots, consider flushing the soil with clean water. This will immediately help dilute the remaining fertilizer. For best results, flush with at least three times the pot volume in clean, room temperature water, allowing it to flow through the drainage holes for at least 15-30 minutes. After flushing, monitor the soil conditions to ensure it begins to recover; aim for a consistent moisture level that allows the roots to breathe while maintaining adequate hydration. After flushing, observe soil texture after it dries slightly; it should feel moist but not waterlogged. If roots still feel mushy even after flushing and you’ve seen no improvement in a few days, it may be time to repot your mint into fresh soil that provides a healthier environment for root development.
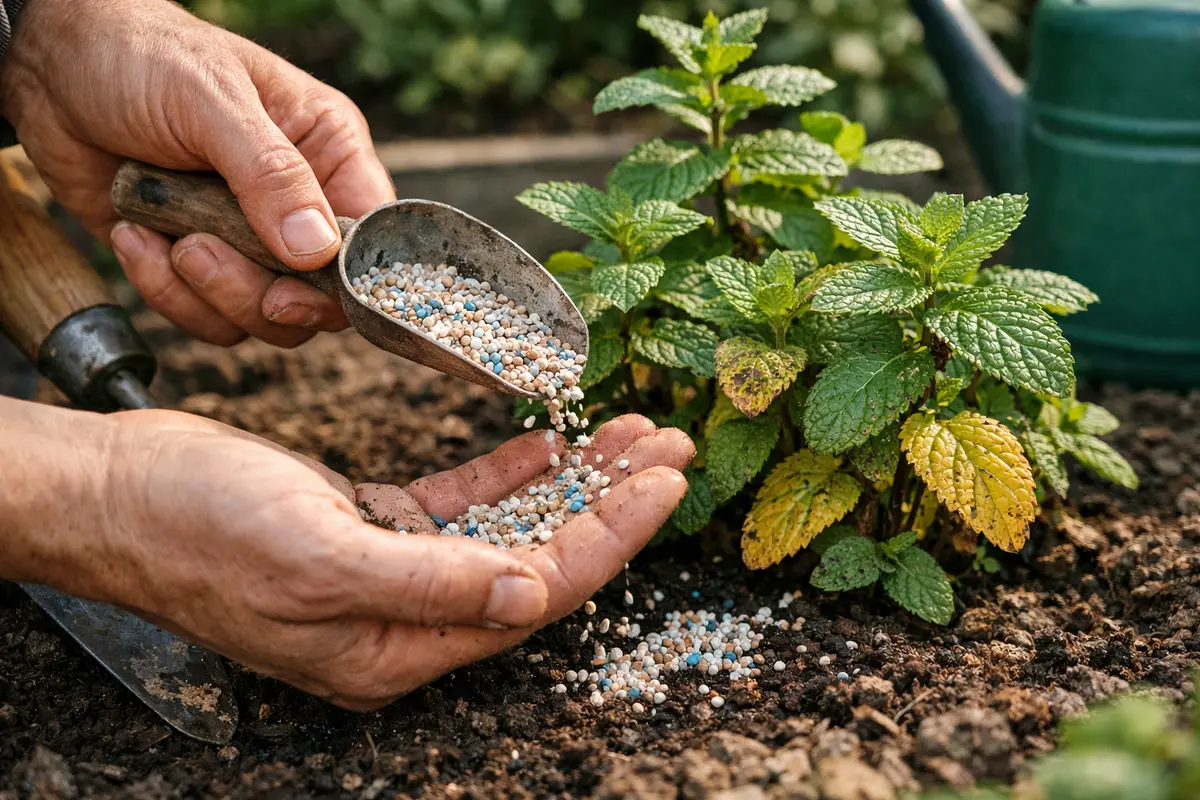
Step 3 – Provide Balanced Nutrients for Mint Recovery
Start by reducing the frequency of watering to allow the soil to dry out between waterings, while also flushing the soil with clean water to wash away excess fertilizer. Within a week, you should start noticing new green growth emerging from the base of the mint, indicating recovery from overfertilization. To prevent this issue from recurring, establish a routine of fertilizing only once a month during the growing season, and follow the recommended dosage strictly, particularly when the plant is actively producing new leaves.
The recovery timeline can vary but generally takes around two to four weeks, depending on the severity of the overfertilization. Check for greener leaves appearing, which signals a successful recovery; however, if the plant visibly droops or continues to yellow, potentially adjust your watering habits. If not improving, check that the soil has proper drainage and isn’t compacted, which can trap excess nutrients.
A common mistake during the recovery-prevention transition involves fertilizing too soon after the plant shows signs of improvement, which can lead to renewed yellowing. Instead, wait until the mint has fully established new leaves and exhibits vibrant color before reintroducing any fertilizers gradually. If the leaves remain yellow despite reduced feeding, check for root rot or other underlying issues that could be affecting nutrient uptake.
Providing balanced nutrients helps restore the nutrient levels in the soil, allowing your mint to recover from the stress caused by overfertilization. Utilize a fertilizer that contains micronutrients, particularly magnesium and calcium, which support healthy leaf development. Be cautious about using organic fertilizers or controlled-release fertilizers that offer steady nutrients without risking another overload. If your mint was overfed with high nitrogen fertilizer prior, switch to one low in nitrogen but balanced with potassium and phosphorus to encourage root health and flowering. Watch your plant closely for signs of improvement; new leaf growth and changes in leaf color back to vibrant green indicate the recovery is on track.
A common mistake during this recovery phase is to apply fertilizer too frequently or too heavily. Instead, use a cautious schedule that allows your mint to absorb the nutrients adequately—typically every 4-6 weeks, depending on the growing conditions. If leaves begin to yellow again after fertilizing, it may indicate another dose of fertilizer or a different nutrient imbalance. For instance, be aware that insufficient magnesium can lead to yellowing between veins in mint leaves. Additionally, always monitor the moisture level; overwatering post-fertilizer can induce further root stress, negating recovery efforts. If the fertilizer does not seem to yield any results after a week, reevaluate your watering practices or consult the product label to confirm the appropriate application rate you’re using.
Step 4 – Inspect Mint for Signs of New Yellowing
Check your mint plant for new yellowing leaves every few days. You should notice vibrant green growth and leathery leaves about a week after implementing changes. If your environmental conditions are favorable—with adequate light and moisture—those signs indicate the plant is responding positively to your interventions and adjusting to the new nutrient balance. Look for signs that the recovery process is working, such as increased leaf fullness and denser growth.
A fully recovered mint plant will appear lively, with flourishing leaves and a healthy green hue, indicating successful nutrient absorption. In contrast, a plant experiencing renewed yellowing may present signs like limp leaves or stunted growth, suggesting that nutritional imbalances or soil issues still need attention. It’s crucial to note that if the yellowing returns rapidly after your interventions, immediate corrective action is necessary. This may involve a second flush of the soil if symptoms persist or assessing the environmental conditions more closely.
If you observe yellowing returning despite following these steps, inspect the roots under the soil for rot as this can be a lingering issue related to overwatering or improper drainage. Additionally, evaluate the light conditions; moving the plant to a brighter location can significantly impact recovery as mint prefers bright, indirect sunlight. Continual monitoring will catch any problems early before they escalate, ensuring your mint remains robust. Be proactive in adjusting your watering practices during this time by allowing the top inch of the soil to dry out before watering, as overwatering can lead to root rot, a common consequence of prior overfertilization.
FAQ
How long does it take for mint to recover after overfertilizing?
Recovery can take about one to three weeks, depending on the extent of the damage and how quickly you implement corrective actions. Once you correct the feeding regimen and prune unhealthy leaves, you should begin to see new growth emerging as early as a week. Factors such as ambient temperatures, light availability, and overall environmental stress can contribute to extending this timeline, impacting how rapidly your mint may bounce back.
Should I remove all the yellow leaves from my mint plant?
Yes, you need to remove all yellowing leaves to help the plant redirect energy to healthy growth. Leaving yellow leaves can encourage pests or diseases, prolonging the plant’s recovery time. Aim to prune back to the healthy green parts of the stems to promote regrowth from viable sections, but do not cut too drastically at once; some green should remain to sustain the plant’s recovery process. Check for any hidden pests on yellowing leaves which can lead to renewed infestations.
Will my mint plant produce new leaves after fixing the overfertilization issue?
Absolutely! Once you correct the fertilization issue and provide balanced nutrients, your mint will likely produce new, healthy leaves within a week or two. Look for vibrant green foliage as a positive sign of recovery, which usually indicates that the plant is back on track to full health. If nutrients remain balanced and care is adjusted correctly, your mint should return to providing the aromatic flavors you expect for culinary needs.