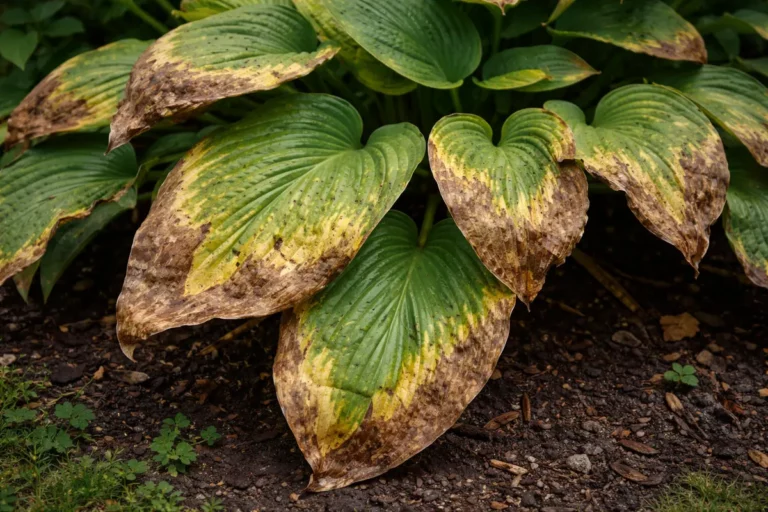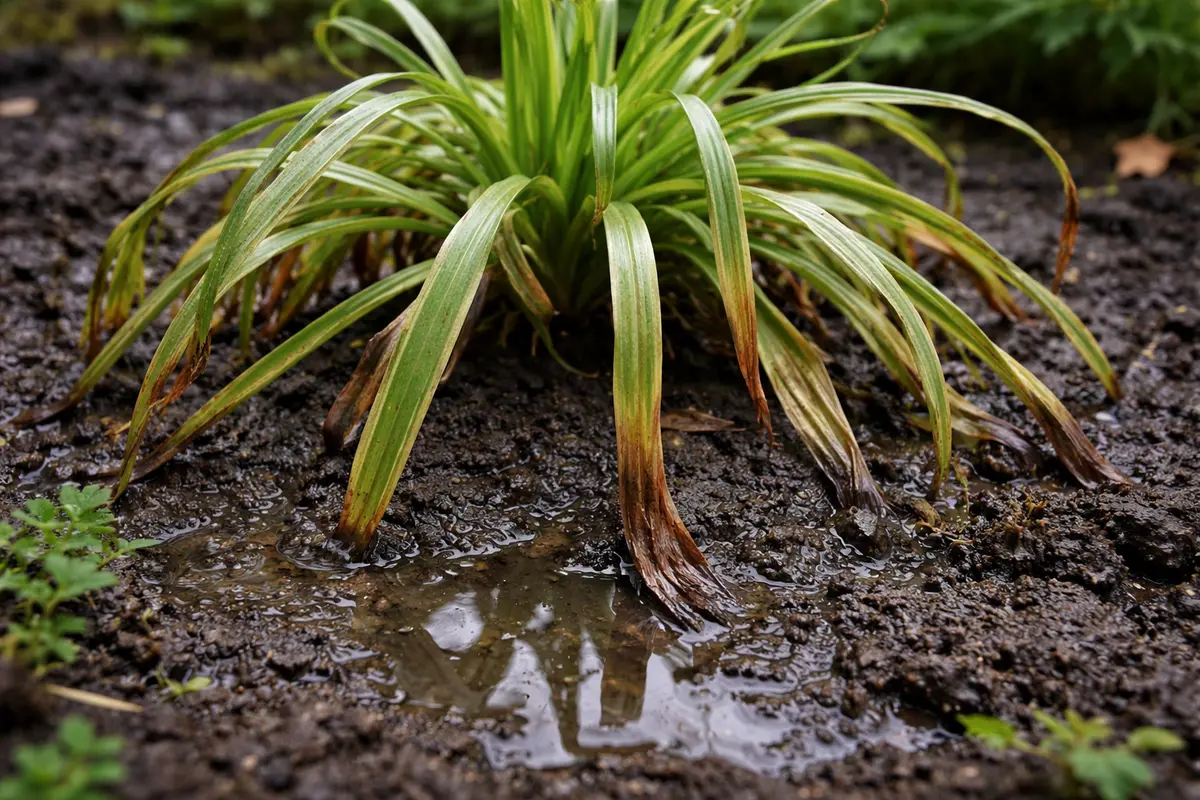
You may notice your spider plant’s leaves developing brown tips and edges, especially when you’ve been overly generous with the watering, which is why you need to know why is my spider plant turning brown after overwatering. This damage often manifests as wilted or mushy spots on the leaves, a clear sign that the plant is struggling to cope with too much moisture. If ignored, the issue gets worse, leading to more damage and eventual leaf drop, but fixing it is possible now if you check the soil moisture levels and adjust your watering habits accordingly.
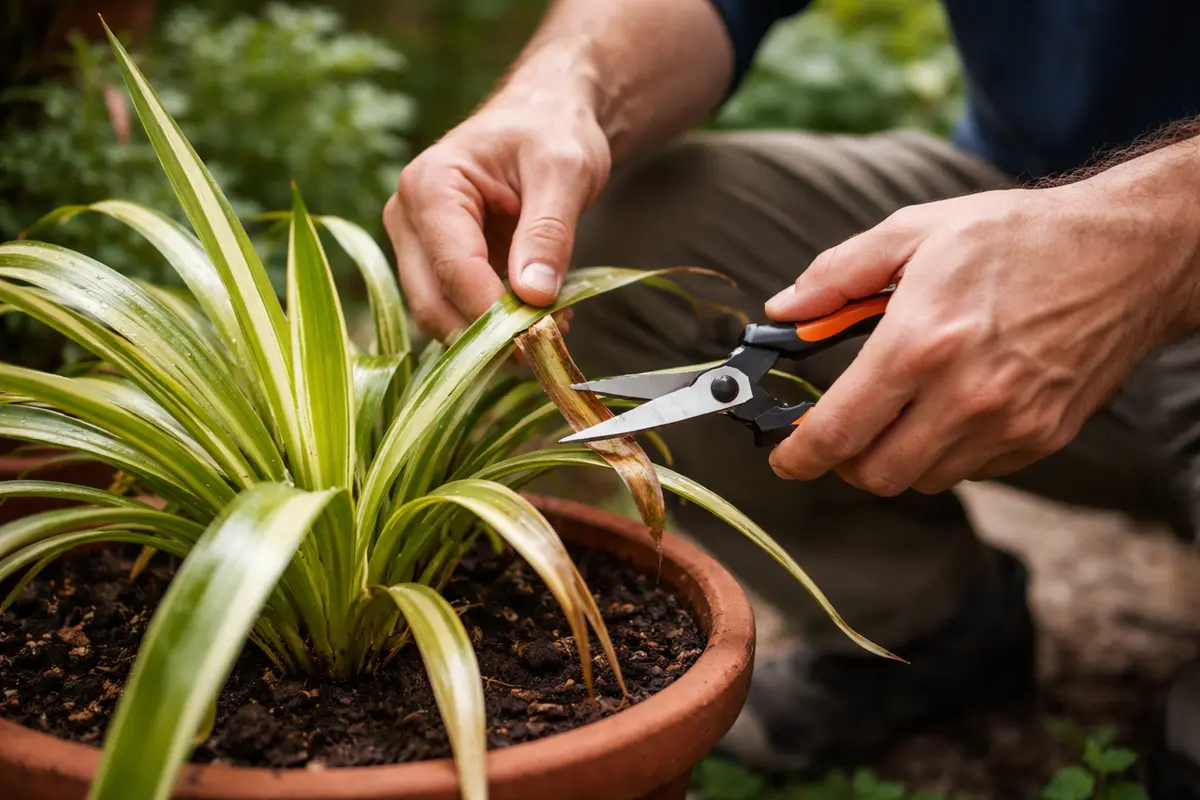
Step 1 – Trim Yellowing Spider Plant Leaves Now
Start by removing your spider plant from its pot to check for root rot caused by overwatering. Gently shake off excess soil and inspect the roots; healthy roots should be firm and white, while brown, mushy roots indicate rot. After addressing the root condition, repot the plant in fresh, well-draining soil to promote recovery.
Acting quickly is crucial because spider plants are prone to root rot, which occurs when roots are waterlogged. If you delay, the brown tips may worsen, and the plant can succumb to decay, leading to further leaf discoloration and overall decline. Without prompt attention, a once-healthy plant can rapidly transition to an irreversible state of damage.
For instance, a gardener once waited too long to repot their spider plant after noticing brown tips, leading to extensive root rot and eventual loss of the entire plant. A common mistake includes continuing to water heavily despite signs of overwatering; if the leaves appear droopy and mushy, check the root condition immediately to prevent further issues.
Removing the unhealthy leaves is crucial because it helps redirect the plant’s energy to healthier growth instead of attempting to repair damaged tissue. If a dying leaf remains on the plant, it can hinder overall health by competing for nutrients and may foster an environment where pests thrive. A quick reduction in visible issues can motivate you to care for it more closely; within a day or two, you can expect more vigorous and green leaves as new growth takes over. If you see new shoots emerging shortly after trimming, it’s a great indication that the plant’s resources are being allocated wisely.
Many gardeners mistakenly wait too long to remove damaged leaves, thinking that they might recover. A common error occurs when individuals expect resilience from these plants, overlooking that untreated yellowing can lead to larger sections browning and an eventual reduction in vibrancy. If you notice multiple leaves changing color, it’s essential to act right away to prevent the potential spread of further damage. Addressing the issue immediately emphasizes the importance of proactive gardening, especially for spider plants, which can rebound quickly once on the right track.
Step 2 – Diagnose Overwatering Issues in Spider Plant
Start by reducing how often you water your spider plant and ensuring that the pot has proper drainage. Check the soil about an inch deep; if it feels consistently damp, allow it to dry out completely. After a few days, you should notice the leaves stopping their browning and new growth starting to emerge from the center.
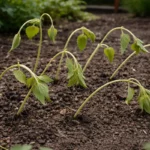
When you overwater a spider plant, excess moisture leads to root rot, which suffocates the roots and prevents them from absorbing nutrients effectively. As a result, the leaves turn brown and crispy, especially at the tips, because the plant can’t transport vital moisture. In contrast, a well-watered spider plant will have vibrant green leaves and a healthy, firm feel.
If the soil smells sour, indicating anaerobic conditions, repot the plant in fresh, dry soil to provide better aeration and nutrient uptake. Alternatively, if you notice yellowing leaves alongside browning, it could indicate a nutrient deficiency rather than overwatering, so check the fertilizer levels and adjust accordingly.
When spider plants are overwatered, the roots can suffocate, leading to discoloration and eventual decay. In this case, the mushy roots cannot uptake nutrients efficiently, causing the yellowing of leaves and browning tips as the plant is deprived of necessary resources. If the leaves begin to droop alongside discoloration, this further signals an urgent need for intervention. Additionally, if you notice a gradual decline in leaf color and texture over time, this is an obvious signal that moisture levels need reassessment; imagine how those layers of waterlogged soil feel under the weight of the plant, which exacerbates the problem.
If your soil smells sour or musty, that indicates root rot has begun. In such scenarios, consider gently removing the plant from its pot to inspect the roots for mushy or dark areas. Healthy roots should be white and firm; if you find black, mushy roots, those portions must be removed to prevent further decay. Delicate handling during this process is critical to avoid damaging any viable roots. If you discover rotten roots, you’ll need to take further corrective actions such as pruning away the affected roots and replanting in fresh soil. If the roots are too damaged, you might need to propagate the healthy parts to salvage your plant entirely. Observing root color and firmness can guide your next steps; for example, if roots appear slimy, they are far gone and the plant may require drastic measures such as propagation.
Step 3 – Replant in Fresh Soil to Aid Recovery
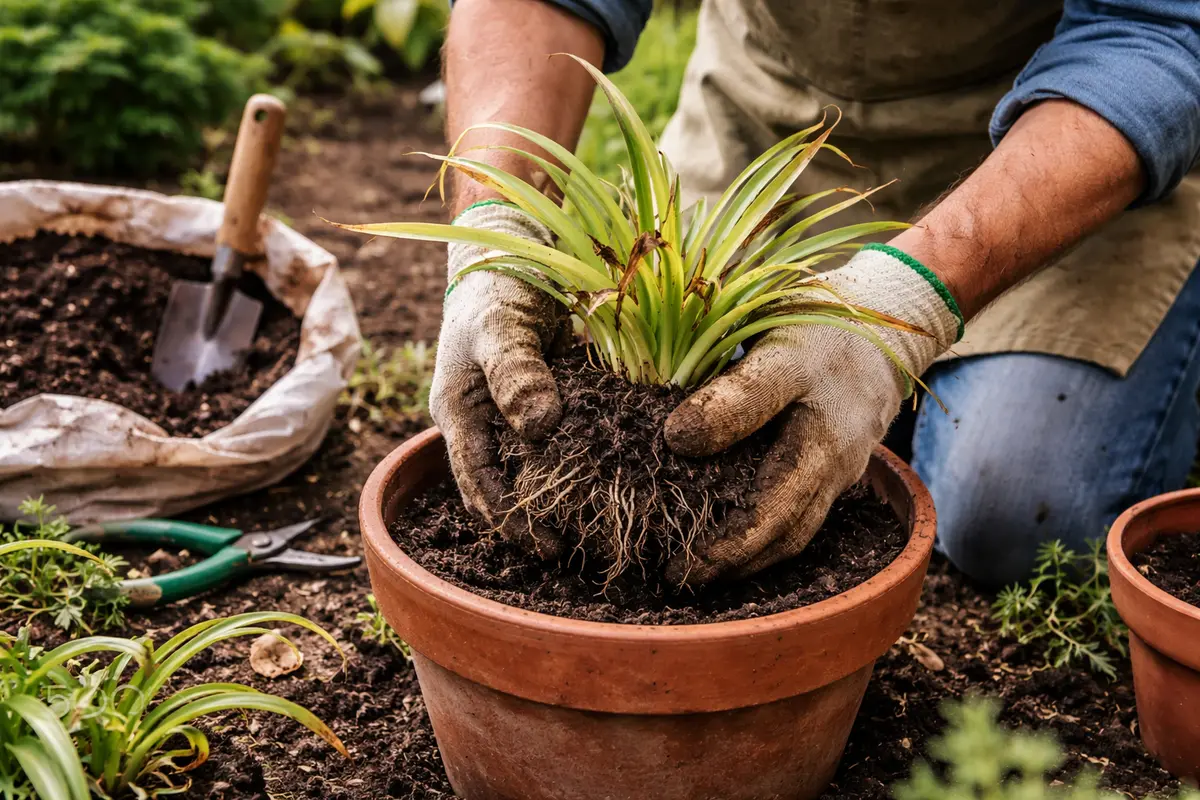
Replant your spider plant in fresh, well-draining soil immediately. You’ll see better moisture retention and healthier root growth as soon as you place it in a more suitable environment. Using soil designed for succulent or cactus plants can be a great option as it promotes drainage and aeration. While repotting, ensure that the new pot has adequate drainage holes, which will prevent water from collecting at the base, reducing the risk of future overwatering.
Using fresh soil provides new nutrients and better drainage, allowing for improved root oxygenation. Healthy roots need air; when they’re kept in excessively soggy soil, they tend to rot, contributing to more browning leaves. During repotting, take extra care to remove any damaged roots and check for any lingering fungal growth that may impact recovery. If any debris is found within the roots, cleaning them can ensure that the plant does not face additional distress during recovery.
Be cautious not to water the newly potted plant too soon after replanting; wait until the top inch of soil feels dry before doing so, as this extra moisture can set back recovery efforts. Over-fertilizing at this stage can stunt recovery; instead, allow the plant to acclimate to its new pot. You may notice that the surface of the soil should feel dry to the touch, almost like slightly crumbly earth. During recovery, you should monitor for signs of fresh growth emerging from the center of the plant, indicating it’s slowly regaining its health. If new growth appears stunted or discolored despite fresh conditions, further evaluation of environmental factors is needed.
Step 4 – Water Sparingly to Prevent Browning
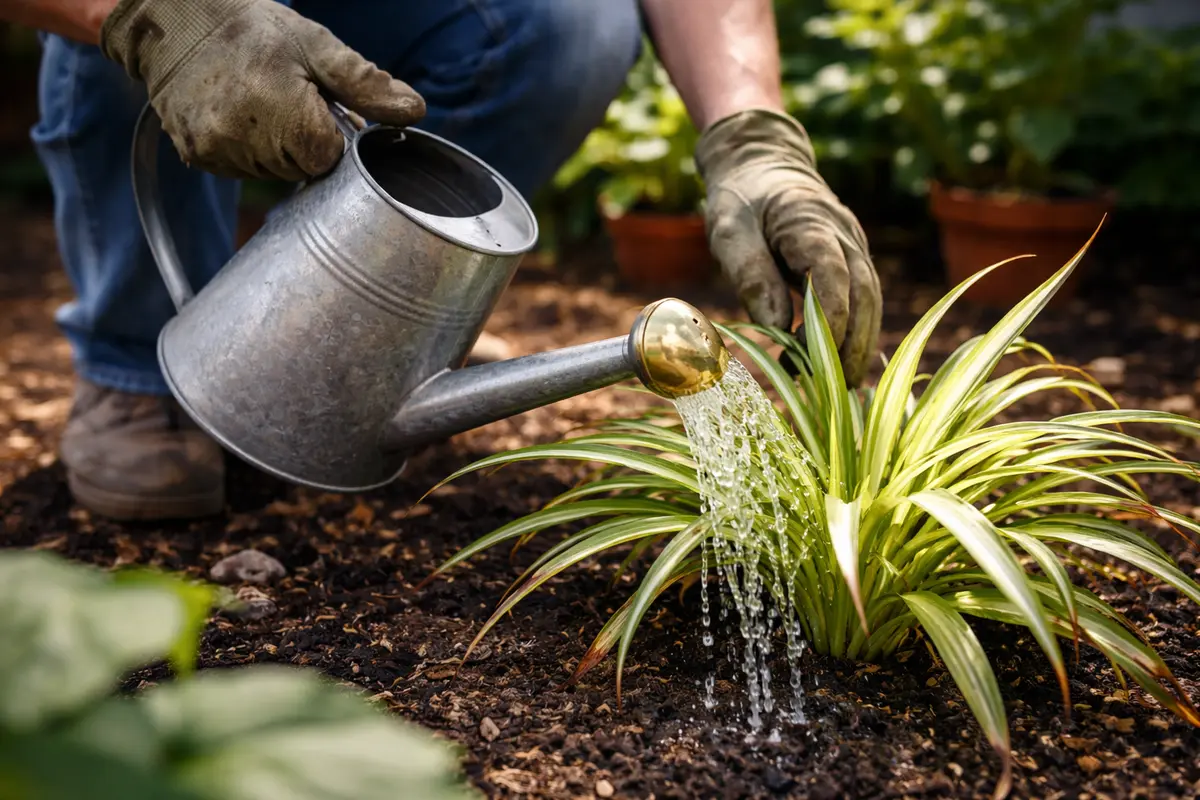
Start by reducing the frequency of watering your spider plant to once every two weeks, ensuring the soil dries out between waterings. This practice will help you observe the leaves regaining their vibrant green color as excess moisture is eliminated.
Environmental conditions such as high humidity or temperatures below 60°F can contribute to overwatering symptoms in spider plants. By following a consistent watering routine that aligns with these conditions—water less in cooler months—you’re tackling the root cause of the browning leaves effectively. If your plant exhibits browning and the surrounding air is dry, check the soil moisture before applying more water.
In summer, when temperatures rise, you might need to increase airflow around the plant with a fan or by rearranging your indoor layout. This ventilation will reduce excess moisture build-up, supporting your watering schedule while keeping browning at bay. If you notice signs of wilting despite watering properly, inspect for drainage issues in the pot.
Too much moisture can lead to root rot; therefore, ensuring your spider plant is not overwatered allows the roots to receive oxygen. If you notice that leaves are wilting after watering, this frequently points to over-saturation; observing droopy leaves might signal that water is pooling at the pot’s bottom. This leaves you with the challenge of ensuring even watering practices by going just a tad deeper to check moisture levels at several points in the pot.
Seasons can significantly impact your plant’s water requirements as well. For example, during the hotter months, spider plants may need more frequent watering; if the soil dries out completely before your scheduled watering, your plant may start to suffer. A general rule is to increase watering intervals when temperatures rise, while reducing it during cooler months. This response to climate changes plays an essential role in preventing further issues like browning. In particular, if fall creates a significant drop in temperature, check the soil moisture every few days to avoid excessive moisture buildup; also, considerations during the winter months often necessitate less watering due to reduced evaporation.
Step 5 – Check for New Brown Spots Weekly
Start by checking the potting soil for excess moisture; stick your finger about an inch into the soil to feel if it’s still damp. If it is, hold off on watering for at least a week. During this time, observe the leaves for any change in color or texture; signs of recovery, such as new growth unfolding, will appear within 1-2 weeks.
A fully recovered spider plant will exhibit vibrant green leaves that feel slightly firm to the touch, contrasting sharply with the limp, brown-tipped leaves seen during overwatering. As the plant comes back, you’ll notice a more upright growth habit, while early signs of returning issues may include yellowing and drooping leaves. If the leaves retain a mushy texture, check the root system for signs of root rot.
If browning occurs again despite taking corrective measures, consider repotting the plant with fresh, well-draining soil to ensure proper aeration. If the problem persists even after repotting, escalate your efforts by assessing your care routines, such as adjusting watering frequency or checking for pests that may be affecting your spider plant.
A fully recovered spider plant will display vibrant, green leaves with a healthy, firm texture, free of brown tips. In contrast, early signs of the problem returning include the reappearance of browning edges and a limp texture, suggesting excess moisture. If the foliage starts to feel mushy, it’s crucial to act quickly.
If the browning persists despite following these steps, consider repotting the plant into fresh, dry soil to improve drainage. If problems continue after that, altering your watering schedule or changing your plant’s location to a spot with better airflow can help mitigate ongoing issues.
A fully recovered spider plant will display vibrant green leaves with a healthy, firm texture. In contrast, if brown tips return, they will appear crispy and fragile, signaling potential overwatering again. If you notice a soft, mushy stem, this suggests root rot which is another sign of excessive moisture.
If the browning continues despite following the above steps, evaluate the pot’s drainage. Ensure any excess water can escape easily; if not, consider repotting the spider plant in a container with better drainage. Additionally, if the soil retains too much moisture, switching to a well-draining potting mix can help prevent future issues.
A well-recovered spider plant will produce new leaves that are vibrant and green, indicating that your actions have improved its health. However, if you notice any new brown spots forming again, it may indicate that the plant is still receiving too much water or that another problem persists—such as insufficient light or a need for nutrition. It’s crucial at this stage to examine the plant’s environment; for instance, if newly sprouted leaves have browning tips, they might be receiving too much direct sunlight, which often leads to sunburn-like symptoms.
If symptoms persist despite your best efforts, consider consulting with a local gardening expert to identify environmental stressors you might not have recognized, such as pest damage or nutrient deficiencies. Given that spider plants can be susceptible to pests like spider mites or aphids, always examine the undersides of leaves for tiny webs or clusters. Observing any peculiarities in leaf texture or color can help in identifying potential issues sooner. Reacting swiftly to these signs will help ensure a longer-lived plant that continues to thrive.
FAQ
How long does it take for a spider plant to recover from overwatering?
Recovery time can vary, but generally, you should see signs of improvement within 1-2 weeks after making necessary changes. New growth should start to appear as the plant adjusts to healthier watering and soil conditions, particularly if you’ve addressed root rot issues effectively while replanting. Just remember, patience is key; plants do take time to reflect changes in care with visible growth and color improvements.
Can root rot spread to other houseplants?
Yes, root rot can spread through contaminated soil or water. To prevent it, always use clean, sterile pots and soil when planting or repotting to ensure a healthy environment across all your plants. Additionally, practice good hygiene by thoroughly cleaning tools after handling affected plants, as spore transfer can exacerbate issues in otherwise healthy specimens.
Should I remove affected leaves permanently?
Yes, permanently removing severely affected leaves aids the plant’s recovery by allowing it to focus energy on new growth rather than trying to repair dead tissue. Always trim back to the base of the leaf to prevent any risk of infection at the stem level, and do this trimming at a 45-degree angle to minimize water pooling on the cut. Regular check-ins will ensure you can manage these proactive measures effectively while maintaining the overall health of your spider plant.