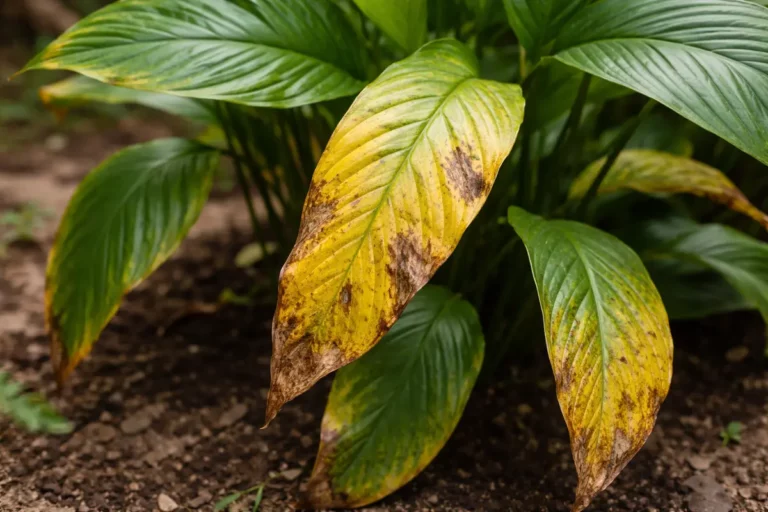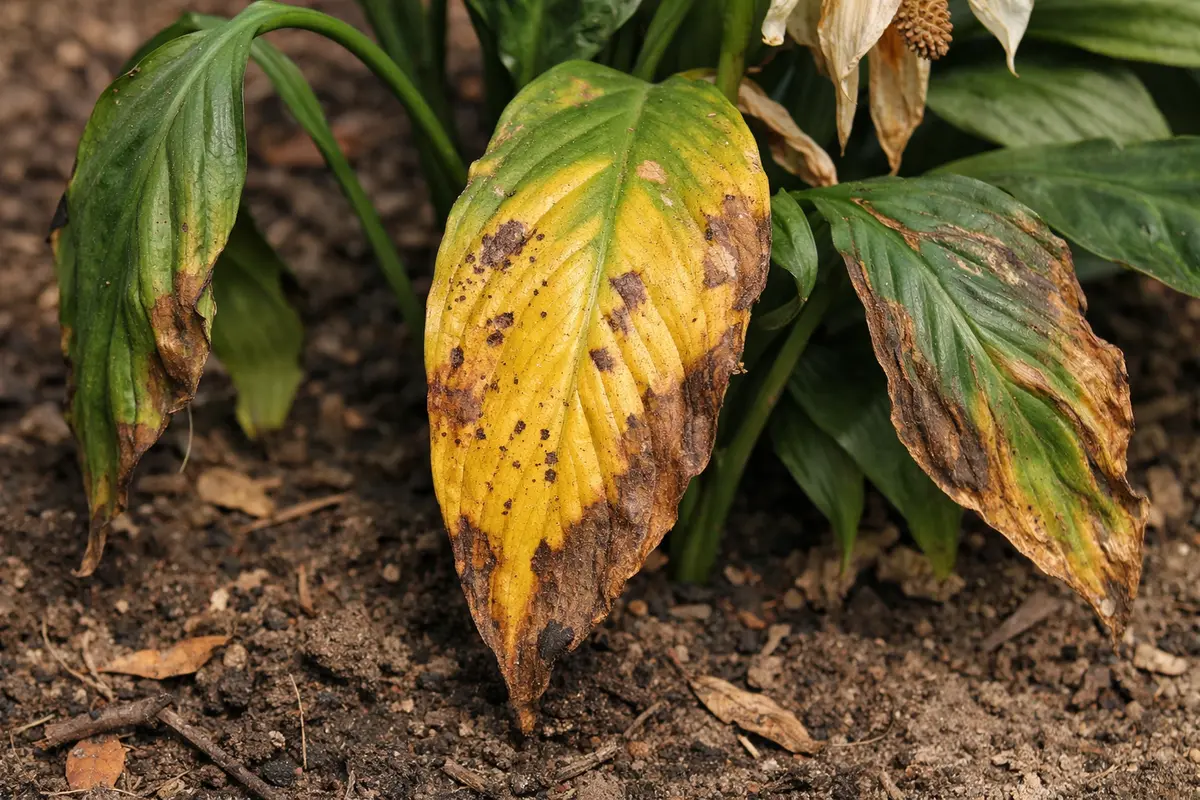
You may notice that during dry seasons, your peace lily’s leaves are developing an unsightly yellow tint, which is why you need to know how to fix yellowing leaves on peace lilies during dry seasons. This yellowing often signals a lack of moisture or nutrients, leading to potential wilting and a general decline in the plant’s vitality. If ignored, the issue gets worse and weakens the plant, making it harder to fix later on, but you can improve the situation by monitoring soil moisture and adjusting your watering routine accordingly.
Step 1 – Trim Yellowing Peace Lily Leaves Now

First, check the soil moisture by inserting your finger about one inch into the potting mix. If it feels dry, give the peace lily a deep watering until water drains from the bottom of the pot. After this action, you should see the leaves perk up within a few hours, indicating a positive response to improved hydration.
Acting quickly is crucial for peace lilies as they can exhibit yellowing leaves when deprived of moisture. If the situation is not addressed, the plant may enter a state of stress, leading to more extensive damage such as root rot or irreversible leaf loss. Healthy leaves should remain dark green; if you see yellowing spreading from the leaf tips toward the base, it signals dehydration. If not water-related, check for pest infestations that could also stress the plant.
In one case, a gardener delayed watering and found significant leaf damage within a week, while another who acted rapidly saw recovery within days. Rushing in this regard can lead to watering too frequently; over-saturating the soil can create root rot. Thus, monitoring both moisture levels and drainage is vital during the dry season.
Trimming yellowing leaves helps redirect the plant’s energy toward healthier foliage and new growth. Yellowing leaves may indicate insufficient moisture or nutrients, which can hinder plant growth. By removing these leaves, you are reducing the leaf surface area that the plant needs to support, thus optimizing its energy utilization. Depending on the severity of the yellowing, just a visual inspection can often reveal the leaves that need to go. Healthy leaves should feel firm and vibrant, while unhealthy leaves might appear limp or even feel softer than usual. Additionally, observe for any speckling or discoloration patterns; heavy spotting may indicate pest issues necessitating further action. If pests are identified, immediate treatment can prevent further stress to the plant, which can compound issues like yellowing.
A common mistake many gardeners make is waiting too long to trim back leaves that have already yellowed significantly. This delay can lead to further stress on the plant, affecting the health of the roots and causing more leaves to die prematurely. Always evaluate the affected leaves promptly to give your peace lily a fighting chance at recovery. If you notice that more than 50% of the leaves have turned yellow, it may signal a deeper issue, such as ongoing stress from poor environmental conditions or root issues that are not easily fixed by trimming alone. In this case, investigating the root system may reveal weaknesses or damage. If two or more adjacent leaves appear to be yellowing, it may indicate localized root health issues that require additional diagnosis, such as checking for root rot or evaluating moisture retention.
Step 2 – Assess Watering Issues Causing Leaf Discoloration
Check your peace lily’s soil moisture levels right away. You will find whether the soil is too dry or overly saturated, which will guide your next steps in refortifying the plant. Use your finger to test the top inch of soil; if it feels dry, it’s time to water. Ideally, the soil should maintain a consistent moisture level akin to a damp sponge, but not soggy. During dry seasons, be particularly cautious; a short period of drought can trigger leaf yellowing more quickly than you might anticipate. If the soil is dry quickly after watering, it might signify too rapid evaporation or insufficient humidity levels around the plant.
Peace lilies thrive in evenly moist soil but can suffer greatly if their conditions fluctuate too much between dry and wet. If the soil feels dry to the touch and has not been watered recently, the plant could be suffering from underwatering, which produces yellowing leaves. Conversely, overwatering leads to root rot, which results in yellow foliage as well. If the soil appears compacted or repels water, it may prevent moisture absorption, indicating a need for repotting and a fresh soil mix tailored to water retention. Addressing the specific soil condition can greatly enhance the plant’s recovery. If the soil appears dry but isn’t cohesive and tends to crumble, this might be a sign to consider repotting with an appropriate mix.
If the soil appears mushy and smells sour, it strongly suggests root rot, which requires immediate intervention to prevent losing the plant altogether. Observe closely for any wet spots or seepage around the pot base. In this case, consider repotting your peace lily in fresh soil and checking the root system for damage. If it remains soggy despite your efforts, it may indicate that the potting mix is not draining well enough for your plant’s needs. Also, if you find that the roots are blackened and mushy, they should be trimmed back to healthy tissue before repotting. If simply repotting does not resolve the issue, evaluate the pot’s drainage holes and consider switching to a container with better drainage capabilities. A pot fitted with a drainage tray could help avoid the water accumulation that typically causes root stagnation. Monitor the bottom of the container for any excess water that may indicate a lack of drainage.
Step 3 – Revive Peace Lily with Balanced Nutrient Boost

Start by providing your peace lily with consistent moisture to combat yellowing leaves. Water the plant thoroughly until excess drains from the bottom, and check the soil’s top inch; it should feel slightly damp but not soggy. After a week, observe new leaf growth or a change in color, signaling recovery. To prevent recurrence, establish a routine watering schedule based on the season, ensuring to check moisture levels weekly during dry months.
The recovery timeline usually spans one to two weeks, during which you should notice the plant responding positively. If yellowing continues after this period, the plant may still be experiencing underwatering or low humidity, which triggers further stress. If soil moisture feels adequate but leaves remain yellow, check for root rot caused by overwatering, which can also disrupt recovery efforts.
A common mistake during the recovery-prevention transition is not adjusting the watering technique based on humidity levels. If your peace lily is still yellowing despite consistent watering, reassess the humidity in the environment; insufficient humidity can exacerbate leaf yellowing. On the other hand, if the leaves are wilting along with yellowing, decrease watering frequency to prevent root suffocation.
Recovery from yellowing can take about 2-4 weeks, depending on the plant’s health and environmental conditions. Observe how quickly the leaves return to firmness and the vibrancy of their color. If you notice leaves yellowing again despite regular watering, assess humidity levels; dry indoor air from heaters can reignite the problem. If you’re experiencing extreme fluctuations in air moisture, consider using a humidifier or placing a tray of water near the plant to maintain optimal conditions. Additionally, a pebble tray can help increase humidity around your peace lily, especially during the dry winter months. Continue monitoring the leaf texture, as a return to firmness typically indicates proper hydration.
A common mistake during this transition is over-correcting with fertilizer, which can lead to nutrient burn and further leaf damage. Instead, focus on consistent watering, and only fertilize when the plant exhibits strong recovery signs for at least a month. If leaves still wilt despite proper watering, check for root rot by removing the plant from its pot and inspecting the roots; healthy roots should appear white and firm, while brown, mushy roots indicate decay. Over-fertilizing can also lead to salt buildup in the soil, which can inhibit the plant’s ability to absorb water, so if you notice a white crust on the soil surface, this may be a sign to flush the soil with plain water to leach out excess salts. If the plant does not respond after substantial monitoring, reconsider the fertilizer being used, as different formulations might vary in effectiveness.
Nutrient replenishment can significantly affect how well the peace lily recovers. During dry seasons, indoor plants often lack the necessary nutrients they would ordinarily get from a balanced ecosystem. Using a water-soluble fertilizer diluted to half strength when recovering can provide the necessary nutrients without overwhelming the plant. Ensure the fertilizer you choose contains an even mix of nitrogen, phosphorus, and potassium, typically represented as N-P-K ratios of something like 10-10-10 or 20-20-20. This careful dosage helps the plant regain its health without risking nutrient burn. Pay attention to how the plant reacts to the fertilizer over time, and be prepared to adjust based on visible changes.
Step 4 – Inspect Leaves for New Yellowing Signs Weekly
Check the leaves of your peace lily for any new yellowing signs every week. You should observe the overall health of your plant improving with minimal leaf drooping or discoloration. Focus on inspecting the area beneath the leaves and near the stems, as these spots may reveal issues unseen to the casual observer. Setting a designated day each week for this task can help make it a part of your routine and ensure timely intervention when necessary. Carefully look for spotting or pests during these inspections, as these factors can significantly affect health. If scaling insects or webbing is observed, immediate action is necessary to mitigate further damage.
A fully recovered peace lily will produce vibrant green leaves without yellowing, indicating successful restoration. Leaves that are firm to the touch and show no signs of browning or wilting demonstrate effective recovery, but keep an eye out for early signs of yellowing, which may suggest inadequate care or environmental stress. If you spot yellowing, it may signify that soil moisture is still inconsistent or that pests are affecting the plant. Inconsistent watering can be particularly concerning; if the plant still exhibits stress after correcting moisture levels, it’s essential to consider environmental factors such as humidity or light exposure. Peace lilies prefer moderate to bright indirect light; too little light can worsen yellowing, following the same principle that insufficient light inhibits photosynthesis. If you suspect light levels are inappropriate, consider relocating the plant gradually to avoid shock.
If yellowing returns despite previous interventions, consider adjusting your watering schedule to match the humidity levels more accurately. For example, if the environment remains dry, frequent light watering sessions may be required. Additionally, closely inspect the foliage for pests that could be contributing to the problem, such as spider mites or aphids. Effective pest management is crucial; not only should you remove any visible pests with a gentle stream of water, but you should also follow up with neem oil or insecticidal soap to ensure pests do not return. Monitor the effects of treatment closely; if the plant continues to show signs of stress post-treatment, it may indicate that the issue was not entirely resolved, or an environmental factor persists.
FAQ
How long will it take for my peace lily to recover from yellowing leaves?
Recovery can take anywhere from one to four weeks, depending on the severity of the issues affecting the plant. Ensuring consistent moisture and proper nutrition significantly speeds up this process. Additionally, a stable environment in terms of temperature and light exposure aids recovery; if these factors are volatile, it could prolong the healing process. If the plant was severely compromised, several weeks may be necessary before you notice visible improvements, especially if you encounter issues such as root rot.
Should I remove all the yellow leaves immediately?
Yes, all visibly damaged yellow leaves should be trimmed away to focus the plant’s energy on healthy growth. However, ensure that you do not over-prune, as some older leaves can support the plant during recovery. For instance, if you have a leaf that is only slightly yellow but otherwise strong, leaving that leaf may help in photosynthesis. Be mindful to sanitize the tools used during this process to prevent transferring any disease to other areas. Regular pruning should be scheduled during times when the plant isn’t actively growing to minimize stress on the peace lily. Additionally, if signs of regrowth appear from a cut leaf, that could indicate effective recovery.
What signs indicate that my peace lily is not recovering?
New yellowing or browning of leaves, wilting despite consistent watering, or persistent mushy soil can suggest that the plant is not on the road to recovery. In such cases, reassess your care routine for any adjustments, like watering techniques or light exposure. Additionally, if you notice more than two leaves drooping simultaneously, that can suggest root stress or insufficient root health. Finally, watch closely for remaining moisture in the potting medium; if soggy conditions persist even after watering adjustments, it may be time to evaluate the drainage setup, potentially signaling the need for a drainage upgrade or repotting.