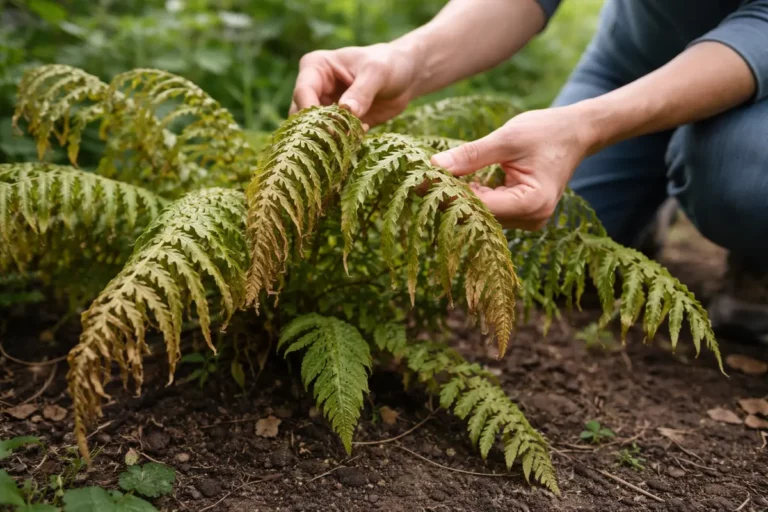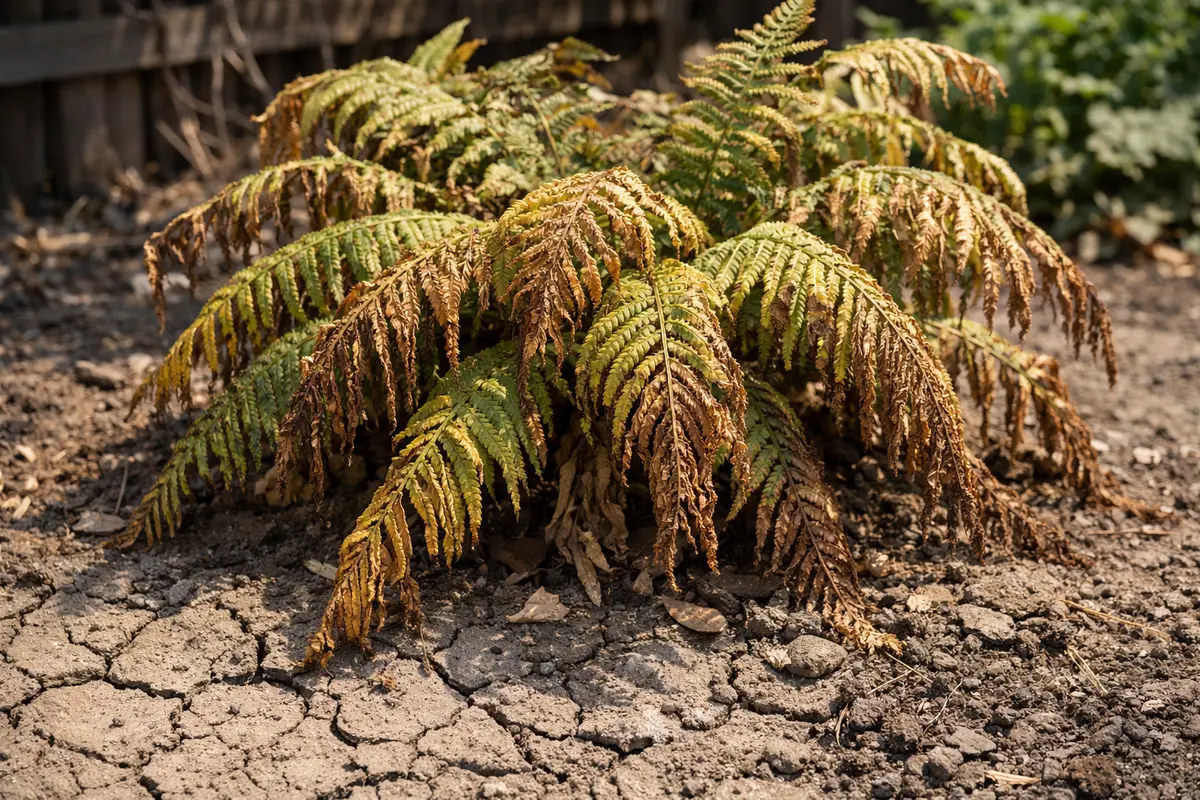
You might notice your ferns looking tired and drooping after an extended drought, which is why you need to know how to fix drooping outdoor ferns after a drought. This wilting indicates that they’re struggling with moisture loss, leading to a decline in their vitality. If left unaddressed, the problem gets worse, making recovery harder, but you can still improve their condition by watering deeply and adjusting their environment for better humidity.
Step 1 – Water Drooping Ferns Immediately
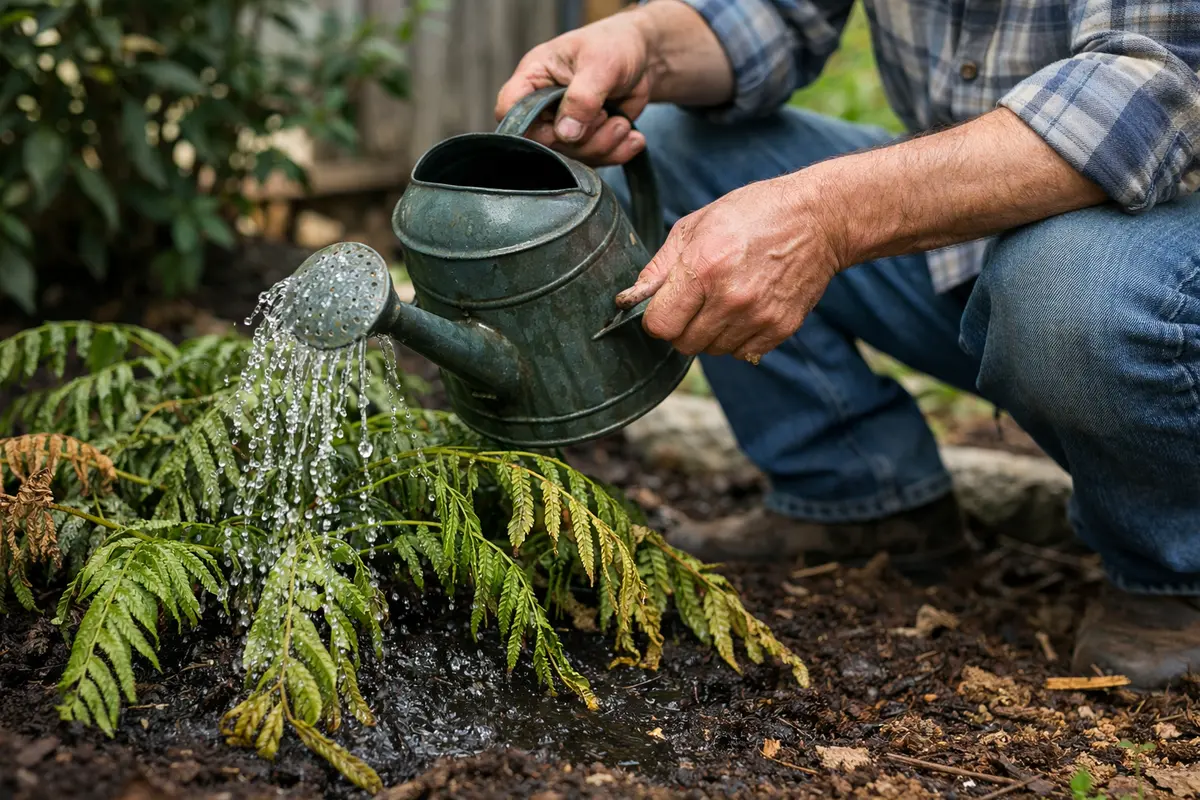
Water the drooping ferns thoroughly to quickly restore moisture. You will observe the leaves beginning to firm up within a few hours, indicating a response to the hydration. Ensure that the water penetrates the soil enough to reach the root zone, which is typically about six to eight inches deep for most fern species. It’s essential to visually check that water is pooling at the base of the plant, which indicates deep saturation. An ideal strategy is to apply water slowly, allowing it to soak into the soil rather than run off the surface.
Acting swiftly is crucial because ferns absorb water through their roots, and prolonged drought can lead to cellular damage. When the soil is dry, roots can’t take up essential nutrients, causing leaves to droop. Quick, deep watering helps rehydrate the plant and prevents further stress. For the best results, use a soaker hose or a watering can to deliver water directly to the base of the fern, allowing for a gradual soak. If you notice water running off instead of soaking in, pause for ten minutes to allow the soil to absorb before continuing to water. In extreme drought conditions, consider watering in multiple stages to enhance absorption.
A common mistake gardeners make at this stage is to provide shallow watering, which fails to reach the deeper roots. Instead, water directly at the base of the ferns until moisture seeps about six inches down into the soil. If the top layer remains dry, moisture will not effectively reach the roots, prolonging the ferns’ suffering. If the fern is in a container, ensure that excess water drains out of the bottom to prevent waterlogging; stagnant water can trigger root rot and exacerbate the drooping. Check the drainage holes; if obstructed, clear them to allow free movement of the water. Rotating the pot occasionally can also help ensure all parts of the root system receive adequate water and nutrients.
Step 2 – Check Soil Conditions Causing Drought Stress
Inspect the soil around the ferns for moisture retention and drainage capacity. You will see if the soil feels dry, compacted, or clay-like, which may indicate poor drainage contributing to drought stress. Taking a handful of soil should feel crumbly, not rock-hard, for successful fern growth. If the soil crumbles easily, it shows it’s aerated, promoting healthy root conditions. Conversely, hard, clumped soil can signal compaction issues that restrict root growth and nutrient intake.
Healthy ferns require well-aerated soil that drains properly while retaining moisture. If heavy clay compacts the roots, it may prevent adequate oxygen and water from reaching them, causing stress. Identifying poor soil conditions enables targeted corrections, essential for recovery. In severe cases, mix in organic matter, like peat moss or compost, to improve soil texture and increase moisture retention while avoiding compacting issues. Keep an eye on soil texture; if it feels sticky when wet, it indicates high clay content, which can hold too much water, leading to potential root rot.
If the soil smells sour, this suggests root rot, which requires immediate attention. In such cases, remove any affected roots, lightly aerate the remaining soil, and amend with compost to improve texture and drainage. Always ensure that your fern’s planting site supports good drainage and aeration to prevent recurrence. Additionally, consider creating raised beds for ferns in poorly draining areas to enhance root health. If the drainage remains problematic, consider relocating the ferns to an area with better-permeable soil. Throughout this process, check the surface for signs of crusting, which can also indicate a lack of moisture penetration.
Step 3 – Test Soil Moisture for Fern Recovery
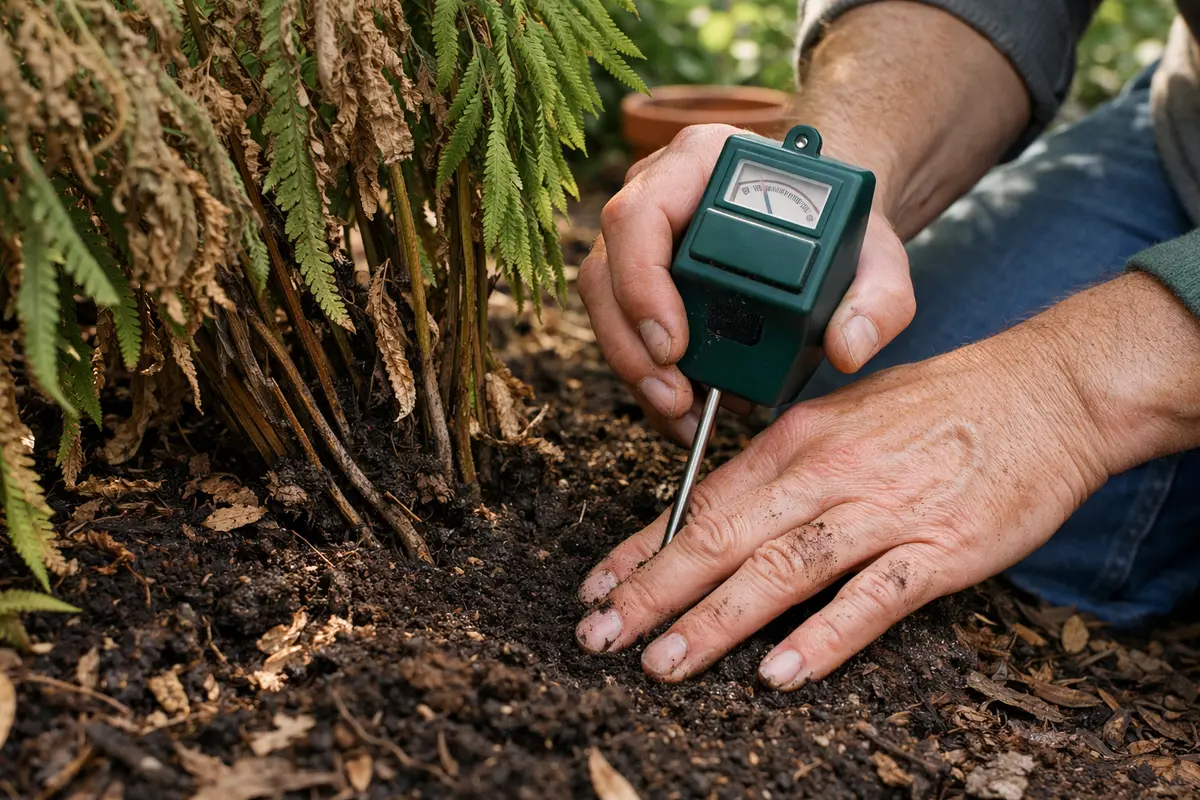
Check the soil moisture levels using your finger or a soil moisture meter. You will notice how the soil feels—if it’s dry more than two inches below the surface, your ferns are still stressed. This check confirms whether your initial watering was sufficient. Using a soil moisture meter provides an accurate reading and can help establish a watering routine moving forward, targeting areas that may dry out faster due to sun exposure. Aim for consistent, damp soil below the surface, avoiding conditions where the soil remains soggy.
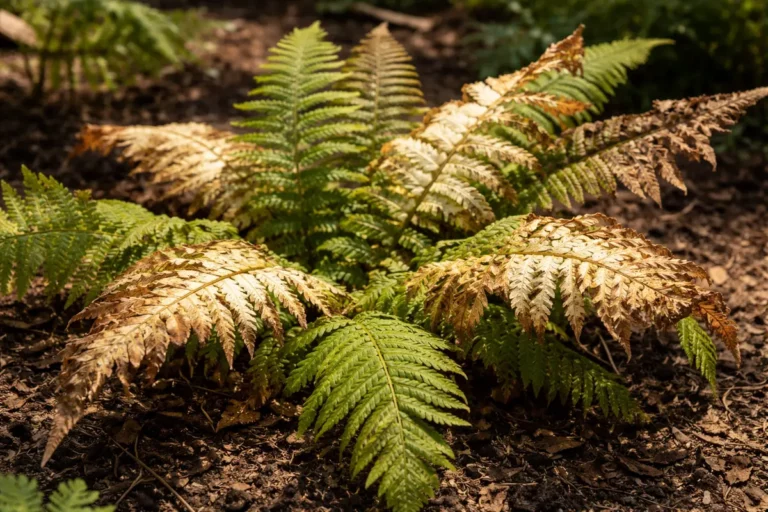
Understanding how to distinguish between drought stress and other issues like overwatering is vital. Drought-stressed ferns usually have dry, crispy edges on their leaves, while overwatered ferns often exhibit yellowing leaves, wilting, or mushy stems, indicating a need for air to get to the roots. Recognizing these distinctions helps tailor your approach to effectively meet the plants’ needs. If you’re uncertain, check multiple spots around the fern to confirm consistent moisture levels; dry pockets often mean uneven watering.
If you’re uncertain whether the soil is adequately moist, take a sample from below the surface. If it’s cool and damp, your watering efforts are on track. Conversely, if it remains dry, reevaluate your watering strategy to ensure you are supplying enough moisture to the roots. Pay attention to pot types; ceramic pots retain moisture more than plastic ones, leading to different watering needs. Additionally, check if sunlight exposure is uneven, which can cause certain parts of the plant to dry out faster than others. On particularly warm days, consider combining soil testing with tactile checks to ensure consistent moisture distribution throughout the root zone.
Step 4 – Fertilize Ferns to Promote New Growth
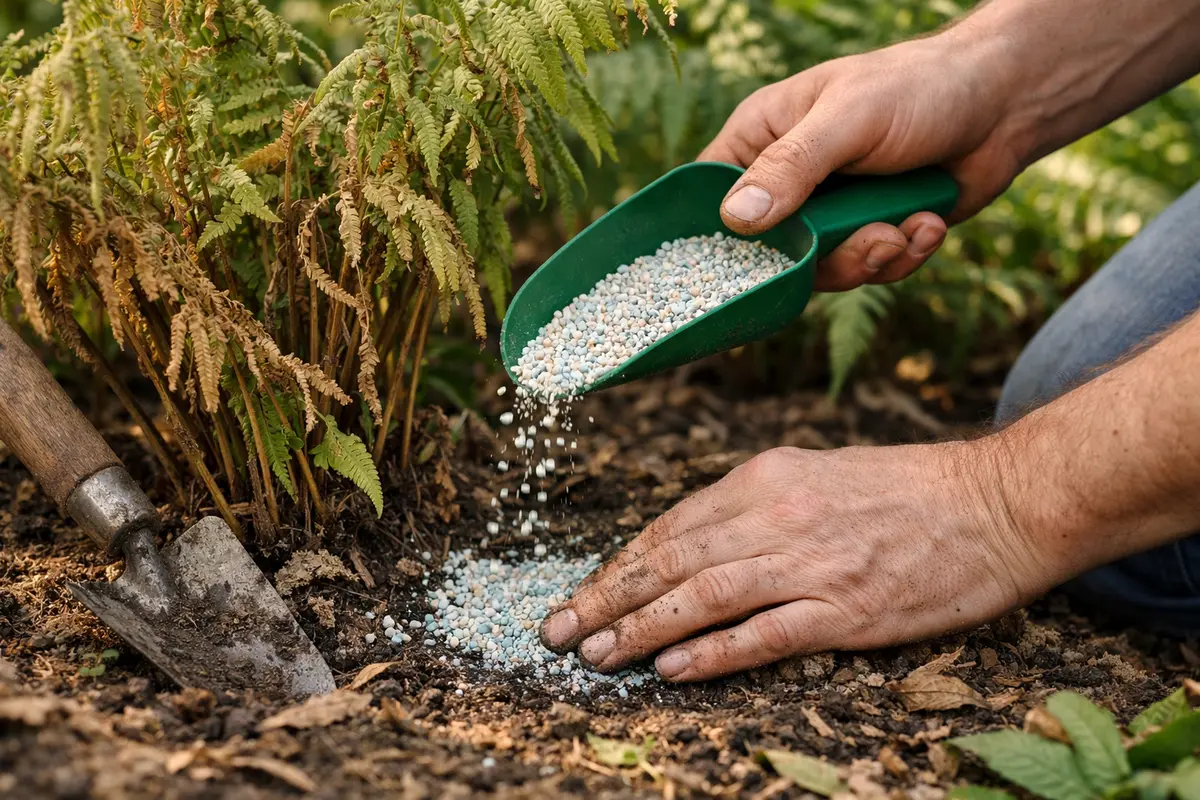
Apply a balanced, slow-release fertilizer to the base of the ferns after confirming adequate moisture levels. You will start seeing signs of new growth, such as fresh green fronds, typically within two to four weeks. Fertilizing helps replenish nutrient levels that may have diminished during the drought, playing a crucial role in recovery. Make sure the fertilizer matches the specific nutrient requirements of the fern type being cultivated, as different species may have unique needs.
Fertilization is effective after watering as hydrated roots can absorb nutrients better. Within 2-3 weeks, healthy plants will begin to push out new green growth, a positive indicator of recovery. In this period, keep an eye out for signs of nutrient deficiency, such as yellowing fronds with green veins, which can give clues about nitrogen requirements. Regular monitoring of nutrient levels can help identify if additional feeding is required in the future; soil tests every few months can help fine-tune long-term nutrient strategies.
A common error to avoid during recovery is over-fertilizing, which can burn the roots if the plants are still in a weakened state. Stick to the recommended dosage on the fertilizer package and fertilize only once the plants appear to be actively growing. If your ferns show signs of nutrient burn, such as browning tips or leaf wilting, cease fertilization immediately and allow the plant to recover before reintroducing nutrients. Timing is critical; consider conducting a soil test before applying fertilizer to ensure you’re complementing rather than disrupting their recovery efforts. Watch the overall health; if new growth appears stunted or discolored, it might indicate over-fertilization or mineral imbalances needing adjustment.
Step 5 – Water Regularly to Prevent Future Drought Stress
Start by regularly watering your ferns during dry spells, providing about one inch of water weekly. This consistent moisture will prevent drooping and encourage a more stable, upright growth habit. Develop a routine for checking moisture levels to ensure that plants receive adequate hydration; consider setting reminders during peak summer so that routine isn’t overlooked. When adjusting the schedule, account for seasonal changes and regional climate variations.
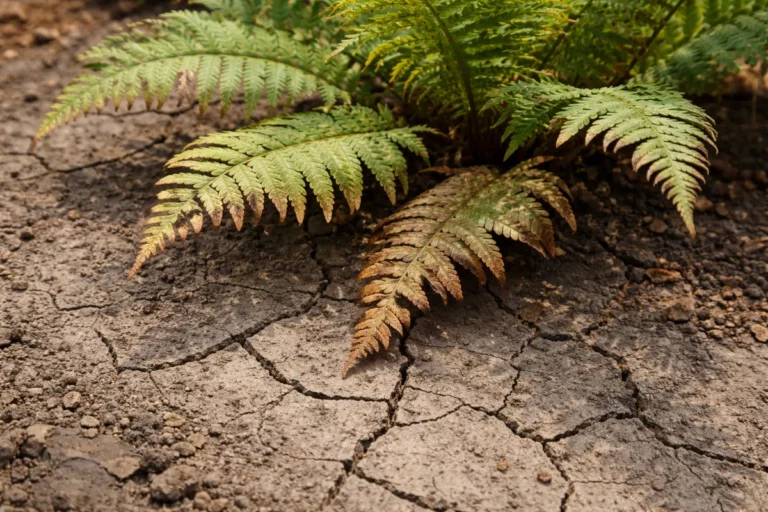
Prolonged drought conditions can cause soil to become compacted and hydrophobic, complicating water absorption by roots. By adopting a thorough watering routine, you can ensure that the soil remains porous, allowing moisture to penetrate and reach the roots effectively. If your ferns are wilting despite regular watering, check for signs of compacted soil or root rot. Conduct an initial check of soil texture and consistency to ensure it remains conducive to healthy growth. If you notice soil pulling away from the pot edges, this indicates severe drying that may require additional watering sessions until moisture levels normalize.
During the hotter summer months, consider increasing your watering frequency to twice a week or adding mulch around your ferns to retain soil moisture. Also, using a moisture-retaining gel or other additives can significantly help during peak dry conditions. Implementing a shading strategy on extremely hot days can protect your ferns from excessive heat stress, reducing the chances of drooping even further. If you notice cracks forming in the soil surface, this is a clear sign of needing to adjust your watering strategy. Regularly observe the leaves; if they begin curling inward, it could indicate moisture stress, necessitating immediate action.
Regular watering patterns, about once a week or more frequently during extreme heat, prevent soil from drying out completely. Healthy, moist soil can support robust ferns, enabling them to better withstand changes in weather conditions. Consider mulching with organic materials like pine needles or wood chips, which will break down over time, enriching the soil further. During extremely hot days, aim to water either early in the morning or late in the evening; this timing minimizes water loss from evaporation and maximizes soil absorption, directly benefiting root health.
Step 6 – Look for New Growth in Ferns Post-Treatment
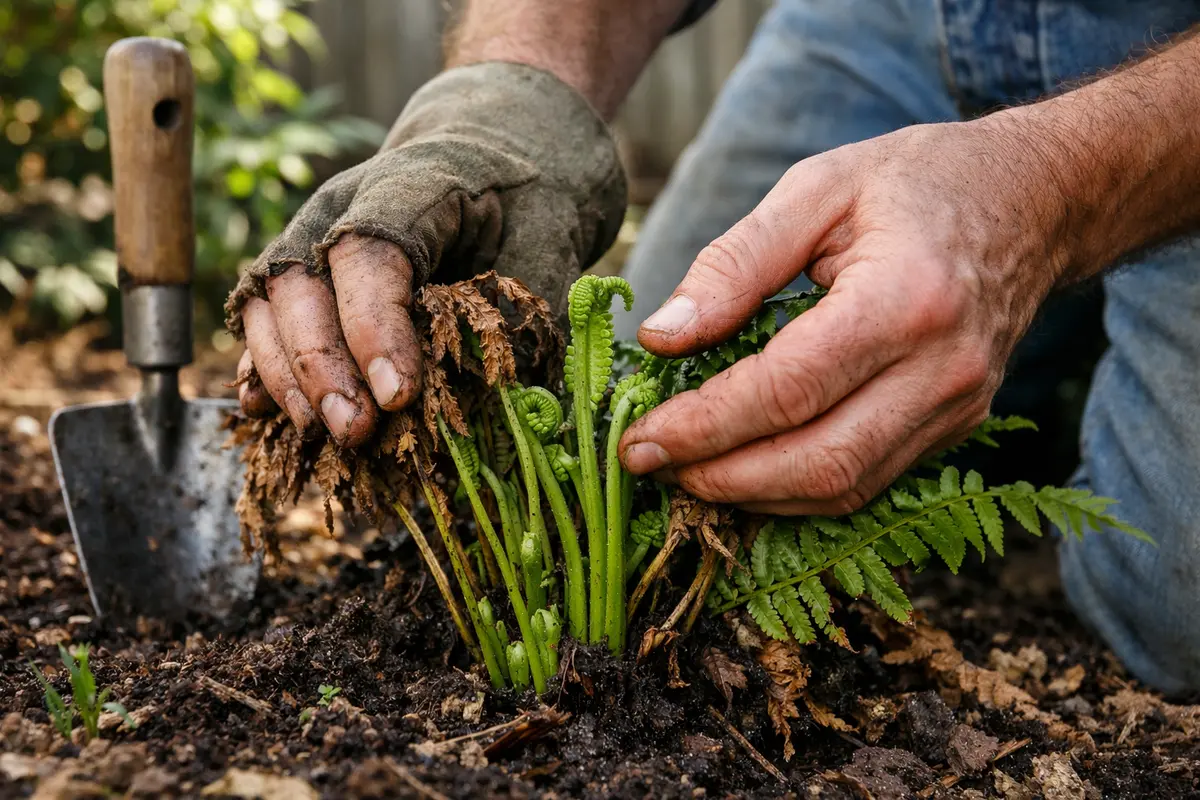
Monitor the ferns regularly, checking for new growth and overall improvement in leaf condition. You will want to observe greener leaves and firm stems as indicators of successful recovery, with rechecks happening every 2-3 days following the treatment. Regular assessments are critical to ensuring that the ferns are indeed recovering, and maintaining a journal of progress could be helpful. Sudden drops in leaf turgor or the emergence of new pests should prompt immediate investigation.
After treating your ferns, recovery usually manifests as fresh, vibrant growth that signifies improvements in overall health. Track visual signs regularly, noting any reappearance of wilting or stress, as these may indicate ongoing issues with soil moisture or root health. Additionally, if new fronds appear curled or discolored, this could hint at persistent stress issues that need further addressing. The emergence of new fronds offers tangible evidence that previously taken corrections are having the intended effect; keep an eye on your watering schedule and adjust it as necessary based on observed conditions.
If the drooping returns or does not improve within a week, reevaluate your watering schedule and the effectiveness of soil conditions. If you encounter persistent issues, it may be beneficial to integrate moisture-retention aids into your soil mix or explore potential pest infestations. Testing the soil again will help identify moisture retention issues that may still affect your ferns and expanding your monitoring system can include checking for pest activities in the surrounding area or under leaves. Remember that if you continue encountering problems, consulting with a local gardening expert may provide tailored advice specific to your environmental conditions.
FAQ
How long will it take for my ferns to recover after a drought?
Recovery can take anywhere from two weeks to a month, depending on the severity of the drought and how promptly corrective actions are taken. Initially, you can expect to see new growth within 2-4 weeks following adequate watering and fertilization. If environmental conditions are ideal, recovery may occur sooner; however, keep monitoring for signs of stress that may indicate deeper issues.
Can drooping ferns spread their issues to nearby plants?
While drooping is primarily a symptom of individual plant stress, if the cause is a disease or pest, there’s a risk of transference. It’s essential to monitor neighboring plants closely for similar symptoms to prevent widespread issues. Implementing a routine inspection schedule can assist in identifying potential problems early, allowing for timely interventions and ensuring your entire garden remains healthy.
Should I remove any fronds from my drooping ferns?
Yes, removing damaged or dead fronds can help direct energy toward healthier parts of the plant. Trim only the visibly damaged fronds and monitor for new growth to determine if further pruning is needed. However, ensure that cuts are made with sterilized tools to prevent introducing pathogens into the plant, and consider pruning during the plant’s dormant period for better recovery.