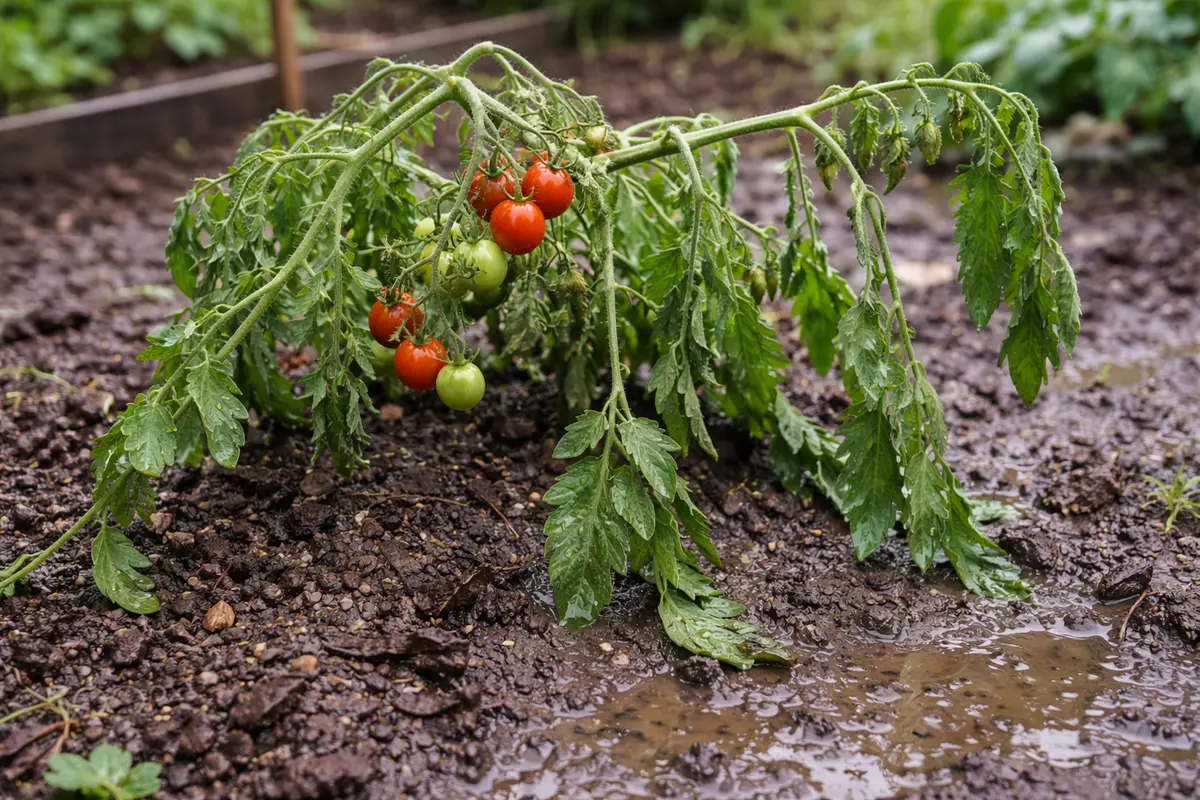
You may notice your cherry tomato plants looking a bit limp and lifeless after a heavy rain, which is why you need to know what to do when cherry tomato plants are drooping after rain. This drooping occurs when the roots struggle to absorb water properly, leading to wilting in the leaves and stems. If ignored, this condition gets worse and can weaken the plant, making it harder to fix later on. Addressing it now allows you to inspect, adjust, and improve the growing conditions for your tomatoes before any lasting damage occurs.
Step 1 – Assess Stressed Tomato Plants Quickly
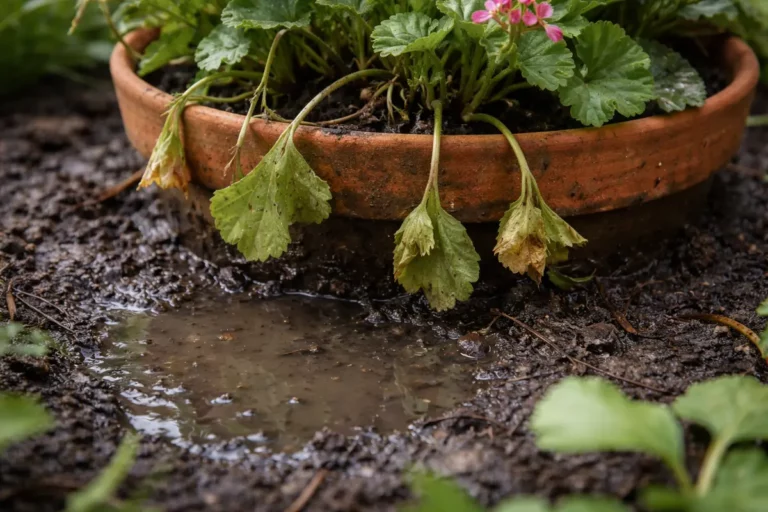
Start by checking the soil moisture level around your tomato plants. You will find the soil may feel overly wet or saturated, which indicates potential waterlogging. This immediate action prevents further stress to the plants and halts deterioration. A moisture meter can provide a clear read on soil saturation levels, particularly if you suspect uneven moisture retention. For instance, if the meter reads over 30% moisture, immediate intervention is warranted. Alternatively, feel the top two inches of soil with your fingers; if they feel muddy or cold, your plants are at risk of becoming waterlogged.
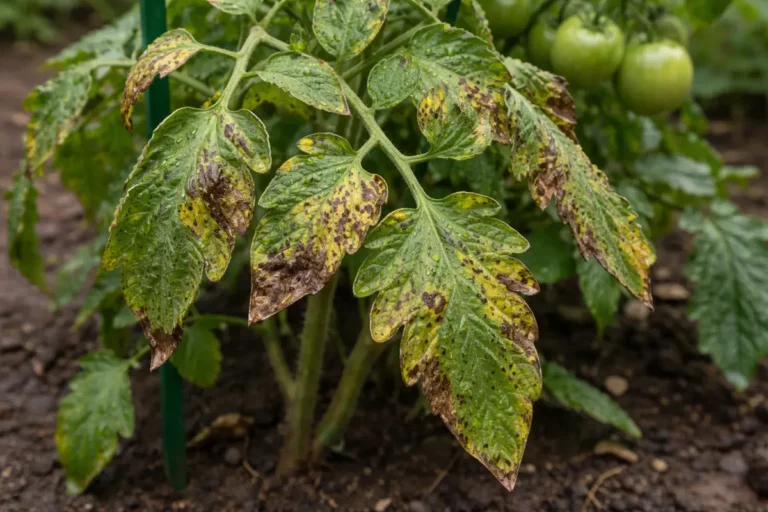
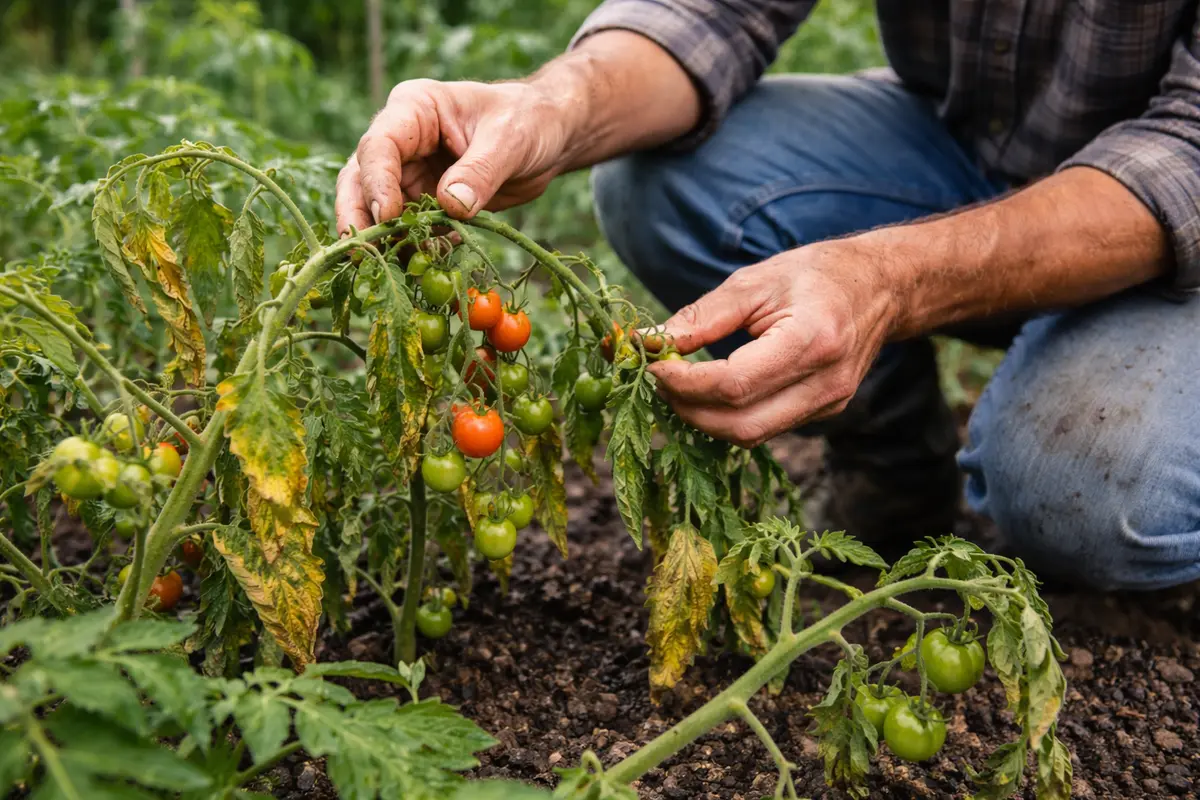
Healthy tomato roots require oxygen, and waterlogged soil can suffocate them, which manifests as drooping leaves and stems. When water saturates the root zone, the roots cannot absorb essential nutrients, leading to further wilting of the leaves. Acting quickly prevents roots from deteriorating further and allows you to address any water retention issues effectively. Pay special attention to whether the leaves feel mushy or display visible yellowing, as these symptoms can indicate that the plant is not merely wilting but that root health is compromised. If several leaves are yellowing, it’s critical to respond to this signal promptly, as it often shows that root health has begun to decline.
A common mistake gardeners make at this stage is to assume that all soil is equally absorbent. For example, if you’re working with heavy clay soil, it can hold moisture much longer than sandy soil. If you dig down about 2-3 inches and the soil feels consistently wet at that depth without any dry spots, your plants are already suffering. Compacting soil layers may also trap water and further exacerbate the drooping. If the soil retains moisture too long, the drooping could lead to severe wilting or even plant death later on. Timely inspection can save your plants, especially when rainfall follows a prolonged dry spell, creating sudden saturation issues. If last week was hot and dry followed by unexpected rainfall, check quickly, as this contrast may lead to a rapid drooping response. If conditions look unfavorable, immediate planning for water management is crucial, as this can mitigate further plant stress.
Step 2 – Determine Waterlogging Impact on Tomatoes
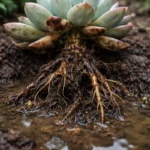
Dig into the soil around your tomato plants to examine the depth of water saturation, which often becomes crucial in determining root health. Once you’ve assessed the soil, you might notice that the top few inches are overly wet while the deeper layers remain dry. This tells you that the roots are likely struggling for both water and oxygen. For instance, if soil from 2-4 inches down is dry while the surface layer feels muddy, urgent action is needed to alleviate root stress. If upon squeezing, the upper layer seems like sludge but deeper soil appears dusty, then the impact of water retention on root health is evident. If you find that the soil depth is somewhat consistent but muddy near the roots, it could indicate the start of root rot.
Waterlogged roots can turn mushy, turning visibility into potential root rot, a fungal condition that can be fatal for tomato plants. Identifying the level of saturation helps you decide whether to improve drainage or consider other interventions. The prompt action here is critical—if you leave the plants in such conditions, the situation may worsen, affecting the overall health and productivity of the plants. Pay attention to any unpleasant, sour smells emanating from the soil, as they are strong indicators of potential root rot. A clear sign to inspect is the presence of black or brown roots visible upon digging. Recognizing these signs early on saves resources and helps you track if your initial measures are effective.
If you discover that the topsoil remains waterlogged while deeper layers are dry, it would indicate poor drainage. If roots smell sour or display a mushy texture when checked, they are likely impacted by rot. Promptly remove affected roots, cutting back to healthy white areas if necessary, or consider transplanting to a different location altogether. In contrast, if there’s muck present but roots appear healthy, it could suggest that your plants may not yet be doomed and could benefit from simple inspections of soil moisture and drainage. Check the color of the roots; healthy roots should look white and firm. If the roots remain healthy after addressing surface issues, it suggests that ongoing management conditions may still allow for recovery.
Step 3 – Support Cherry Tomato Plants for Recovery
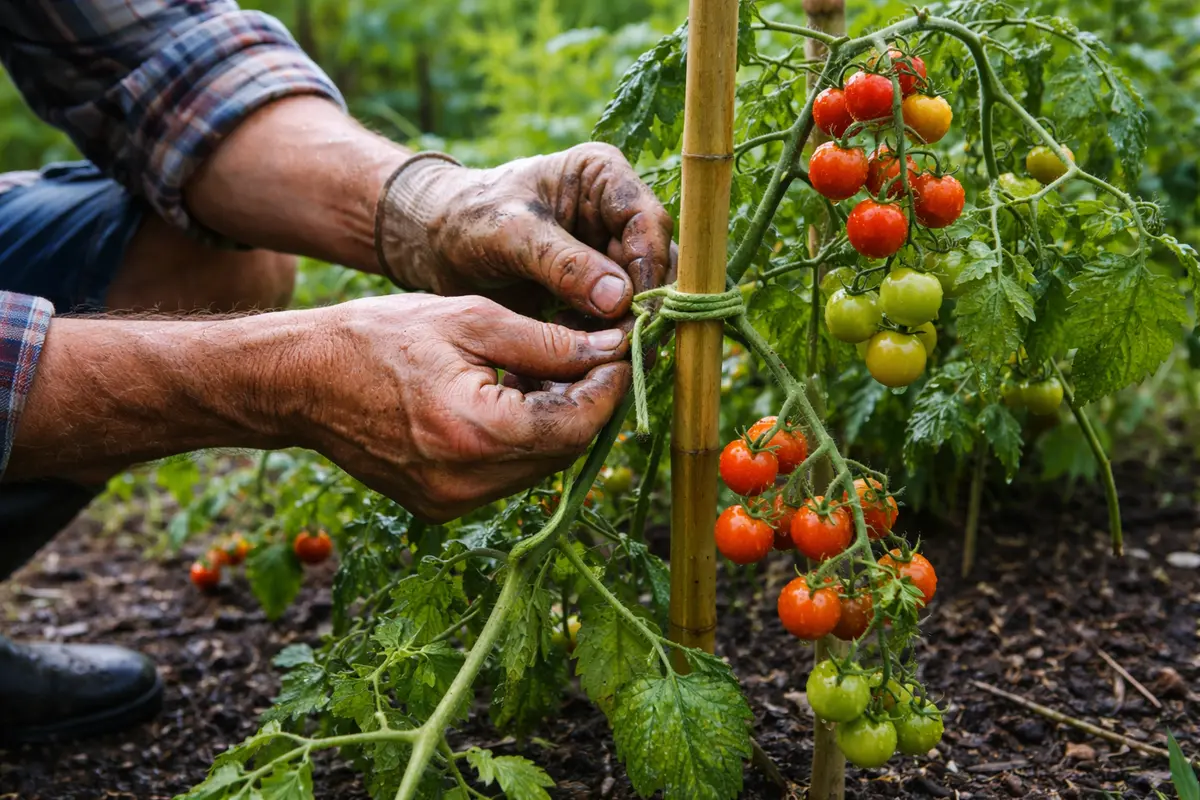
Move affected plants to a sunnier location to help them recover from their drooping state. Ideally, within a few days, you should see improved leaf rigidity and greener appearances resulting from this simple action. The additional sunlight promotes faster evaporation of excess moisture and supports overall healing. If relocating, aim for a spot that offers at least 6-8 hours of sunlight every day, as this can significantly enhance their recovery momentum. If the new location allows for better air circulation, also monitor closely for any changes in temperature or humidity that can further influence their recovery.
Providing light and well-aerated conditions is crucial for recovery. Ensure that the soil is well-drained—this prevention technique stops excess water from accumulating again, facilitating faster recovery processes. If necessary, consider repotting your tomatoes into a mix that includes perlite or vermiculite for improved drainage properties. As an example, mixing one part compost with one part vermiculite can create an ideal medium. When repotting, use a pot that is slightly larger than the current vessel to allow new root growth without encroaching on the remaining healthy roots. Furthermore, observing plants closely after repotting can yield insights into how well they are responding to their new environment.
A frequent misstep during the recovery phase is overcorrecting by watering too frequently or moving the plants back and forth too often. Monitor the soil moisture and adjust watering intervals as needed to avoid potential distress. If you see that the top inch of soil dries out quickly, but others remain moist, this might suggest too much root compaction, thereby inhibiting moisture flow. When applying supplementary watering, make sure to do so less frequently at first until the plants stabilize. Keep track of environmental factors, as moving them to a shaded area too hastily may inhibit recovery as they attempt to regain their strength. Establish a watering schedule that allows the soil to dry out enough to prevent root rot while encouraging healthy moisture levels. If conditions do not seem to improve within a week of relocation, reevaluate container size and drainage solutions.
Step 4 – Check for New Wilting Signs Regularly
After heavy rain, start by checking the soil moisture around your cherry tomato plants. Observe if the soil is soggy or waterlogged, which can lead to root stress. Recheck the moisture levels in a few hours or the next day to see if they have improved; the soil should begin to drain and feel less compacted.
A fully recovered cherry tomato plant features upright leaves that are firm and vibrant green, indicating active photosynthesis and healthy structure. In contrast, if the leaves start to droop again, you may notice a wilting texture or a yellowing discoloration, both signs of continued stress. If the leaf edges turn brown and crisp, the plants may be suffering from underwatering despite previous rain.
If the drooping persists even after the soil has drained, consider aerating the soil to improve oxygen flow to the roots. If drooping and discoloration continue, increase the frequency of checks, and look for pests or disease that may have entered due to the damp conditions, escalating your intervention as needed.
A fully recovered plant will display vibrant green leaves, a sturdy stem, and showcase no signs of wilting. Use your senses—look for changes in feel and texture, and even smell the soil to detect any anomalies as you monitor plant health. If the leaves start to droop again, or if the soil remains overly moist despite your intervention, recognize that further adjustments are necessary to prevent the issue from returning. Regular inspection allows you to identify patterns in growth or stress, so act promptly when alterations arise.
If new symptoms arise despite following these recovery steps, consider re-evaluating your drainage system or adjusting sunlight exposure once more. If the existing conditions have not improved, you might require further interventions such as alternative potting materials, or the incorporation of organic matter to improve soil structure. Frequent checks will indicate whether your changes yield positive effects. If you observe ongoing drooping, it might become necessary to elevate pots or dig up a plant in severe cases to carefully inspect the roots. Adapting your approach based on careful observation enhances the chances of achieving stability and vitality for your cherry tomato plants going forward.
FAQ
How long does it take for cherry tomato plants to recover from wilting?
Recovery timing can vary based on the extent of moisture stress and environmental conditions. However, most tomato plants show improvement within a week when provided with appropriate sunlight and well-drained soil. Be sure to adjust watering as necessary during this period, ensuring that it corresponds with the plant’s light exposure. Take note of environmental variables such as temperature and humidity; in warmer, sunnier conditions, recovery may occur faster than in cooler temperatures. If recovery is delayed beyond this point, consider re-evaluating soil quality or checking overall environmental conditions for factors that could be impeding growth.
Can waterlogged soil cause root rot in cherry tomatoes?
Yes, waterlogged soil is a primary cause of root rot in cherry tomatoes. If roots sit in soggy conditions for too long, fungi can take hold and damage them, leading to severe health issues or even the death of the plant. Be proactive in checking moisture levels; if the roots appear brown or mushy, it’s crucial to adjust conditions immediately. Be aware of environmental stresses such as extreme heat or dense overcasting, as these can play additional roles in root health. If a foul smell accompanies the condition, consider uprooting the plant to inspect further since this can often be a last step before decay takes hold.
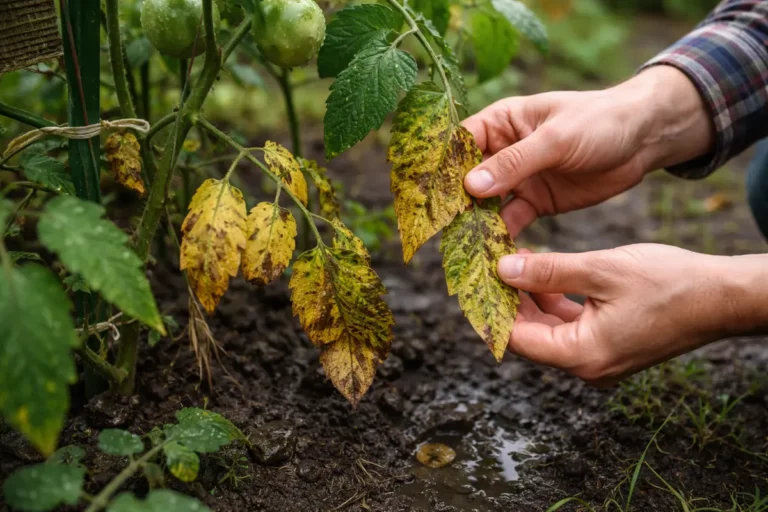
Should I remove drooping leaves from my tomato plants?
Yes, removing yellow or overly drooping leaves can improve airflow and reduce the risk of disease. This action helps the plant redirect energy toward healthy growth and recovery, while diminishing the likelihood of further deterioration. Carefully examine leaves to determine which ones show the most signs of stress. Be sure to use clean, sharp shears for this task, as it minimizes stress to the plant and prevents the introduction of pathogens. If multiple leaves need removal, consider doing so gradually to avoid shocking the plant.