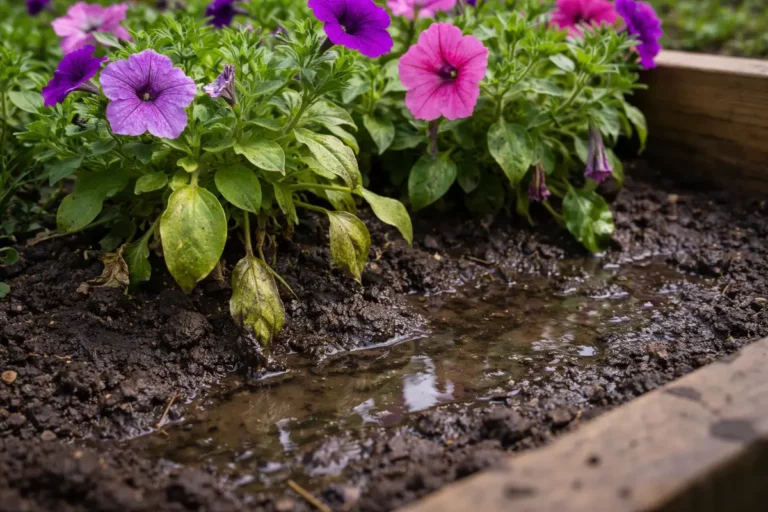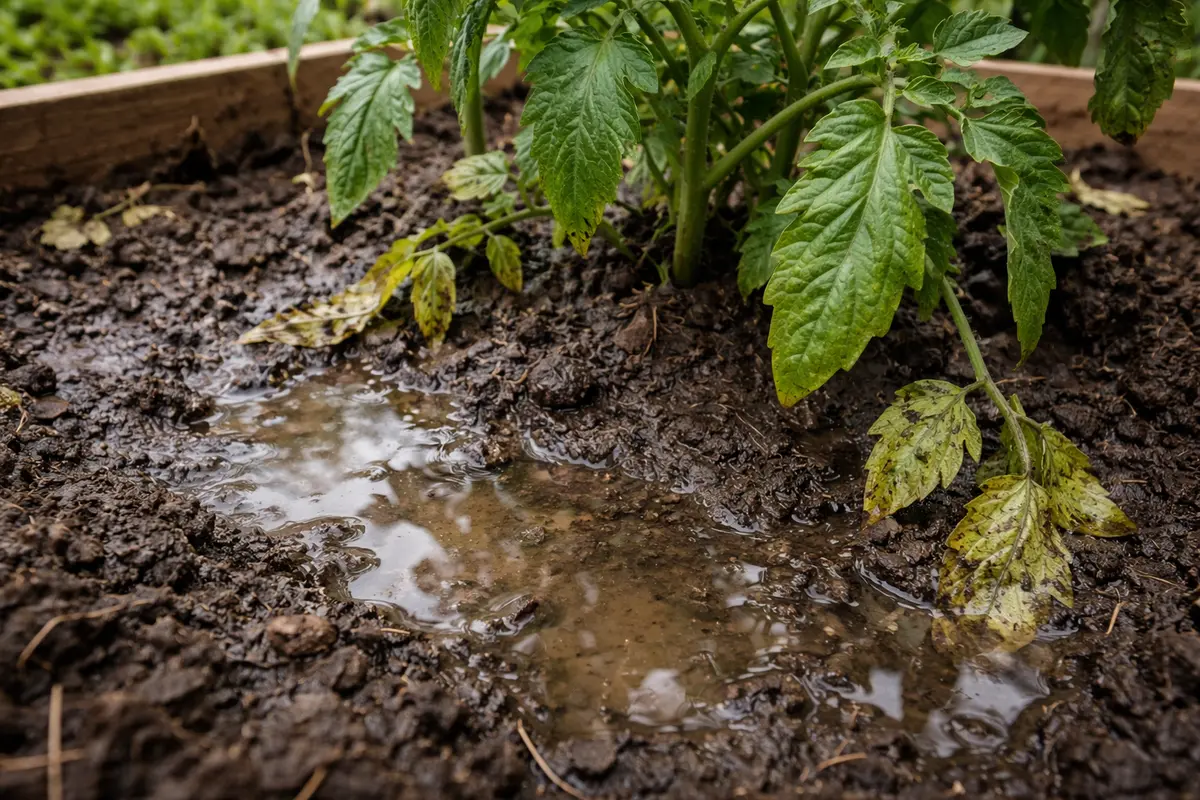
You may notice your raised beds are struggling during spring, with water pooling around the base of your plants, which is why you need to know how to treat poor drainage in raised beds during spring. This excess moisture often leads to problems like yellowing leaves and wilting stems, as the roots drown and suffocate. If left unaddressed, the situation gets worse, weakening the plant and making it harder to fix, but you can improve drainage now by inspecting the soil and adjusting your watering practices.
Step 1 – Dig Out Compacted Soil in Beds
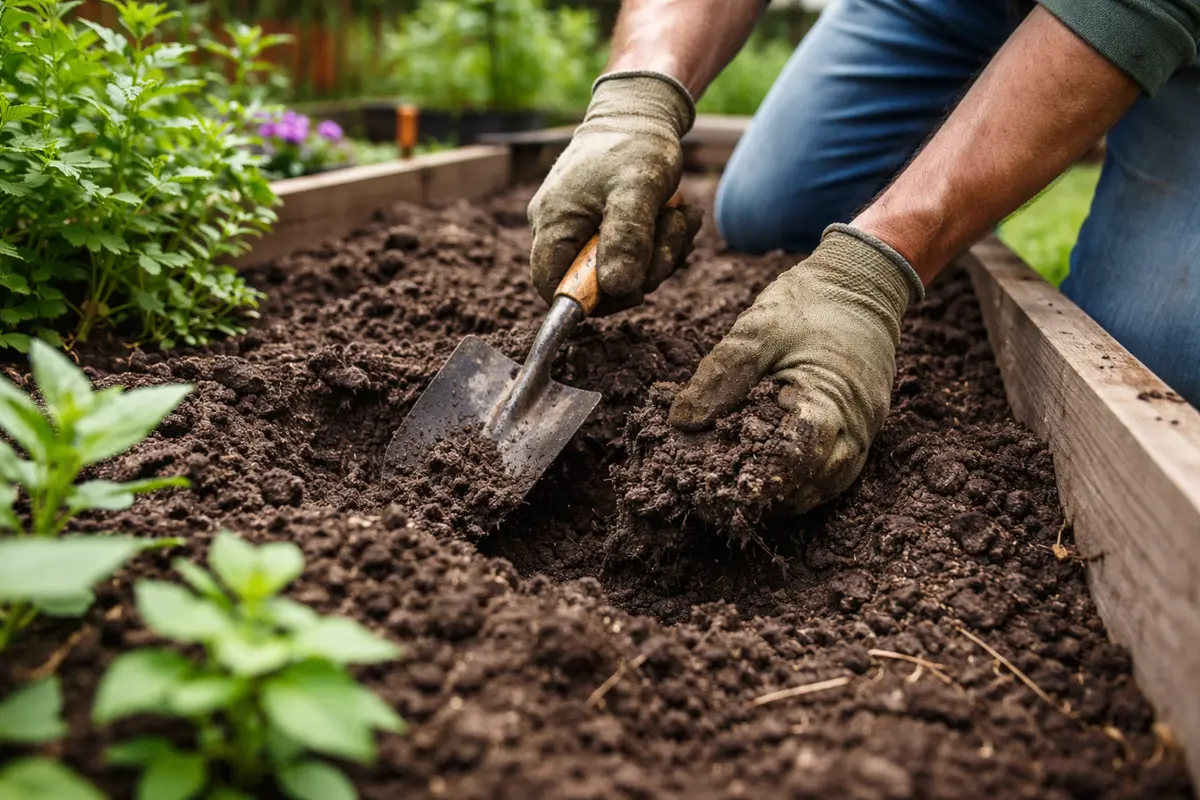
Begin by digging out the compacted soil in your raised beds. You will notice a looser texture and improved air flow immediately after doing this, which facilitates better root respiration. Using a garden fork or broad-headed shovel can help break up the soil effectively.
Compacted soil restricts root growth and water drainage, leading to waterlogged conditions. When the soil is dense, it compresses roots and limits their access to essential resources, which can stunt growth. By loosening this compacted soil, you allow for a significant improvement in aeration, enabling the roots to penetrate more deeply, thus enhancing their ability to uptake nutrients. Aim for a depth of at least 12 inches when digging to adequately address any layers of compaction.
Many gardeners overlook soil compaction, assuming it will remedy itself with time or watering. However, if your raised bed has been in place for several seasons, compacted areas may form from foot traffic or heavy rains. It’s important to check for any signs of compaction, such as a crusty surface or pools of water that remain long after watering or rain. Address this as soon as you see pooling after rains; waiting can lead to even more severe drainage issues which will be harder to mitigate later on and could damage root systems. If you can’t easily insert a trowel into the soil, that’s a strong indicator that compaction is an issue that must be addressed urgently.
Step 2 – Diagnose Poor Drainage Source in Raised Beds
Inspect and identify the root cause of the poor drainage in your raised beds. You will observe a clear distinction between wet and dry spots that can help diagnose the issue. Thoroughly observe the soil after watering; if specific sections remain soaked while others dry quickly, focus on these problematic areas for further assessment. Pushing your finger into the soil can reveal moisture levels—if you notice a thick, wet layer just below the surface, this could point to poor drainage.
Check if the drainage holes in the bottom of your raised bed are blocked or if the soil is too clay-heavy. Heavy clay soil restricts water movement and can retain moisture, leading to root rot. This situation is particularly common in raised beds located in low-lying areas or spots that do not receive adequate sunlight. Understanding whether your soil type is contributing to the drainage problem is essential for effective correction. If the texture feels sticky, this further confirms a clay-heavy composition. Additionally, comparing the conditions of your raised bed to surrounding soil can help determine if the issue is localized or more widespread.
If you discover that your raised bed’s drainage holes are blocked, promptly clear them to prevent any further waterlogging. Seasonally inspect drainage systems; a common oversight is not regularly checking these holes, which can easily become clogged with dirt or roots. To further verify drainage effectiveness, consider pouring a couple of gallons of water into your bed and timing how long it takes for the water to fully drain. If it takes more than 20 minutes, this may indicate the need for more significant amendments. For clay-rich soil, you may need to amend it with organic matter or sand to improve its drainage properties, usually about 25% organic material mixed in will show good results. If the soil smells sour or appears waterlogged, that’s another indicator of severe compaction that requires more aggressive treatment, like extensive aeration or even reconfiguring the bed to ensure better water flow.
Step 3 – Add Organic Matter for Bed Recovery
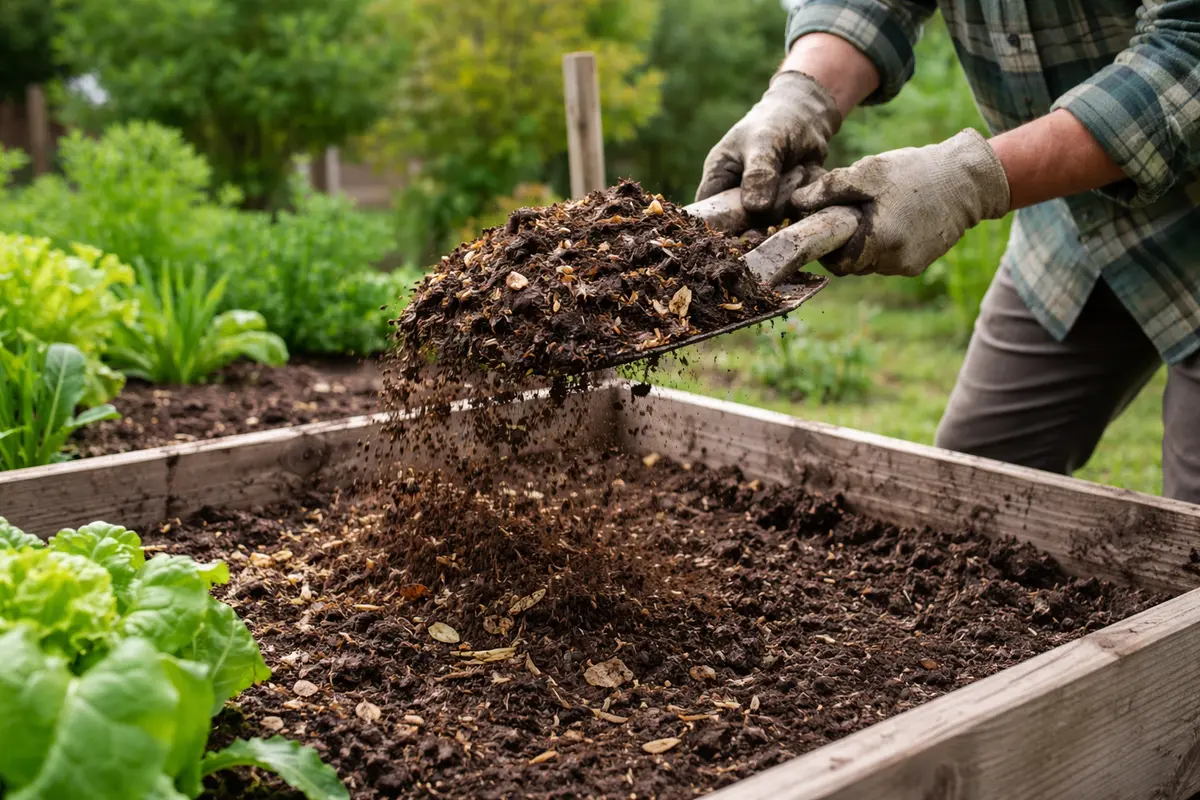
Start by amending your raised bed soil with organic materials like compost or aged manure to improve drainage. Look for signs such as enhanced soil texture and moisture retention, which indicate progress in allowing excess water to escape more effectively.
Recovery typically spans from a few weeks to a couple of months, depending on environmental conditions and plant types. Healthy regrowth can be visible as new shoots emerge and root systems expand. Factors like consistent rainfall or bright sunlight accelerate recovery, while persistent heavy rain or shade can impede growth; if plants seem stunted, check for root rot.
Avoid overwatering during this recovery phase, as this can lead to further drainage issues. While some plants may thrive with additional nutrient input, others, like established herbs, do better with minimal fertilization until they show signs of vigorous growth. If these plants aren’t flourishing, check for waterlogged soil rather than boosting their feed.
The recovery timeline for your raised beds can vary, but you may begin to see visible improvement within 1-2 weeks if conditions are ideal, such as warm temperatures and ample sunlight. Healthy regrowth will appear as vibrant green shoots emerging from the soil and roots spreading deeper. However, if the beds remain overly compacted or shaded, the recovery process may take longer. If you do not observe any signs of new growth within two weeks → check the soil for excessive moisture retention.
A common mistake during recovery is overcompensating with water or fertilizer, which can lead to root rot or nutrient burn. Stick to a moderate watering schedule, ensuring that the top inch of soil dries out before adding more water. Timing matters for specific plants; for instance, cool-season plants will thrive earlier in spring while warm-season crops should not be disturbed until the soil warms significantly.
Organic matter improves soil structure, promoting better aeration and moisture retention without risking water pooling. This amendment works by filling air pockets in the soil, creating a looser texture that allows excess water to pass readily while still holding the necessary moisture. As the organic amendments break down, they will create a healthier environment for plant roots, providing nutrients while improving overall soil drainage. You should see the soil shift from being heavy and dense to light and crumbly, which is ideal for root growth.
A common mistake during this recovery phase is to overwater, thinking that the newly added organic matter will require extra moisture. Instead, it is crucial to allow the soil to adopt its new texture for a few days and monitor how it retains water before adjusting your watering schedule. Observe the soil; it should feel moist but not soggy. The key indicator is that it retains moisture without turning into mud, encouraging strong root development while reducing the chances of root rot due to saturation. If the soil appears too dry within a few days, a minimal light watering could suffice, keeping it moist without flooding. However, be cautious not to flood the area immediately after amendment, as this could counteract your efforts.
Step 4 – Water at Appropriate Times to Prevent Saturation
Start by integrating organic matter, such as compost or well-rotted manure, into the soil of your raised beds to improve drainage. This will enhance soil structure, enabling better water movement and reducing instances of waterlogging, promoting healthier root systems for your plants.
Poor drainage often arises from compacted soil or a lack of aeration, which can create water accumulation during spring rains. By consistently adding organic matter, you counteract compacted layers, leading to a lighter soil texture that allows excess water to flow away while retaining necessary moisture for plant growth. If you notice stagnant water pooling on the surface, it indicates inadequate drainage that needs urgent attention.
During rainier spring months, increase the frequency of adding organic amendments to maintain the soil’s aeration. This proactive adjustment ensures that even after heavy downpours, your raised beds stay well-drained and suitable for new seedlings. For regions prone to heavy snowmelt, consider installing drainage pipes beneath your raised beds to further divert excess moisture away.
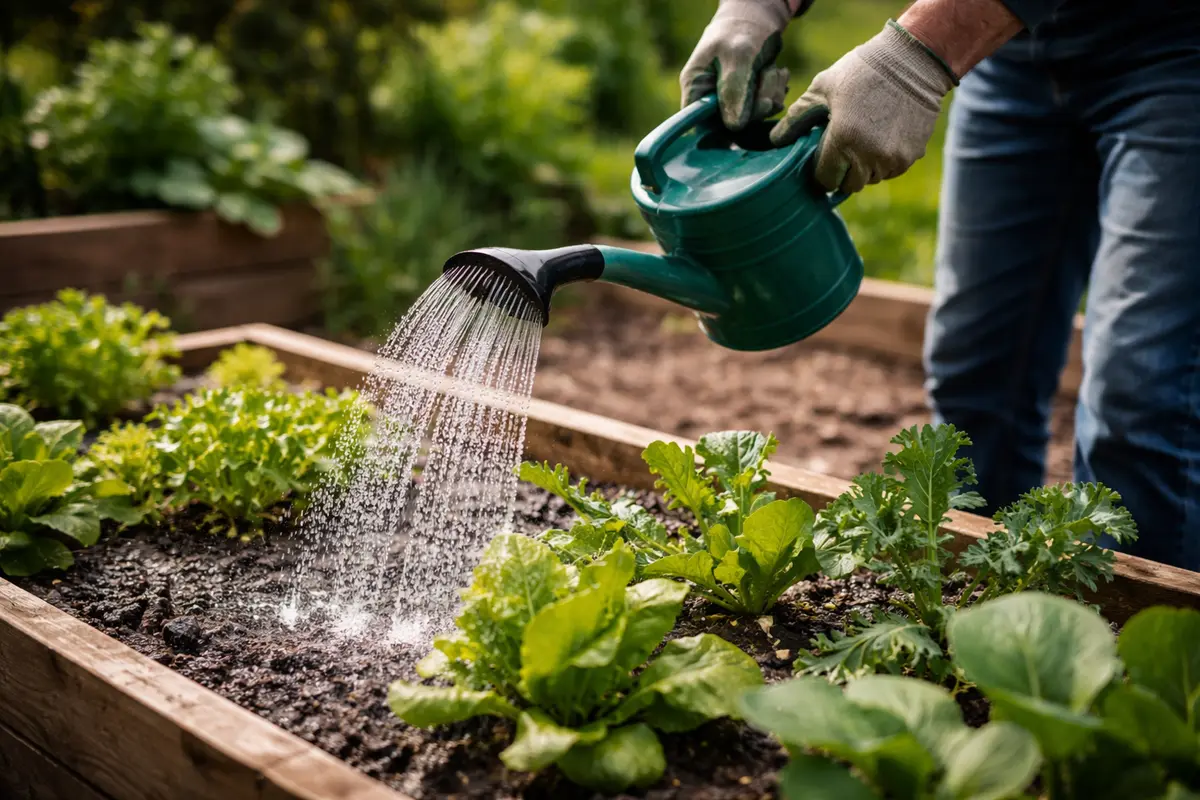
Watering too often can lead to saturation, especially in spring when rainfall can be significant. This routine prevents the creation of overly wet conditions that can promote root rot and other water-related diseases. Knowing when to water is essential, particularly after heavy rains, to avoid exacerbating drainage issues. Keep an eye on your plants; drooping leaves may indicate a lack of hydration, but rising humidity levels after watering may lead to a different, damp state, indicating that the soil is already saturated.
Especially during the peak of spring growth, keep an eye on the weather forecasts; if you know rain is coming, reduce your watering in advance. Additionally, implementing mulch around your plants can help maintain consistent moisture levels in the beds while preventing soil erosion and further compaction. A good rule of thumb is to apply mulch to a depth of about 2-3 inches to help regulate soil temperature and retain moisture without allowing the soil below to become overly soaked. Look for signs of adequate moisture; the mulch should remain damp but not soggy to indicate a healthy balance.
Step 5 – Inspect Soil Moisture Weekly After Treatment
Check soil moisture levels weekly after treatment to ensure the drainage strategy is effective. You should observe a noticeable difference in moisture retention and drainage patterns, ensuring soil doesn’t stay waterlogged for extended periods. As you check, gauge the soil condition not just by feel, but also by looking for visual indicators; soil pulling away from the edges of the beds can indicate improved drainage.
Look for signs such as changes in the soil texture; well-drained soil should feel crumbly and break apart easily in your hands, while persistently wet soil can become muddy and heavy. Regular check-ins will help you identify any potential problems before they escalate into serious concerns or damage to your plants. Adjust your assessments on your growing season; higher temperatures may necessitate more frequent checks, while cooler periods require less.
If signs of poor drainage reappear, such as water pooling again after rains, revisit earlier steps like loosening compacted soil or adding more organic matter. The moisture levels should remain balanced, so if they often fluctuate between dryness and saturation, this indicates the need to revisit your watering practices or consider re-amending the soil with more organic material. Establishing a monitoring routine is vital to maintaining healthy raised beds, as the first signs of trouble can often indicate a deeper issue that requires immediate attention and further action to correct.
FAQ
How long will it take for plants to recover from poor drainage?
Recovery can take anywhere from a few weeks to a couple of months, depending on the plants’ species and the adjustments made. During this time, keep monitoring moisture levels; look for wilting, and assess for new growth as an indicator of recovery. If your plants seem to stabilize, they may show signs of healthy new sprouts within a few weeks, suggesting your interventions are paying off.
Will adding organic matter completely fix my drainage issues?
While adding organic matter significantly improves drainage, it may not entirely solve severe drainage issues, particularly if heavy clay soil is present or if the raised bed dimensions are not adequate for your plants. Regular monitoring and potential additional amendments may be necessary for optimal outcomes, especially for long-term soil health. Observing plant performance will be crucial; any continuing signs of distress may indicate that further steps are needed to rectify the situation.
Should I remove damaged plants due to flooding?
If the plants exhibit signs of severe distress, such as extensive wilting or root rot, it’s advisable to remove and replace them. However, if the symptoms are mild, they may recover with improved drainage and care—be sure to monitor their progress closely for any signs of recovery or further decline. Replacing or relocating damaged plants can help ensure your garden remains thriving, preventing further resource depletion from the soil.