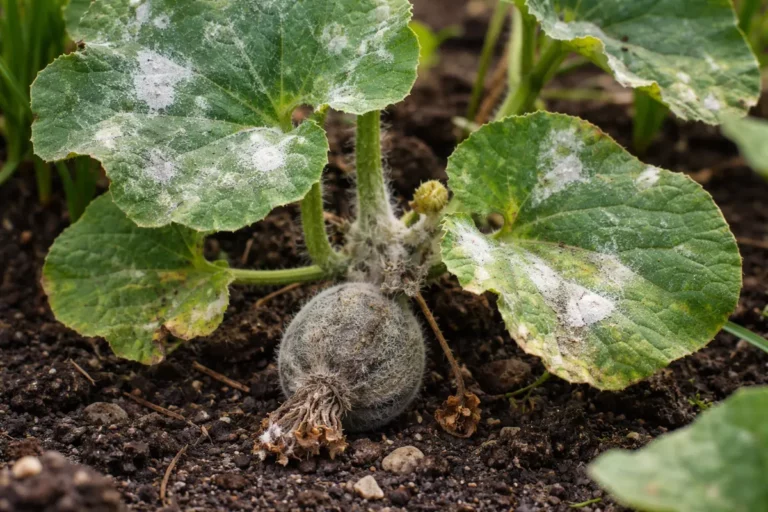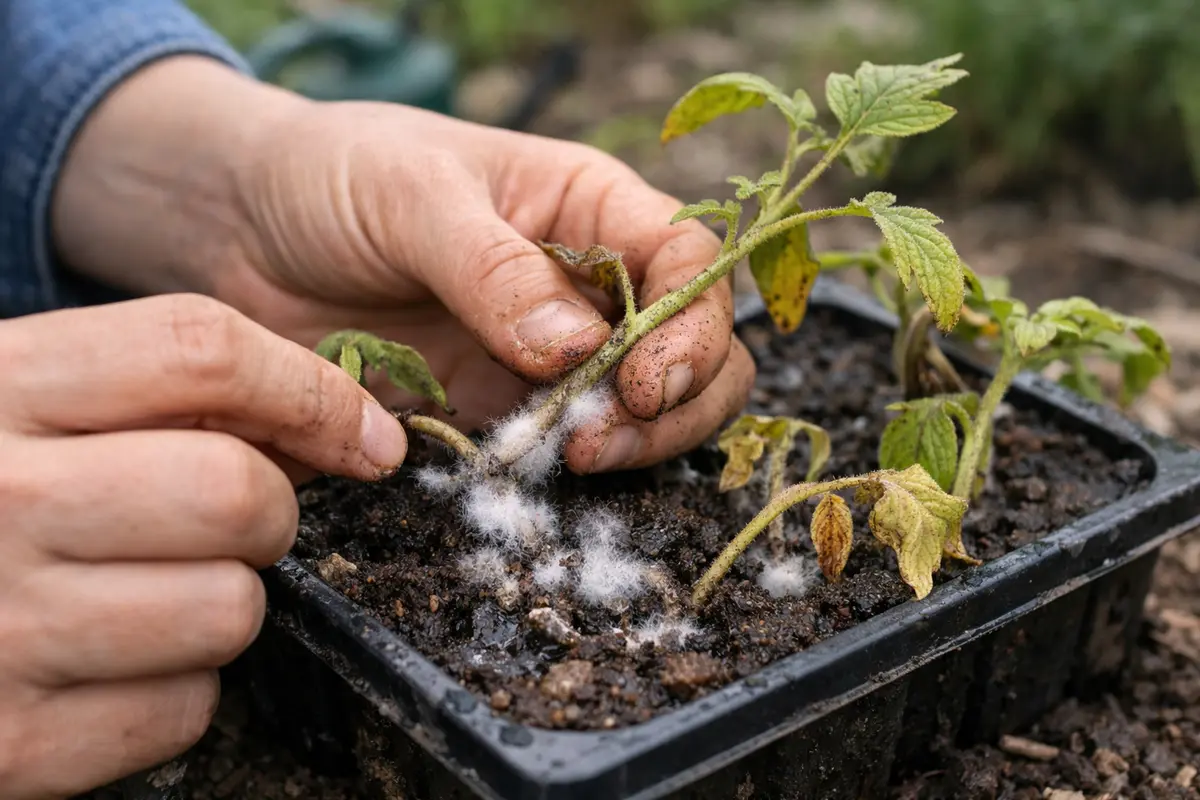
You may notice your seedlings developing fuzzy white growths and dark spots during a humid spell, which is why you need to know how to prevent mold on seedlings after overwatering. This fungal issue often arises when the soil remains overly wet, creating the perfect environment for mold to flourish, leading to rotting roots and leaf drop. If left unchecked, the situation gets worse and weakens the plant, but you can fix it now by adjusting your watering routine and inspecting your seedlings regularly.
Step 1 – Clear Excess Water from Seedlings
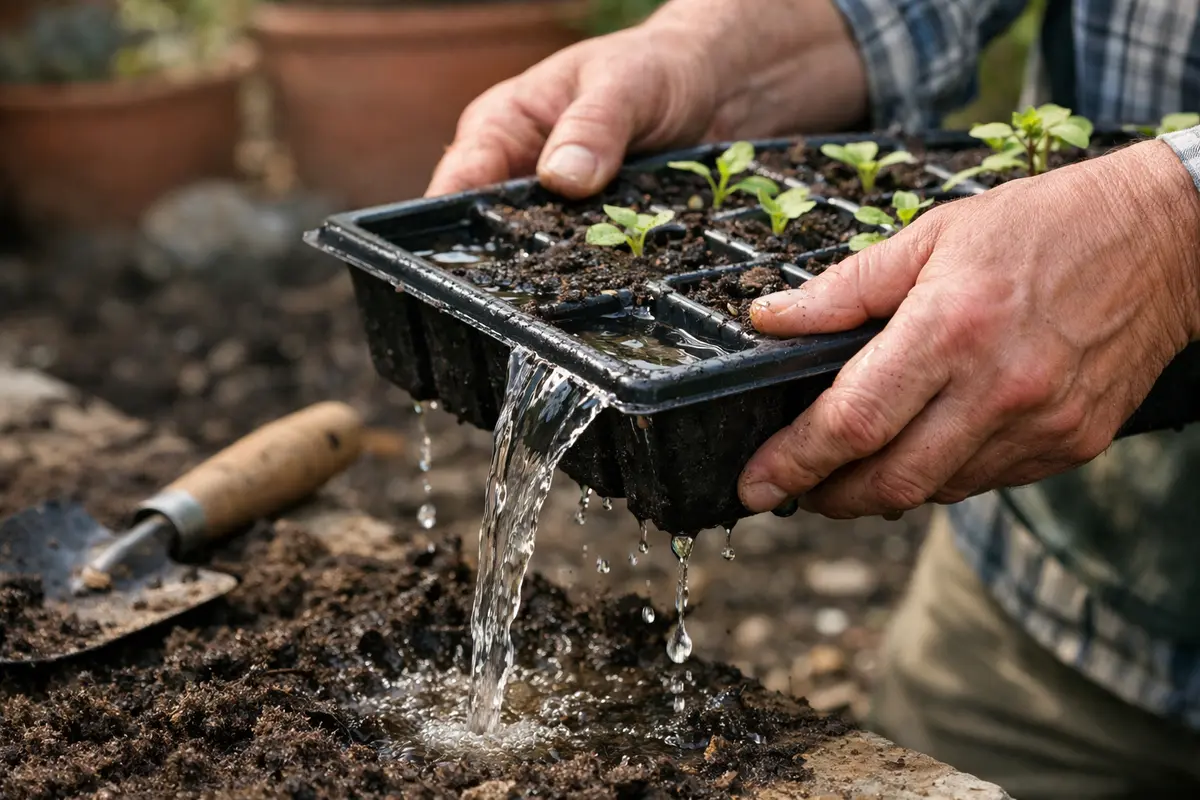
Remove any excess water pooling at the base of your seedlings immediately. You will see the water level decrease and the soil appear less saturated within moments. Start by gently tilting the container to allow trapped water to escape, or use a turkey baster or siphon tool for more precision in your small pots. Be vigilant about the frequency of this check—especially after heavy rains or watering, as this is when water buildup is most likely to occur.
Waterlogged soil suffocates seedlings by blocking air from reaching their roots. When conditions are overly moist, seeds and seedlings are vulnerable to pathogens, which accelerates mold growth, especially if temperatures are warm and humidity is high. Cleaning the area right away helps create a more breathable environment crucial for their development. It is also important to consider the type of soil being used; heavier soils retain more water, increasing the likelihood of mold development. Therefore, using a well-aerated potting mix can also assist in deteriorating moisture quickly.
A common mistake during these situations is neglecting to assess how much water is in the soil before watering again. If the soil feels soggy or has standing water, take immediate action, as this can lead to significant health issues for the seedlings. If this step is overlooked, the consequences can escalate quickly, as mold can develop within just a few days in overly wet conditions. If excess water appears consistently, you might need to reconsider the containers’ drainage holes—perhaps they are not wide enough to facilitate proper drainage!
Step 2 – Examine Soil for Overwatering Issues
First, remove the seedlings from their current soil to check for excessive moisture and root rot. Allow the roots to dry out slightly before replanting them in fresh, well-draining soil. You should observe a decrease in mold growth after this step as air circulation improves around the roots.
Overwatering creates a saturated soil environment, leading to a lack of oxygen in the root zone. This condition fosters mold growth, as fungi thrive in such damp conditions. In contrast, if the soil remains slightly moist but not drenched, the roots can access the necessary oxygen, promoting healthier growth. If the soil feels muddy, check for drainage issues as a separate concern.
If the seedlings develop a sour smell, it indicates anaerobic bacteria are also present. In this case, remove the seedlings and treat the soil with a fungicide before replanting them. Conversely, if the soil surface appears dry but mold is still present, adjust your watering schedule to ensure even moisture without saturation.
Overwatering leads to soil saturation, reducing its ability to drain effectively. This creates a challenging environment for seedlings to thrive as their roots require oxygen to absorb nutrients. By evaluating soil conditions, you can pinpoint the areas needing immediate attention and prevent mold from worsening. Additionally, consider the overall depth of the pot; if it is too shallow, the soil may not drain adequately, thus exacerbating moisture retention. Ideally, pots should have a minimum depth of six inches, especially for seedling seedlings that are likely to develop extensive root systems.
If your soil smells sour or feels slimy, it’s a serious indicator of excess moisture and potential root rot. In such cases, you’ll need to amend drainage methods or consider transplanting seedlings into fresh, dry soil. A concrete next step includes introducing coarse materials like sand or perlite into the mixture to further enhance drainage. If the problem persists, examine your watering methods; if you are using a spray bottle too often, switch to more controlled watering methods, as misting can exacerbate moisture issues. This step not only alleviates immediate mold concerns but can also help identify if the seedlings vary in their moisture needs, which can inform future watering schedules.
Step 3 – Replant Seedlings to Promote Recovery
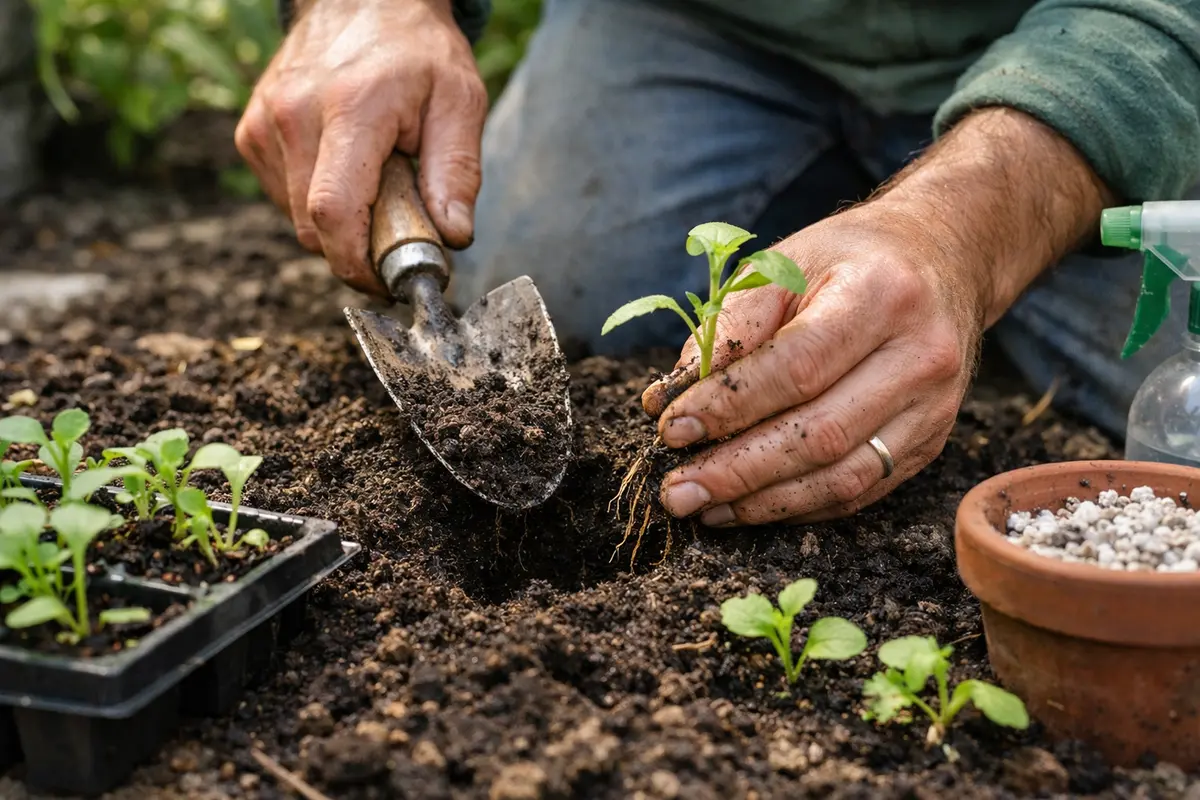
Replant affected seedlings into fresh, dry soil to allow for recovery. You will begin to see stronger, healthier growth within a week, provided you maintain optimal conditions. Ensure the new pot has proper drainage holes to facilitate water flow away from roots, minimizing the potential for future overwatering. Observe the color and health of the leaves as indicators for when seedlings are ready to be transplanted; vibrant green leaves without yellowing often suggest that they can handle the transition.
Transplanting provides seedlings with a fresh start, reducing the risk of mold. A mixture that contains compost and well-draining materials like perlite can improve drainage and aeration, creating a supportive environment for the seedlings. Signs of recovery include new leaf growth and improved color, indicating that they are regaining their strength. During this process, avoiding deep planting is essential, as burying seedlings too deep can hinder their recovery due to moisture holding near the base.
A critical mistake during recovery is overcompensating with nutrients or water, thinking they will bounce back faster. It’s essential to monitor moisture levels cautiously; excess nutrients can create chemical burns on roots, further harming the seedlings if there is already a struggle for survival. A clear indicator of nutrient overload is browning at the tips of the leaves; if this occurs, reduce nutrient input promptly. By introducing water only when necessary, you can help the seedlings adjust to their new environment without overwhelming them again. Once you notice stabilization in humidity and moisture, it may be beneficial to implement a slow-release fertilizer rather than frequent heavy feeding.
Step 4 – Keep Seedlings Dry to Prevent Mold Growth

Start by reducing watering frequency, allowing the soil surface to dry out between sessions. This adjustment will help to minimize excess moisture, creating a less favorable environment for mold growth.
Mold thrives in damp conditions, often appearing on seedlings when both soil and air are overly humid. When you limit watering, you alleviate moisture accumulation, which is a key trigger for mold development. In contrast, seedlings that receive consistent overwatering will show black, fuzzy mold, while properly spaced watering leads to clean soil without fungal growth. If seedlings are still damp after a few days, check that their drainage pots are not clogged.
During periods of high humidity or wet weather, ensure adequate air circulation by spacing seedlings properly and using a fan if indoors. This variation is vital, as stagnant air combined with moist environments can lead to mold reappearing quickly. Additionally, consider using soil amendments like perlite to improve drainage in consistently wet seasons.
Overly moist environments are breeding grounds for mold and fungal diseases. By limiting water availability during crucial growth phases, you mitigate the conditions that promote mold growth. This routine fosters strong root systems and a healthier environment for your seedlings, encouraging robust growth. Adjust your watering schedule according to seasonal changes; seedlings often require more water during the hot summer months when evaporation rates are higher. Monitoring external conditions, like rainfall or high humidity, allows for appropriate adjustments that can prevent unnecessary overwatering.
When humidity levels rise significantly, consider additional measures like using fans for better air circulation around your seedlings. If your climate is particularly humid, enabling airflow can reduce dampness around the plants and further deter mold. A key warning is not to place seedlings directly in drafts, as strong, cold winds can stress them during recovery. A common error is watering too frequently during cooler months; if the seedlings remain in a cold, damp state for too long, powdery mildew may become a recurring problem. If you notice persistent dampness within the soil, consider increasing the frequency of monitoring at this stage to prevent mold from taking hold.
Step 5 – Inspect Soil Surface for Mold Every Week
Start by checking your seedlings every few days for signs of mold or discoloration on the soil surface. Observe the moisture level by gently touching the top inch of soil; it should be dry to the touch but remain moist underneath. If moisture persists without any signs of new growth or recovery, recheck the seedlings weekly to ensure that overwatering is no longer a concern.
A fully recovered plant will have vibrant green leaves that feel firm and healthy, while early signs of the problem returning may include a sticky texture on the leaves and a dull, grayish surface on the soil. If you see white or fuzzy spots forming again, it indicates excess moisture is still an issue, and the seedlings require further assessment; if not this → check that the pots have proper drainage to prevent water accumulation.
If mold reappears despite following the initial steps, consider gently removing the affected soil layer and replacing it with fresh, dry soil. Additionally, reduce the frequency of watering to allow the soil to dry out more between watering sessions. If the problem persists, escalate by applying a natural fungicide or consider relocating the seedlings to a less humid environment to minimize excess moisture.
A fully recovered seedling will have a vibrant green color, firm leaves, and no signs of wilting or mushiness. In contrast, early signs of returning mold might include faded or yellowing leaves, a slimy texture at the soil surface, or a visible layer of white or gray fuzz. If your seedlings continue to look limp and you see small black spots, they might be struggling again.
If mold persists despite these efforts, increase air circulation around the seedlings by spacing them out more or using a small fan. If the problem continues after adjusting conditions, consider treating with an organic fungicide to help eliminate the mold safely. Remove any severely affected seedlings to prevent further spread.
A fully recovered seedling will showcase vibrant green leaves and sturdy stems, indicating strong growth. In contrast, early signs of the problem returning include yellowing leaves with a mushy texture at the base, suggesting mold or root rot. If you see this return but the stem firmness is intact, it signals potential overwatering issues.
If the mold problem resurfaces despite following the steps, reduce watering frequency further and consider improving air circulation around your seedlings. If they continue to show signs of distress, raise the seedlings to a drier environment or transplant them into fresh, dry soil to ensure better drainage.
Healthy seedlings will show robust, green leaves and firm stems. Correcting issues early by adjusting watering schedules will help ensure seedlings remain healthy. Regular inspection also helps identify deterioration in seedlings before mold becomes a problem. If any seedlings appear stunted or stressed, evaluate surrounding moisture conditions and adjust accordingly. Be on the lookout for changes in coloration, particularly if the leaves develop darkened patches.
If you notice mold returning, consider reducing watering frequency further and improving drainage by incorporating grit or perlite into the soil mix. Incorporating these materials into the soil changes the structure, improving aeration and drainage, thereby decreasing the likelihood of standing water. Should the problem persist despite these efforts, it may be essential to temporarily relocate seedlings to an area with better airflow to aid their recovery. It’s crucial to monitor this environment closely; ensure that the light levels remain appropriate so the seedlings do not become leggy due to inadequate light exposure during this time. If relocating seedlings outside, be mindful of directional sunlight to avoid leaf scorch.
FAQ
How long does it take for seedlings to recover from overwatering?
With prompt action, seedlings can start showing signs of recovery within a week, evidenced by new growth and a return to moisture balance. Full recovery may vary depending on plant type, environmental conditions, and the severity of root damage suffered from overwatering. On average, keep an eye on humidity and moisture levels in the surrounding area for possible fluctuations that can slow recovery yet further.
Can mold on seedlings spread to healthy plants?
Yes, mold can spread to nearby healthy plants if not controlled. Ensuring proper spacing and good airflow can help minimize the risk of cross-contamination as mold spores can travel through the air or via contact with tools or hands. Regular checks on neighboring crops can help mitigate the spread, and if you see signs of moisture in the ambient air, implement a fan or improved air circulation strategy immediately.
Should I remove damaged parts of the seedlings?
Removing visibly damaged leaves can help prevent mold spread and encourage new growth. Trim back any unhealthy tissue carefully to give your seedlings the best chance of recovery. Do so by using sterilized scissors to minimize introducing any pathogens during the process. It’s best to trim leaves in the early morning hours when the plants are hydrated and can heal faster from the cuts.