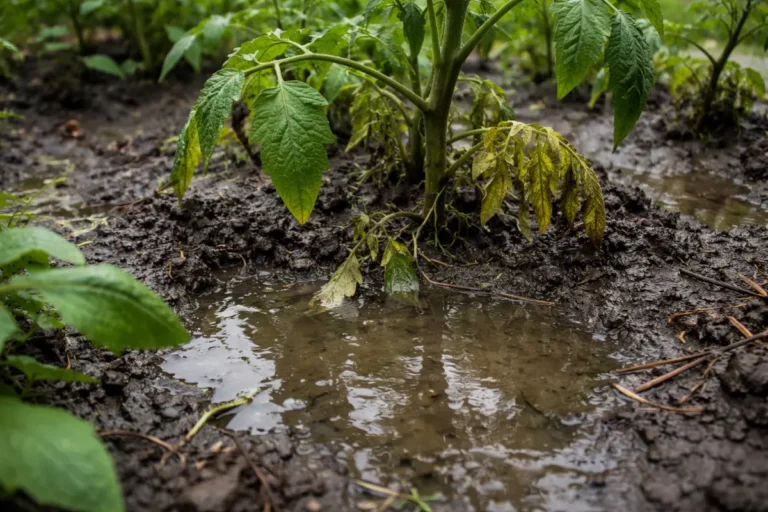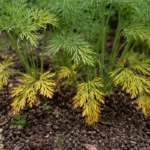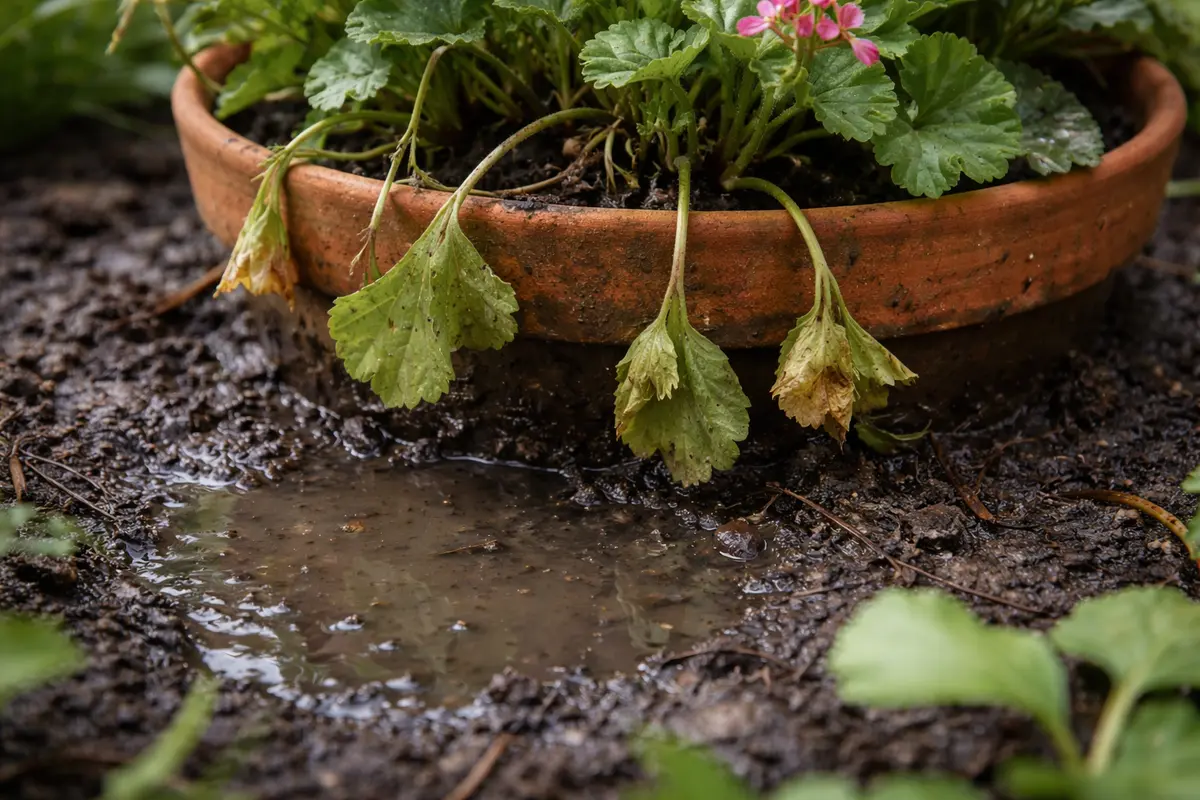
You’ve probably seen your once-vibrant potted geraniums drooping and developing mushy roots after a heavy rain spell, which is why you need to know how to stop root rot in potted geraniums after overwatering. The plants are suffering from root rot, caused by excess moisture depriving the roots of oxygen, leading to yellowing leaves and wilting stems. If left unchecked, this issue worsens, weakens the plant, and can lead to more damage, but you can improve the situation now by inspecting the roots, removing any that are rotten, and adjusting your watering practices.
Step 1 – Trim Off Rotting Geranium Roots Quickly
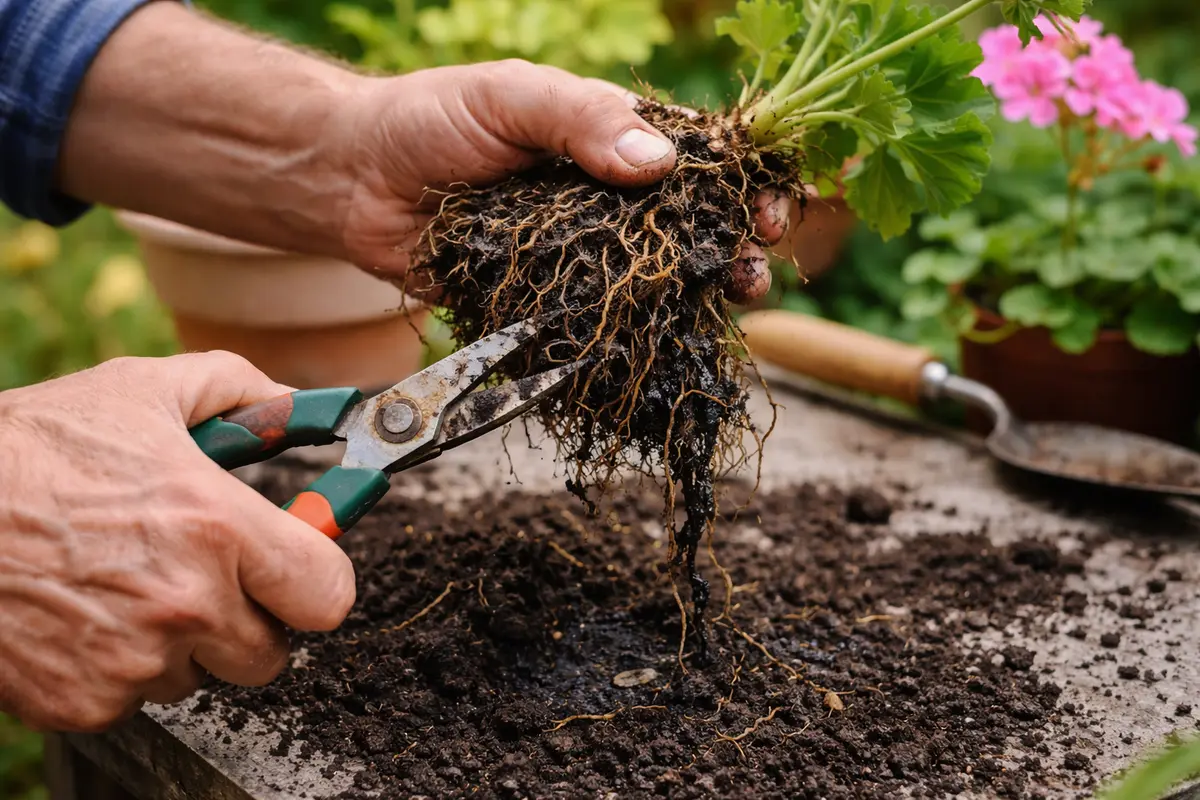
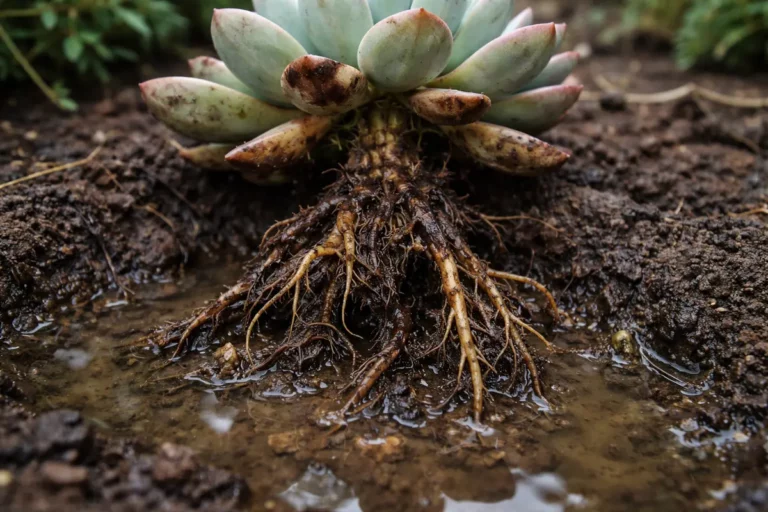
First, remove the geranium from its pot to assess the roots. Gently shake off excess soil and inspect for mushy, brown roots, which indicate root rot caused by overwatering. If you notice these unhealthy roots, trim them back to healthy tissue, and let the plant air out for a few hours before repotting it in fresh, well-draining soil. You should see the remaining healthy roots appear white or cream-colored and firm to the touch, a visual cue that recovery is underway.
Acting quickly is crucial for geraniums affected by root rot because prolonged exposure to excess moisture leads to anaerobic conditions, ultimately suffocating the roots and creating an environment for pathogens. If the roots remain over-saturated for too long, the healthy portions of the plant become unable to absorb nutrients and water, leading to further decline and even death. If you notice lingering yellowing leaves, it signifies the plant is already under stress from overwatering. Conversely, if the leaves look vibrant after trimming, it indicates that regrowth can be expected.
In one case, a gardener waited three weeks before addressing signs of root rot in her geraniums, resulting in extensive root damage and significant plant loss. Many gardeners mistakenly believe that simply reducing watering frequency will solve the problem, but neglecting to assess and trim the roots can delay recovery and exacerbate the rot. By taking immediate action, the gardener could have saved her plants and restored their health more effectively. If your plants are wilting despite adjustments to watering frequency, it’s time to investigate root health—don’t overlook this critical step.
Acting quickly to trim off these rotting roots is crucial because healthy roots are essential for the plant’s nutrient uptake. The longer affected roots remain, the more likely they are to promote further rot and fungal spread, which can harm the remaining roots. Cutting back at the first sight of rot helps to limit the severity of the problem and increases the chances of recovery. If you see blackened tips or a spongy texture, that’s a clear indicator that a root is beyond saving. Always use sharp, sanitized scissors or pruning shears to prevent introducing any fungal spores; sterilization can make a significant difference in recovery success.
Many gardeners underestimate the importance of inspecting the root system promptly. For example, if left unchecked for even a few days, other roots can start deteriorating, worsening the overall health of the plant. Pruning away the rotten sections right away not only stops the spread but also provides a clearer pathway for new, healthy roots to establish. It’s recommended to recheck any remaining roots for signs of decay post-trim; any lingering mushiness should be addressed immediately. This check ensures that you’re only left with robust roots to support new growth. If unsure, consider consulting local gardening experts for confirmation on the state of your plant’s roots.
Step 2 – Diagnose Watering Issues Causing Root Rot
Check the soil moisture level and ensure that it’s not too saturated; if it is, remove excess water and allow it to dry between watering sessions. This can lead to visibly drier soil and a healthier root system within just a few days, allowing the remaining healthy roots to breathe better. Always feel the top inch of the soil for dryness before deciding to water, as this is often a good indicator of the plant’s thirst. You may also consider using a moisture meter for more precision, especially in deeper pots.
Geraniums prefer to have dry periods between watering due to their susceptibility to root rot when overwatered. Excessive watering can lead to anaerobic conditions where roots suffocate, and fungal infections can promote rot. By diagnosing watering practices, you not only help the plant regain stability but also create a better environment for future growth. Choosing pots with adequate drainage holes enhances this process by allowing excess water to escape rather than sit at the bottom, which often causes root decay. Assess the pot’s drainage regularly to ensure it’s not clogged, which can easily happen with compacted soil over time.
A common mistake is to continue watering on the same schedule despite signs of root rot. If the soil feels overly moist or the pot has drainage holes that are clogging, consider repotting in dry soil. If the plant was previously in a container without drainage, transferring it to a well-draining potting mix can alleviate further issues. Adjusting your watering routine based on the plant’s needs can establish a healthier environment and prevent future rot scenarios. Keeping a moisture meter handy can provide an accurate reading, reducing the likelihood of overwatering. If you notice that your argparse geraniums’ soil stays wet for more than five days post-watering, it’s a clear indication your current container setup requires reevaluation.
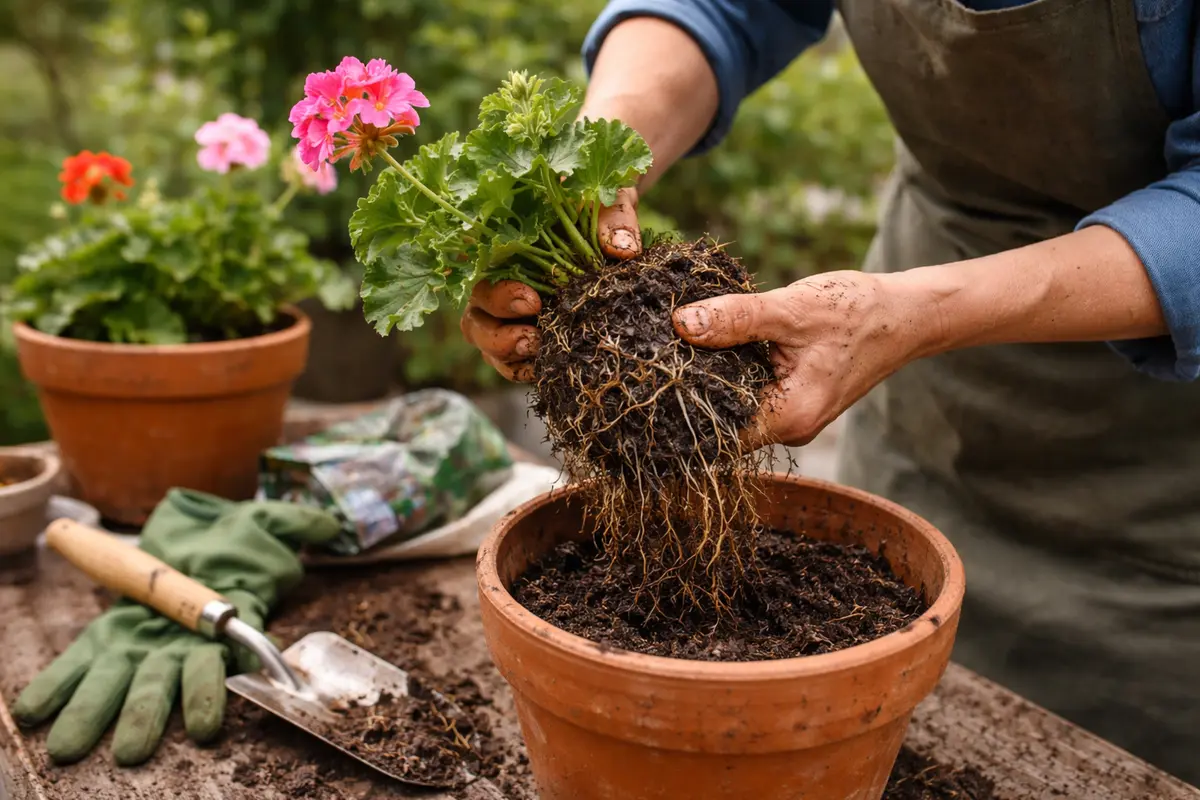
Step 3 – Repot Geraniums to Recover from Overwatering

Apply fresh, well-draining soil in a pot that is slightly larger than the previous one, and repot the geraniums to promote new growth. You should start observing new growth within a week as the roots begin to recover in healthier soil. When repotting, gently shake off as much old soil as possible without damaging the roots, as the old soil may still harbor degenerated roots. Carefully inspect the roots again during this process; if you encounter any remaining rot, trim it away again before planting.
Repotting is vital because it allows the geranium’s roots to thrive in an environment that provides both air and moisture. Fresh potting mix not only drains better but also replenishes essential nutrients that may have been lost in the previous soil. Once the roots can no longer access water, they will start to regain health, enabling the plant to flourish. Ensure that the new pot has ample drainage and consider mixing in perlite or sand to enhance aeration within the soil. The goal is to create a light, fluffy medium that encourages drainage while holding some moisture.
Be careful not to overwater again immediately after repotting. This is critical because the plant’s roots still might be delicate and could easily succumb to stress again. If the plant begins to show leaf curl or discoloration shortly after repotting, it might indicate that the roots are still struggling or that the watering routine needs further adjustment. Keep a close eye on the new growth; fresh, green shoots should start appearing if the plant is recovering well. A consistent watering schedule will be key; check weekly to ensure you are not enabling a return of rot. If the newly potted geraniums sit in a high-humidity area, consider adjusting their location to minimize excess moisture retention.
Step 4 – Avoid Overwatering Geraniums in Future
Start by ensuring your potted geraniums have proper drainage. Check that the pots have sufficient drainage holes, and elevate them slightly using pot feet to promote airflow, which will lead to drier soil and less risk of root rot. This practice is particularly effective in preventing water from accumulating at the pot’s base.
Excess moisture and poor air circulation often trigger root rot in potted geraniums, particularly in hot, humid conditions or after heavy rains. By maintaining proper drainage and avoiding overly wet soil, you address these underlying issues, significantly reducing the chance of root rot recurring. If your soil remains soggy days after watering, check the drainage holes for blockages. Regularly flush the pots with clean water every few weeks to prevent mineral buildup that can result in poor drainage.
During the rainy season, increase your watering interval, allowing the top inch of the soil to dry out before adding more water. Additionally, consider moving your geraniums to a sunnier spot to enhance evaporation, as this can help combat excess moisture during periods of high humidity. If the plants have been in the same location where they previously suffered from root rot, relocating them could be crucial in breaking the cycle of moisture retention.
Regularly measuring moisture levels helps ensure the plants get just what they need without drowning their roots. Geraniums thrive in drier conditions, and the effect of adhering to this routine can greatly improve plant health and prevent the recurrence of rot. If the soil remains too wet, particularly in cooler weather, issues like root rot can quickly come back. This step involves becoming attentive to local weather patterns as well, such as rainfall, humidity, and temperature shifts to prevent overwatering during those conditions.
Pay particular attention during rainy seasons or if your home’s humidity increases. A good tip is to check the soil moisture daily in such cases and adjust your watering schedule accordingly. Implementing such precautions can significantly reduce the risk of root rot returning. Furthermore, consider using self-watering pots if you’re prone to forgetting watering schedules, but ensure they still allow for proper drainage to prevent waterlogged conditions. Set a reminder to check moisture levels on days when rain is expected; this can be your passive guide to avoid excess watering.
Step 5 – Inspect Geranium Soil Regularly for Moisture
Check the soil moisture every 2-3 days to ensure it remains within the ideal range for healthy growth. You should observe a firm root system alongside vibrant foliage as signs of recovery within a few weeks. If moisture remains excessive for several cycles, consider adapting your watering regimen further and assessing the pot size for potential over-encumbered roots. Sometimes, reduced pot size can help with moisture control if the roots aren’t yet sufficiently extensive.
By routinely monitoring the soil’s moisture levels, you can nip any potential issues in the bud before they develop further. When your geraniums are fully recovered, the soil will feel moist but not soggy, and the roots will appear firm and healthy when checked. The foliage will also look lush, signaling that the plant is thriving. If you see any signs of wilting or yellowing leaves, it’s essential to troubleshoot quickly to catch any possible returning rot. If a sudden change to a more humid environment occurs, increase your checks to every day until you understand how that affects your plant.
If signs of root rot reappear, such as wilting leaves or a foul smell, it’s crucial to take immediate action. In that case, consider inspecting the drainage holes of the pot and adjusting your watering schedule accordingly. Recognizing these early symptoms can prevent further damage and help maintain the vigor of your geraniums. It may also be time to consider whether environmental factors—like placing the pots at a cooler temperature or in a shadowed area—are causing excess moisture retention. Ensure that any nearby plants are not contributing to the humidity; sometimes, overcrowding can exacerbate moisture problems.
FAQ
How long does it take for geraniums to recover from root rot?
Recovery from root rot can typically take 2-4 weeks, depending on the severity of the damage and the care provided. Regular monitoring of soil moisture and healthy growing conditions can expedite recovery, leading to new growth during this period. It’s helpful to establish a caring routine that involves gentle interaction with the plant while it recovers, ensuring that you do not disturb the roots excessively.
Can root rot spread to other potted plants?
Yes, root rot can spread to other potted plants, especially if they share the same water source or are closely placed together. Ensure to isolate affected plants to prevent the fungus from transferring to healthy plants and take immediate steps to rectify the issue. Always clean any tools used on infected plants before using them on healthy plants to avoid cross-contamination; practices such as using bleach solution can go a long way in maintaining plant health.
Should I remove all affected parts of my geraniums?
It’s vital to remove all rotting roots and any leaves showing significant damage. By getting rid of all affected parts, you significantly reduce the chance of the rot spreading and give the remaining healthy parts a better chance to thrive. After removal, ensure you treat the plant with a fungicide suitable for geraniums if necessary, which can help protect new growth while it heals. In some cases, you can also benefit from applying root stimulators to encourage healthy regrowth during recovery.