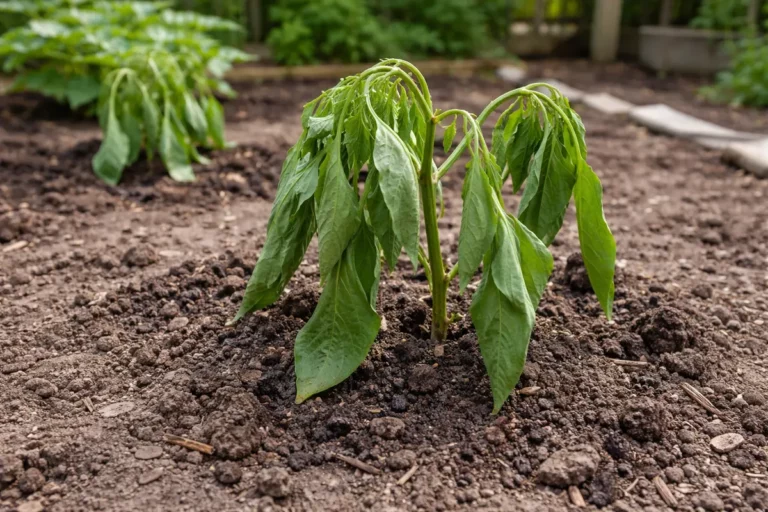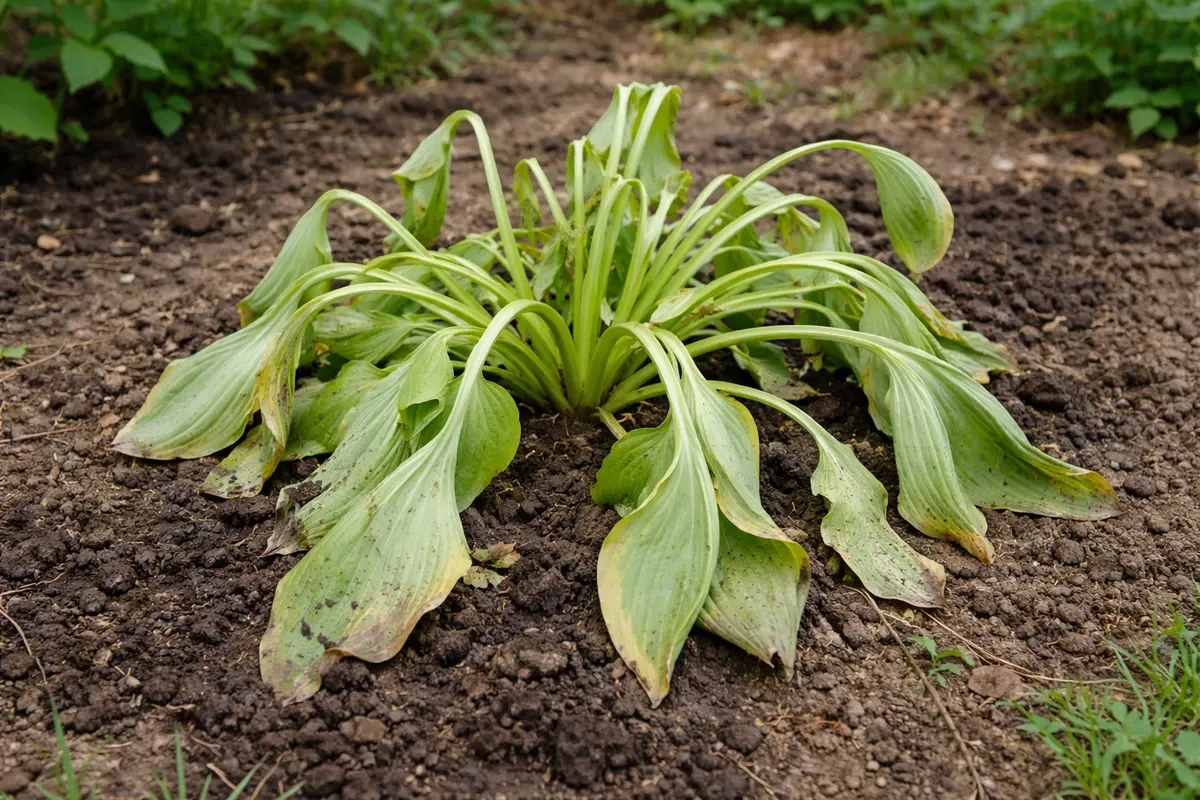
You may notice your once-vibrant hostas drooping under the afternoon sun right after transplanting, which is why you need to know why are my hostas wilting after transplanting. This wilting is often due to transplant shock, where the plants struggle to establish their roots in their new environment, leading to leaf drooping. If left unaddressed, this stress can worsen, ultimately weakening the plant and setting its growth back, but you can act now to improve the situation by watering thoroughly and adjusting their location for optimal light. Together, these steps can help your hostas bounce back to their lush glory.
Step 1 – Water Hostas Deeply Right After Transplanting
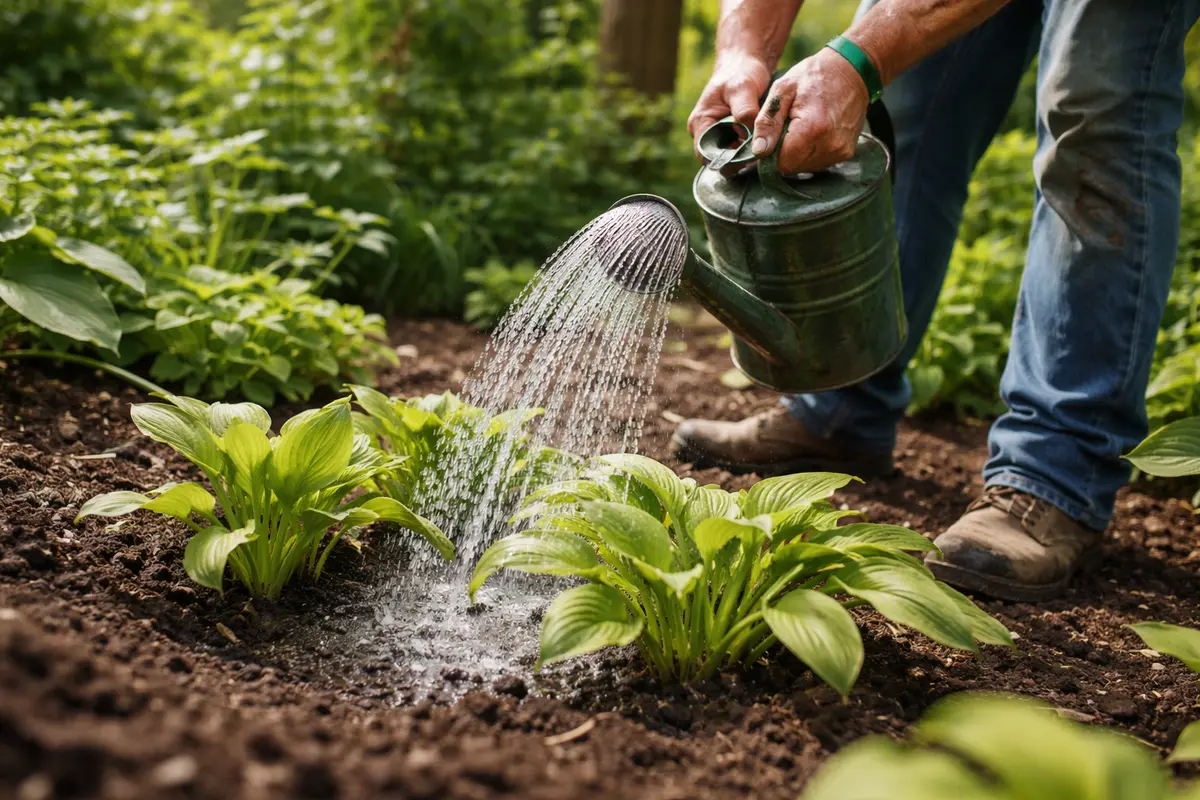
Water the hostas deeply immediately after planting. You will see the soil around the roots becoming saturated, helping to stabilize the plant. Ensure the water reaches at least 6 to 8 inches deep to saturate the root zone, providing the necessary hydration to help alleviate the stress from transplantation. A quick check can confirm this; if the soil is dry at any depth under the surface layer, immediate action is required. Utilize a soil moisture meter if available, as this will give you a clear idea of moisture levels buried deep within the soil. If the reading is low, it’s crucial to continue watering until adequate moisture levels are established.
Deep watering is crucial for recovering from transplant shock because roots need consistent moisture to function properly. Once hostas are transplanted, their ability to absorb water can be compromised due to root disruptions, causing immediate wilting. Without sufficient moisture right after transplant, hostas’ leaves might begin to curl or droop more noticeably. If the soil does not seem to hold water or the hostas remain wilting even after deep watering, reassess the soil structure for compaction or poor drainage. It’s essential to ensure the roots can access the water they need; within an hour of watering, inspect for any water pooling at the surface, which indicates poor draining soil.
A common mistake at this stage is to water lightly, which does not penetrate deeply enough to reach the roots. This shallow watering can cause the surface soil to dry while the deeper soil remains depleted. Therefore, while the top layers may appear moist, the roots are left dehydrated and exposed to unnecessary stress. If you notice the leaves still wilting within a few hours after deep watering, this may signal further issues. Check for drainage by observing how quickly water penetrates the ground; if it takes longer than 15 to 30 minutes to drain, consider loosening the soil or aerating it. This can be achieved by gently forking or tilling around the area, ensuring you avoid damaging the roots in the process.
Step 2 – Investigate Soil Quality for Hostas’ Wilting
First, check the soil moisture around your hostas. Water the plants thoroughly if the soil feels dry, and observe if the wilting improves within a few hours. Wilting due to dry soil can often be remedied quickly with an adequate water supply. However, if waterings do not provide immediate relief, it may indicate other underlying soil problems.
Hostas transplanted into dry soil may experience wilting because their root systems are unable to take up sufficient moisture. When the soil lacks adequate moisture, the plant’s leaves lose water faster than the roots can supply it, resulting in drooping. In contrast, if the soil is overly wet or soggy, the roots can suffocate in waterlogged conditions, leading to similar wilting symptoms. This duality highlights the critical need for balance; checking consistently is essential to gauge moisture properly, especially in fluctuating weather conditions. Testing soil moisture with your fingers can help—if the top two inches feel dry and your fingers come out dusty, it’s time to replenish moisture immediately.
If the soil is wet and the leaves are persistently wilting, check for root rot as a potential cause. Gently pull the plant from the ground, noting any changes in resistance—roots should feel firm and healthy. If they appear mushy or dark brown, they are more than likely rotting. In this case, it is vital to replant in fresh, well-draining soil after trimming away any dead roots. Roots like these can introduce pathogens into new soil, complicating the recovery process if not dealt with effectively.
Poor soil quality can severely inhibit root development, leading to symptoms like wilting. Hostas flourish in rich, well-draining soil that supports proper aeration and nutrient uptake; thus, soil that is too compacted or lacks organic matter can stifle roots’ absorption capabilities. One practical solution post-transplant is to conduct a soil test to evaluate pH and nutrient content. Aim for a pH level around 6.5 to 7.0, as this is optimal for nutrient uptake. If the test reveals deficiencies, incorporate compost or organic amendments to restore balance, addressing specific nutrient deficits that can escalate wilting if ignored.
If the soil smells sour and appears muddy, it may indicate waterlogging due to poor drainage. In this scenario, incorporate organic material, like compost or peat moss, to enhance aeration and fix drainage issues. Alternatively, relocating the hostas to a location with better drainage may be necessary. Conversely, if the soil feels dry and crumbly when checked, increase your watering frequency or consider applying mulch to improve soil’s moisture retention. Implementing a 2 to 3-inch layer of organic mulch around the base can help retain moisture while protecting shallow roots from temperature extremes.
As a rule of thumb, soil should form a damp, cohesive clump when squeezed; if it crumbles too easily, there is a significant moisture retention issue at hand. In contrast, any soil that adheres too much to your hands may indicate excessive clay content, leading to problems with aeration. Observing the soil’s behavior during these checks becomes crucial; both conditions could significantly contribute to the potential for future wilting or other complications.
Step 3 – Revive Hostas with Balanced Fertilizer Application
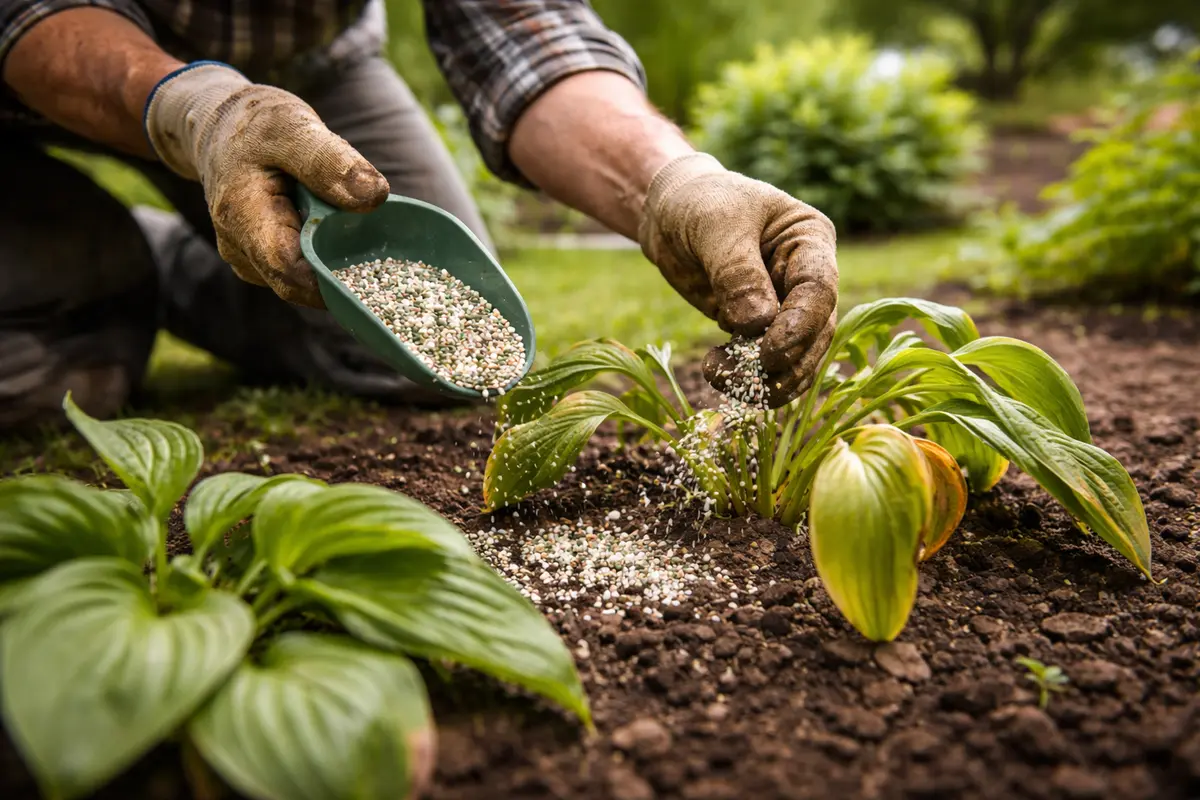
Apply a balanced fertilizer to your hostas once they are established in their new location, ideally around four weeks after transplanting. You should notice a steady improvement, with signs of fresh leaf growth emerging. New leaf shoots near the base indicate the plant is successfully adapting to its environment, and such changes can be typically observed after approximately 2 to 4 weeks following fertilizer application.
Fertilizer application helps hostas regain lost nutrients that may have diminished during the transplanting process. A balanced fertilizer ensures macronutrients like nitrogen for growth and potassium for root health, and micronutrients are readily available, promoting recovery and reinforcing root strength as the plant readjusts. Following the directions for fertilizer application closely is crucial; typically, a liquid fertilizer should be mixed at about one tablespoon per gallon of water, avoiding over-concentration which could pose further stress to the plant. Aim for slow-release formulas to provide ongoing nourishment throughout the growing season, which can help mitigate stress from extreme fluctuations.
A common mistake is to over-fertilize in hopes of speeding up recovery. However, excess fertilizer leads to root burn; symptoms may manifest as blackened tips or browning edges on leaves, signaling heightened stress. Monitoring these signs closely is essential during the first week after fertilization; if you notice significant fading in green coloration or stunted growth, this may indicate it’s time to reduce fertilization frequency or switch to a more diluted formula. An instance like this is especially prevalent when the hostas have just weathered stresses from transplant, and root systems may still be fragile.
If corrective measures are not implemented, over-fertilization can suffocate the roots, creating an imbalance that stresses the plant even more. Should you observe stagnant growth or further wilting despite adhering to fertilization protocols, evaluate nutrient levels. It may be beneficial to switch to a formulation specifically designed for hostas; those often benefit from additional micronutrients that are critical during recovery. Also, consider conducting a follow-up soil test after applying fertilizer to confirm nutrient levels return to desirable ranges.
Step 4 – Inspect Hostas for Stress Signs Weekly
Check your hostas weekly for signs of recovery or ongoing stress. During each inspection, you should assess for new growth and observe whether the leaves regain firmness, as these are positive indicators that the plants are bouncing back. Record observations in a notebook or garden journal to help keep track of any changes, making it easier to monitor recovery over time. An effective method is to take photos of the hostas after transplanting and then again weekly to visually compare progress.
A fully recovered hosta will present with vibrant, perky leaves, showing no signs of wilting or stress. Compare these healthy signs to early indicators such as drooping leaves or discoloration, which may suggest lingering drainage problems or stress from the location. The plant’s response over these weeks reveals a great deal about its recovery from transplant shock and its acclimation to new soil and moisture conditions. If new leaf tips begin to turn yellow, that is a warning sign revealing a nutrient deficiency linked to improper uptake or recovery issues; this needs immediate attention.
If you find that wilting continues despite these corrective steps, reevaluating your watering practices and soil conditions may be in order. Check for external factors such as extreme sun exposure or conflicting root systems nearby. Be particularly vigilant during periods of temperature changes, as fluctuations can exacerbate wilting symptoms. Consulting a garden professional can provide insights into persistent problems; they might help diagnose issues beyond simple care measures. Timely responses are key; prolonged problems can lead to serious health complications for your hostas. If wilting occurs specifically in isolated sections of the plant, evaluate whether competing roots, excessive sunlight exposure, or shelter from wind could have detrimental effects on moisture retention.
Adapting your monitoring routine to account for shifting weather patterns and specific needs of the hostas throughout the growing season can provide the best care. During peak growth periods, hostas require more water and checking after rainfalls will help prevent both over and under-watering. Experience shows that detailed weekly check-ins during dry spells are necessary to ensure consistent plant growth and vigor.
FAQ
How long does it take for wilted hostas to recover after transplanting?
Recovery can take anywhere from a few days to several weeks, depending on the conditions of the soil and care following transplanting. Ensuring consistent watering and proper care is crucial, as maintaining stable moisture levels can significantly encourage quicker recovery. Over the initial weeks, watch carefully for new growth and the return of turgidity in the leaves; this often indicates effective recovery. If recovery seems delayed beyond a few weeks, recheck moisture levels as well as nutrient availability, adjusting fertilization or soil amendments as necessary.
Can overwatering cause hostas to wilt after transplanting?
Yes, overwatering can lead to root rot and other stress responses that cause wilting. If the soil remains soggy, it suffocates roots and leads to poor uptake of water and nutrients. If you suspect overwatering, immensely inspect drainage conditions and adjust your watering schedule accordingly to prevent severe damage. Additionally, if root rot is suspected, consider gently removing the plant, rinsing the roots, and inspecting for any mushy sections that would need to be trimmed away to support recovery. Work under clean conditions when handling the roots to avoid introducing pathogens.
Should I remove damaged leaves from wilting hostas?
You can prune away significantly damaged or dying leaves to redirect energy to new growth. However, avoid excessive cutting; only remove what is necessary to help the plant focus on recovery. Ensure to also evaluate the overall health of the roots; if they are discolored or mushy, further action, such as soil amendment or repotting, may be required beyond just leaf pruning. Additionally, if the damaged tissue is extensive and the overall foliage appears brown or mushy, this indicates a severe issue that may need more comprehensive intervention beyond simple pruning for effective recovery.