You may notice your beautiful tulips drooping dramatically after heavy winds, which is why you need to know how to stop drooping tulips after heavy winds. This drooping occurs due to the weight and stress that strong gusts place on the delicate stems, often leading to wilting or unsightly bends. If left unaddressed, the problem gets worse and can spread to nearby plants, weakening them further. By swiftly addressing drooping and implementing proactive care, gardeners can prevent long-term damage and support their tulips in thriving through tumultuous weather. Taking these steps will help revive your tulips and enhance their resilience against future storms.
Step 1 – Trim Drooping Tulip Blooms Now
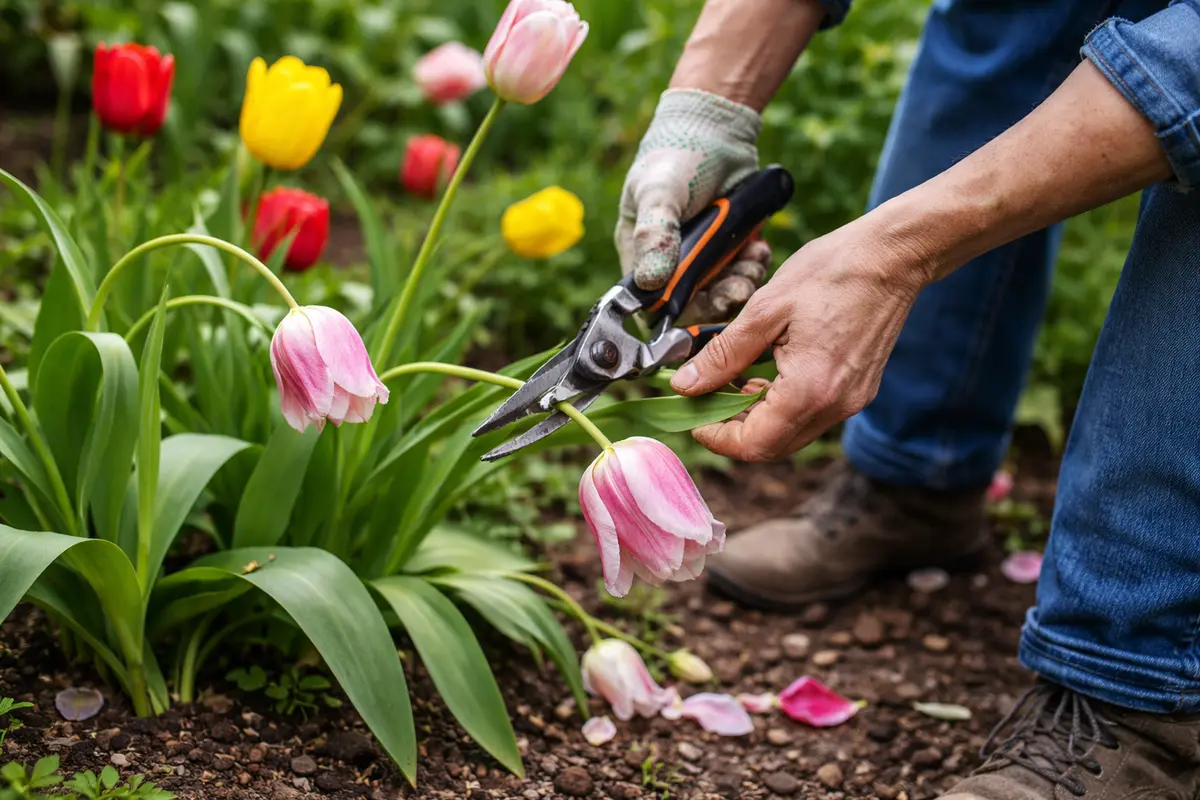
Start by gently gathering the drooping tulips and securing them to nearby stakes or supports. Use soft twine to bind the stems loosely to avoid any damage. Immediately, the plants should appear more stable and upright, providing essential support as they recover from the wind stress. Depending on the severity of the drooping, you may find that a simple tying strategy will help stabilize them in just a few minutes.
Acting quickly is critical because tulips are particularly vulnerable to breaking under their own weight when the stems are compromised. When winds cause drooping, the plant’s internal water transport system can be disrupted, leading to wilting if not addressed promptly. If you delay, the stems may weaken further, resulting in permanent damage that won’t allow the flowers to stand again. Adding a light support structure not only stabilizes drooping stems but also helps to prevent bending that can occur if left unattended. After the first day, check for any signs of struggle during recovery; if the stems continue to droop despite staking, further action may be necessary. Look for signs such as limpness or a lack of upward movement that could indicate inadequate stabilization.
For instance, a gardener who secured their tulips within hours of a windstorm found that the blooms returned to an upright position within a couple of days. Conversely, another gardener who neglected to act faced broken stems and dropped blooms. If the flowers aren’t stabilizing, check if the connections to stakes are too tight or if additional support is necessary. Consider using a stake every 12-18 inches for optimal stability, particularly for taller tulip varieties. A common mistake at this stage is to wait too long before trimming or securing the plants, thinking the blooms may recover on their own. If heavy winds occur over several consecutive days without action, the plants suffer even more as they attempt to support blooms that are already failing. Observe also if the soil around the base retains excess moisture, as this could exacerbate drooping. If you see signs of overwatering—such as a mushy texture in the soil—it’s vital to allow the soil to dry out completely before re-watering, which can actually help the plants recover more effectively.
Step 2 – Diagnose Tulip Wind Damage Issues
Inspect the remaining stems and foliage closely to diagnose any further wind damage or weak supporting structures. Look for cracks or areas that appear more brittle than others; signs of brittle stem tissue may indicate they are struggling to uptake water efficiently. A thorough inspection helps differentiate between merely bent stems and those with structural compromises that may worsen over time. If you see small splits, darkened areas on the stems, or soft, mushy sections, they may be at a higher risk of decaying or exhibiting secondary damage as the season progresses.
Wind damage can cause stress fractures within the stems, impairing their ability to uptake water and nutrients effectively. If stems are split at the base, they might not recover fully, impacting blossoming in the next season. Inspecting at a slight angle can often reveal deeper internal damage that isn’t immediately visible. It’s crucial to understand that stress fractures can lead to larger structural failures if not promptly addressed, which could capsize the entire plant. If these issues are detected, apply appropriate treatments urgently to contain the injury’s spread. Consider using a fungicide if you notice any signs of rot; this will help in preventing further deterioration. A gardener should check for water-efficient remedies to use on damaged plants, ensuring both their health and their available space within the garden.
If you discover separate and distinct issues—such as multiple stems with different degrees of damage—this indicates a more complex response may be necessary. For stems that show complete separation at the base, their best chance may be to provide additional support using sturdy plant stakes. Be sure to insert stakes before the next rain to prevent the wounds from taking in excess water and creating pathogen entry points. For slender stems that have only bent but remain structurally intact, tying them gently to a support mechanism can facilitate upright growth without causing further damage. Regularly rotating your ties or stakes as the plant grows can improve its overall posture and reinforce healthy development, while accommodating natural movement, which helps to avoid potential future bending issues. Caution should also be exercised if you notice that multiple stems are affected—the presence of widespread damage could indicate systemic failure, warranting serious intervention or even removal, especially if more than half the plant is compromised.
Step 3 – Nourish Tulips to Promote Upright Growth
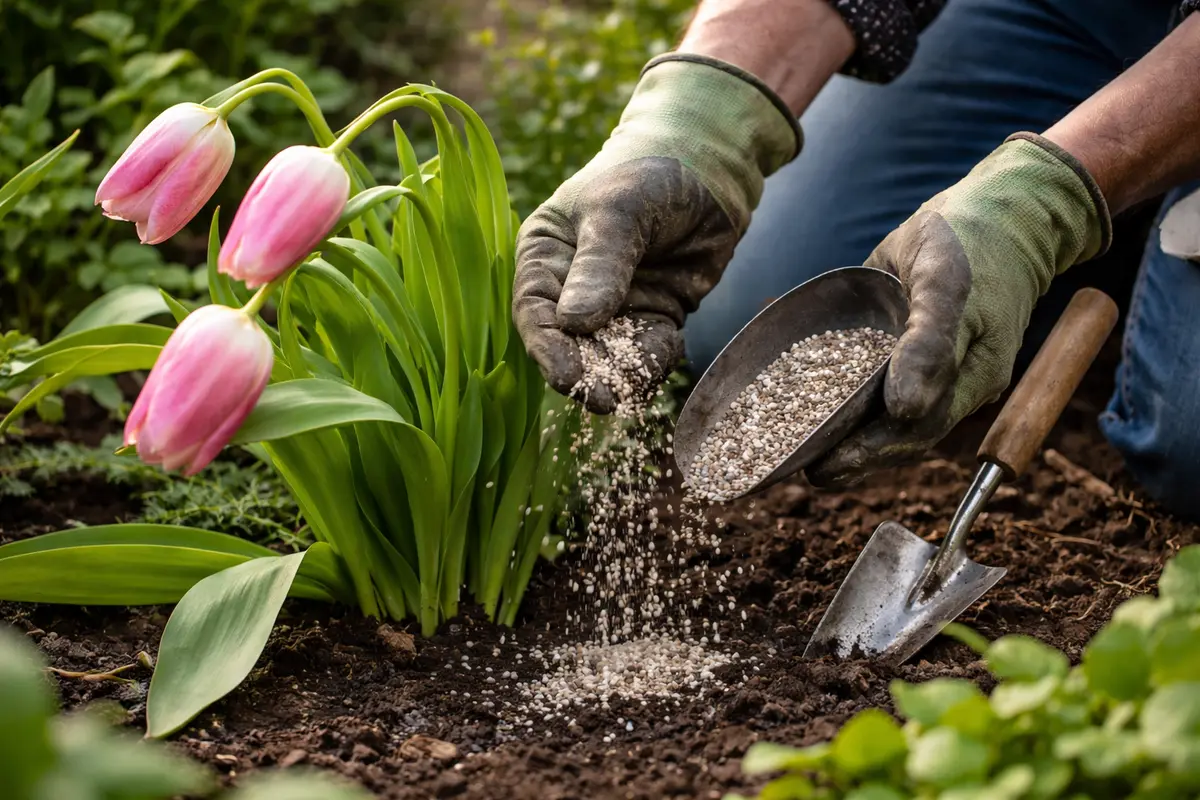
Begin by applying a balanced, slow-release fertilizer around the base of your tulips to encourage recovery. You should observe greener leaves and improved upward growth within a few days as the plants start to respond to the nutrients. Use fertilizers with an NPK ratio of 10-10-10 or 5-10-10 to ensure your tulips receive essential nutrients while building sturdy stems. Targeting soil amendments should also take into account the plant’s existing needs in terms of potassium and magnesium; these nutrients help reinforce the plant’s cellular structure and internode flexibility. Applying around 1 cup of fertilizer per plant will generally suffice, but adjust based on the product’s recommendations.
Nourishing the soil aids in replenishing lost nutrients, particularly significant after stressful weather conditions. Healthy root systems are paramount for a robust above-ground structure; without adequate nourishment, the plants won’t flourish regardless of how much care you give them. Assessing soil quality by measuring pH levels can redirect your feeding approach; tulips prefer slightly acidic to neutral soil (pH 6.0-7.0). Regular fertilization schedules will help prevent nutrient depletion, especially after torrential rains that wash away important minerals. Observing the upper leaves can also provide insight; if they appear yellow or pale, consider immediate fertilization to reverse any nutrient deficiencies that have developed due to disruption from the winds.
Gardeners sometimes fail to modify their feeding routines following adverse weather, mistakenly believing that healthy bulbs can manage without extra nutrients. Signs of nutrient deficiencies typically manifest as yellowing leaves or failure to bloom, signaling the need for intervention. It’s best to act quickly; for example, when leaves begin to curl or droop instead of maintaining their natural posture. If fertilizer applications do not improve conditions within 10-14 days, the next step should include soil testing to check for compaction or drainage issues that can inhibit root access to nutrients. If the soil is too compacted, consider aeration methods to help roots breathe and thrive. Additionally, ensuring proper water drainage through landscaping techniques can prevent the roots from sitting in excess moisture, which further supports recovery.
Step 4 – Inspect Tulips for Injury Signs Weekly
Check your tulips weekly for any signs of new damage or stress. Look for symptoms such as yellowing leaves, wilting flowers, or signs of pest activity, which can indicate that your recovery efforts may not be yielding the desired results. This ongoing assessment can often catch issues before they escalate into more serious problems, facilitating quicker interventions. Record noted changes after watering or fertilization so you can adapt your methods based on real-time conditions.
As your tulips recover, the leaves should turn vibrant green, and you should observe new growth emerging toward the sun. Firm, resilient stems signal that the plant is effectively absorbing nutrients and water; this is a clear sign of recovery. If you frequently find that conditions fluctuate—like inconsistent rainfall or increased pest activity—be prepared to adjust your monitoring and watering strategies accordingly. Keeping a journal of observed changes not only tracks improvements but also aids in recognizing recurrent issues that may arise later. Such documentation can reveal patterns, helping you predict when certain problems might occur in the future and to reevaluate your overall care routine for the tulips.
If you notice signs of new damage returning after implementing recovery steps, revamping your watering regimen becomes vital—especially during dry spells or when heat stress occurs. If leaf wilting is observed sooner than expected, this suggests moisture content is either too high or too low. Documenting watering frequency can guide adjustments necessary for optimal care. Conversely, if too much time has passed without adjustments to the watering schedule, it’s possible for the soil to dry too much, leading to further stress. Regular assessments ensure that your tulips remain in good health, fostering a resilient bloom for the next season. If you find signs of fungal growth or pests, consider reevaluating your integrated pest management strategies. Over-saturation can lead to rot, so allowing the soil to dry out adequately before re-watering is critical for preventing root diseases.
FAQ
How long does it take for tulips to recover from heavy winds?
Recovery depends on the extent of the damage to the tulips. Typically, you can expect to see signs of improvement within 1-2 weeks if you take immediate action. However, severely damaged stems may take longer to recover and might need additional support or care to fully stabilize. Continued monitoring during the initial recovery weeks is crucial to dictate necessary adjustments in your care routine to promote optimal resilience.
Can drooping tulips spread the problem to nearby plants?
While drooping itself doesn’t directly lead to disease spread, increased stress on your plants can weaken their defenses against pests and diseases. Monitor nearby plants closely for any signs of distress as their health could be indirectly affected if the drooping tulips succumb to pathogens or pests. Environmental conditions often influence nearby plants as well; keeping vigilance can allow for more immediate responses in case problems arise while maintaining the strength of the overall garden cohesion.
Should I remove all damaged parts of the tulips?
Only remove parts that are severely damaged or dead, as excessive removal can shock the plant and hinder recovery. Pruning lightly helps redirect energy to healthier sections, but a heavy-handed approach can result in lasting harm. Focus on maintaining robust growth moving forward by supporting and nourishing them, rather than extensive cutting. Strategically removing damaged areas will target them, allowing the plant to heal effectively. This approach will yield stronger blooms in the upcoming season when care is implemented correctly and timely.