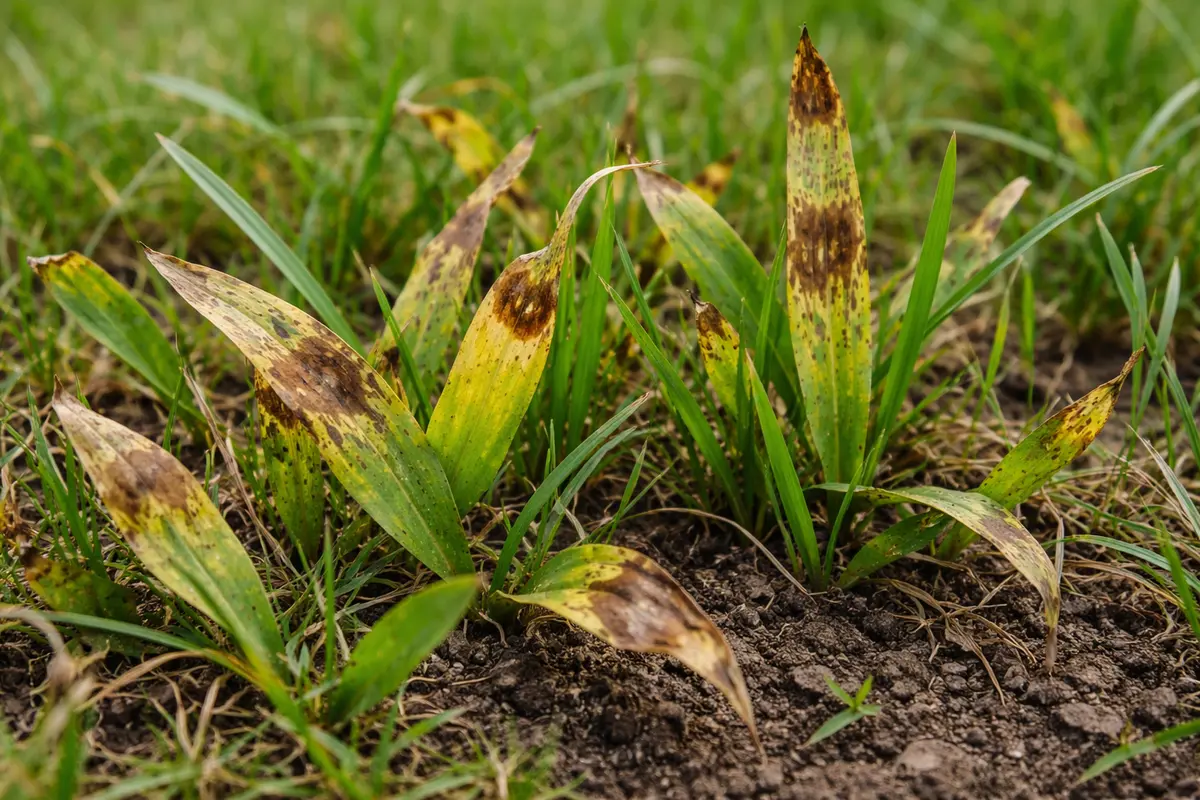
You may notice patches of yellow grass appearing across your lawn when the warmer spring days finally arrive, which is why you need to know what to do if lawn turns yellow in spring. This yellowing often indicates that the grass is struggling due to factors like drought stress or nutrient deficiency, leading to a decline in overall health. If left unaddressed, the problem gets worse over time, ultimately weakening the plant and making it more susceptible to pests and diseases, but fixing it is possible now—simply monitor the soil moisture and adjust your fertilization routine accordingly.
Step 1 – Check for Soil Issues Causing Yellowing
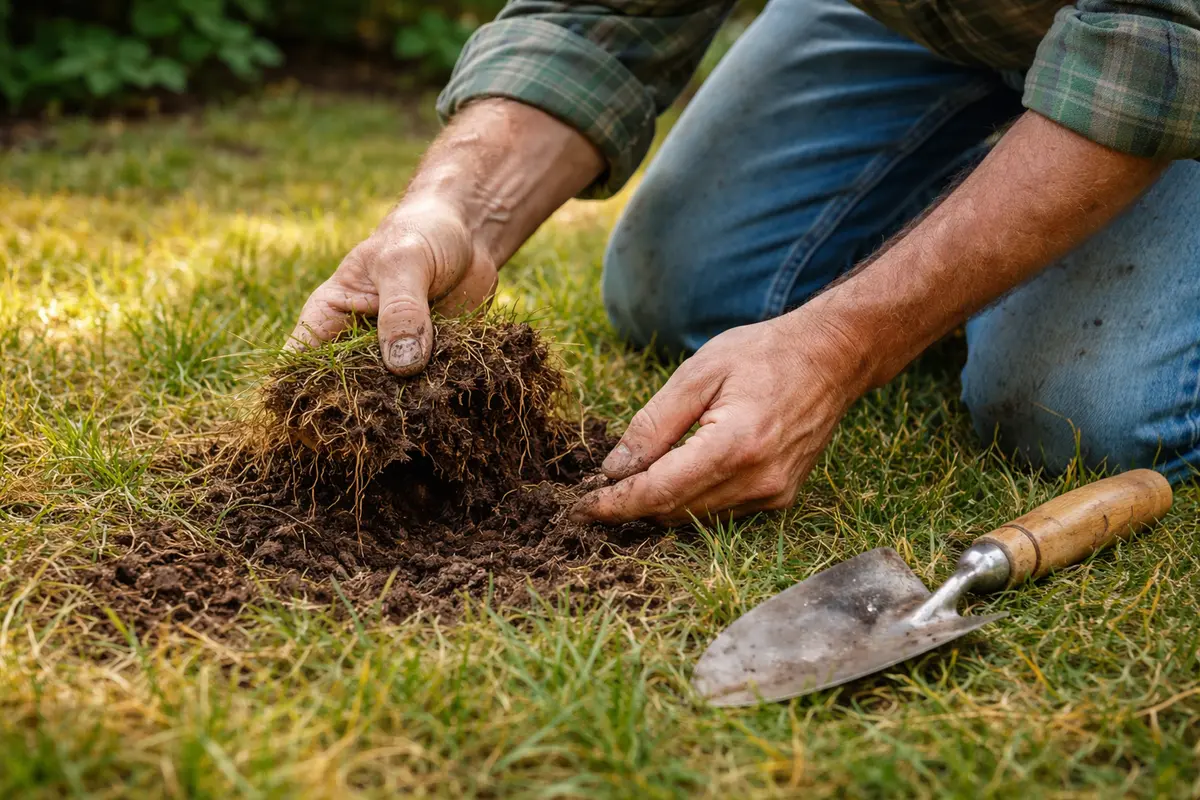
First, check the soil moisture by inserting a finger about two inches into the ground. If it feels dry, immediately water your lawn deeply to provide moisture, aiming for about one inch of water. Within a few hours, look for the grass blades to start perk up and return to a greener hue, indicating initial hydration.
Acting fast is critical because drought stress can lead to root damage in grass, which occurs when the plant cannot access adequate water for metabolic processes. If you delay watering, you risk stunting the grass growth and causing a permanent yellowing due to damaged roots, which can take longer to recover once replenished. If spotting shows fungal growth, assess for excess moisture to avoid overwatering.
In one instance, a neighbor noticed yellow patches and delayed watering for several days; the grass completely wilted and struggled to revive, whereas my timely watering resulted in a quick recovery. Many gardeners mistakenly neglect to check soil moisture, thinking yellow grass merely indicates a need for fertilizer when it is primarily thirst-driven.
Understanding the moisture levels in your soil is crucial; both inadequate drainage and excessive watering can significantly stress your grass, leading to yellowing. For instance, if the soil remains too wet for long periods, it can suffocate roots, preventing proper nutrient uptake and making your grass vulnerable to diseases, such as root rot, that can develop in soggy conditions. In contrast, if the soil feels dry and hard, especially after a period of warm weather, the grass will struggle to absorb the necessary nutrients and moisture, particularly during critical growth periods.
A common mistake many gardeners make at this stage is overwatering, particularly if a rainstorm has recently passed. If you notice soft, spongy soil that retains water, it’s crucial to aerate the lawn to improve drainage. This process involves creating small holes in the soil, ideally spaced about 6 inches apart, to allow better airflow and moisture penetration. Conversely, if the soil feels hard and dry, adjust your watering habits to ensure a more consistent moisture level, potentially increasing frequency and depth if necessary. If you have a powerful lawn irrigation system, consider tuning it down during rainy months to prevent soil saturation. Over time, monitor for changes, and if conditions do not improve within a week, consider checking for compaction or other underlying issues, such as clay soils that prevent water saturation.
Step 2 – Assess Nutrient Deficiencies in Grass
Start by inspecting your lawn for signs of nutrient deficiency, particularly nitrogen. If the grass blades appear pale yellow, apply a nitrogen-rich fertilizer immediately; you should notice greener growth within a week.
Nitrogen is essential for chlorophyll production, which gives grass its green color. When nitrogen is lacking, the grass cannot synthesize enough chlorophyll, leading to the yellowing of the leaves. Conversely, if the lawn is yellowing but shows signs of dark, saturated areas, your soil might be waterlogged, causing root suffocation and poor nutrient uptake.
If the soil smells sour, this indicates potential root rot due to excess moisture, necessitating improved drainage solutions like aeration. Alternatively, if the yellowing is uniform and widespread across your lawn, consider testing for soil compaction, which restricts root growth and nutrient absorption.
Deficiencies in soil nutrients directly impact your lawn’s health, with nitrogen deficiencies often leading to chlorosis, where yellowing occurs on older leaf blades first. Chlorophyll production drastically decreases when your grass lacks adequate nitrogen, resulting in dull coloring and stunted growth. If your soil test indicates nitrogen deficiency, applying the right type of fertilizer can correct these issues. However, the application should be timely—preferably after a rainfall—since nutrients can be washed away by heavy waters, especially in early spring before the ground has warmed up.
If your soil test indicates high pH levels, which impede nutrient absorption, consider applying sulfur or ammonium sulfate to lower the pH effectively. This adjustment can enhance the availability of essential nutrients by encouraging a more conducive environment for microbial activity in the soil. Additionally, if your test shows adequate nutrients but yellowing persists, focus on compacted soil or poor drainage as these factors can mimic nutrient deficiency symptoms. For example, a compacted area may feel dense and heavy underfoot, and grass in that zone might appear unhealthy. In this scenario, consider core aeration to relieve compaction. Pay attention to the texture of the soil when testing; it should crumble easily and not feel like a solid mass.
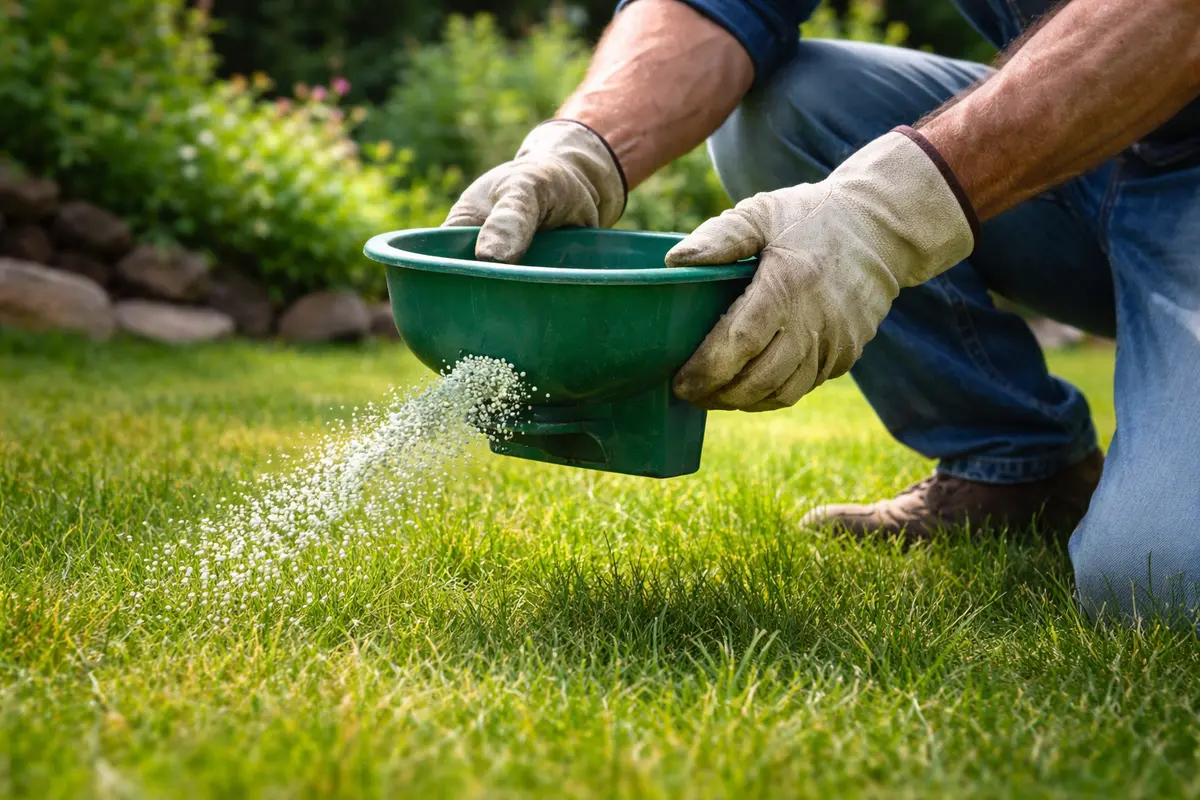
Step 3 – Feed Your Lawn to Encourage Green Growth
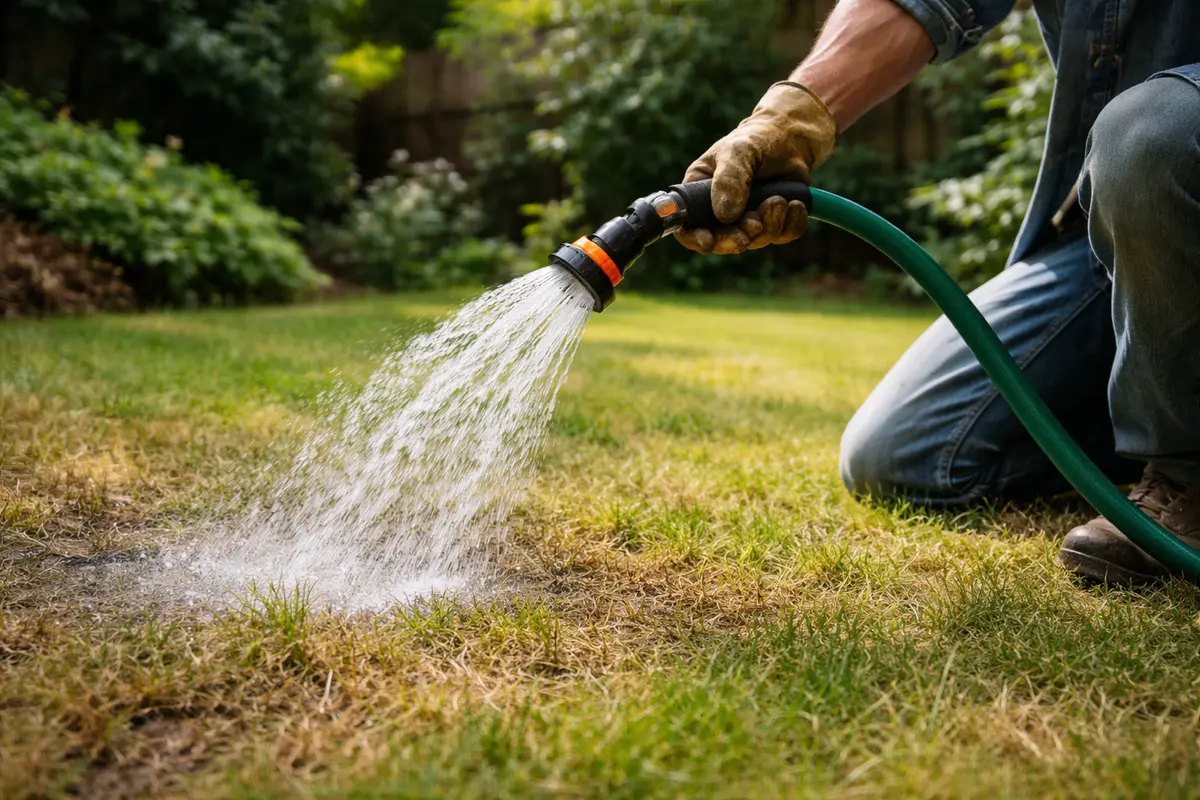
Start by watering your lawn deeply, applying about one inch of water every week to combat dryness and encourage recovery. In just a few days, you should notice a gradual shift from yellowing to greener patches, indicating that the grass is starting to absorb moisture and nutrients effectively.
The timeline for recovery can vary; typically, you’ll see significant improvement in two to four weeks if conditions are optimal. Grass that turns dark green and regrows upright is a sign of healthy progress, while persistent yellow areas indicate ongoing stress. Factors such as temperature and sunlight can accelerate recovery—warm, sunny days are ideal, while shaded or cold areas may slow regrowth. If not this condition, check for soil compaction or fungal diseases that might be affecting growth.
Avoid the mistake of overwatering or over-fertilizing, as these can lead to root rot or nutrient burn, worsening the situation. Instead, follow a balanced fertilization schedule, applying a slow-release fertilizer gradually. For instance, if the grass is receiving more than the recommended amount of water but still appears yellow, check for drainage issues in those areas.
Fertilization is crucial for jumpstarting grass growth after the stressors of winter. As the grass begins to uptake essential nutrients from the applied fertilizer, chlorophyll production will increase, leading to greener leaves. It’s beneficial to choose a slow-release fertilizer, which can provide a steady stream of nutrients over an extended period, mitigating the risk of nutrient leaching away or being washed out during heavy rainfall common in spring.
Avoid applying excessive fertilizer, as it can lead to nutrient runoff and potential lawn burn, presenting a tricky scenario if initial applications are overly aggressive. To prevent this, always adhere to label instructions for the recommended amount, and consider splitting applications every 4 to 6 weeks throughout the growing season to maintain consistent nutrient levels. Also, take note of the environmental conditions; too much nitrogen in rapidly warming spring weather can hasten grass growth, promoting lushness but leading to an inadequate drought-resistance strategy. If you notice any signs of fertilizer burn, such as burnt tips on the grass blades shortly after application, reduce the amount used in subsequent treatments. This feedback helps calibrate future nutrient application.
Step 4 – Water Deeply to Prevent Future Yellowing
Start by applying a balanced fertilizer specifically designed for lawns in early spring. Regularly feeding your lawn with the right nutrients will help restore its green color and establish a robust growth pattern.
Environmental conditions such as temperature fluctuations and increased rainfall can contribute to yellowing, especially if the soil lacks essential nutrients. A consistent fertilization routine addresses nutrient deficiencies and promotes strong root development, making the lawn less susceptible to stress during changing weather patterns. For instance, a lawn receiving proper nutrition will display vibrant green blades, while a nitrogen-deficient lawn shows signs of yellowing. If your lawn isn’t responding positively, check the soil pH and drainage to ensure better nutrient absorption.
During particularly wet springs, consider adjusting the fertilization schedule to apply a slow-release granule instead of a quick-acting liquid fertilizer. This method allows nutrients to be available over an extended period, preventing any runoff loss and ensuring the lawn gets the nutrition it needs even in saturated soils.
Deep watering encourages healthy root development, allowing your lawn to access moisture during dry periods more effectively. Moreover, it greatly reduces weed presence by promoting a denser turf that can outcompete unwanted plants for nutrients and resources. Monitor your watering, especially during the hot months, as too much shallow watering can result in weak root structures, which increases the likelihood of yellowing during stressful conditions.
During hot, dry periods, closely monitor soil moisture daily. If you notice areas of your lawn beginning to brown, consider adjusting your watering schedule accordingly—especially in peak summer months. For instance, increasing watering frequency during extreme heat while utilizing the deep watering technique can substantially help keep your lawn robust and green. If the area remains dry within a couple of inches despite regular watering, it may warrant a reevaluation of your irrigation system. Common culprits may include damaged sprinkler heads that do not spray water properly or hoses that kink, preventing even distribution of moisture.
Step 5 – Inspect Grass for New Yellow Patches Weekly
Start by checking the moisture levels in your soil using a soil moisture meter or by digging a small hole. Observe the color and texture of the grass; yellowing often indicates insufficient water or nutrient imbalance. Recheck the moisture and grass health every few days to track improvements or worsening conditions.
A fully recovered lawn will showcase rich green blades that are firm to the touch and display vibrant color without any discoloration. In contrast, if the grass starts to develop brown tips or fading patches, it signals that the issue may be returning. If you see a return of yellow hues, check for compacted soil or pest activity, both of which can contribute to stress.
If the yellowing persists despite following your watering and fertilization regimen, consider testing your soil for pH or nutrient levels to identify potential deficiencies. Should you find imbalanced nutrients or pests, apply the appropriate fertilizer or pest treatment, ensuring to monitor your lawn’s response closely afterwards.
Regular inspections enable early detection of returning problems. Look for subtle changes in texture or color; healthy grass should feel firm and have a vibrant green hue. If yellow spots reappear, it could signal persistent underlying issues such as continuing nutrient deficiencies, overwatering, or even pest infestations. Observing the overall area can also help you ascertain if the problem is isolated or starting to spread, critical in deciding how quickly to escalate the action taken. For example, if you find that yellowing patches are expanding beyond the initial zones, it may be necessary to reassess both your watering and feeding strategies.
If yellowing continues despite following these steps, consider consulting a lawn care professional or pest expert. They can offer targeted treatments addressing specific pest pressures or diseases impacting your lawn that earlier efforts may not have resolved. This approach helps ensure that you are not only treating the symptoms but also addressing the root causes of the issue effectively. Be cautious with chemical applications; rely on expert guidance to avoid damaging your lawn further while battling these pests or pathogens.
FAQ
How long does it take for grass to recover after yellowing?
Recovery after implementing the right measures typically takes 1-2 weeks, depending on the severity of the yellowing and the steps taken. You should begin to observe greener blades and signs of new growth within this timeframe, significantly improving the overall appearance of your lawn.
Can yellow grass spread to healthy patches?
Yes, if the yellowing is caused by disease or pests, it can easily spread to healthy areas. It’s crucial to act quickly and treat any identified problems to prevent further damage to your lawn and maintain its overall health. Early intervention is key in preserving the integrity of your landscape.
Should I remove the yellowed grass?
If patches are severely damaged and dead, carefully removing them may allow for new growth when combined with effective fertilization and proper watering techniques. However, maintain healthy grass in the surrounding areas, as they can recover best on their own with proper care and attention to environmental conditions such as light and moisture.