You may notice that your houseplants are displaying yellowing leaves after fertilizing, which is a clear sign that you need to know how to treat yellowing leaves on houseplants after fertilizing. This yellowing usually occurs due to the buildup of salts from the fertilizer, leading to damaged roots that struggle to take up nutrients. If ignored, this issue can worsen and weaken the plant, making it harder to fix later on, but you can improve the situation now by adjusting your watering routine and checking the soil for salt buildup.
Step 1 – Inspect Affected Leaves for Nutrient Burn
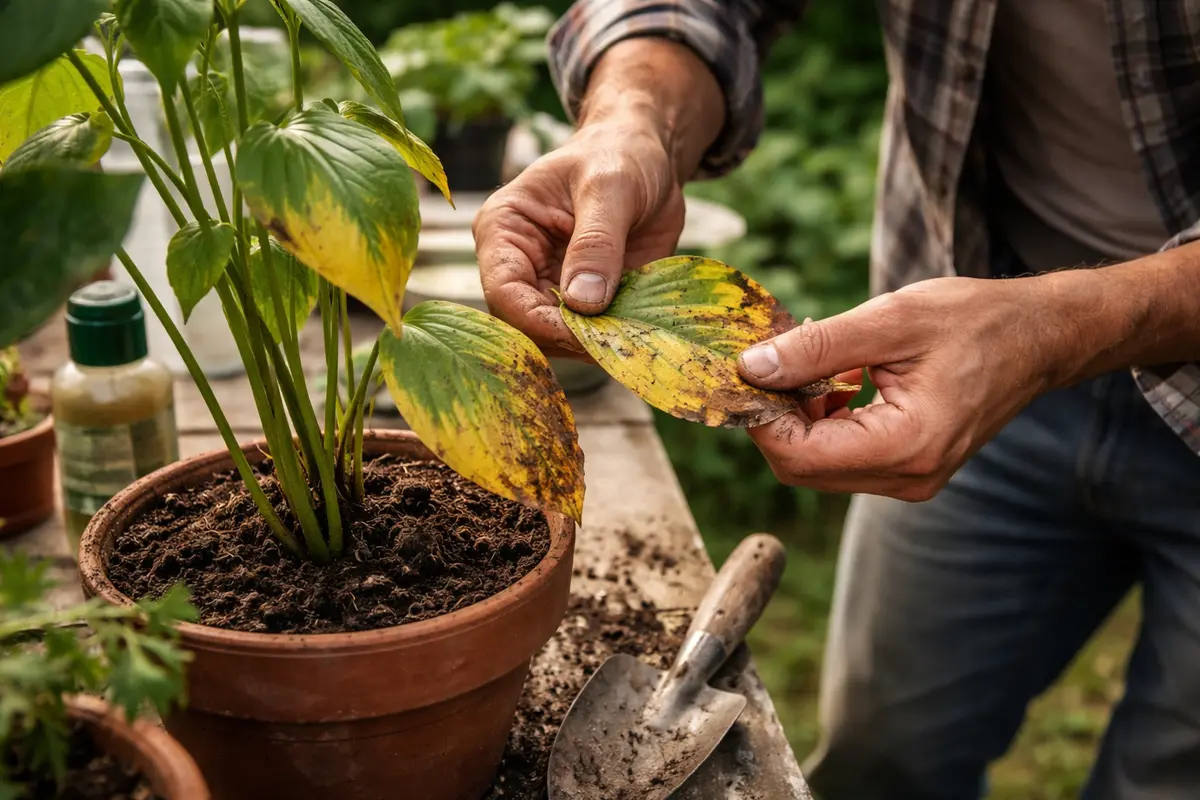
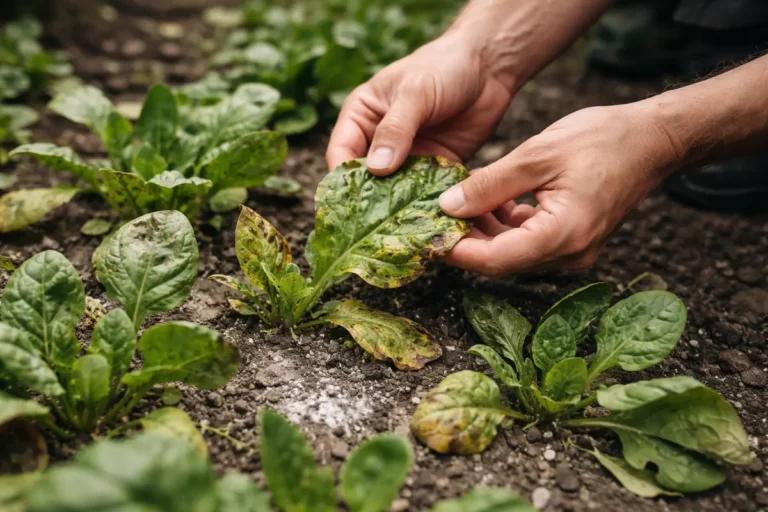
Start by examining the yellowing leaves closely for signs of nutrient burn. You should see clear evidence of leaf tip browning or crispy edges within moments of your inspection. These visible signs help confirm if nutrient burn is the culprit. A good visual cue is to compare the yellowing areas to the healthier parts of the plant; the contrast will often reveal uneven coloring and texture. If the leaf tips appear scorched or dark brown, it may confirm nutrient burn is in effect.
Nutrient burn occurs when excess nutrients accumulate in the soil, leading to an imbalanced chemical composition that can cause foliage damage. This issue can manifest quickly, especially after applying a strong fertilizer or over-fertilizing, making immediate inspection crucial. Once you notice yellowing, act fast, as left untreated, it can spread, resulting in more extensive leaf damage, possibly even leading to leaf drop if the condition worsens. A plant in the early stages of nutrient burn may only show slight yellowing at the leaf tips; however, if not addressed promptly, symptoms can escalate, leading to substantial browning and crispiness across multiple leaves.
A common mistake at this stage is to assume all yellow leaves are due to lack of water, prompting over-watering. However, excessive fertilization can actually dehydrate the roots instead, preventing them from efficiently absorbing water. If you see crispy leaf edges combined with a light green-yellow color, it may indicate nutrient excess rather than dryness. A helpful rule of thumb is to assess the soil moisture and nutrient levels before proceeding with any watering; errant watering can compound the problem. Additionally, checking the leaf undersides may reveal any pests that could exacerbate leaf stress. Addressing the primary issue promptly can prevent further complications, which is why understanding the cause of yellowing leaves is vital. If, after this diagnosis, you still see yellowing spreading, consider whether the fertilizer was too concentrated or improperly applied, leading to immediate and damaging impacts on the plant’s health.
Step 2 – Diagnose Over-Fertilization Issues in Soil
Check the soil moisture level to determine if over-fertilization is the cause of your plant’s distress. You should observe that the soil feels overly dry, compact, or has unreleased fertilizer particles visible at the surface. This dense soil structure can indicate an unhealthy buildup of salts. If compacted soil retains water without draining, it exacerbates the situation by risking root suffocation. To confirm, use your finger or a moisture meter to test the soil’s depth; if it remains dry several inches down, it’s a clear sign of issues.
The presence of compacted soil indicates a buildup of salts from fertilizers, which might hinder water absorption. Salts in the soil draw moisture away from the roots, further stressing the leaves and causing them to yellow. Nutrient lockout, a result of soil imbalances, can inhibit essential nutrient uptake and stifle plant growth, leading to a vicious cycle of poor health. Regular monitoring of soil texture and smell helps catch issues early; if you feel granules of salt or see white crust forming on the soil surface, this is a significant indicator of excessive fertilization. If you notice the soil is hard and dry, and plants are not responding to watering, take immediate action.
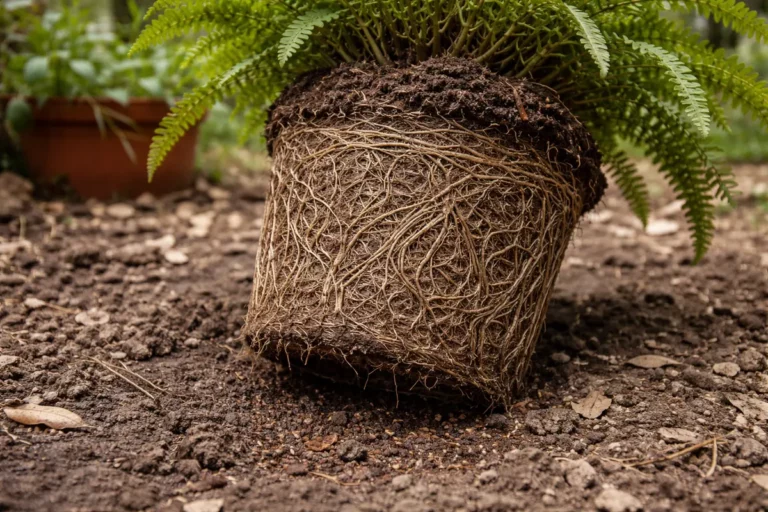
Should you notice a sour smell when checking the soil, this indicates that a different issue, such as root rot, might be present. Root rot can often be hidden until significant damage is visible. If root rot is suspected, promptly inspect the roots themselves. They should be firm and white; brown, mushy roots indicate decay that necessitates immediate and careful management. If you find unhealthy roots, ensure you are evaluating the moisture level of the soil before watering—moisture should be just right, allowing soil to stay damp but not soggy. Additionally, assessing for dark, saturated soil is crucial; if the soil feels squishy, it’s time to act. Neglecting to properly assess your plant’s environment can lead to further issues that are increasingly challenging to manage and repair, exacerbating plant stress. If root rot is confirmed, remove the affected roots immediately and implement better soil strategies to avoid future problems, like choosing well-draining soil blends.
Step 3 – Water Houseplants to Flush Out Excess Fertilizer
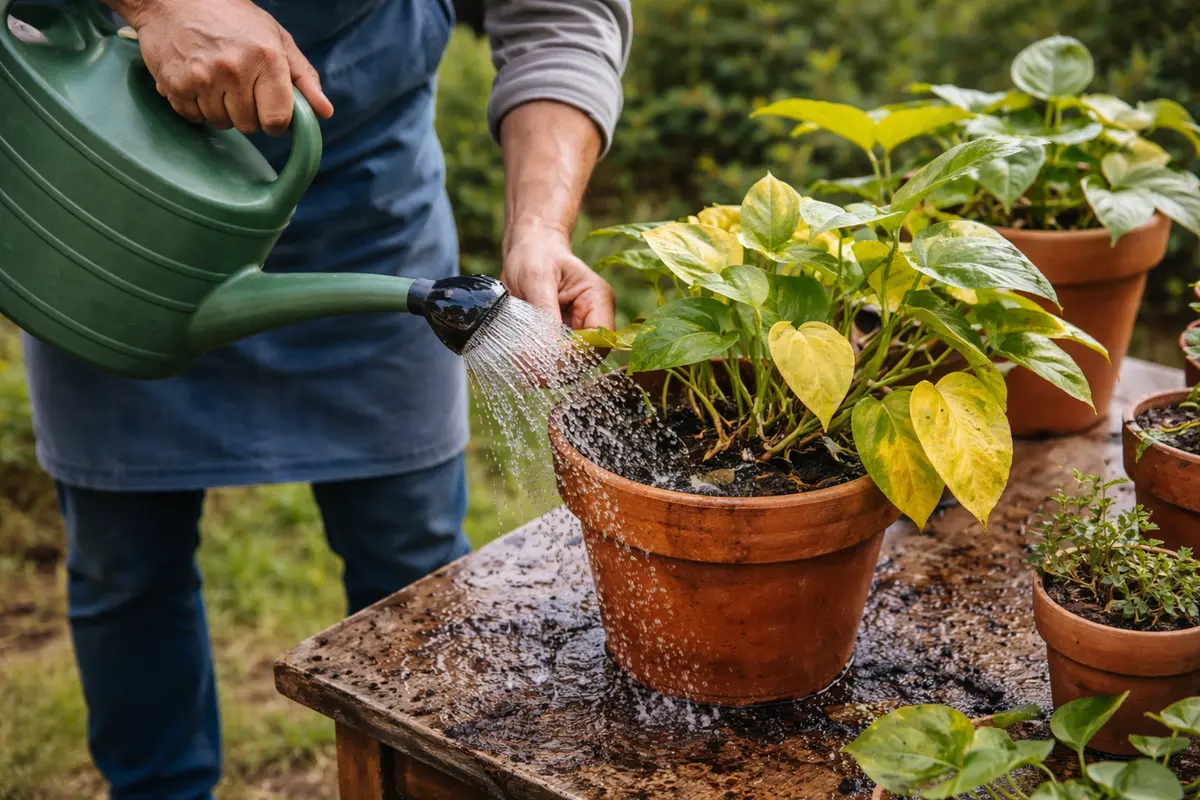
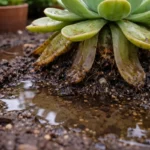
Water your houseplant thoroughly with clean, room-temperature water to flush out excess fertilizer. You should see the water draining from the bottom of the pot, indicating that you are successfully leaching away built-up nutrients. Aim to use about 2-3 times the amount of water relative to the pot size to ensure comprehensive flushing while avoiding waterlogging. It’s crucial to strike a balance; overly soggy soil can lead to more issues like root rot. For instance, if your pot is 10 inches in diameter, prepare to use about 1-2 gallons of water for effective flushing. Allow this process to take a few minutes to ensure the full depth is soaked. Soggy root zones are a common trigger for discover why your succulent is turning.
Flushing the soil not only helps remove excess salts and nutrients but allows your houseplant to regain access to the necessary moisture content it desperately needs. As the roots rehydrate, they will gradually improve their overall function, absorbing water and nutrients more effectively. After this process, expect leaves to begin regaining their lush green hue within a week or so. Typically, you should observe signs of revitalization as previously limp, yellowing leaves take on a more vibrant appearance. Look for changes in texture; healthy leaves should feel flexible and resilient without being mushy.
To prevent recurrence, maintain a watering schedule that includes flushing the soil once or twice a month, particularly if your plant is in a high-nutrient environment. A crucial factor is how often you fertilize; overly frequent applications can lead to excessive salt buildup. A frequent oversight during this phase is neglecting to ensure proper drainage; without it, water accumulation can lead to root issues. Double-check that your pot has adequate drainage holes—ideally, multiple holes to avoid clogging by debris. If the drainage holes become blocked, consider cleaning them to restore proper function. Elevating the pot slightly can help maintain airflow around the bottom, facilitating quicker drying and reducing stagnation.
Step 4 – Check for New Yellowing Leaves After Treatment
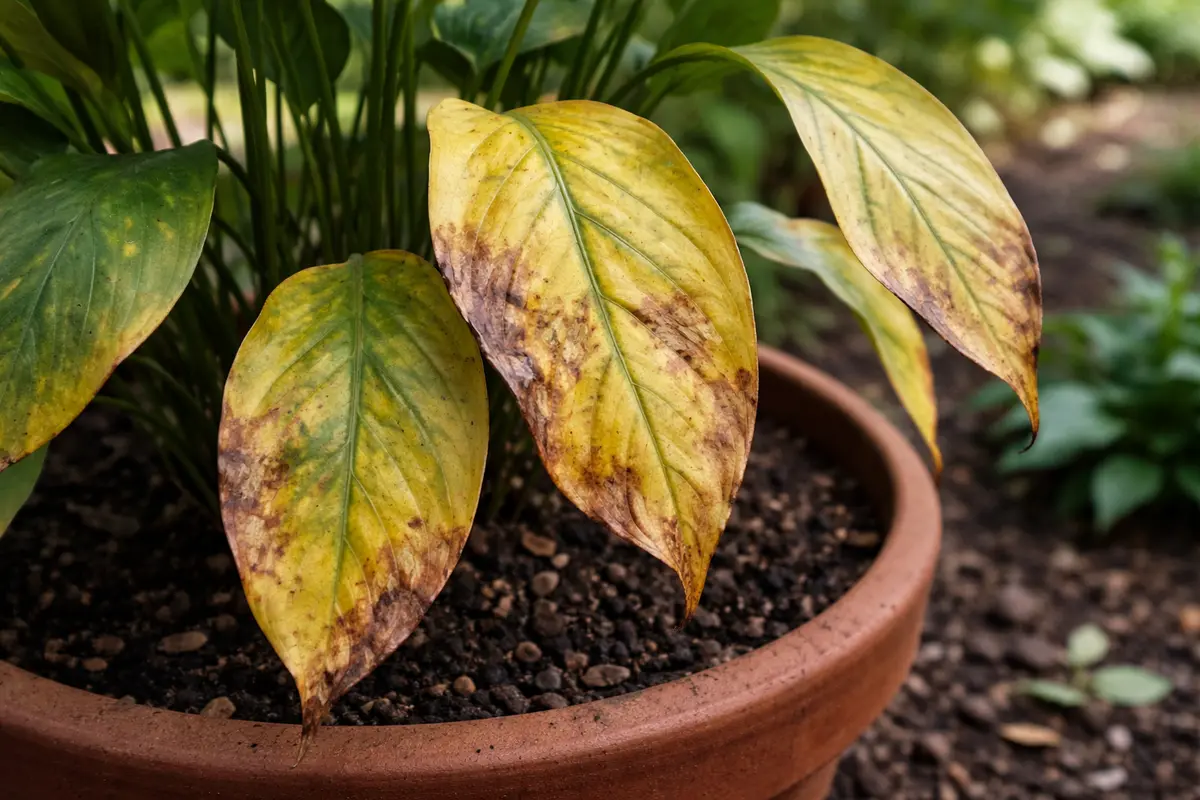
Monitor your houseplant closely over the next week, especially looking for any new yellowing leaves. Regular checks are essential to spot any potential issues early, and you should be prepared to identify small changes; for instance, newly sprouting healthy leaves or improvement in the color of existing leaves may indicate recovery. If leaves continue to yellow despite treatment, further investigation into other environmental factors may be required. An important distinction to make is that some yellowing can occur as the plant naturally sheds older leaves, but this should occur at a rate that does not compromise overall plant health.
Within a week or so after treatment, a fully recovered plant will typically show signs of growing fresh leaves that are vibrant and healthy. Look for any visible signs of renewed vigor, such as thicker stems or fuller foliage. You might also observe that older leaves regain firmness and sheen, indicating that the plant’s health is on the mend. Maintaining consistent monitoring ensures that you remain aware of the plant’s condition, including any sudden decline in overall leaf health. If the color remains off or deteriorates, this signals that further issues might still be present, possibly indicating ongoing nutrient deficiencies or environmental stressors. Each plant species has its unique response time, so comparing against expected growth rates for your specific plant can provide additional clarity.
If the problem resurfaces despite proper care, consider evaluating environmental factors such as light exposure, humidity levels, or temperature fluctuations that may be contributing to plant stress. If the plant is receiving too much direct sunlight, the processes of photosynthesis can become hampered, leading to further yellowing. Tracking overnight temperatures is also crucial, as extreme temperature changes can affect overall health. If new yellowing occurs within 3-5 days after you see recovery signs, it could indicate that the initial issue was not fully resolved or that new stresses are affecting the plant’s revival. Regular follow-up checks every 3-5 days post-treatment are vital for catching early signs of problems, including pest infestations or shifts in humidity, both of which can derail recovery. Without diligent observation, treatment could stall, returning the plant to poor health.
FAQ
How long does it take for yellow leaves to recover?
Recovery time varies, but typically you can expect to see improvement in leaf color within 1-2 weeks after taking corrective actions. Factors such as plant variety, environmental conditions, and the extent of damage affect recovery duration. If the yellowing was particularly severe, it may take longer for fully green leaves to re-emerge, as roots must acclimate to improved conditions; in cases of serious nutrient burn, damaged leaves might not fully recover, thus necessitating the potential for pruning.
Can over-fertilization spread to other plants?
Yes, over-fertilization can potentially impact nearby plants if nutrients leach into shared soil or through watering practices. This is particularly a risk in communal pots or planters where moisture can mix and create a uniform nutrient profile. Always ensure that each plant’s nutrient needs are assessed independently to avert similar issues across your indoor garden; if you suspect excess nutrients in one plant, check others nearby to ensure they remain unaffected. Regularly assessing the watering habits of other plants adjacent may uncover similar struggles that warrant unified treatment, as collective over-fertilization can lead to systemic issues.
Should I remove yellow leaves after treatment?
It’s generally advisable to remove heavily damaged leaves, as they can drain energy from the plant and delay recovery. Removing leaves that feel crunchy and dry helps prevent the plant from reallocating resources to damaged tissues. However, if leaves show minor yellowing, they can sometimes recover. Assess them based on their overall firmness and color before deciding which to remove. Healthy, pliable leaves that show signs of improved chlorophyll production are best left until they completely lose their vitality. Additionally, leaving some yellowed leaves may sometimes contribute to photosynthesis, even if it’s at a reduced rate; thus, consider your specific plant’s resilience before making definitive pruning decisions.