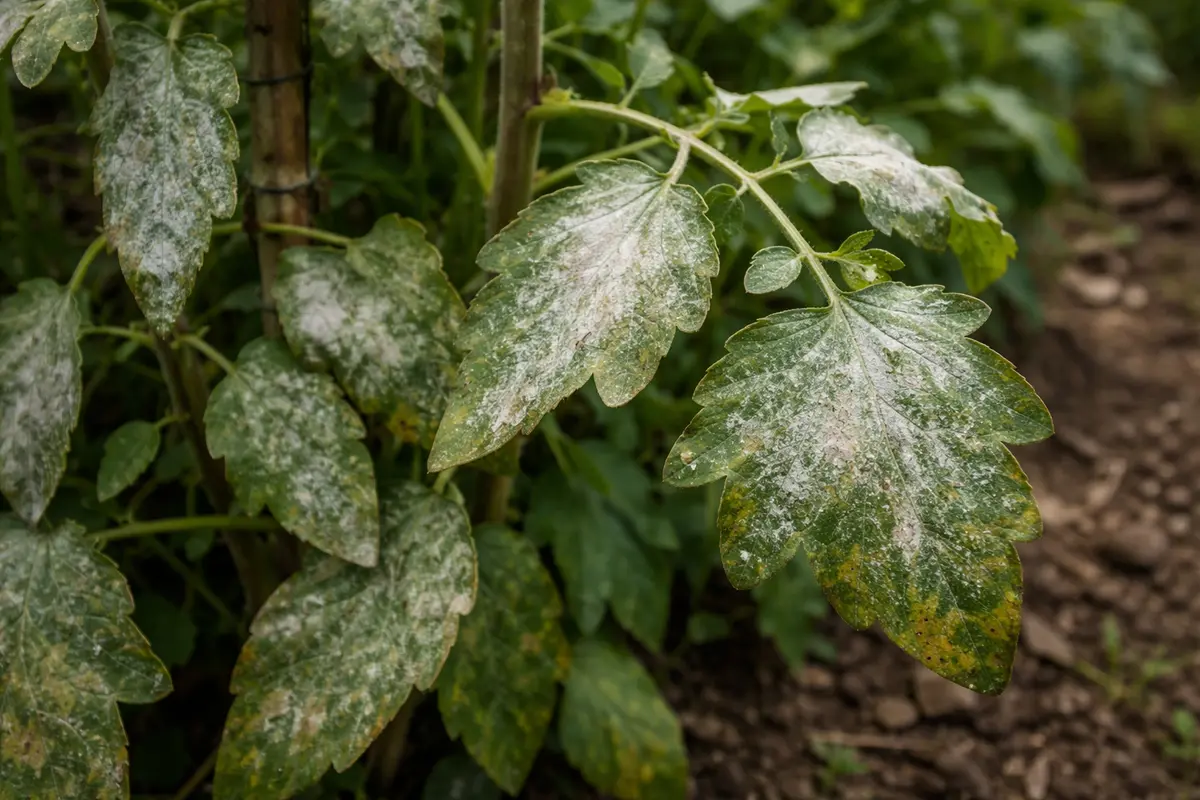
You may notice fuzzy white spots on your indoor plants during humid weeks, which is why you need to know how to prevent mold on indoor plants during humid weeks. This problem arises when excess moisture creates the perfect breeding ground for mold, leading to unsightly growth and potential damage. If left unaddressed, the issue gets worse, weakening the plant and making it harder to fix, but you can tackle it now by inspecting your plants, adjusting their watering schedule, and improving air circulation.
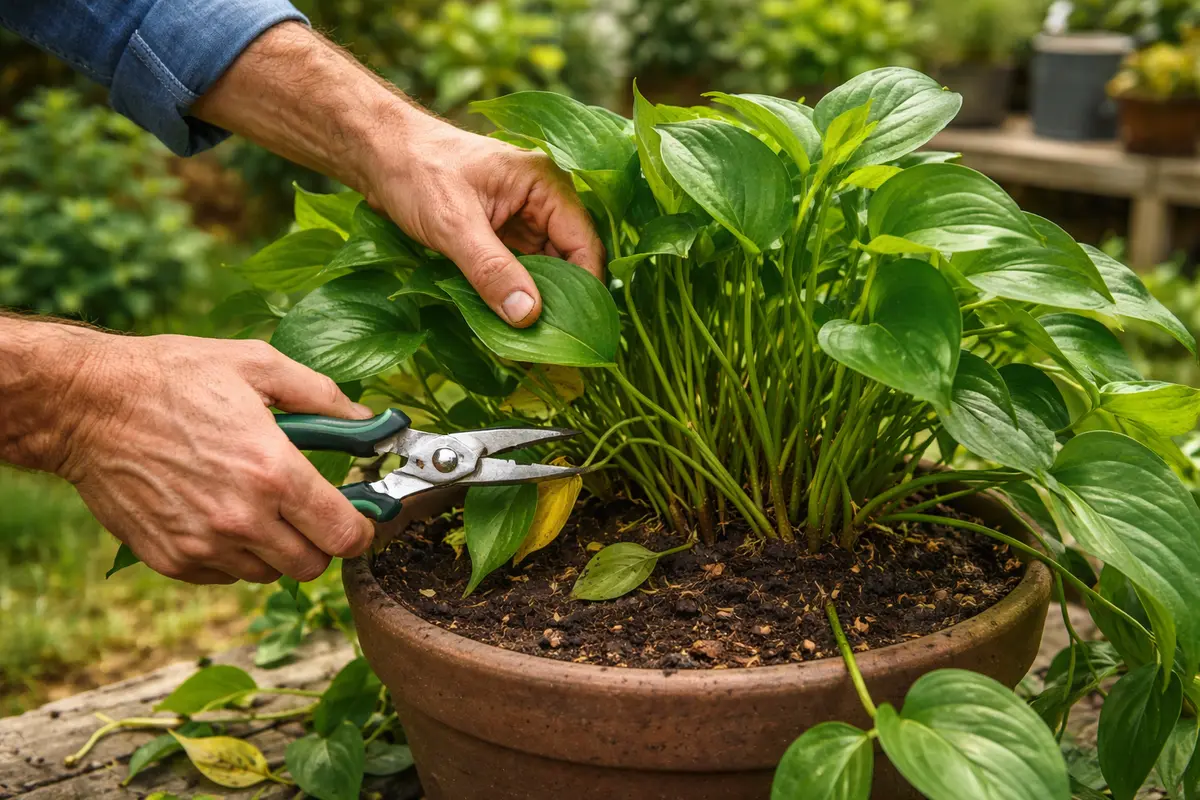
Step 1 – Treat Affected Leaves on Houseplants Immediately

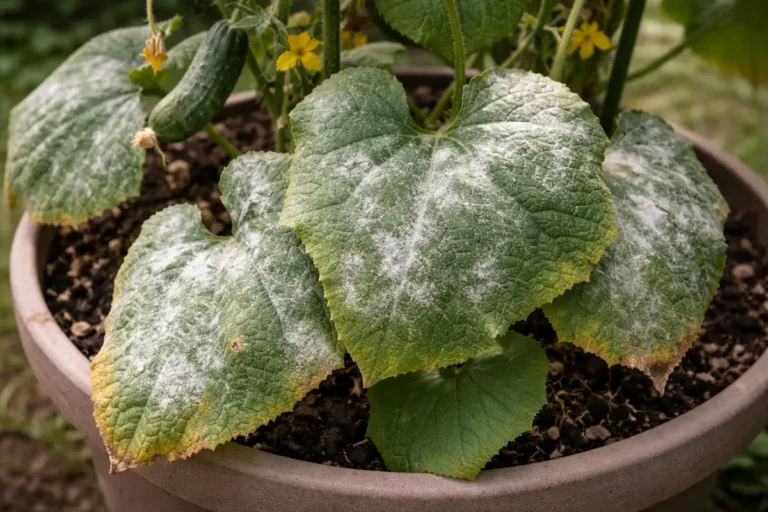
Start by removing any leaves that show visible signs of mold. You will see a reduction in visible mold patches within a few days, as clearances allow your plant to breathe again. Handle the plant gently to avoid spreading spores; utilizing gloves can limit cross-contamination of the mold to unaffected areas. After removal, the exposed surfaces of the remaining leaves should show improvements as they regain access to light. Aim for a clean-cut, as this minimizes the risk of further damage and also prevents bits of tissue from remaining that might harbor mold.
Removing affected leaves is crucial because mold can quickly spread to healthy foliage. Mold spores are notoriously prolific; they can travel through air circulation and on direct contact, meaning that if you don’t act swiftly, an entire plant may become compromised. By eliminating the main source of mold, you give your plants a chance to recover without distraction. Healthy leaves may start to exhibit a more vibrant color while being free of the fungus. This process also allows for better exposure to light and air, which are key for photosynthesis and overall health promotion. Expect newly exposed areas, now uncovered, to enhance nutrient uptake and increase overall plant vitality.
Many gardeners mistakenly assume that just cutting back the leaves is enough without addressing the underlying cause. For those who skip inspecting their home’s humidity levels, mold may return faster than anticipated due to optimal conditions still lingering in the environment. A key observable sign to monitor is any moisture around the base of the plant or under the leaves; if humidity remains high, combined with limited air circulation, conditions become ripe for a recurrence, potentially leading to further substantial damage to your plants, eclipsing the benefits of leaf removal. Instead of just a single removal session, a persistent outlook on sustaining dry conditions is crucial for long-term health.
Step 2 – Check Humidity Levels Causing Mold Growth
Start by checking the moisture level in your indoor plant’s soil; if it feels overly damp, reduce watering immediately and allow the soil to dry for a few days. You should notice a decrease in mold growth and improved aeration in the soil, which helps prevent future issues. Use a moisture meter for precise readings if needed; these can indicate when the bottom layers of soil remain damp while the top appears dry.
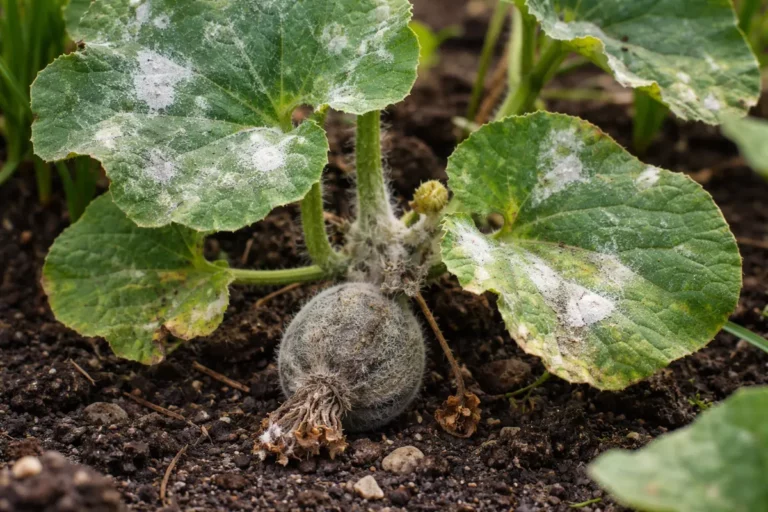
Mold thrives in consistently wet environments, where soil retains excess moisture. When you overwater your plants, the roots cannot breathe and become prone to rot, which creates a perfect breeding ground for mold. In contrast, if the soil is dry and crumbly, your plant is likely in better condition and less susceptible to mold issues. Mold outbreaks may become prevalent not just on the soil but around the base of the plant—a common sign that corrective action is necessary.
If the top layer of soil smells sour, it indicates anaerobic conditions where harmful bacteria may thrive; in this case, swap the potting medium for a fresh, well-draining mix to support healthy root conditions. Alternatively, if you notice mold on just the surface without a foul smell, gently scrape it away and improve air circulation around your plants to discourage recurrence. Be cautious, however; scraping too harshly can compromise the integrity of the soil structure or leave spores behind to regenerate.
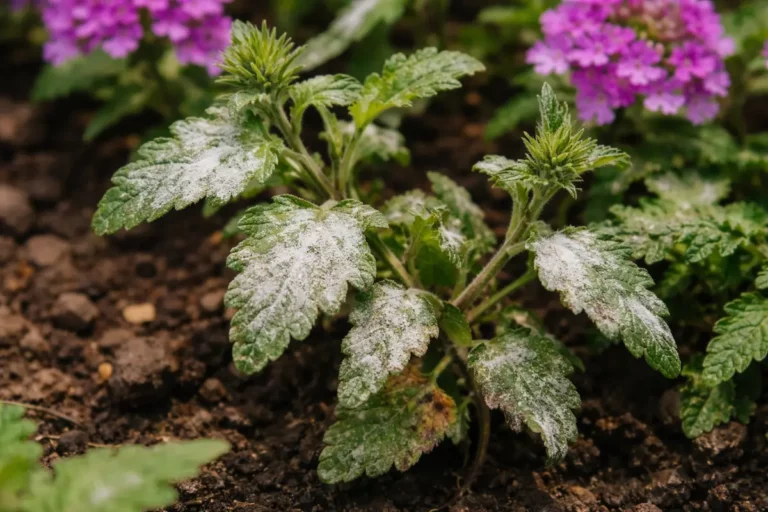
A relative humidity above 60% allows molds to flourish, as these fungi prefer damp environments to reproduce. As humidity rises, additional moisture gets trapped in both leaves and the soil, leading to an ideal breeding ground for mold outbreaks. Plants that retain moisture, such as ferns, may show signs of distress sooner than more drought-tolerant plants, which might delay the appearance of mold until conditions have become critically humid. Make it a routine to use a hygrometer to measure indoor humidity levels; consistent monitoring can help preemptively address mold issues.
If you do not spot any mold but the humidity level is consistently over 60%, consider relocating plants to a drier location, such as an area with better air circulation. A common mistake is keeping plants in a corner where airflow is minimal; this can foster mold conditions. For instance, if a plant is crammed between furniture pieces, air circulation around its leaves may be restricted, complicating recovery. Alternatively, if humidity remains high but your plant appears healthy, try placing a fan nearby to enhance air circulation. Without intervention, mold can easily mount an attack once weather patterns change, so checking humidity diligently will be key.
Step 3 – Increase Air Circulation Around Foliage
Start by carefully removing any visibly moldy sections of your indoor plants and ensuring proper airflow by spacing them apart. After a few days, you should notice a reduced presence of mold and an improvement in the plant’s overall condition as the remaining foliage becomes less discolored and limp.
Recovery from mold can take anywhere from a few days to several weeks, depending on the plant species and the initial severity of the infestation. Healthy regrowth is often characterized by new, vibrant leaves emerging where the mold was previously affecting growth; however, low light or overly wet conditions can slow this process down significantly. If the plant remains droopy and yellowed, check for adequate drainage and consider repositioning it in a brighter location.
Avoid overcompensating with water or fertilizer while your plants are recovering, as this can lead to further complications such as root rot. For example, African violets respond well with less frequent watering during recovery, while snake plants thrive with minimal interference. If the leaves are still limp and discolored days after adjusting care, check the soil moisture level to ensure it’s not excessively wet.
The recovery timeline can vary, but expect to see noticeable regrowth within 2-3 weeks in optimal conditions. Healthy regrowth looks like new leaf shoots developing and existing leaves becoming more colorful. High humidity and poor air circulation can slow this process, while warm temperatures and proper watering will speed it up. If not seeing new growth after a couple of weeks, check for signs of nutrient deficiency or insufficient light. Setting up a simple rotation system could ensure that all plants receive equal exposure to air circulation by moving each pot every so often.
A common mistake during recovery is overwatering or applying too much fertilizer out of concern for the plant’s health. Instead, focus on a balanced watering approach, allowing the top inch of soil to dry out before rewatering. For plants like ferns, ensure they receive the adequate humidity they thrive in, as inadequate moisture can lead to stress and further mold issues. This is where many gardeners falter; investing time in understanding each plant’s needs can greatly mitigate such instances.
Increased air circulation speeds up the drying process, preventing moisture from lingering on leaves, where mold thrives. Areas that maintain a consistent breeze from fans or open windows reduce humidity and promote a healthier microclimate for your indoor plants. For most fungi, establishing itself in the presence of dampness becomes difficult, further reducing the risk of mold. It’s essential for the health of your plants that airflow is gentle yet persistent, as aggressive airflow might stress delicate leaves or even cause them to dry out too quickly, leading to other issues. Consequently, you may need to rearrange the direction or level of airflow if signs of stress appear on foliage.
A common mistake during recovery is overwatering; if you do not assess moisture levels after adjusting airflow, you risk worsening the mold situation. With increased air circulation, it’s crucial to keep a close eye on soil dampness. If the soil feels excessively dry, then adjust your watering schedule; but if it remains moist and mold still appears, reevaluate humidity management. Continue using the moisture meter to create a specific watering schedule based on the needs of each plant type. Older leaves can struggle to manage moisture levels due to buildup from mold, complicating their recovery as they may absorb essential nutrients slower than healthy, unaffected leaves. Keeping soil too wet for too long often shows up first as mold on seedlings after overwatering when.
Step 4 – Water Indoor Plants Less During Humid Weeks
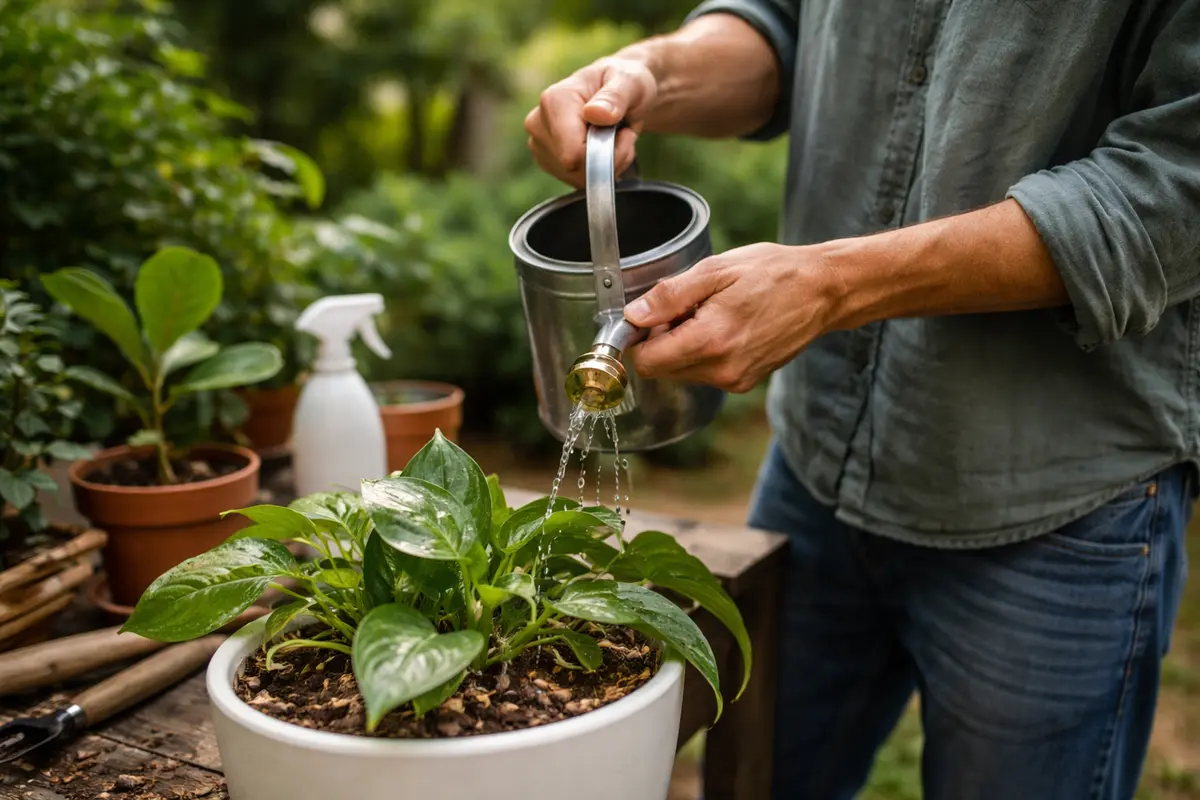
Reduce your watering frequency; water only when the top 2 inches of soil feel dry to the touch. As a result, you’ll likely see healthier roots, fewer mold instances, and an overall plant revival centered around moisture management. Incorporating this new habit diligently will help improve your watering practices year-round. A good practice is to lift pots to gauge their weight, indicating when it’s time to water. Remember, consistency is key; letting plants dry out thoroughly between watering helps establish a vigilant routine.
Watering less during humid weeks minimizes excess moisture retention, which can lead directly to mold issues. Indoor plants that sit in overly wet soil not only encourage mold but may develop problems like root rot, severely impeding their overall health and growth rates. During peak summer humidity, it’s common for pots to retain more moisture than during cooler months, necessitating further adjustment to your watering routine. This should be noted especially after rainy days or significant weather changes; indoor spaces can retain higher humidity levels long afterward.
During particularly wet seasons, consider watering in the early morning to maximize evaporation during the warmth of the day. For grouped plants, ensure the pots are spaced apart to allow adequate airflow between them—this ventilation is paramount in preventing moisture-related issues. If mold still appears despite your adjustments, it may be time to reconsider potting—transitioning to a soil mix that promotes better drainage can yield substantial benefits. Additionally, a pot with drainage holes becomes essential to ensure any excess water can escape; using clay pots instead of plastic ones may also aid in moisture regulation during hot and humid conditions.
Step 5 – Inspect Soil for Fungal Activity Regularly
Start by checking your indoor plants every few days for signs of mold, particularly on the leaves and soil surface. Look for visible white or gray fuzz, especially in the leaf crevices or on the potting mix. Recheck periodically to observe any changes in moisture levels, allowing you to intervene promptly if mold begins to develop again.
A fully recovered plant will exhibit vibrant green leaves, firm texture, and no residue on the soil. In contrast, if early signs of mold return, leaves may exhibit dark spots or a slimy texture, indicating moisture retention in the environment. If not this, check the soil’s moisture by inserting your finger; if it feels excessively damp, mold growth is likely imminent.
If mold returns despite following these steps, immediately reduce watering and increase air circulation around the plant. If the problem persists, consider repotting the plant in fresh, dry soil to eliminate spores and prevent further growth.
Monitoring soil regularly serves as a diagnostic tool for fungal issues and helps maintain a balance between moisture retention and aeration. Healthy soil that dries out quickly avoids becoming a mold haven. A good indicator of a thriving soil system is its texture; soil that feels coarse yet slightly dry suggests proper aeration, while overly sticky or moist soil could indicate that fungal growth is lurking nearby. Should sticky soil present, consider elevating the pot slightly to encourage runoff and prevent water pooling.
If the mold issue appears to return quickly, consider integrating a lighter soil mix that prioritizes aeration and encourages quick drainage. Investigating soil moisture and quality can be pivotal; if you consistently see wet soil or mold despite cutting back on watering and increasing airflow, be prepared to repot your plant. A transition to a breathable substrate, potentially composed of perlite or orchid bark, can significantly impact the plant’s health and mold mitigation efforts. Constant vigilance, combined with thoughtful adjustments, can proactively address soil concerns before they manifest into broader issues.
FAQ
How long does it take for mold to affect indoor plants?
Mold can appear on indoor plants within a few days of exposure to high humidity and excess moisture. Typically, it becomes noticeably detrimental when conditions are particularly damp, like after watering or significant humidity spikes. This heightened sensitivity underscores the importance of monitoring environmental factors as humidity levels fluctuate, allowing for swift removal of any emerging mold. Early attention can significantly mitigate damage experienced in this crucial timeframe.
Will my plants recover from mold if treated promptly?
Yes, plants can recover fully from mold if treated quickly and effectively. By promptly removing affected leaves, adjusting humidity levels, and enhancing airflow around the foliage, you create an environment conducive to healing. This approach allows your plants to regain their health and vibrancy, with recovery often evident in new growth and improved leaf color. However, it’s important to observe for signs that might indicate lingering moisture issues months down the line.
Should I remove all affected parts of my plants?
Yes, absolutely remove all visibly affected parts to stop the spread of mold. It’s essential to use sanitized tools, ensuring that no spores are transferred to healthy parts of the plants or to other plants nearby. Quick action in removal is a significant part of mold control; cleanliness is key in preventing future outbreaks as well as fostering a healthy environment for plant recovery. Additionally, inspect surrounding plants after removal to ensure they haven’t been contaminated.