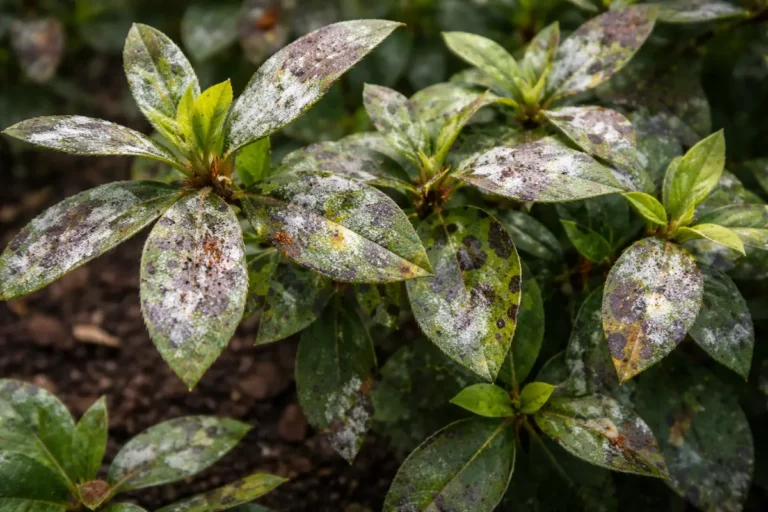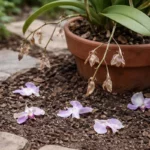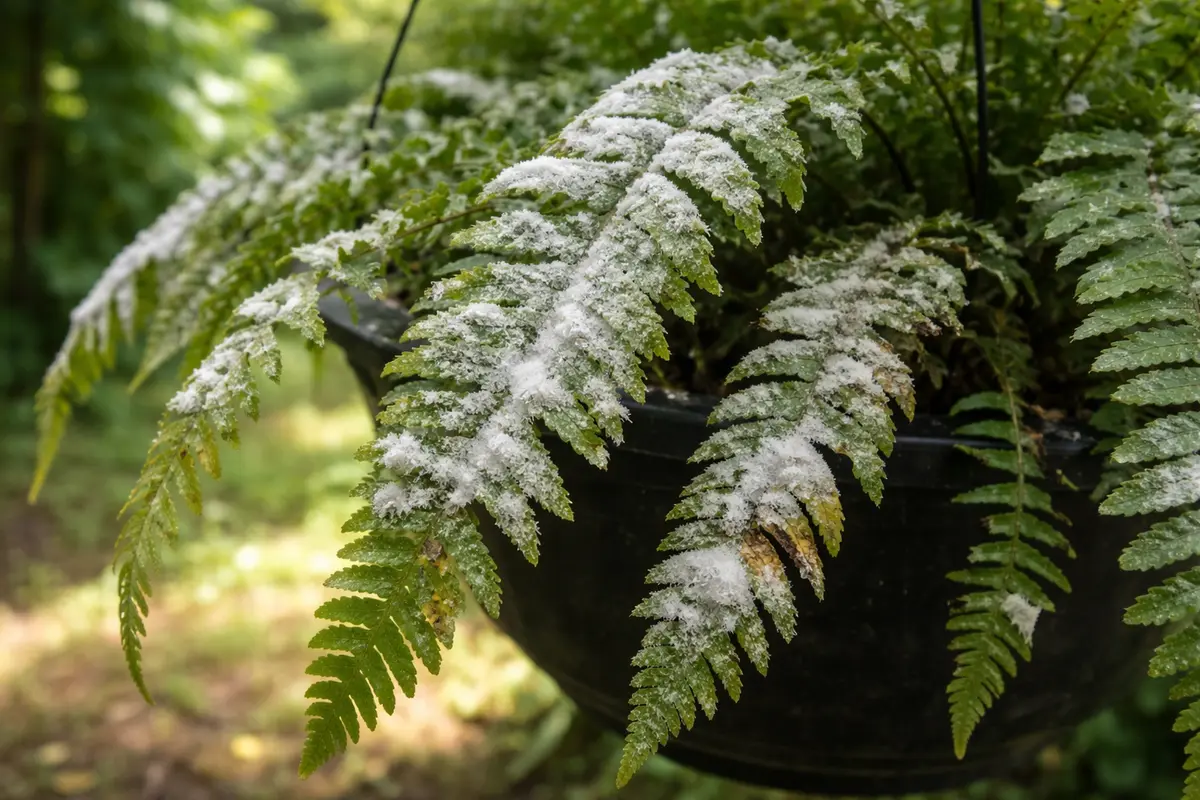
You may notice unsightly black spots appearing on your hanging ferns during humidity, which is why you need to know how to prevent mold on hanging ferns during humidity. This mold thrives in damp conditions, leading to leaf drop and overall damage to your plants. If left untreated, the issue gets worse and can spread, weakening the plant and making recovery harder, but you can fix it now by inspecting your ferns and adjusting their watering habits accordingly.
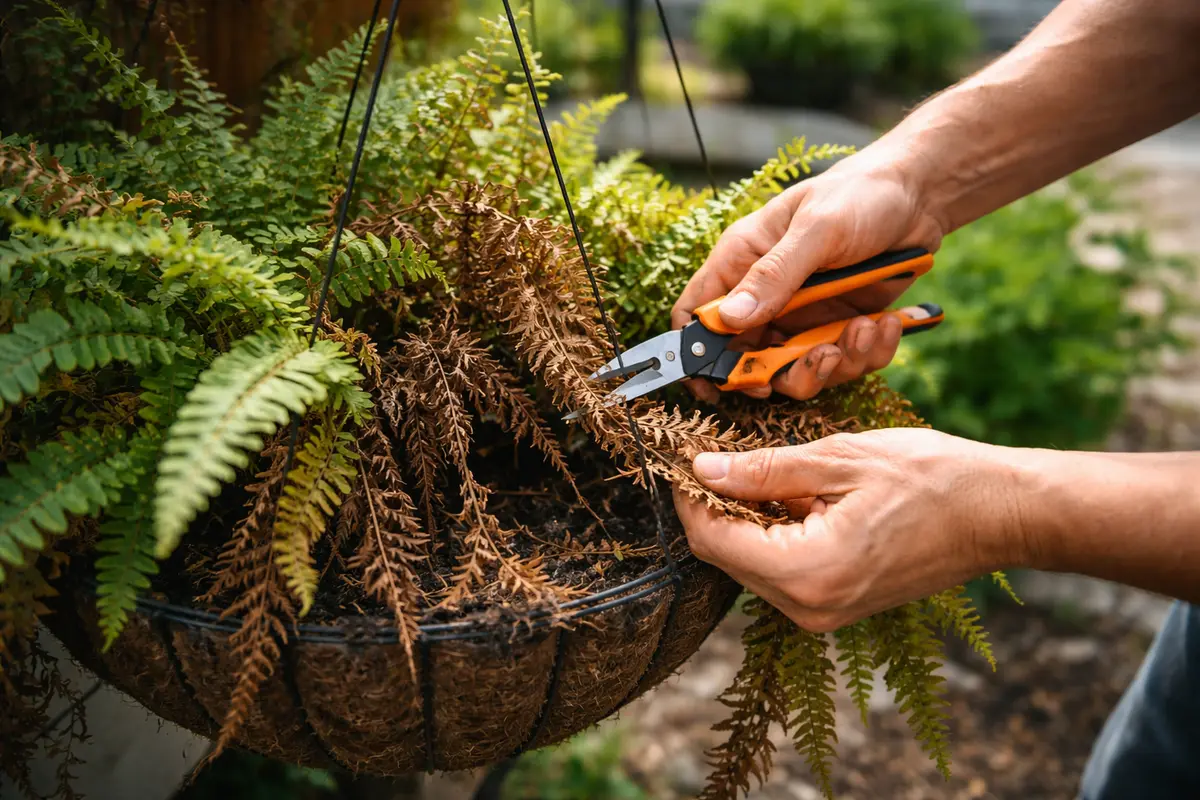
Step 1 – Prune Wilted Fern Fronds Quickly
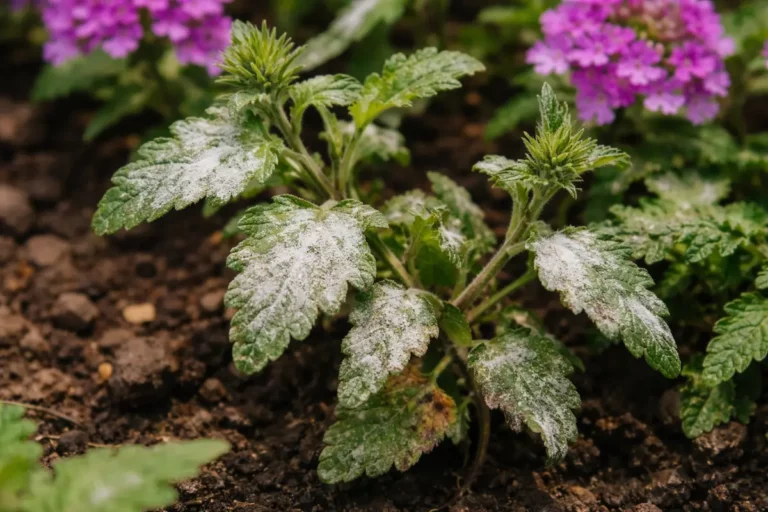
Start by inspecting your hanging ferns closely for any signs of mold or mildew. If you spot affected areas, gently remove them with a clean cloth or damp sponge, which should immediately give the foliage a fresher appearance and improve air circulation through the fronds.
Acting quickly to remove mold prevents it from spreading further and causing irreversible damage. Mold thrives in humid conditions, and if left untreated, it can penetrate the plant’s tissue, hindering nutrient absorption and stunting growth. If you see subtle discoloration of leaves, this may indicate an early stage of mold invasion; if not addressed, entire fronds may turn brown and die.
For instance, a gardener noticed mold on their ferns in early summer. They promptly treated it, leading to robust growth by late season; however, another gardener waited too long, resulting in extensive damage that required replacing several plants. If you don’t see visible mold but note a musty smell, check for hidden moisture buildup in the container or surrounding area.
Pruning is crucial because it effectively removes the diseased parts of the plant, allowing it to redirect energy toward healthy growth. If left unchecked, the mold can spread from the affected fronds to the rest of the plant, leading to a more systemic issue that could threaten the entire fern. For hanging ferns, such as Boston ferns, this is particularly critical due to their dense growth habit. Their lush foliage can trap moisture, fostering a microenvironment conducive to mold. Hence, prompt intervention is vital. Recognizing that some fronds may appear healthy but have hidden mold also underscores the need for thorough pruning; missing these concealed threats can undermine your efforts.
Timing matters significantly here. Many gardeners delay pruning until they notice widespread decay, believing it unnecessary to act sooner. However, pruning immediately upon spotting the first signs of sickness is more effective; this action can halt the further spread of mold, saving the plant before the damage becomes extensive. A common mistake during this stage is trimming only the visible mold without checking for internal rot or insufficient air circulation. Some growers might believe that a quick trim is sufficient when, in reality, the internal structure of the fern may harbor hidden mold or moisture. Failing to consider airflow around the remaining fronds after pruning risks allowing future mold outbreaks. Leaving tight clusters of fronds can promote trapped moisture, which is a breeding ground for mold.
Step 2 – Identify Causes of Moist Air Around Ferns
First, check the soil moisture levels in your hanging ferns and adjust your watering routine accordingly. If the soil feels overly wet and retains water, reduce watering frequency or improve drainage to prevent mold growth; you should notice less mold after a few days if this is the cause.
Excess water in the soil leads to anaerobic conditions, causing fungal spores to thrive and potentially resulting in mold on the surface of the soil or the fern’s foliage. A well-draining soil mix allows air to circulate around the roots, while compacted, constantly wet soil can suffocate them and create the perfect environment for mold production. If the soil appears dry yet mold persists, the issue may lie elsewhere, such as humidity levels or airflow.
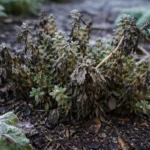
If you notice a sour smell coming from the soil, it indicates root rot instead of just mold; switch to a pot with better drainage or amend the soil with perlite. Alternatively, if your ferns are drooping but the soil is moist, check for pests, which can also encourage mold growth by damaging the plant tissue. Ensuring your ferns have adequate airflow may help prevent both issues.
When overwatering occurs, the soil becomes saturated, inhibiting oxygen flow to the roots and creating a conducive environment for mold growth. This leads to root rot, which can cause symptoms like yellowing leaves or a sour smell in the soil. By decreasing moisture levels, you encourage beneficial aerobic bacteria to thrive, reducing the chances of mold forming.
If you notice soft, mushy roots or a foul odor, this indicates root rot rather than just mold on the surface. In such cases, remove the fern from its pot, trim away the affected roots, and repot in fresh, dry soil to prevent reinfection. If the plant appears wilted but the soil is dry, adjust your watering schedule instead.
High humidity surrounding the ferns is frequently due to overcrowded growing conditions, insufficient airflow, or too frequent watering. Mold thrives in damp environments; the excess moisture weakens the fronds and root areas, making them more susceptible to fungal infections. If your ferns are nestled too closely together or situated in a poorly ventilated area, these conditions exacerbate the problem significantly. Assessing the layout of your hanging ferns can be revealing; a space that looks visually appealing may not always be aerodynamically sound for plant health.
If you notice that the humidity is primarily due to environmental conditions, consider relocating the ferns to a more open area with better air circulation. For instance, moving them to a location with consistent breeze flow or placing them on hanging racks with spacing can effectively mitigate humidity levels. If the soil feels overly saturated or has a sour smell, this indicates overwatering or waterlogged conditions, requiring immediate attention to remedy the situation. A common misstep by many gardeners is assuming that all situations suit the same watering routine; changes in humidity and temperature absolutely shift the water needs of hanging ferns. Ignoring these subtleties can set you back considerably in recovering your ferns. The risk of mold can escalate rapidly unless these conditions are addressed. If left unresolved, the growth of mold can require more aggressive treatments, which could stress the plants further.
Step 3 – Treat Ferns with Fungicide for Mold Recovery
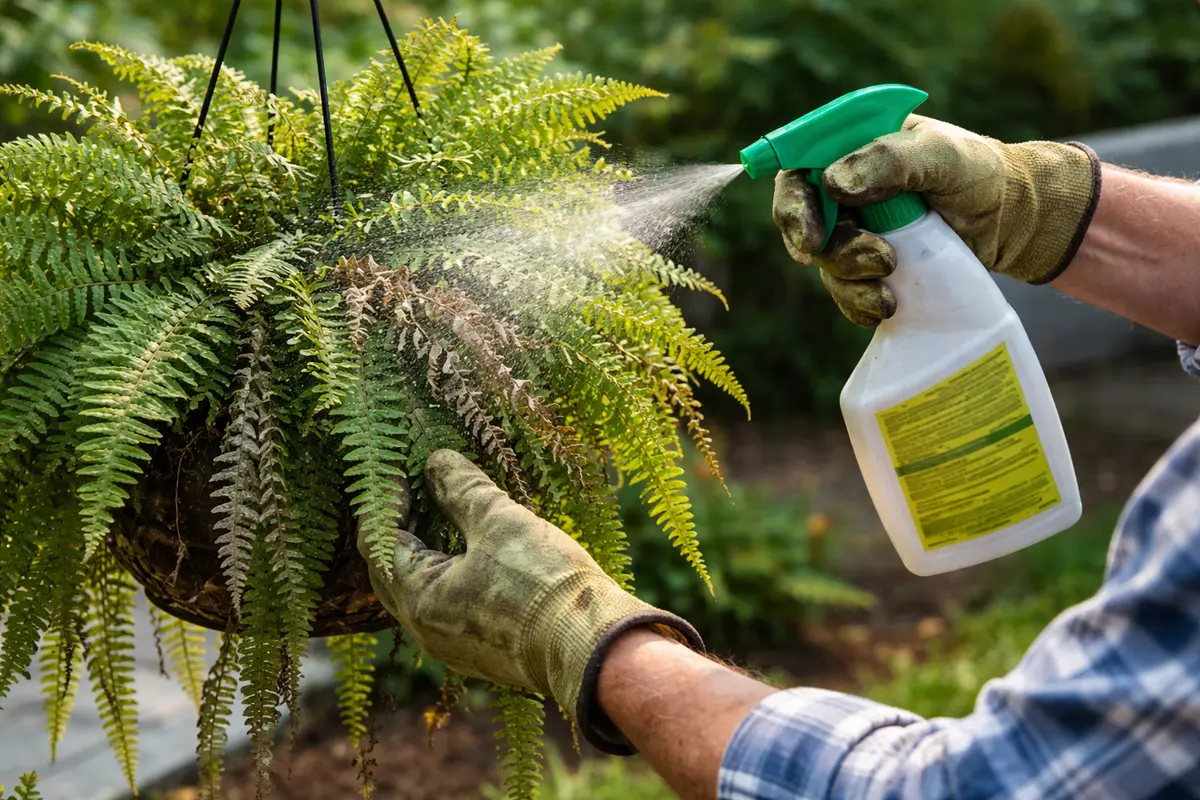
Apply a suitable fungicide to the impacted areas of your ferns as part of the recovery process. You should expect to see positive signs of recovery from mold, such as diminishing signs of discoloration, within a week of treatment. Be sure to follow the instructions carefully to avoid any adverse effects, particularly regarding products formulated for sensitive plants like ferns.
Fungicides work by targeting and killing the mold spores that compromise the health of your ferns. Choosing products specifically formulated for ferns ensures that they won’t cause additional stress. As the fungicide takes effect, you should observe fuller fronds that show less discoloration, indicating tissue recovery and overall health improvement. Note that the effectiveness of the fungicide can often depend on the environmental condition at the time of application; applying it when the weather is dry can maximize absorption.
A common mistake during this recovery phase is over-applying the fungicide, believing that more will yield quicker results. Instead, it’s essential to adhere strictly to the label’s dosage recommendations; excessive application can lead to chemical burns or further weaken the plant. For this reason, be vigilant in observing how different fronds react, as sensitive varieties may show signs of distress quicker. Timing is particularly crucial; applying fungicides during warm, dry days enhances effectiveness, as moisture can dilute the treatment and prevent it from performing optimally. If it rains shortly after application, you may need to reapply for effective results; this consistent treatment is key to preventing mold’s return. Should you notice that certain fronds remain discolored despite treatment, reconsider your fungicide choice or application method, as some products may not be effective on specific mold strains.
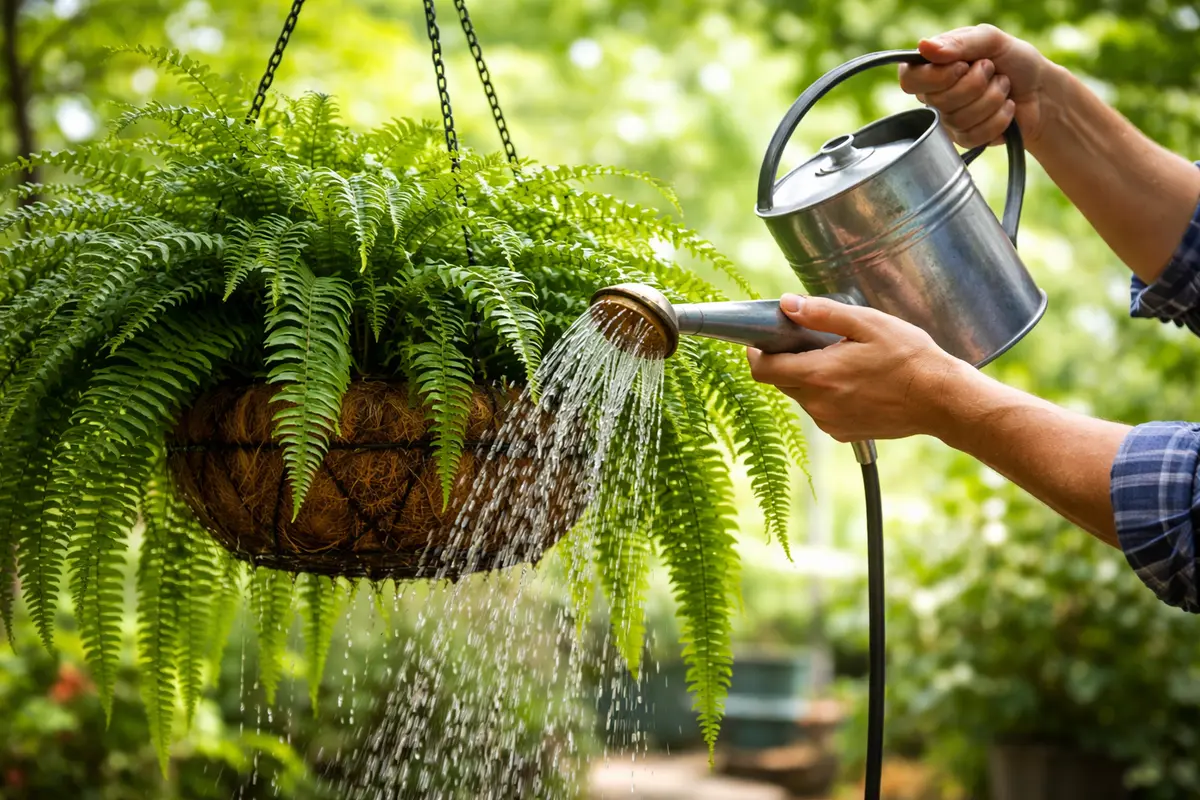
Step 4 – Water Hanging Ferns Carefully During Humid Seasons
Start by reducing the humidity around your hanging ferns by placing a small fan nearby or ensuring good air circulation. By implementing this action, you will notice less condensation on the leaves, significantly lowering the risk of mold growth over time.
Mold thrives in high humidity and stagnant air, conditions that can easily accumulate around hanging ferns if not addressed. By establishing a consistent airflow with a fan or ensuring the ferns are hung in a well-ventilated space, you reduce moisture buildup, directly targeting the root cause of mold development. If you find mold appearing despite these measures, check for waterlogging in the pots, which can also contribute to excessive humidity.
During the rainy season or in extremely humid climates, increase air circulation by rotating the ferns to different areas for more exposure to drafts. Additionally, consider placing silica gel packets nearby to absorb excess moisture in the air, adding an extra layer of prevention against mold.
Consistent overwatering, particularly in humid conditions, dramatically increases the likelihood of mold growth as excess moisture builds up in both the soil and surrounding air. By allowing the topsoil to dry out before rewatering, you reduce moisture levels overall, creating a less hospitable environment for mold spores. This more cautious watering technique is critical during summer months when humidity levels would otherwise promote mold growth. If you notice that the soil stays wet for periods longer than recommended, inspect for signs of root rot, which is a direct consequence of excessive moisture.
For more effective prevention, check your ferns in the early morning hours when the humidity is lowest. If prolonged periods of high humidity are noted, consider relocating the ferns to a more shaded area where excess moisture can evaporate more readily. Additionally, adjusting your watering method to include a deeper yet less frequent approach can further prevent recurring mold issues. A thorough soaking less frequently is often better than light, consistent daily watering, which keeps the soil continuously damp. This proactive approach is vital in fending off mold, and re-evaluating your watering can often lead to marked improvements in appearance and health.
Step 5 – Inspect Fern Leaves for Mold Growth Weekly
Start by checking your hanging ferns at least every few days during periods of high humidity. Look for visible gray or white spots on the leaves, which could indicate mold growth. If you notice any signs, recheck after 24 to 48 hours to assess whether the problem is worsening or improving.
A fully recovered plant exhibits vibrant, lush green fronds free of spots or texture changes, indicating it’s thriving again. In contrast, early signs of the problem returning are seen as small, fuzzy patches or a slimy texture on the leaves that disrupt their smoothness. If the leaves begin to curl or droop, that may signal another potential mold issue arising.
If you observe mold returning despite your preventative efforts, trim off the affected leaves immediately to prevent further spread. Adjust your watering routine, ensuring the soil remains moist but not soggy, and consider improving air circulation around the plant. If mold persists after these adjustments, escalate your treatment by applying an organic fungicide specifically designed for ferns.
Watch closely for dark spots or fuzzy growths that might signal mold making a comeback. A fully recovered plant will exhibit vibrant green fronds without signs of limpness or softness, as these are indicators of potential issues. On the flip side, if you check and find external moisture present or light fuzziness on leaf surfaces, this may suggest early mold indicators that could turn into a more significant problem if not treated quickly. Addressing early indicators promptly is crucial; this involves reassessing your environmental management and possibly taking another round of treatment.
If you find evidence of mold returning, promptly take corrective action, such as reapplying treatment to the affected areas. Ignoring the visible signs of decay during monitoring can allow the problem to escalate quickly, leading to significant loss of the entire plant due to unchecked growth. Consider incorporating air circulation tools, such as small fans in your growing area, during humid periods to mitigate dampness on the fronds. Be prepared to inspect your ferns more frequently if the weather becomes particularly humid; vigilant monitoring now serves as the best defense against future outbreaks.
FAQ
How long does it take for mold to grow on hanging ferns in high humidity?
Mold can begin to form on hanging ferns within 24 to 48 hours in consistently humid conditions. Noticing a decrease in leaf vitality or the development of dark spots is usually an early indicator. Regular inspections are crucial, especially during humid weather, to catch early signs and treat them effectively before they escalate.
Can mold on hanging ferns spread to other plants?
Yes, mold can indeed spread to other nearby plants if conditions remain suitable for fungal growth. Spore release can occur simply through wind or contact. It’s paramount to isolate any affected ferns promptly and treat them immediately to prevent cross-contamination and potential spread to additional plants.
Should I remove all moldy leaves immediately?
While it’s essential to trim away heavily affected leaves, it’s important to be cautious and not remove too much foliage at once. Retaining some healthy leaf area is critical for the plant’s recovery, as these leaves aid in photosynthesis. Monitor the plant’s condition closely; if only a few fronds are compromised, that might suffice—excessive pruning could disturb the plant’s stress balance. It’s best to prune healthy fronds to maintain stability while allowing time for treatment to work on the affected areas. Adjust your approach based on visible signs of distress after initial treatment, stepping back on aggressive pruning if the ferns show clear recovery signs.