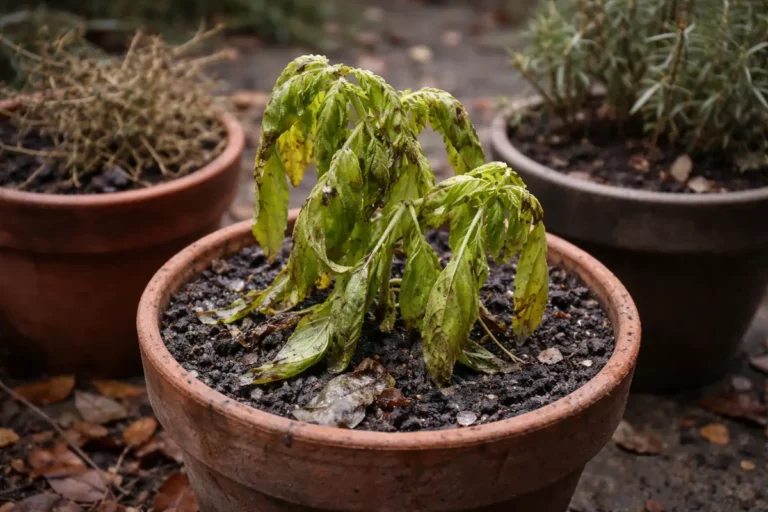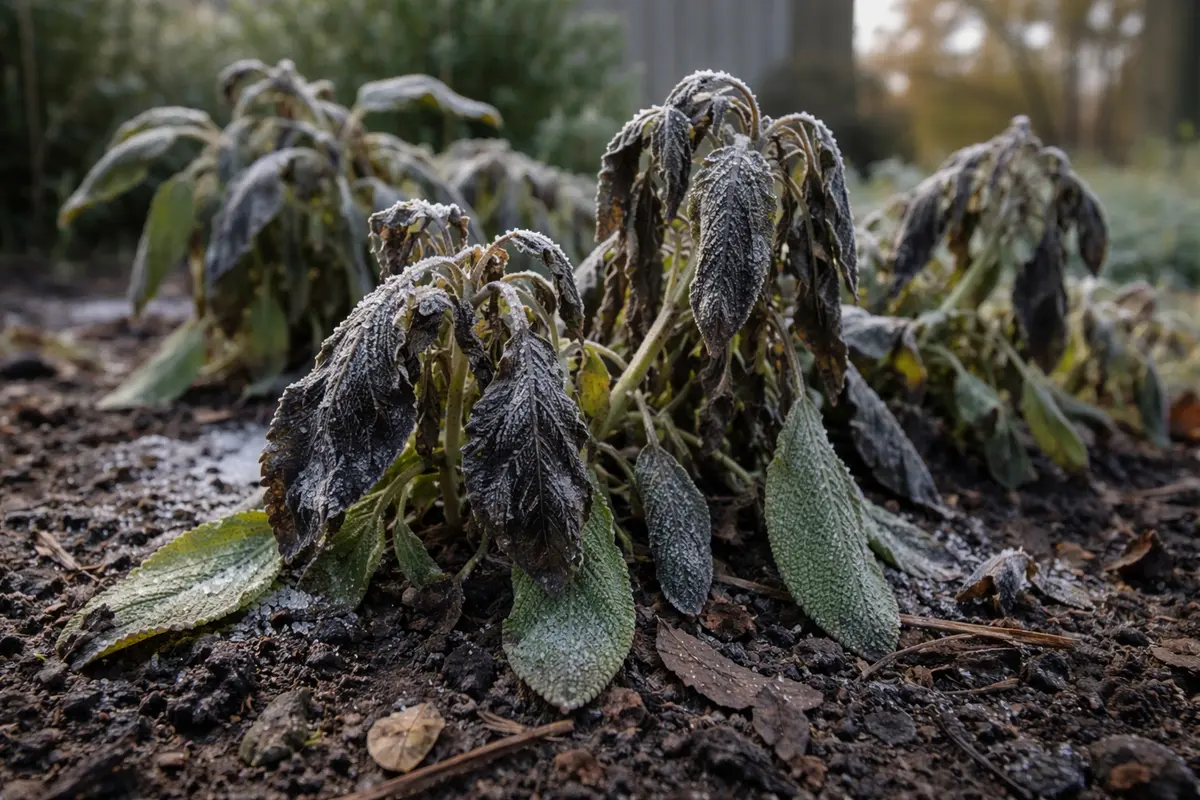
You may notice that your sage plants are struggling with stunted growth after cold nights, which is why you need to know how to fix stunted growth in sage after cold nights. This can result in yellowing leaves and drooping stems, indicating that the plant is experiencing stress from the temperature drop. If left unaddressed, these issues can worsen, making recovery harder, but it’s possible to improve the situation now by adjusting your watering schedule and providing adequate warmth.
Step 1 – Protect Sage from Frost Damage
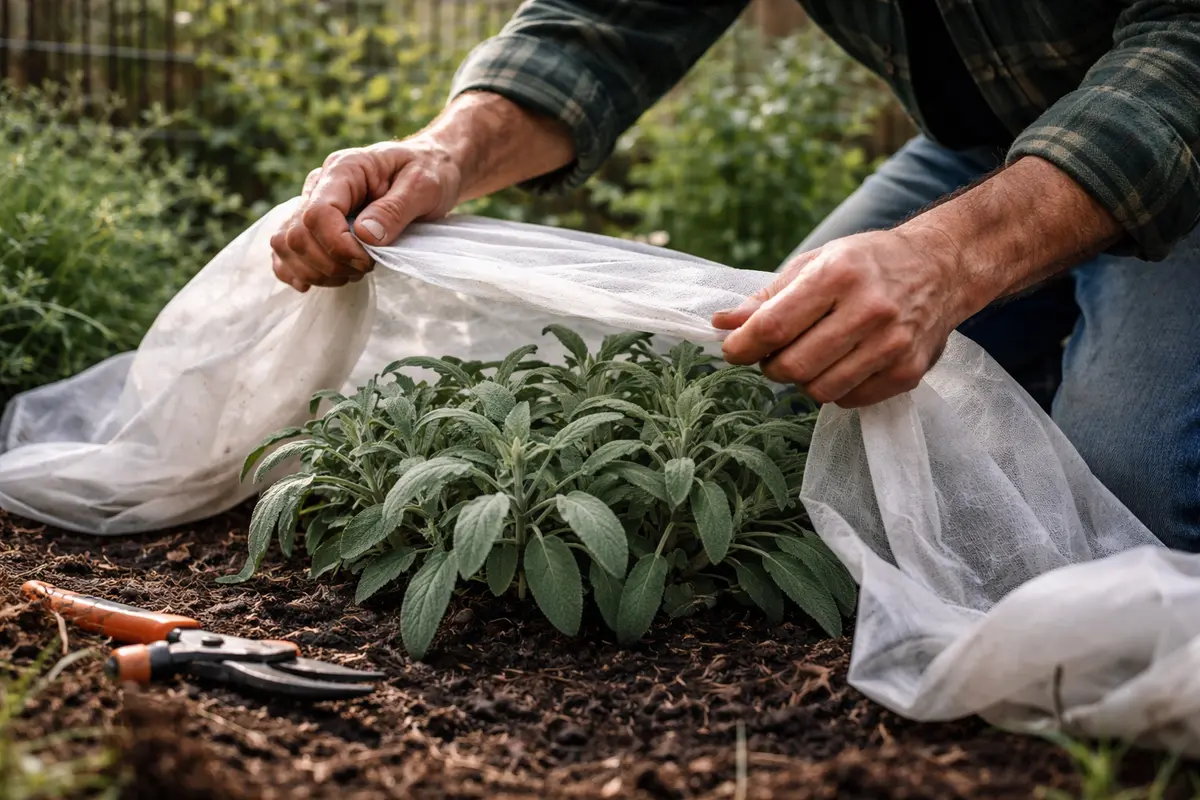
Cover your sage plants with frost cloth or burlap early in the evening before expected cold temperatures. You will immediately notice reduced leaf wilt and exposure to frost once the protective barrier is in place. Timing is crucial—apply the covering just as the sun dips below the horizon, typically around 5 to 7 PM, depending on your geographical location and seasonality. For example, in areas where temperatures drop sharply at night, early coverage can make a significant difference in plant resilience.
Frost cloth works by trapping warmer air close to the ground and insulating the plants. This protection prevents cold air from penetrating too deeply, which can damage delicate cell structures within sage leaves. If the frost reaches these cells, it leads to irreparable damage and prolonged stunted growth, especially in young plants that are more sensitive to temperature fluctuations. Upon uncovering the plants, they should display firm leaves rather than limp or darkened areas, indicating successful protection against frost. If you discover limp leaves after uncovering them, this indicates an issue with your timing or method of coverage.
A common mistake gardeners make at this stage is neglecting to cover their herbs until frost is visible. Cold nights can sneak up unexpectedly in early spring or late fall, and a failure to cover them ahead of forecasts can lead to significant damage. Typically, if you wait until after the damage occurs, recovery becomes significantly slower and labor-intensive. Additionally, frost can occur even when nighttime temperatures hover just above freezing, especially in low-lying areas. If you forget to cover them and the frost settles in, you’ll likely see a larger percentage of damaged foliage, which may not recover adequately. Always check nightly lows on your weather app to mitigate this risk effectively.
Step 2 – Assess Cold Damage on Sage Leaves
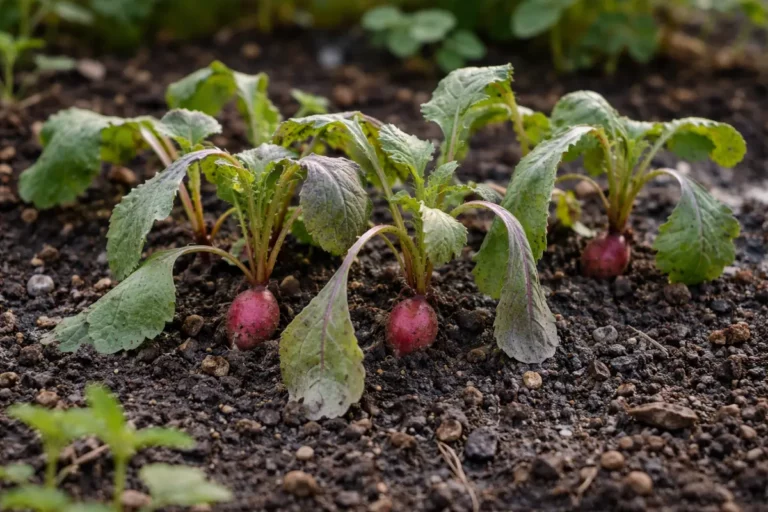
Start by examining your sage plants for signs of frost damage, including brown or blackened leaves and a wilted appearance. If you spot these signs, gently prune away the damaged foliage and provide a layer of mulch around the base to retain warmth and moisture, which should help stimulate new growth within a few weeks. On average, removing damaged portions can lead to more vigorous regrowth, as the plant redirects its energy toward healthier stems.
The cold nights can cause stress to sage, leading to impaired root function and disrupted nutrient uptake. When temperatures drop, soil microbes may become sluggish, hindering decomposition and nutrient availability, while roots may struggle to absorb enough water. This can result in stunted growth signals when the plants cannot access essential resources efficiently, causing them to languish instead of thrive. If there’s compromised root health due to cold exposure, this might limit the plant’s ability to recover, extending its recovery time beyond the average range.
If your sage leaves appear yellow and mushy rather than just brown, check for overwatering as a cause, which results in root rot. In this case, allow the soil to dry out completely before watering again, and consider relocating the plant to a well-draining pot or garden bed. If not this, check for pests such as aphids, which can mimic stunted growth when sap-sucking damages the plant. Inspecting undersides of leaves regularly can help identify such pests early, preventing further complications.
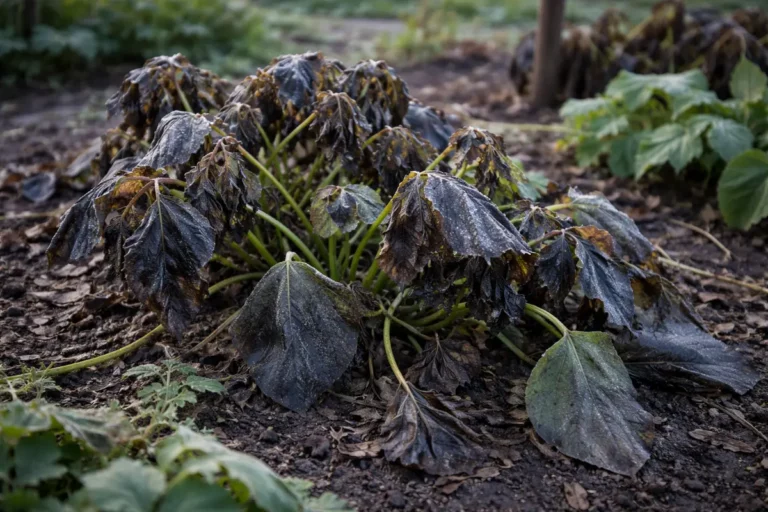
Cold temperatures can freeze the moisture inside plant cells, causing them to rupture, resulting in dark or limp leaf tissue. When tissue becomes darkened, it often indicates that the plant has lost its cellular integrity, which can slow down overall growth and reduce the plant’s ability to photosynthesize effectively. If you observe leaf edges turning crispy, this indicates severe damage; by contrast, a more subtle yellowing might point to less critical stress levels that may still lead to recovery if treated quickly. Pruning early helps to maintain the energy flow to healthier sections of each plant.
If you notice only minor discoloration without major wilting, removing the affected leaves can help redirect energy toward healthier growth. However, if the majority of the leaves are damaged, focus instead on nurturing the healthy portions through careful watering and nutrient supplementation. One frequent misstep here is to cut into the plant indiscriminately; trimming should always involve assessing healthy stems first to avoid a drastic reduction in leaves, which could further stress the plant’s ability to recover. An indicator of healthy parts includes firm texture and vibrant color—both essential for effective growth and photosynthesis.
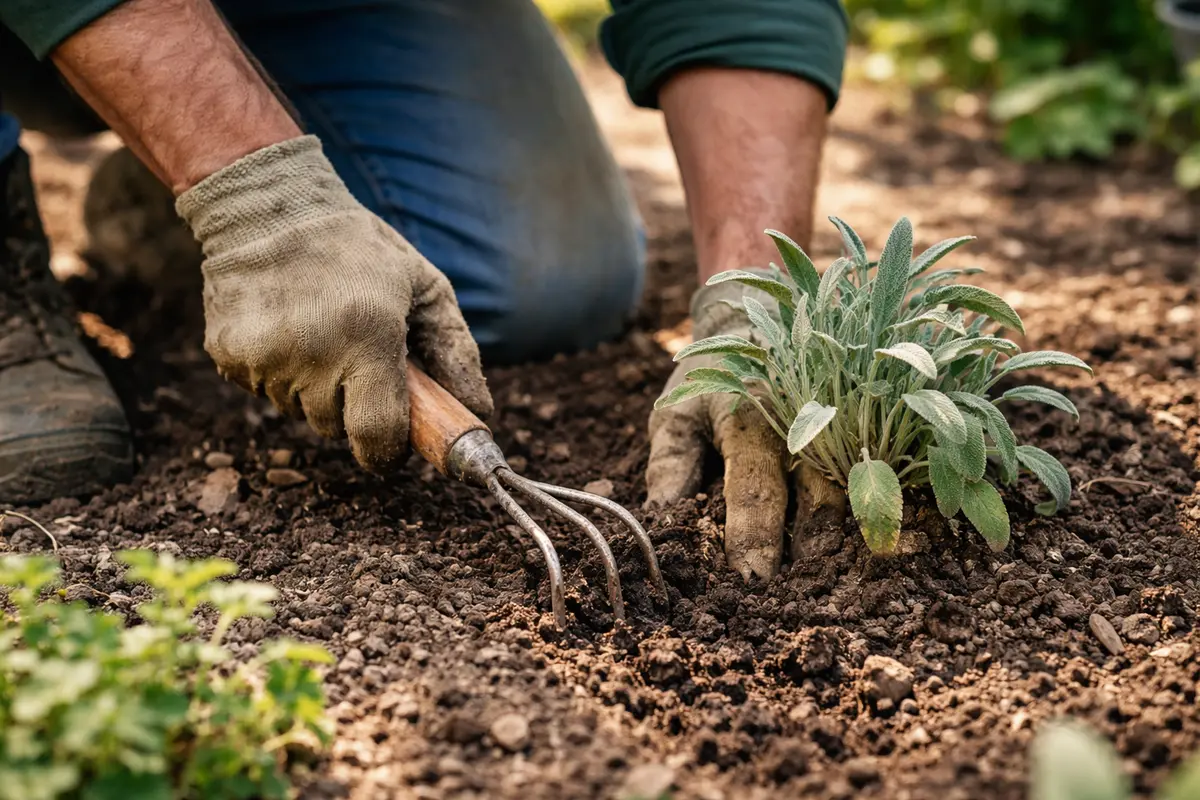
Step 3 – Cultivate Soil for Sage Recovery
Water the sage deeply to rehydrate the plant, ensuring the soil is moist but not soggy. Within a few days, you should observe signs of life such as new leaves unfurling and a richer green color replacing the pale, stunted foliage. If the soil remains consistently moist after heavy watering, it may indicate poor drainage, requiring immediate attention to soil amendments.
Recovery from stunted growth can take one to three weeks, depending on environmental conditions. Healthy regrowth will manifest as robust new growth and an overall bright green color. Adequate sunlight and moderate temperatures will speed up the process, while prolonged cold or overcast skies could delay recovery and lead to further stunting. If recovery seems slow beyond the three-week window, double-check your watering frequency and environmental conditions—perhaps adjusting light or humidity levels might help.
Avoid overwatering during this recovery phase, as too much moisture can lead to root rot, which further hinders growth. If you notice yellow leaves appearing, check the soil for drainage issues; if not that, ensure the plant is getting enough light to support its recovery. The roots typically need oxygen to thrive, so healthy soil promotes better root growth, enabling sage plants to absorb essential nutrients during recovery. This focus is crucial if the roots were exposed to cold damage as they are typically the last part to recover from frost. Not only does organic compost provide the necessary nutrients, but it also improves soil structure, promoting better drainage and aeration.
Remember to incorporate compost lightly into the top few inches of the existing soil, as deep mixing can disturb established roots. A common mistake during recovery is overwatering; plants may appear to be in need of more moisture due to frost damage. Instead, always check the soil moisture level before watering again. If it still feels damp several inches below the surface, hold off on watering. If the soil is too wet, it can lead to root rot, which can impede recovery even further and cause additional stress to the plant. When assessing soil moisture, if the surface looks dry but moisture is still present deeper down, you may need to adjust your watering practices, considering lighter, more frequent applications versus heavy watering.
Step 4 – Shield Sage from Future Cold Snaps
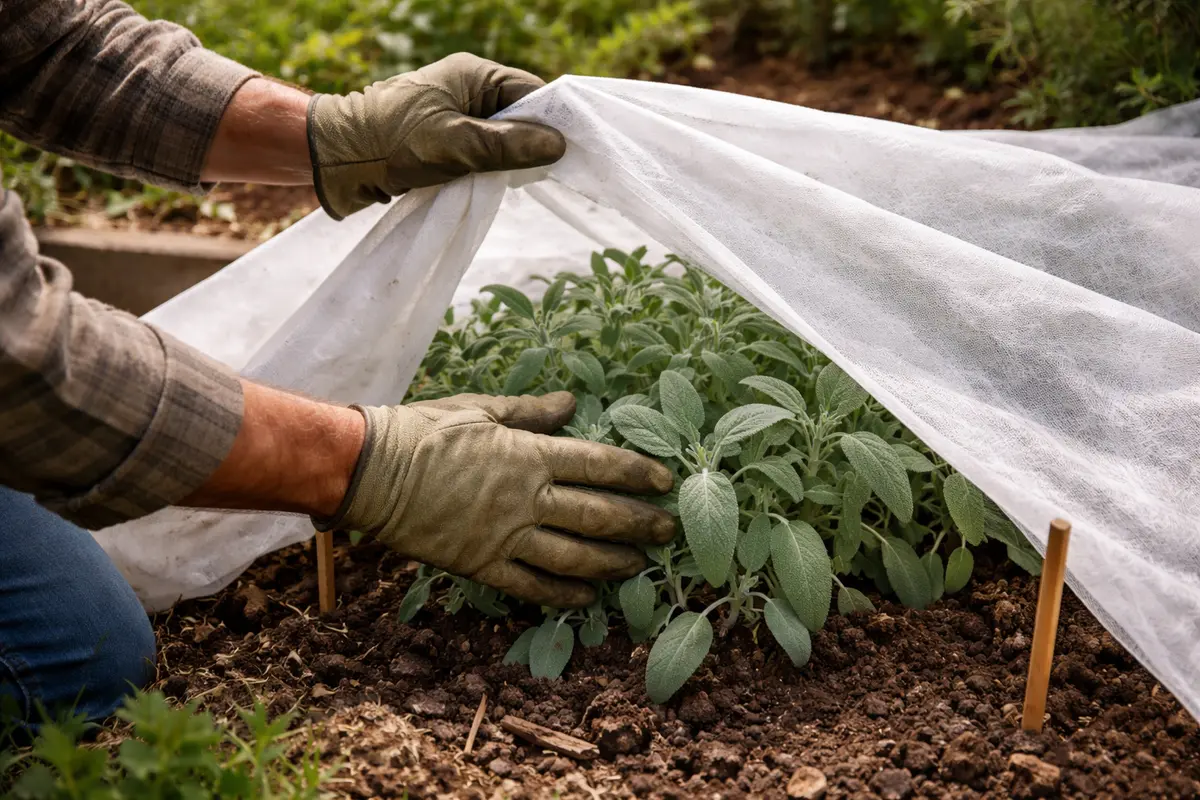
Start by installing row covers or planting sage in a sheltered area before cold nights arrive. This will create a microclimate that keeps the soil temperature consistent, promoting more vigorous growth as conditions warm up.
Cold nights can lead to a drop in soil temperature, causing sage to enter a state of dormancy. When plants are exposed to consistently chilly conditions, their metabolic processes slow, resulting in stunted growth. Using row covers addresses this by capturing heat and retaining moisture, which helps maintain a stable climate for the plants.
In late fall or early spring, always check the weather forecast for unexpected cold snaps, especially if they follow a warm spell. If temperatures are predicted to dip below freezing unexpectedly, reinforce your plant protection with additional mulch or extra layers of row covers to ensure your sage remains insulated.
Cold nights can lead to chilling injury, causing stunted growth in your sage if not promptly addressed. By using protective coverings, you create a microenvironment that insulates the plants against low temperatures, reducing the likelihood of cellular damage that stunts growth. If you notice your sage wilting despite coverings, check soil moisture to ensure it’s not too dry. If the soil remains dry and plants exhibit wilting, that might indicate a need for more moisture in your protection routine, thus maintaining a delicate balance.
In early spring, consider using heat mats under your sage plants to further promote soil warmth during unexpected cold snaps. This added layer of protection not only supports growth but also encourages root development, especially when nighttime temperatures fluctuate later in the season. A typical recommendation is to maintain soil temperatures between 65°–75°F for optimal sage growth, which can be achieved with timely placement of heat mats.
Learning how environmental conditions trigger frost will help you establish this habit. Cold air often settles during the night when the skies are clear and winds are calm, so being proactive in protecting your sage during these times creates a crucial safeguard. For gardeners in areas where the temperature fluctuates frequently, having a checklist for weather conditions can prompt you once evening approaches. Require a minimum ambient temperature criterion—if forecasts predict temperatures below 40°F, it’s time to cover your plants. Key areas of concern would include local microclimates where cold air collects.
Be mindful to adjust the timing of your protection routine according to seasonal weather patterns. For instance, in the early spring, check your local forecasts and be ready to cover your sage if temperatures drop sharply. In milder climates where frosts are infrequent but still possible, consider using mulch to moderate soil temperatures instead. Such a layering strategy can also provide additional thermal protection during late-night cool downs. Regular monitoring of nighttime forecasts can assist in planning the coverage routine effectively.
Step 5 – Check Sage Growth Patterns Weekly
Monitor your sage plants weekly for signs of growth progress, focusing on new leaf emergence and overall firmness of the existing leaves. You should observe fresh growth returning within two weeks if they are recovering well and were not significantly damaged. Establish a baseline by noting current growth rates, as this can help you identify any setbacks in the recovery process more swiftly. If growth is minimal or non-existent after the two-week mark, consider reevaluating your care regimen, particularly soil moisture and temperature conditions.
Healthy sage growth will show firm, bright green leaves and stems. Keep a close watch on the number of new leaves versus the total leaf count; ideally, the emergence of new growth should outpace the loss of any potentially damaged leaves. If the plants begin to appear wilted or if discoloration returns, it may indicate further action is needed, such as adjusting water levels or providing nutrients. Catching these signs early ensures any issues can be addressed swiftly, preventing further decline in plant health. Tracking the plant’s response also helps you make future adjustments based on seasonal feedback.
If the problem appears to return, consider an evaluation of potential environmental changes, such as recent temperature dips or altered watering habits. For instance, if week-to-week changes in weather correspond to observed growth patterns, it might prompt adjustments in your frost protection methods. In severe cases, consult with local gardening resources to determine if there are more extensive underlying issues, like pests or soil deficiencies, that need to be resolved. Keeping a consistent observational log of the plants helps to clarify any recurrent patterns of stress or growth, which is integral for effective sage care.
FAQ
How long does it take for sage to recover from cold damage?
The recovery time for sage after cold damage typically ranges from a week to several weeks, depending on the extent of the damage. You should start seeing new growth or improvement within about two weeks if proper care measures are taken. If cold weather persists, you may need to readjust your watering and nutrient schedule to further support recovery, ensuring an optimal environment for healing.
Can frost damage spread to other plants?
Certainly, frost damage is localized to the affected plant, but it does not spread like a disease. However, stressed plants can become more susceptible to pests that may move in once they are weakened, which is why quick response is critical. Taking ample proactive measures for neighboring plants ensures broader vulnerabilities in your garden are minimized, making integrated pest management essential.
Should I remove damaged leaves from my sage plant?
Yes, removing the damaged leaves can aid the sage plant by redirecting energy towards healthier growth areas. Always assess the overall health of the plant before trimming; if the majority of leaves are still viable, avoid excessive removal as that can hinder the plant’s recovery. When trimming, use sterilized shears to minimize the risk of introducing disease to healthy portions of the plant, reinforcing the integrity of your holistic plant care approach.