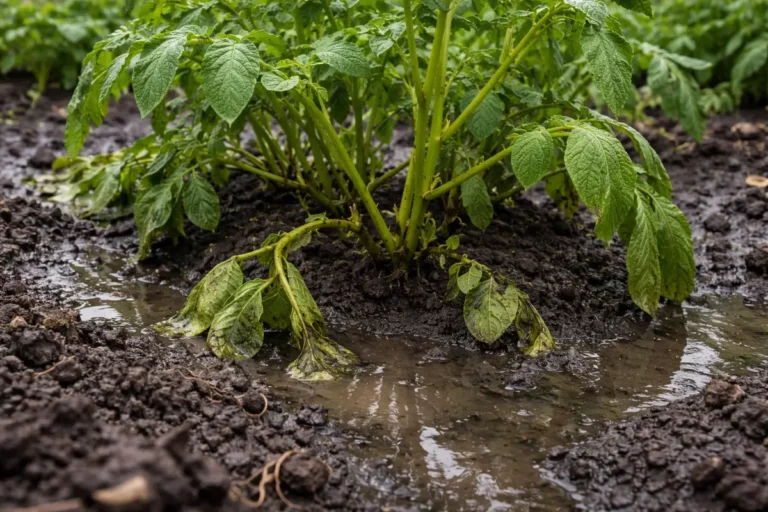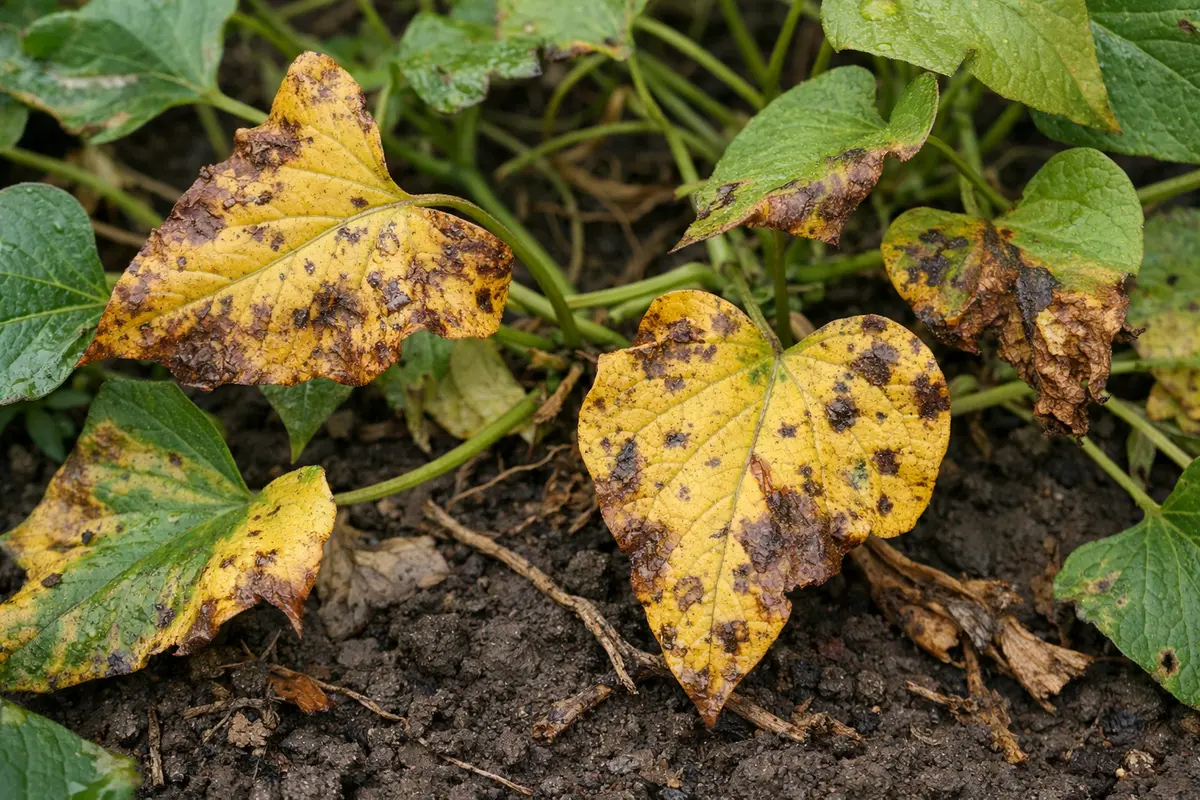
You’ve probably seen that peculiar sight in your garden—your sweet potato plants exhibiting a sudden yellowing of their leaves after heavy rain, which is why you need to know why are my sweet potato leaves yellowing after heavy rain. This yellowing often occurs due to excess moisture, leading to symptoms like wilting and nutrient deficiency that can jeopardize the overall health of your plants. If left unaddressed, the issue worsens, and the plant weakens, making recovery harder, but you can fix it now by adjusting drainage, checking for pests, and monitoring soil moisture levels.
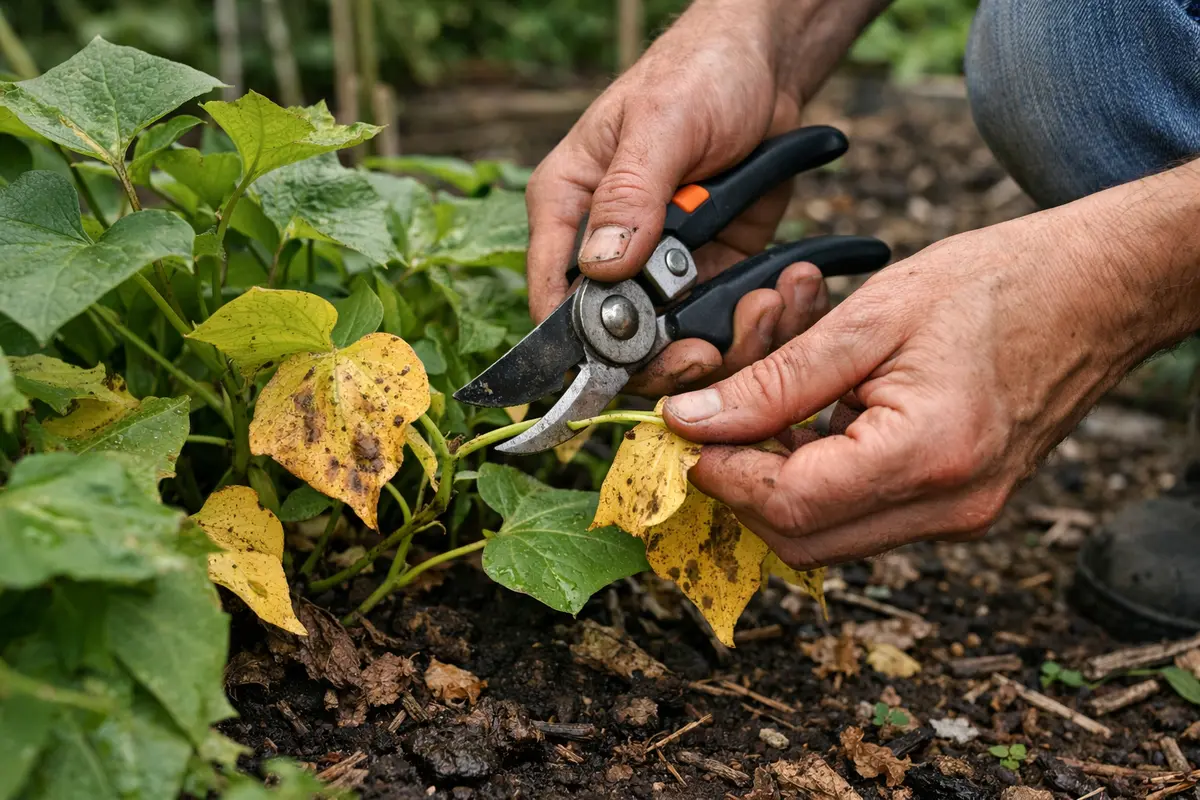
Step 1 – Prune Yellowing Sweet Potato Leaves Immediately
First, check the root area for signs of waterlogging. If you find excess moisture, gently loosen the soil around the roots to improve drainage and remove any standing water; this should help reduce leaf yellowing within a short period. You should also see the leaves regain their color over the next few days as stress levels decrease.
Acting quickly is crucial because sweet potatoes are particularly susceptible to root rot from excess water, which can lead to permanent damage if not addressed. If you delay, the yellowing will likely progress, indicating deeper issues like fungal infections taking hold in the roots. If you notice continued yellowing despite improving drainage, check for other symptoms such as wilting or a foul smell from the soil.
In one scenario, a gardener noticed yellowing leaves just days after a heavy rainstorm and immediately checked for waterlogging. They quickly fixed the drainage issue and observed a significant improvement in leaf color compared to a neighbor who waited too long, resulting in heavy rotting and loss of their crop. A common mistake is to overlook drainage until it’s too late, leading to irreversible damage to the plant.
Pruning yellow leaves is crucial because it helps the plant redirect its resources to healthier parts. Excess moisture, like that from heavy rain, can overwhelm sweet potato plants, making them vulnerable to diseases such as root rot and fungal infections. By promptly removing the affected parts, you are reducing the plant’s energy expenditure on damaged areas and enhancing airflow around the healthier leaves. Observing improved air circulation can prevent further fungal outbreaks and promote a more vigorous recovery. Should you notice existing fungal growth on the remaining leaves or stems, this indicates an urgency to escalate your care protocols.
One common mistake gardeners make is waiting too long to prune yellow leaves due to indecision about how much to cut. In this context, the hesitation allows disease to progress, often resulting in soft, brown patches appearing on adjacent healthy leaves, indicating systemic stress. If left unaddressed, surrounding healthy leaves can also begin to yellow as stress accumulates. To avoid this, consider removing any yellow leaves as soon as they become evident — doing this can halt the spread of diseases associated with declining plant health. Pay attention to the leaf stem; if you notice it feeling soft or mushy, remove that entire stem as well, which might indicate deeper issues within the plant.
Step 2 – Diagnose Excess Water Exposure in Sweet Potatoes
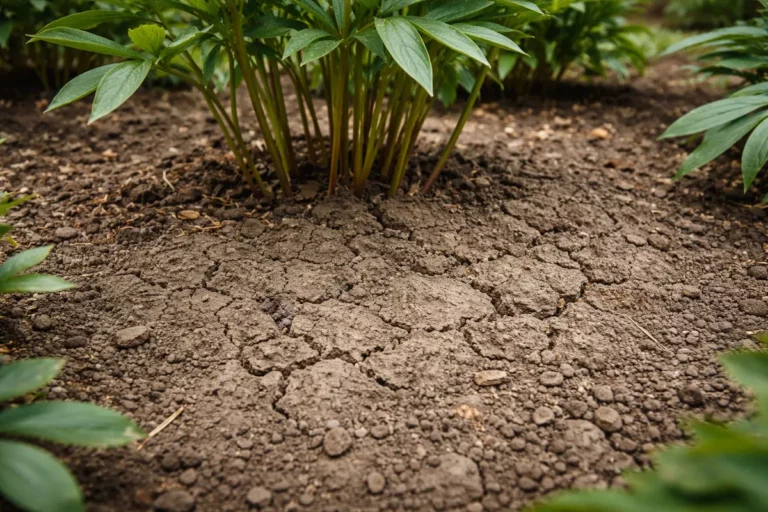
Check the soil moisture level around your sweet potato plants thoroughly. If the soil feels overly saturated or muddy, you should consider draining excess water and aerating the soil. You will see the soil texture improve, which supports better root health, and the area may feel drier and crumbly in just a few days following intervention. A drier surface is often the first visual cue of successful drainage.
The yellowing of sweet potato leaves often results from waterlogged soil, which suffocates the roots. When roots lack adequate oxygen, they struggle to absorb nutrients effectively, leading to deficiencies that exhibit as yellowing leaves. Checking the moisture balance periodically allows you to catch waterlogging early, preventing further spread of symptoms. If you instead detect a rich, earthy smell that signals healthy soil life, that’s an indication that you’ve addressed the issue correctly. However, the presence of a foul, sour odor serves as a warning flag that the soil has likely become anaerobic and is hazardous to root health.
If the soil smells sour or is exceptionally heavy, this indicates compromised root health. If you notice a mushy texture on any exposed roots during inspection, trim away those areas to prevent further issues, and consider using a drainage amendment, like perlite or sand, for future planting. Swift action minimizes risks and supports long-term recovery. Additionally, if roots appear entirely black or slimy, it suggests advanced rot, requiring immediate repotting or remediation efforts to save remaining plant parts. Should multiple roots be affected, consider creating new drainage channels to expedite water movement away from the root zone.
Step 3 – Fertilize Sweet Potatoes for Nutrient Recovery
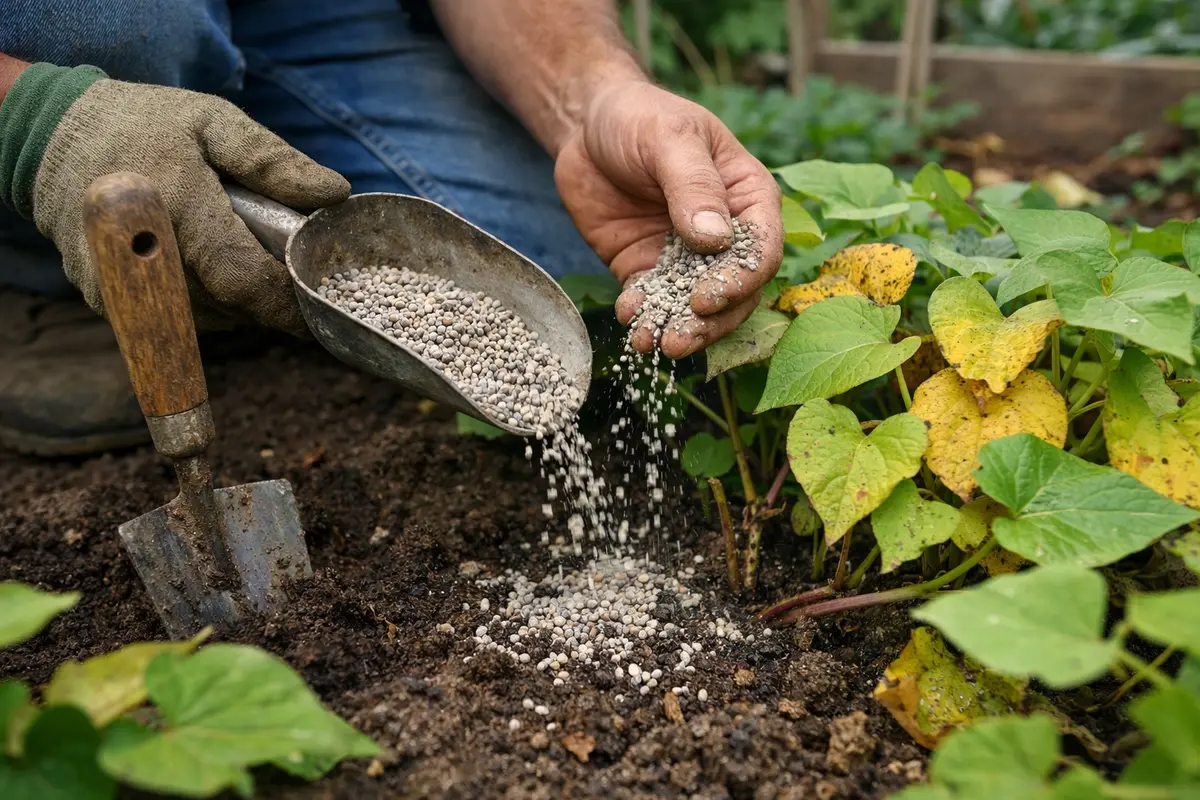
Apply a balanced fertilizer to your sweet potato plants to replenish lost nutrients. Within a week, you should observe a noticeable green hue returning to the remaining leaves, indicating that the plant is starting its recovery. This vibrant color will expand from older leaves outward if fertilization effectively rebalances nutrient levels. Regular inspection during this time should become part of your care routine to assess changes.
This fertilization step is effective as it replenishes essential nutrients that the plants need to combat stress and leaf yellowing. Heavy rain can wash away vital minerals such as nitrogen and potassium from the soil, hindering the plant’s ability to thrive. By using a slow-release fertilizer, the nutrients are made available over time, which aids in gradual recovery. For significant deficiencies, consider a higher ratio of nitrogen early in the season, shifting to phosphorus and potassium as the plant matures. Observing the color and size of leaves post-fertilization is a good indicator of whether your interventions are effective.
Over-fertilizing can have detrimental effects, causing nutrient burn that may exacerbate leaf yellowing. Pay attention to the application rates recommended on fertilizer labels. It’s important to monitor the plant’s response closely, as new growth should emerge quickly. Adjusting the frequency based on weather, such as increasing during dry spells or lowering in extended rain periods, supports recovery efforts. If there is simultaneous evidence of soil nutrient depletion, supplementing with compost or organic matter can enhance soil structure and nutrient retention. Be cautious, as adding too much compost can lead to other imbalances, affecting root health negatively.
Step 4 – Water Sweet Potatoes Wisely After Heavy Rain
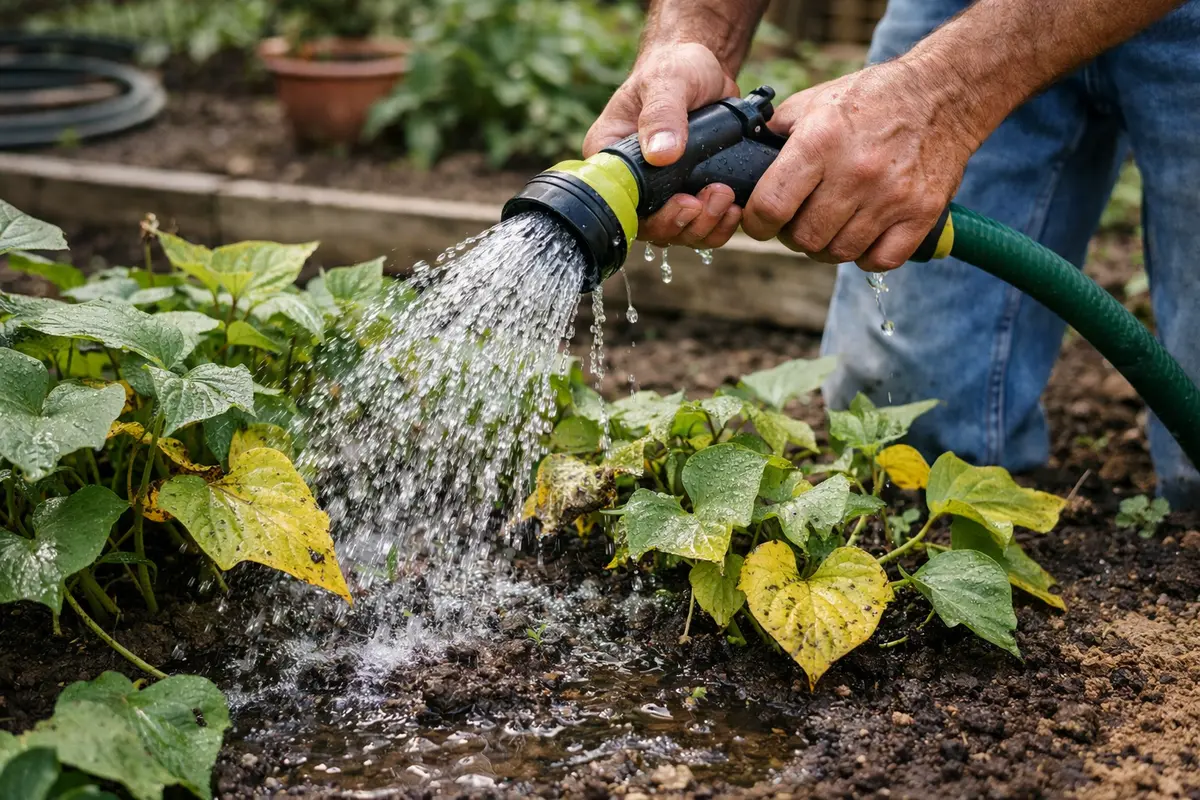
Adjust your watering routine according to the recent weather patterns. You should only water your sweet potatoes if soil moisture levels drop below 6 inches deep, ensuring they do not get over-saturated. This consistent checking can help establish a habit for better water management and will help maintain balance even in varying weather conditions. Additionally, consider keeping a log of rainfall amounts to know when to delay watering.
Building a routine around prudent watering practices directly addresses the excess moisture that leads to yellowing leaves. Rainy conditions can contribute to root rot and nutrient depletion, so your goal should be to maintain a balanced level of soil moisture. Use a moisture meter for more accurate readings or perform the finger test, inserting a finger into the soil up to two knuckles deep to assess moisture levels. Developing awareness of local weather patterns will inform you on when additional watering is necessary versus when the plants can rely on natural rainfall. If prolonged dryness causes wilting, that indicates the need for immediate intervention.
If you notice significant rainfall has passed but find yourself returning to waterlogged conditions, consider using raised beds or enhancing drainage solutions accordingly. Adjusting for seasonal changes ensures your sweet potato plants remain resilient against conditions that invite stress and disease. Another option is to implement a drip irrigation system, which can regulate water delivery more effectively than traditional overhead watering, preventing over-saturation and root damage. Always ensure that the irrigation system is functional and that excess water does not pool around the roots before rainy days.
Step 5 – Check Sweet Potato Vines for Yellowing Signs Regularly
Start by checking the soil moisture around your sweet potato plants immediately after heavy rain. Use your finger to feel if the soil is soggy or retains excessive water; if so, take action to improve drainage. Recheck the soil every few days for moisture levels, as the conditions can change rapidly in wet weather. Look for signs of recovery in the leaves, such as a return to vibrant green hues and improved texture within a week.
A fully recovered sweet potato plant displays bright green, robust leaves with a smooth texture and healthy growth patterns. In contrast, early signs of the problem returning include a re-emergence of yellowing leaves that feel limp or dry to the touch. If you notice mottled yellow patches alongside fragile leaf edges, these could indicate stress and require immediate attention.
If the yellowing of leaves continues despite these steps, assess for root rot by gently digging around the roots for signs of brown, mushy areas. Alternatively, consider applying a balanced fertilizer to replenish nutrients, or if yellowing persists, consult a local garden expert for further diagnosis and treatment options.
A fully recovered sweet potato plant should have vibrant green leaves and strong, healthy vines. Initial signs of trouble often start subtly, such as slightly fading colors or random yellow patches that escalate later to significant yellowing, which requires prompt response. By keeping a close eye, you can identify any potential return of the issue and respond accordingly. If yellowing reappears near the base of vines while upper leaves remain healthy, it could indicate a nutrient deficiency that requires focused treatment. Scoring the vines for stress signs can also help in understanding the plant’s health under varying conditions.
If you start to see the yellowing return, it may indicate a drainage issue, a nutrient imbalance, or even disease. Re-assess your watering routine and consider taking soil samples to check pH and nutrient levels. This vigilance pays off in maintaining plant health without needing immediate and extensive intervention, which can stress both you and the plants. If the condition persists despite corrective actions, it may be worth consulting local agricultural extension services for advanced diagnosis and recommendations. Repeated yellowing can signal a need for different interventions, such as altering planting conditions or altering care approaches over time.
FAQ
How long will it take for my sweet potatoes to recover from yellowing leaves?
Recovery can take anywhere from a few days to a couple of weeks, depending on the severity of the yellowing and whether proper corrections were implemented. Regular inspections and consistent care will help speed up the process. Expect visible changes such as new leaf growth and improvements in color during this period. Observing leaf expansion and overall vigor will be the main attributes to notice in your sweet potato plants’ recovery timeline.
Can yellowing leaves spread to other parts of the plant?
If the underlying issue, such as poor drainage or nutrient deficiencies, continues, yellowing could potentially spread. It’s vital to take immediate action when you notice yellowing to reduce the chances of further damage to the plant. Regular checks can help you catch any potential escalation before it becomes widespread and impacts the entire plant. Drawing attention to specific areas showing weakness will be more effective than treating the plant uniformly.
Should I remove all yellow leaves immediately?
It’s best to remove heavily yellowed leaves, but avoid drastic pruning all at once. Let the plant stabilize before addressing any other leaves to avoid unnecessary stress during recovery. Gradual pruning will allow the plant to adjust without overwhelming it. Assess any remaining foliage for patterns that might signal nutrient needs; the goal is to maintain as much healthy growth as possible during recovery.