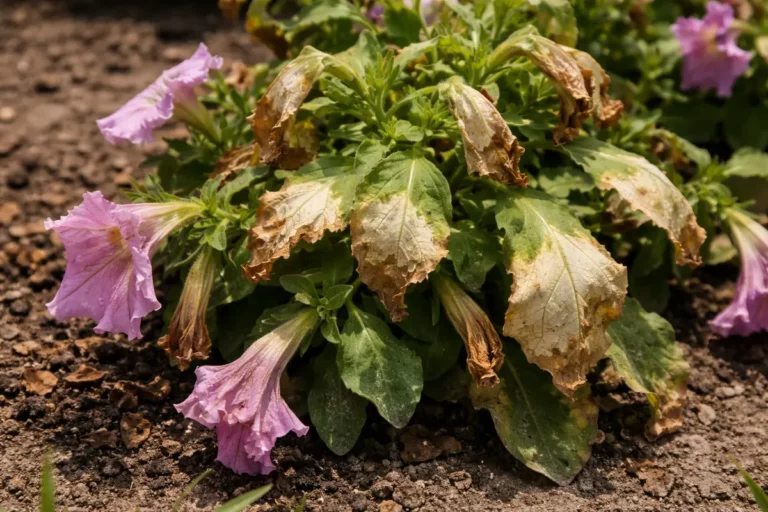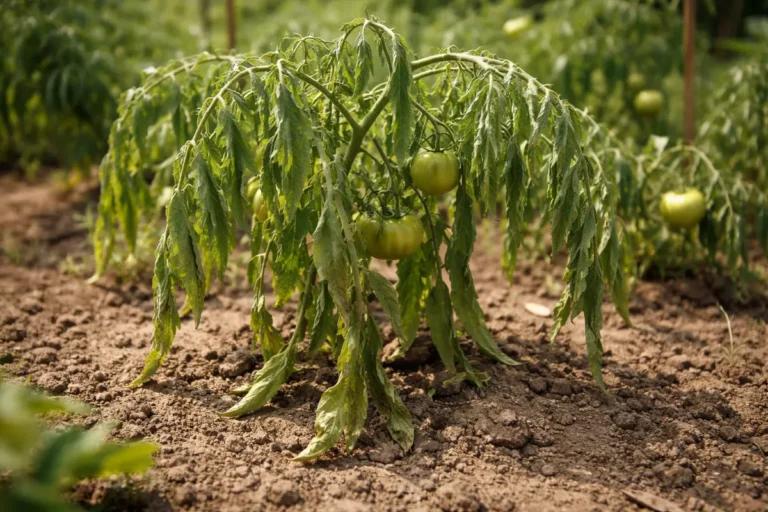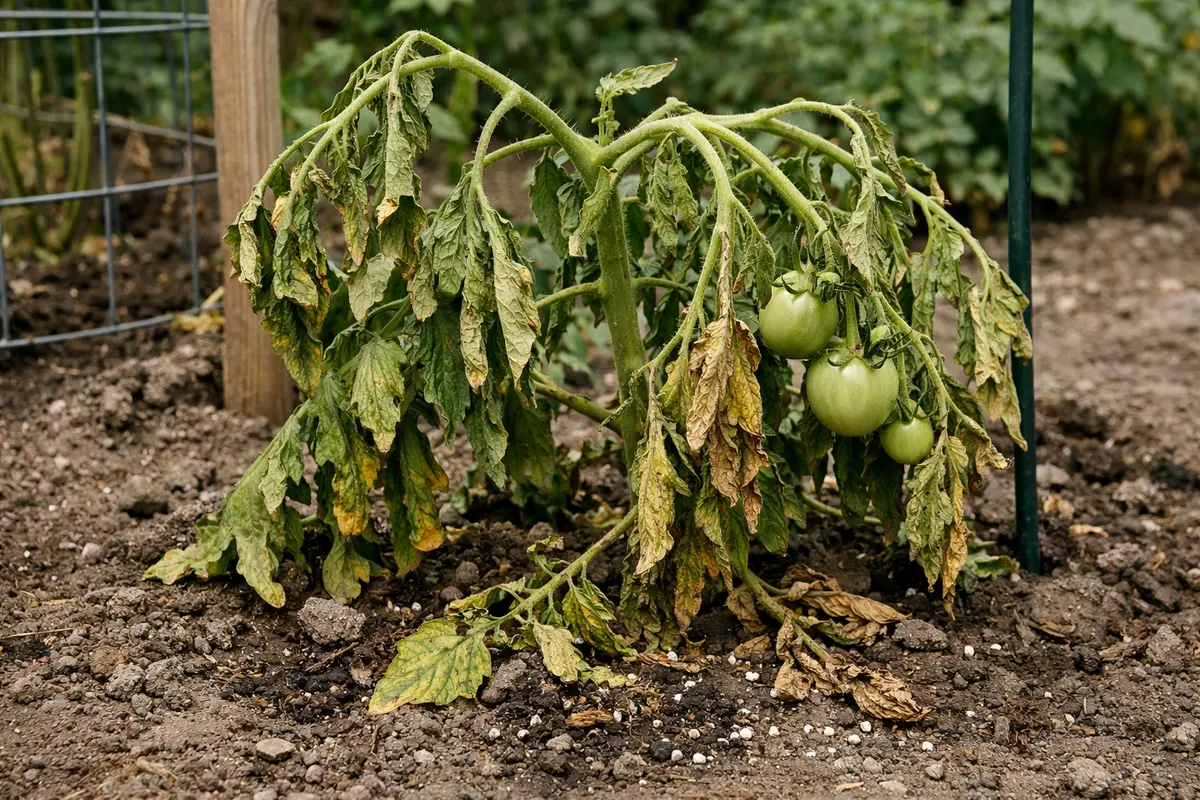
You may notice your tomato plants droop after fertilizer application, which is a clear sign that you need to know what to do when tomato plants droop after fertilizer application. This drooping occurs due to stress from over-fertilization or a lack of sufficient water, leading to wilting leaves and overall decline in vigor. If not addressed promptly, this issue can worsen and weaken the plant, hindering its growth and fruit production. Fortunately, fixing it is possible now; simply adjust your watering schedule and monitor soil nutrient levels to improve plant health.
Step 1 – Water Tomato Plants to Alleviate Stress
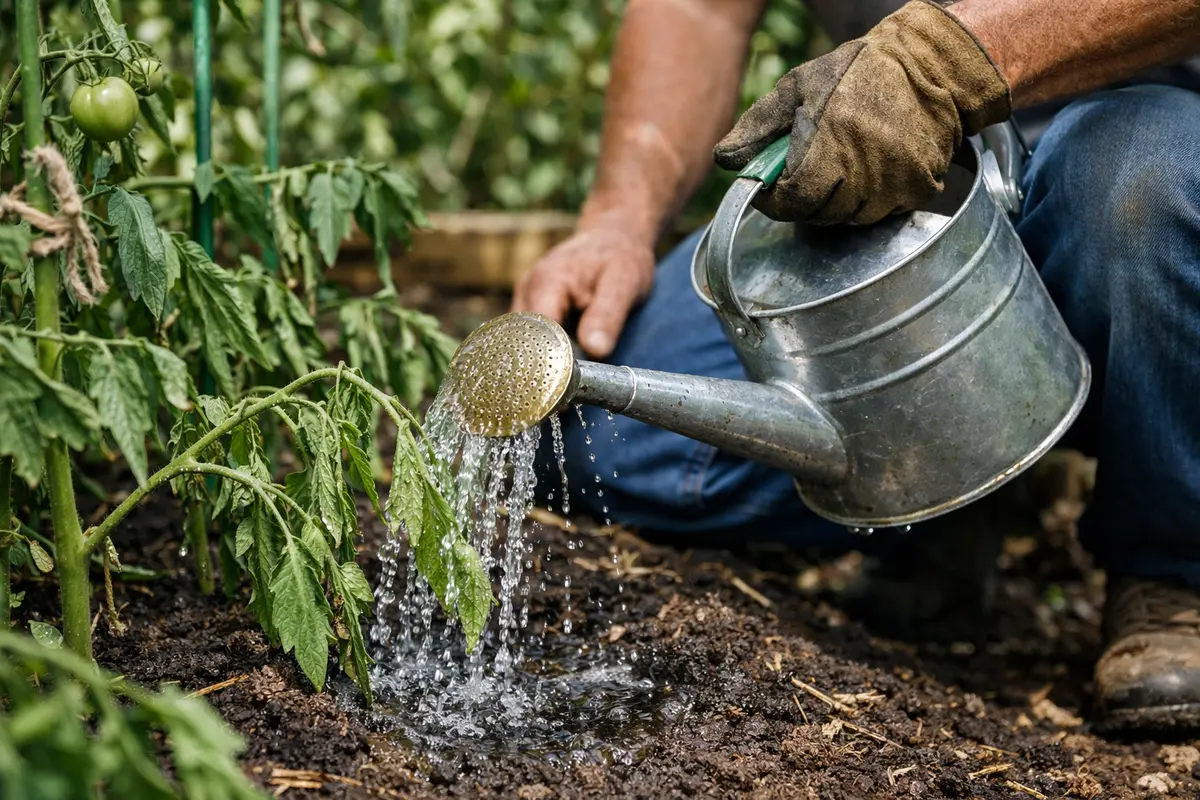
Water the tomato plants thoroughly to alleviate the immediate stress caused by nutrient overload. You will notice the leaves start to perk up within a few hours, indicating improved hydration and reduced droopiness. Aim for at least 1 to 1.5 inches of water weekly, initiating with a deep soak of half an inch to quickly address drooping. This initial watering deeply hydrates the root zone, promoting nutrient uptake and recovery. Pay attention to the soil temperature—if it feels warm to the touch, an additional soak may be necessary to counteract heat stress.
Excess nutrients can lead to high salt concentrations in the soil, which disrupts moisture uptake and causes leaf drooping. By thoroughly watering, you help dilute these salts and restore moisture levels, keeping the plant healthy. Reacting timely is crucial, as neglect might lead to conditions such as root burn or severe wilting. Check the soil moisture by digging down to your first knuckle. If it feels dry, it’s time to water. After you water, observe drainage closely; if water runs off too quickly, the soil might be struggling to retain moisture due to compaction or poor structure.
A frequent error is to water lightly, expecting that this will relieve stress. Such light watering rarely penetrates to the root zone effectively. Make sure to saturate the soil thoroughly, aiming for a depth of at least six inches. If drooping persists despite adequate watering, investigate soil drainage with a simple test: dig a small hole and check if water pools on the surface rather than soaking in. If drainage issues are revealed, consider amending the soil by mixing in organic matter or coarse sand. For container plants, ensure proper drainage holes to prevent standing water.
Step 2 – Test Soil for Fertilizer Overload
Check the soil pH and nutrient levels to evaluate any fertilizer overload. Using a comprehensive testing kit will give insights within a day or two. Focus on measuring both the pH and the electrical conductivity (EC), as a high EC indicates an excess of salts that can compromise root health. If your readings show high salt levels, immediate adjustments to your fertilization methods will be necessary to ensure your plants recover.
Tomato plants thrive in slightly acidic soil, ideally between 6.0 and 6.8 pH. Higher pH levels can diminish nutrient availability and contribute to drooping. Utilize the soil testing kit to assess if the levels of nitrogen, phosphorus, and potassium are excessive, as these are common in over-fertilized soils. For instance, if nitrogen readings top 4 grams per liter, corrective actions are urgent to prevent long-term growth stunting.
Should the soil emit a sour or overly rich smell, it may be undergoing anaerobic conditions, harming beneficial organisms and promoting root rot. To counter this, incorporate organic materials like compost, using a ratio of one-part compost to three parts existing soil. If sodium levels remain high, increase watering frequency to effectively flush out these salts. If elevated sodium continues after flushing, you might need to replace a portion of the soil to return to ideal conditions. Regular monitoring of nutrient levels is essential to maintaining soil health and preventing future drooping.
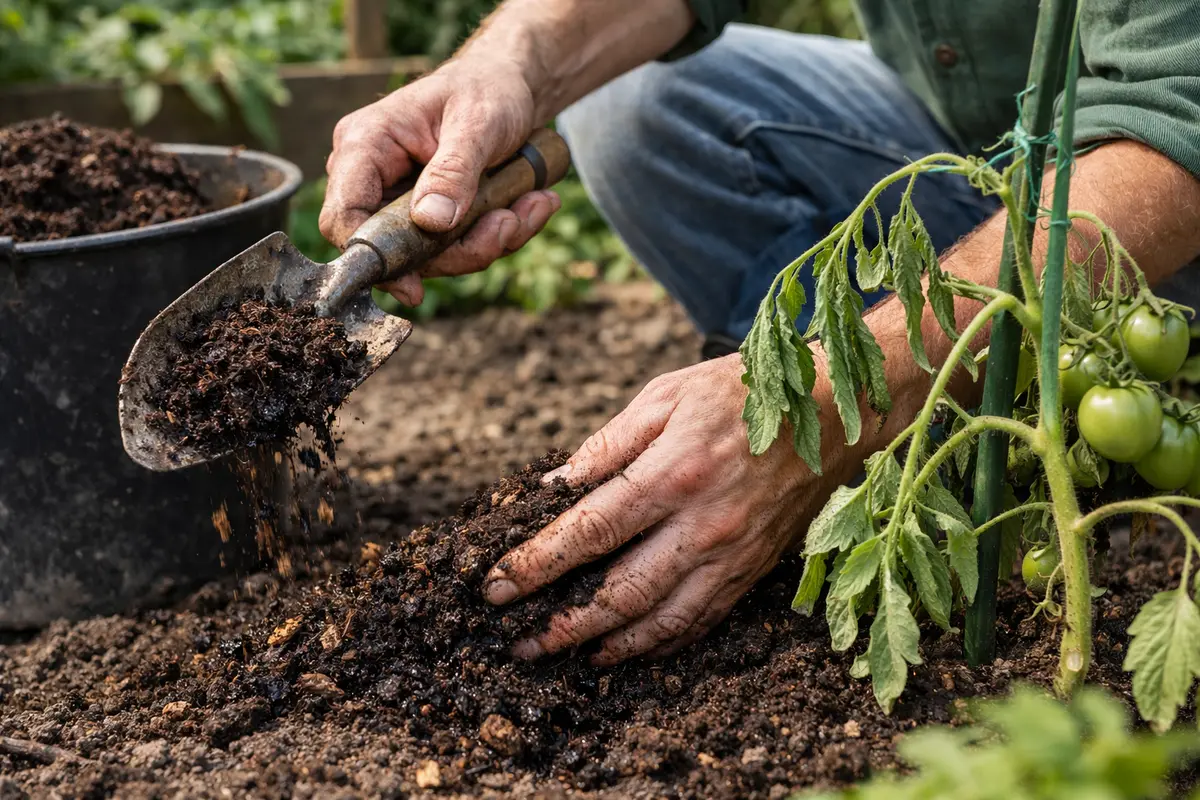
Step 3 – Add Compost for Nutrient Recovery
Begin by watering your tomato plants deeply but infrequently to keep the soil moist without becoming oversaturated. Within a few days, you should notice improved leaf turgor and sturdier stems, signs that your plants are responding positively to improved care.
Recovery from drooping post-fertilizer can typically take between 3 to 7 days. During this period, look for new leaf growth and sturdiness in the branches. Healthy tomato plants will exhibit vibrant green foliage. In contrast, those that continue to struggle may develop yellow or browning leaves, signaling ongoing problems. If substantial improvements have not been observed within this timeframe, re-evaluate watering practices to avoid further stressing the roots from overwatering.
Do not be tempted to apply additional fertilizer in hopes of speeding up recovery; this can lead to nutrient burn and exacerbate existing problems. If you see discoloration in the leaves, such as yellowing instead of new growth, review your watering approach to ensure roots aren’t submerged in water. Recovery typically spans about one to two weeks; you should expect to see new growth and firm leaves. The ideal conditions, including adequate sunlight and warmth, will facilitate this recovery; meanwhile, poor weather may slow it down. If no improvements appear, investigate soil drainage for waterlogged roots that could obstruct recovery. Spotting new growth is an encouraging indicator that your adjustments are working. Lack of growth might imply pests or diseases are exacerbating the initial issue, necessitating a careful inspection.
During recovery, avoid the impulse to over-fertilize; hold off on feeding until plants are visibly upright and the soil has dried adequately. If leaf curling persists even with reduced watering, inspect for potential pest infestations or diseases. Adding compost supplies lost nutrients from over-fertilization. The beneficial microorganisms present in compost enhance soil structure and drainage while counteracting excess salt levels. Mix the compost thoroughly into the top 2-3 inches of soil to improve integration and efficacy. Should your initial compost application not yield positive changes, reassess your compost’s quality; poorly decomposed compost may introduce pathogens that worsen drooping.
Be cautious when using compost, as excess can create nutrient imbalances. Start slow with a one-inch layer around the plants, observing for further stress afterward. Should drooping continue, consider tapering off other fertilizers or using a balanced feed. Scrutinize the compost quality—healthy compost has a rich, earthy smell; if not, sourcing a better option is beneficial. If signs of nitrogen burn appear, characterized by crispy leaf edges, halt compost use immediately to prevent further damage.
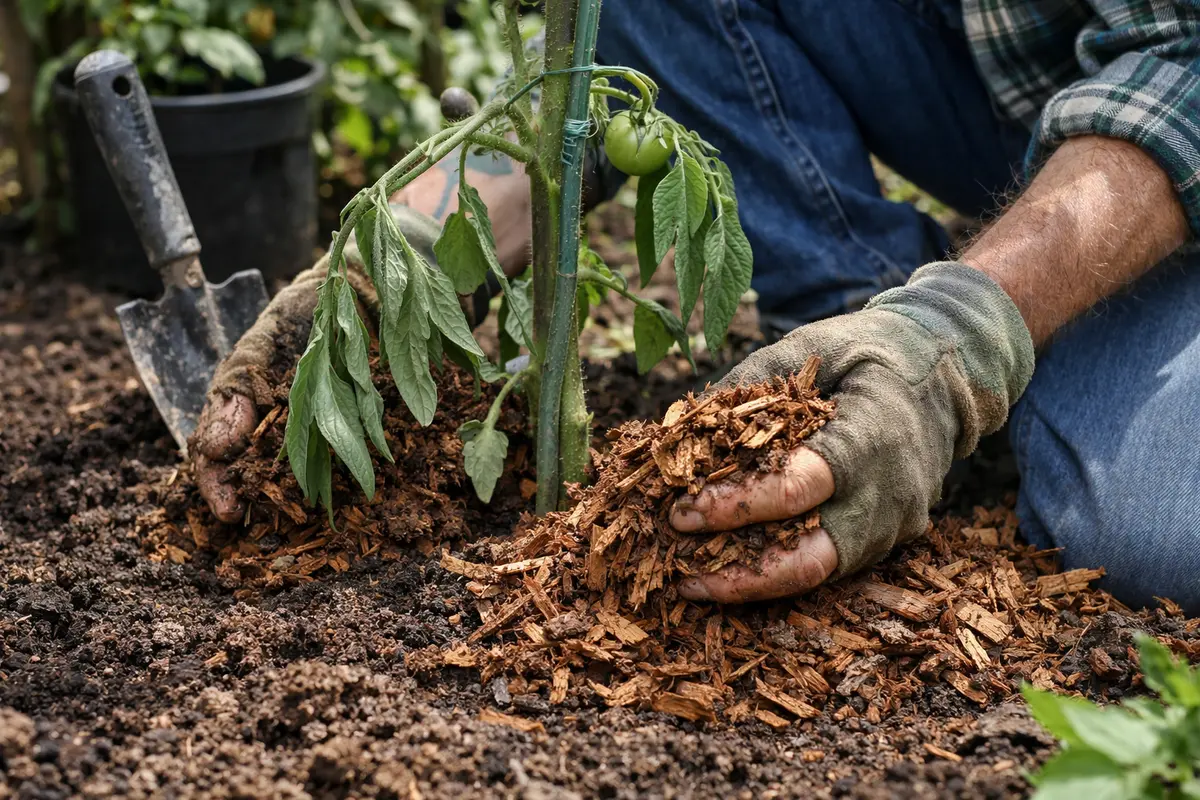
Step 4 – Use Mulch to Shield Tomato Roots
Start by applying a balanced, slow-release fertilizer specifically formulated for tomatoes. This will maintain consistent nutrient levels in the soil and prevent drooping, allowing your plants to develop robust root systems and stronger overall structure.
Tomato plants often droop due to rapid changes in nutrient availability, particularly when over-fertilized or under-nourished. High nitrogen levels can prompt excessive leaf growth with weak stems, leading to drooping. By using a slow-release fertilizer, you mitigate spikes in nutrient levels, ensuring a gradual supply that strengthens the plants’ foundations. If you notice drooping after using a standard fertilizer, check the N-P-K ratio to ensure it aligns with tomato needs.
During periods of high heat, consider increasing your watering schedule but maintain the slow-release fertilizer routine. Over-fertilization combined with water stress can worsen drooping, making it critical to balance both aspects. If the soil feels dry several inches down, freshen up the mulch layer to retain moisture while still allowing nutrients to be absorbed.
Mulching proves especially beneficial in hotter months, preventing rapid moisture evaporation from the soil—an essential factor when water consumption increases. Organic mulch options like straw, wood chips, or grass clippings efficiently insulate roots from extreme temperature fluctuations. However, if mulch is applied during intense sun, be watchful; dryness may compact the texture or accelerate evaporation, requiring more frequent replenishment. A common mistake is mulching too early in the season before soil temperatures have risen, which can slow plant growth.
Continuously monitor and replenish mulch over time, particularly after heavy rains when it could compact or wash away. If mulch levels drop or degrade, adding a fresh 2-3 inch layer will ensure continued root protection and moisture retention. Maintaining adequate mulch levels helps your plants stay insulated, enhancing their ability to recover from drooping. If mulch fosters pest attraction, like slugs, consider employing safe pest deterrents to maintain a healthy garden. Regularly check the mulch for conditions that may harm root systems; compacted mulch can lead to anaerobic conditions, negatively affecting overall plant health.
Step 5 – Inspect Leaves for Drooping Signs Weekly
Start by closely monitoring your tomato plants for signs of improvement over the next few days after applying fertilizer. Check the soil moisture level—ensure it remains consistently damp but not soggy, as overwatering can compound drooping. Look for changes in the leaf texture and color; expect to see leaves gradually returning to a more upright position and rich green hue.
A fully recovered tomato plant will show vibrant green leaves held firmly upright, while early signs of the problem returning may include drooping leaves that appear dull or show brown edges. If the plants revert to wilting, the leaves may feel thinner and more brittle compared to the firm, succulent texture when healthy. If you observe these deteriorating signs, check for soil moisture consistency: soggy soil can indicate overwatered conditions.
If the drooping persists despite following these monitoring instructions, consider reducing the fertilizer amount or switching to a more balanced formulation. Additionally, check for root issues—if you suspect root rot or damage, carefully inspect the root system and consider repotting in fresh soil if necessary. Always escalate to professional advice if the condition does not improve within a week.
Once plants receive proper care, observe signs of recovery like burgeoning new foliage within a week. Thriving tomato plants will exhibit upright leaves, signaling renewed nutrient uptake. Regular monitoring of both leaf condition and soil moisture is crucial; staying vigilant will ensure your plants retain long-term health. Remain alert for yellowing or brown spots, which might reveal emerging problems requiring attention. If yellowing occurs alongside drooping, consider applying a balanced foliar feed to support recovery.
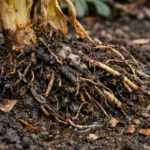
If the drooping or wilting returns, revisit your watering schedule and examine soil drainage. Ongoing drooping may indicate deeper issues, such as root damage or pest infestations. To check for root problems, gently excavate a few root structures; they should be white and firm. If roots appear brown or mushy, immediate adjustments to soil moisture levels are essential to salvage the plant. Addressing these concerns swiftly can prevent entering a cycle of decline. Additionally, incorporating a broad pest management strategy can help safeguard your tomato garden against any detected insect activity or feeding damage impairing leaf health.
FAQ
How long does it take for tomato plants to recover from drooping?
Recovery from drooping typically ranges from a few days up to a week, depending on the severity of the nutrient imbalance. Throughout this recovery period, consistently providing water and monitoring for new growth is vital to effectively gauge progress. Favorable conditions, such as plenty of sunlight and warmth, can greatly speed up recovery time. While many changes may become noticeable in a few days, full recovery could stretch to a couple of weeks as the plants reestablish their health.
Can excessive fertilizer cause permanent damage?
Yes, excessive fertilizer can lead to permanent damage if it causes severe root stress. Prolonged nutrient overload might stunt growth or even kill the plants. Observing signs of leaf necrosis can indicate that the plant is entering a troubling cycle, causing premature flower drop and reducing fruit set. Timely intervention is critical to prevent such outcomes, especially by closely monitoring soil conditions and quickly adjusting fertilizer rates as necessary. Consistent observation can help identify lingering effects of past over-fertilization.
Should I remove drooping leaves from tomato plants?
Initially, it’s advisable to leave drooping leaves on the plant, as they may recover with proper care. However, if the leaves turn completely brown or dead after some time, trimming them away is better to redirect the plant’s energy towards healthy growth. Regular evaluation of leaf conditions is crucial; if new foliage emerges while older leaves remain wilted, focus on supporting the overall vigor of the plant rather than salvaging every leaf. Pruning techniques, such as cutting diagonally, can promote better healing and lessen disease susceptibility.