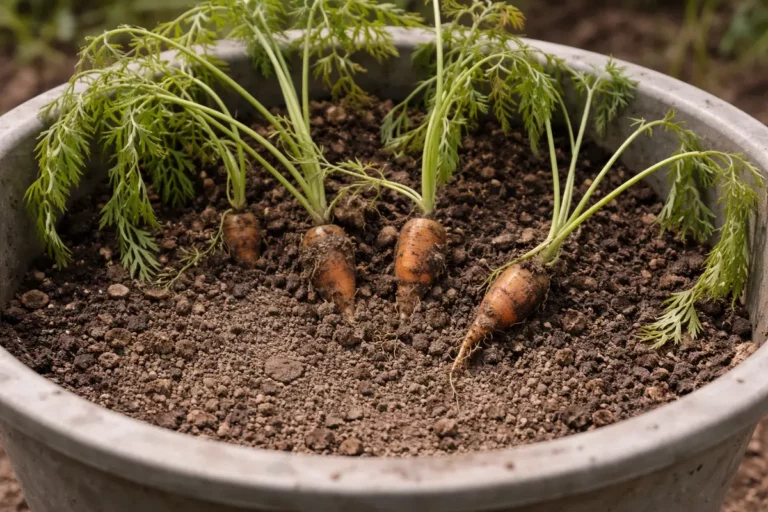
You may notice your potted strawberries struggling to thrive after repotting, which is why you need to know about Fixing stunted growth in potted strawberries after repotting. The plants often exhibit yellowing leaves and stunted new growth, often due to root disturbance and transplant shock. If left unaddressed, this issue can worsen and lead to more damage, making recovery harder, but correcting it is possible now if you inspect the roots and adjust their watering.
Step 1 – Inspect Potted Strawberries for Immediate Signs
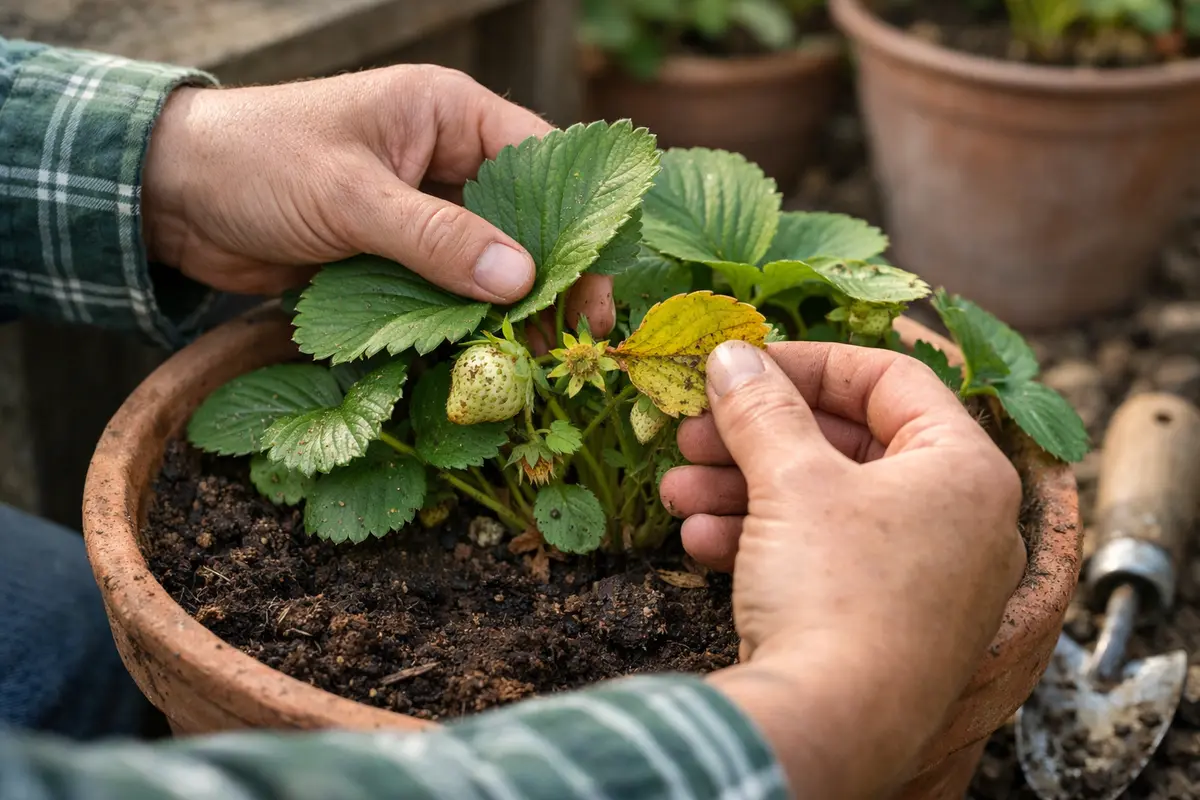
Start by removing the top layer of soil and gently inspecting the root system. You will notice the roots’ condition, such as discoloration, mushiness, or dryness, and these signs can indicate immediate issues such as root rot or dehydration. Check for roots that have a brown or black discoloration, which suggests rot, while healthy roots should be white and firm. If you detect roots that appear shriveled and brown, it’s a clear indication of stress due to inadequate moisture or oxygen. Once you start unearthing them, be gentle to avoid causing additional damage; undisturbed trays of roots often indicate stronger plants.
Taking this action is crucial because it allows you to directly assess the health of the roots, which are vital to the strawberry plant’s overall health. For example, if the roots are rotting, they are unable to effectively absorb water and nutrients, which directly impacts the plant’s growth. This observation is best done within a few days after repotting, ideally within 3-5 days, as any delay might result in further deterioration, making recovery more difficult. If you find yourself noticing a pungent odor coming from the pot, that’s a strong indicator of root rot. Additionally, if you see that roots are tightly bound in a mass and not spreading out into the soil, it suggests they’ve outgrown their previous pot and need immediate attention. If no strong roots are found, then the foundation for growth is weak, necessitating new planting strategies.
A common mistake at this stage is to overlook the root condition and assume that the soil’s appearance reflects the plants’ health. When the soil appears dry on the surface but is wet below, the roots may suffer from overwatering while simultaneously drying out on the top layer. This can create conditions conducive to root rot if not corrected promptly. If your pot lacks adequate drainage holes, excess moisture can accumulate at the bottom, exacerbating these symptoms. Additionally, checking the soil consistency can be beneficial; overly compacted soil can indicate a lack of oxygen, hindering root expansion. Addressing these issues immediately can drastically improve the chances for recovery, as the combination of proper watering and adequate drainage can revive a struggling root system. If the soil is compacted, gently loosening it can improve air flow to the roots.
Step 2 – Diagnose Nutrient Deficiency in Strawberry Roots
Examine the soil mixture for nutrient deficiencies and add a balanced fertilizer if needed. Following this step, you should observe a visible improvement in leaf color and firmness within a week. Monitor the leaves closely; if they continue to yellow or remain limp, that may indicate the need for more immediate intervention or a change in your fertilizing strategy. If the symptoms persist despite fertilization, consider checking root health and drainage again; sometimes the roots can’t absorb nutrients properly due to existing conditions.
This action addresses nutrient deficiencies that can severely stunt growth. Strawberries require essential nutrients such as nitrogen, phosphorus, and potassium for healthy growth and fruit development. Nitrogen is crucial early on for leaf growth, while phosphorus improves root development and flowering. Insufficient nitrogen often leads to yellowing leaves, which can signal imminent nutrient starvation. If your soil has not been amended properly or contains too much clay, that alone could be why your strawberries are not thriving after repotting. Additionally, if waterlogged conditions existed during repotting, it might have washed away nutrients essential for healthy growth, indicating the need for a richer organic mix or additional amendments. Regularly testing soil can help reveal hidden deficiencies before they become critical, ideally using a moisture and nutrient meter.
Consider testing the soil pH, aiming for a range of 6.0 to 6.8, as it can significantly affect nutrient availability. If the test reveals an imbalance, incorporating lime can raise the pH or sulfur can lower it, which can help the roots better absorb needed nutrients. This ensures that the plants have the best chance of absorbing the nutrients they require. Be cautious when adding any fertilizer; if over-applied, it can lead to nutrient lockout by creating salt buildup in the soil. If applying fertilizer doesn’t improve the condition in a few weeks, reevaluate your soil amendments and check for any roots that may still be suffering from poor drainage or nutrient blockade from compacted soil.
Step 3 – Fertilize Strawberries for Optimal Recovery
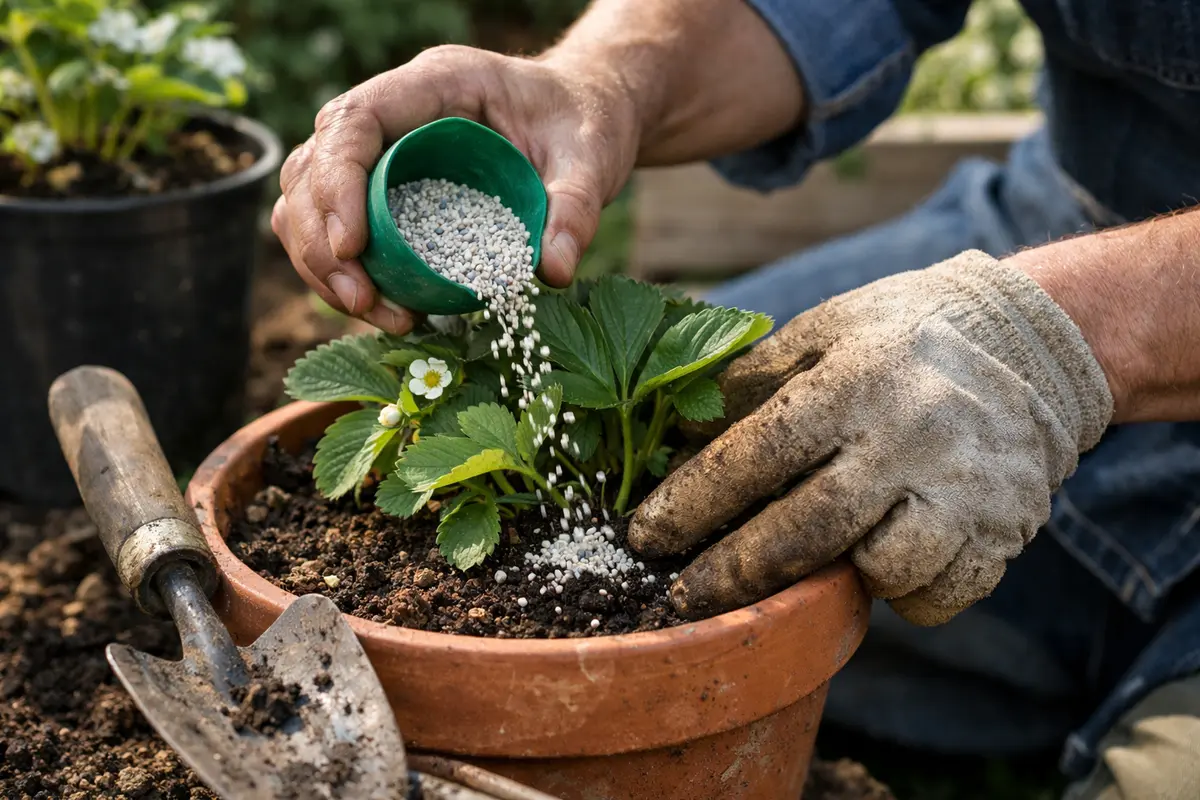
Apply a slow-release organic fertilizer around the base of the potted strawberries. Over the next two weeks, you should notice new growth and healthier-looking leaves, a sign that the roots are better nourished. A good rule of thumb is to use about 1-2 tablespoons of fertilizer for a small to medium pot, ensuring it surrounds but does not touch the stems directly. Be mindful to moisten the soil lightly before applying fertilizer; this helps the granules dissolve and integrate into the soil better. After fertilizing, keeping the soil moderately moist (but not soggy) will help the nutrients disperse evenly. Watch for sudden spurts of growth which indicate better nutrient accessibility.
Providing additional nutrients through fertilization helps the plants recover more efficiently, especially after the stress of repotting. The nutrient-rich environment encourages efficient metabolic processes, which can lead to enhanced growth and fruit production. Fertilization is especially critical during active growth periods; neglecting to feed during this time can halt growth entirely. Keep an eye on the soil moisture after fertilization, as nutrients can sometimes disperse quickly if the soil dries out excessively. If the plant does not respond positively within two weeks, check if your watering schedule matches the soil requirements; inadequate moisture can impede nutrient absorption.
Bear in mind to avoid over-fertilizing, which can lead to nutrient burn or salt buildup in the soil. A common mistake is to follow fertilizing schedules too rigidly without considering the plants’ immediate responses. If yellow tips on leaves appear or if the leaves start curling, this likely indicates nutrient burn, often due to high salt concentrations in the soil. In this case, flush the soil with water to help leach out excess salts and adjust the fertilizer schedule based on the plants’ recovery signs. If you constantly notice yellowing or browning even after flushing, it may indicate that the right balance of nutrients has not been restored, requiring scale-up of amendments or potentially seeking a manufactured soil mix that maintains nutrient levels more effectively.
Step 4 – Ensure Proper Drainage to Prevent Root Issues

Improve drainage in the pot by adding a layer of gravel or perlite at the bottom and using a well-draining potting mix. This will result in healthier roots and avoid water pooling, which could lead to root rot. A thick layer of at least 1 to 2 inches of gravel can effectively create air pockets that help prevent waterlogging at the base, allowing roots to breathe properly. Verify that the new mixture provides the right mix of air and moisture retention, as overly heavy mixes can lead to poor drainage despite good surface appearances.
Proper drainage is essential because strawberry plants are particularly sensitive to oversaturation. Waterlogged conditions reduce oxygen availability to the roots, stunting growth and increasing susceptibility to root diseases. If the soil remains soggy for extended periods, it deprives roots of the air they need to thrive, which can cause long-term damage. Be cautious when choosing pot sizes as well; if the pot is too large, it can retain excessive moisture around the roots. If the drainage situation does not change after your initial corrections, consider changing the potting medium entirely, replacing it with a lighter mix designed for strawberries or other sensitive plants.
Consider adjusting your watering frequency based on environmental conditions such as temperature and humidity. In warmer months, aim to check the soil moisture more frequently, ideally using a moisture meter, which allows a more accurate assessment. You may find that in deep summer, you should water daily with less volume, rather than once a week with more. Conversely, during cooler periods, the plants may require less water, so reducing watering frequency is crucial to prevent over-saturation and ensure optimal root breathing. If the top layer of soil dries out within a day, this could signal a more problematic drainage issue further down. The key is to keep an eye on the overall soil condition rather than sticking rigidly to a schedule; every pot can behave differently based on its circumstances.
Step 5 – Check Foliage for New Growth After Treatment
Monitor the foliage for any signs of new growth, checking every 3-5 days. You should look for fresher, greener leaves and increased firmness in the existing leaves, indicating recovery progress. A slow progression of leaves curling or remaining limp after treatment may necessitate a reassessment of previous care methods. If new growth appears but is weak or discolored, that may indicate that the plants are experiencing still unaddressed nutrient deficiencies or environmental stress. Examine the surrounding environment as well; sufficient light exposure and airflow are also key.
The frequency of checking is crucial, especially while the plants are recovering. Early signs of improvement are vital indicators that the actions you’ve taken are effective. Generally, noticeable new growth typically suggests that the plants are regaining their strength, while the presence of wilting leaves or discoloration would indicate that the problem may be resurfacing. If the plants still exhibit signs of stunted growth despite care adjustments, increased chances of a pest infestation or fungal infection may need to be evaluated immediately, as these issues can compound under stressful conditions. Be aware that delays in action could lead to irreversible plant damage, and thus timely monitoring is essential.
If signs do not improve within a week, reassess your care methods; potential pests might be hindering recovery. Inspecting the undersides of the leaves for aphids or spider mites can reveal infestations that may be affecting growth. If pests are found, prompt treatment with organic insecticidal soap may help restore the plant’s vitality while allowing essential pollinators to thrive. Additionally, check for any signs of fungus on leaves, which can hinder growth when left untreated. If fungal signs appear but pests are absent, applying a fungicide can be the best route until the strawberry plants fully stabilize. If issues persist or rapidly escalate, evaluating environmental factors such as lighting, humidity, and temperature may reveal underlying causes impacting recovery.
FAQ
How long does it take for strawberries to recover after treatment?
Strawberries typically show signs of recovery within 1-2 weeks after proper treatment steps, such as fertilizing and ensuring adequate drainage. You can expect new leaf growth, healthier foliage color, and improved overall resilience during this time, making it essential to monitor closely. If you see no progress after two weeks, re-evaluating your treatment strategy is recommended to trace any persisting issues. Don’t hesitate to adapt and make changes whatever the situation, as robust action often yields the best results.
Can poor drainage lead to stunted growth in strawberries?
Yes, poor drainage can suffocate strawberry roots, leading to stunted growth and increased disease susceptibility. It is essential to ensure that the container has adequate drainage holes and to use a soil blend that allows for proper water retention without becoming overly boggy. Being vigilant about drainage throughout the growing season can help prevent long-term damage from excess moisture, which will only complicate their recovery when stunted. Furthermore, if you suspect water buildup, consider pulling up the potting mix for a closer inspection.
Should I remove yellowing leaves from my strawberries?
Removing yellowing leaves can help the plant direct energy to healthier parts and promote better airflow. However, do this cautiously to avoid further shock; only prune leaves that are significantly unhealthy or damaged. If multiple leaves appear discolored, consider assessing moisture levels and nutrient availability before proceeding with further removals. Additionally, if yellowing occurs in the fresh growth, it might indicate a need for immediate intervention. By targeting the most problematic areas, you stand a better chance of encouraging vitality in the plant as a whole.